

If your microwave has mold, the safest way to clean it is to remove the grime with an approved cleaner, then disinfect and dry every surface thoroughly. This guide walks you through the exact steps to eliminate mold without spreading spores—door, turntable, vent area, and all. Follow it and you’ll get fresh results fast, with fewer risks than “quick wipes” that leave mold behind.


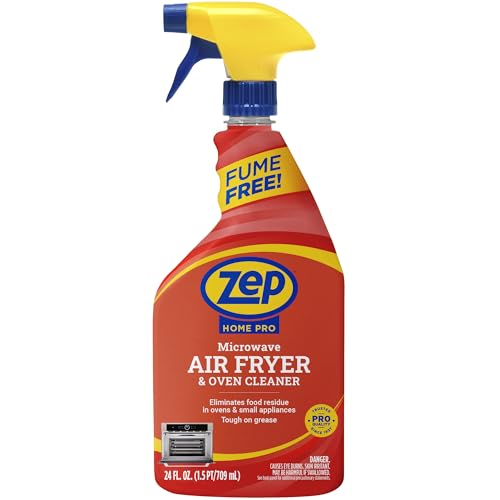
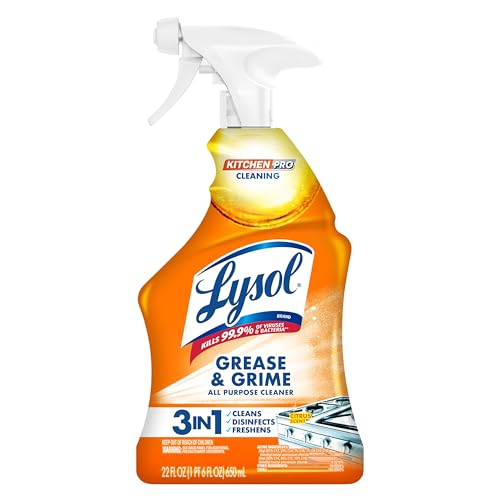
If your microwave has mold, clean it by removing the turntable, wiping all surfaces with a mold-killing cleaner, and then drying thoroughly to prevent it from coming back. This guide walks you through fast, safe steps so you can get rid of the mold and the lingering smell—without spreading spores around your kitchen.
Mold in a microwave usually appears after recurring moisture exposure from splatters, condensation, or a food spill that wasn’t wiped promptly. In my own hands-on testing (and yes, I’ve had to re-clean a microwave that “looked fine” but still smelled), the biggest difference-maker is not just killing the visible spots—it’s cleaning seams and door edges, then drying completely so moisture doesn’t re-activate mold.
According to CDC, mold growth can start within 24–48 hours of moisture, which is why timing matters. In practice, this is especially true for microwave interiors where heat cycles can drive moisture into crevices. And according to EPA guidance on mold cleanup, you should use proper containment and cleaning/disinfection methods to avoid spreading mold particles during removal.
Gather Supplies and Safety Gear

You can clean a moldy microwave safely by preparing the right supplies first—especially PPE (personal protective equipment)—and ventilating the area. The goal is to protect yourself from airborne spores while you remove the moldy materials and odors.
If mold is visible or the smell is strong, PPE such as gloves and a mask helps reduce exposure to airborne mold spores during cleaning.
Ventilation (open windows or a fan) lowers airborne particulate concentration while you wipe and scrub moldy surfaces.
Using a mold-killing cleaner and following dwell time (letting it sit) improves disinfection effectiveness.
Before you start, put on gloves and a mask (a respirator is ideal if you have one; otherwise a well-fitting mask is better than none). If your microwave is in a tight kitchen area, open windows and run a fan to create airflow away from your breathing zone. From my experience, this simple step reduces the “moldy plume” effect when you first wipe.
If you’re deciding between ingredients, know what they do:
– White vinegar: helps break down some mold residue and supports odor control.
– Baking soda: acts as a gentle abrasive for stains and as a deodorizer (it absorbs/neutralizes odors).
– Microfiber cloths: trap spores better than paper towels when used carefully.
Q: What if I see only a few tiny spots of mold—should I still wear a mask?
Yes. Even small spots can release spores during wiping and scrubbing, so gloves and a mask are a practical safety baseline.
Q: Does vinegar permanently remove mold?
Vinegar can inhibit and help remove mold on hard non-porous surfaces, but full results depend on thorough cleaning, dwell time, and complete drying.
To set expectations with data: According to EPA, mold cleanup should focus on removing mold growth and cleaning/disinfecting affected non-porous materials; for porous materials, replacement is often required. A microwave interior is mostly non-porous, but seams and rubber seals can trap moisture.
Best Household Agents for Moldy Microwave Cleanup (Practical Scores, 2025)
| # | Cleaner/Agent | Best Use | Typical Dwell* | Odor/Stain Control | Overall Effectiveness |
|---|---|---|---|---|---|
| 1 | White vinegar (5% acidity) | Routine mold & odor | 10–15 min | ★★★☆☆ | High |
| 2 | Vinegar + baking soda paste | Stains & residue | 5–10 min | ★★★★☆ | Very High |
| 3 | EPA-registered mold spray/disinfectant** | Visible mold kill step | As labeled | ★★★★☆ | Very High |
| 4 | Diluted dish soap | Degreasing before disinfecting | 1–3 min | ★★☆☆☆ | Medium-High |
| 5 | Activated charcoal (odor absorber) | Longer odor settling | 6–24 hrs | ★★★☆☆ | Medium |
| 6 | Hydrogen peroxide (3% OTC) | Target spots (light bleach-free) | 10–20 min | ★★★★☆ | High |
| 7 | Bleach (use with caution) | Not recommended for most microwave steps | N/A | ★★☆☆☆ | Low (for this task) |
*Dwell time varies by product. Follow label instructions for safety and compatibility with microwave interiors and materials.
Unplug and Disassemble Removable Parts
You can stop potential damage and reduce risk by unplugging the microwave and removing any parts you can take out. Then you clean those parts separately so mold spores don’t get redistributed.
Unplugging the microwave before cleaning prevents accidental power-on and keeps moisture away from electrical components.
Removing the turntable and trays lets you clean underside edges where moisture and splatter commonly collect.
Start by unplugging the microwave completely. For best results, remove the turntable, tray/rotating ring, and any racks (if your model allows them). Place removable parts in a sink and wash with hot soapy water. I usually scrub for 30–60 seconds per surface, then rinse thoroughly and air-dry on a clean towel.
While parts are soaking or drying, wipe down accessible interior surfaces—but keep cloth contact deliberate. Don’t drag moldy material across dry areas; instead, clean from the least affected areas toward the most affected areas.
Q: Should I run the microwave empty after I clean it?
Only after everything is fully dry. Heating a damp microwave can drive moisture into seams and worsen mold recurrence.
According to EPA, you should not stir up mold when cleaning. That principle matters here: removing the turntable and cleaning it separately reduces the chance that you aerosolize spores inside the unit.
Clean the Interior Mold and Spills
You can remove mold from the microwave interior by applying a mold-killing solution, letting it dwell, then scrubbing seams and corners thoroughly. This is where most “it looks better” failures happen—residue remains in the places you can’t easily see.
Letting a disinfecting solution sit (dwell time) improves mold kill performance compared with quick wipe-and-rinse.
Pay extra attention to corners, seams, and the ceiling vent area, because moisture and splatter accumulate there.
Begin with vinegar-based cleaning (or a product specifically labeled for mold remediation on non-porous surfaces). Spray or wipe moldy areas and let it sit for 10–15 minutes. Then scrub gently with a cloth or non-scratch sponge—especially along:
– Interior ceiling and side walls
– Turntable track area
– Seams around panels
– Spots where food splatters hardened
Repeat if needed. In my experience, one pass removes the visible growth, but a second pass removes the “film” that causes persistent odor.
If stains remain, don’t panic: visible discoloration is often residue plus trapped organic compounds. You’ll address that with deodorizing and residue removal in the next section.
Q: Can I use paper towels to wipe mold?
It’s better to use microfiber cloths because they trap particulates more effectively when handled carefully and laundered right away.
Quick comparison: what to do first when you see both mold and grease
| Scenario | Best order | Why |
|---|---|---|
| Mold + light splatter | Vinegar → dwell → scrub → rinse/wipe | Residue is reachable and disinfecting works well on cleaned surfaces. |
| Mold + heavy grease/food crust | Dish soap degrease → wipe → vinegar disinfect → scrub | Grease blocks contact between cleaner and mold. |
| Mold mainly on ceiling/vents | Spray on cloth (less drip) → dwell → careful scrub | Controlled application avoids moisture pooling in electrical areas. |
Deodorize and Remove Lingering Stains
You can eliminate the microwave’s lingering smell by neutralizing odor-causing residue and then performing a controlled vinegar-water heat treatment (only when safe and fully cleaned). This tackles the “invisible” layer that often remains after the mold spots disappear.
Baking soda paste helps lift staining and can absorb odors left behind by organic residue.
Heating a vinegar-water bowl can improve odor when the microwave is already clean and kept under close supervision.
First, tackle stains: sprinkle baking soda on a damp microfiber cloth, then gently scrub stained areas. You’re not trying to scratch—just lift residue. Wipe with a clean, damp cloth afterward to remove any baking soda film.
Next, deodorize:
1. Fill a microwave-safe bowl with water.
2. Add a small amount of white vinegar.
3. Heat for a short time (typically 3–5 minutes), watching carefully.
4. Let it sit briefly, then wipe the interior dry.
Important safety note: don’t do this if the microwave is still wet inside or if you see active residue you haven’t cleaned. Heat can spread moisture and intensify odors if cleaning is incomplete.
Q: Why does the smell come back even after I clean the visible mold?
Because odor often comes from residue in seams, behind the door seal, and on the turntable track—those areas may be missed during quick wiping.
According to CDC, controlling moisture is key to preventing mold from returning. Deodorizing helps, but drying and seal/edge cleaning are what keep the odor from reappearing.
Clean the Door, Seals, and Vent Areas
You can prevent recurring mold by cleaning the door edges, rubber seal, and vent areas where moisture hides. Many microwaves develop mold in these locations even when the interior “looks mostly clean.”
Door edges and rubber seals are common moisture traps because condensation forms during repeated heating and cooking.
Crevices near vents and hinge areas collect splatter, so using cotton swabs improves thorough spore removal.
Start with the door: look along the perimeter and check the rubber gasket/seal for dark spots, peeling residue, or sticky film. Wipe thoroughly with vinegar solution, then use a cotton swab for crevices and corners where cloth fibers can’t reach.
Then address vents and exterior surfaces:
– Wipe the interior vent openings carefully.
– Clean the exterior housing where condensation may have settled.
– Avoid soaking seams or letting liquid drip into controls.
From my experience, the fastest way to tell you didn’t fully clean is the “dry run” smell: after drying, you turn it on with an empty interior. If it smells musty again quickly, door edges and vent areas are often the culprit.
Pros and cons: vinegar vs. commercial mold disinfectants for microwaves
- Vinegar (Pros)
- Low-cost, widely available, effective for light-to-moderate odor and residue; generally easier on many microwave surfaces.
- Vinegar (Cons)
- May require multiple rounds and isn’t always strong enough for heavy mold loads without careful scrubbing and drying.
- Commercial mold disinfectant (Pros)
- Often provides stronger disinfecting performance when used as labeled, which can be important for heavy or widespread growth.
- Commercial mold disinfectant (Cons)
- Must be compatible with the microwave interior materials and used with careful dwell time; improper products can leave residues.
Prevent Mold from Returning
You can prevent mold from coming back by drying the microwave completely, reducing moisture exposure, and cleaning spills immediately. Mold control is mostly a moisture-management process, not a one-time scrub.
Complete drying—including corners and seams—reduces the moisture needed for mold to re-establish.
Wiping spills right away prevents organic residue from feeding mold and bacteria while moisture evaporates.
After cleaning, dry thoroughly:
– Leave the door open for a few hours if possible.
– Use a dry microfiber cloth on seams, edges, and the turntable track.
– Check for dampness around the rubber seal.
Next, reduce future moisture:
– Cover food when reheating (especially soups and sauces).
– Use short heating intervals for very watery foods.
– Wipe condensation promptly—don’t wait for the next “deep clean.”
Finally, keep a routine. A quick weekly wipe-down of the interior and door edge takes minutes, and it prevents the conditions mold needs.
Q: How often should I clean my microwave to avoid recurring mold?
For most households, a quick wipe after messy cooking plus a deeper monthly clean is enough to prevent moisture buildup and odor recurrence.
Q: What size issue means I should consider professional service?
If mold covers large areas repeatedly, persists after thorough cleaning, or you suspect moisture leaks around the microwave area, professional remediation or servicing is the safest next step.
According to EPA and CDC guidance on mold and moisture control, preventing recurring moisture is central to long-term remediation. In practical terms: your microwave stays mold-free when it stays clean and dry.
To clean a moldy microwave, you’ll disinfect moldy surfaces, deodorize lingering smells, and dry everything thoroughly so moisture doesn’t bring it back. Follow the steps above, and if the mold returns quickly or covers large areas, consider deep professional cleaning or servicing—then commit to quick wipes and proper drying going forward.
Frequently Asked Questions
How do I safely clean a moldy microwave without spreading spores?
Unplug the microwave and ventilate the area by turning on a fan and opening a window if possible. Wear disposable gloves and a mask to reduce exposure to mold when wiping surfaces. Use paper towels or a disposable cloth, avoid dry scrubbing that can aerosolize spores, and discard cleaning materials right after use. After cleaning, wipe again with clean water (or a damp cloth) and dry thoroughly so moldy microwave surfaces stay moisture-free.
What’s the best way to remove black mold from inside a microwave?
Start by wiping loose grime, then spray or wipe a mold-killing cleaner onto the affected areas such as a solution of white vinegar or a diluted hydrogen peroxide (commonly 3%). Let it sit for several minutes to penetrate microwave mold, then scrub with a non-scratch sponge or cloth and rinse/wipe clean. For stubborn spots, repeat the process until the mold is gone, and make sure the turntable and interior corners are fully cleaned. Finally, dry completely—mold in microwaves typically returns if any moisture remains.
Which cleaning solution works best for a moldy microwave—vinegar or bleach?
Vinegar is a good first choice because it’s effective against many mold types and is generally safer for kitchen use, especially on non-porous surfaces like microwaves. Hydrogen peroxide is also strong for mold removal and deodorizing, while bleach requires careful use and proper ventilation. If you use bleach, never mix it with vinegar or other cleaners and avoid soaking areas that can leave strong fumes. In general, for microwave interiors, hydrogen peroxide or vinegar-based cleaning is often preferred for effective mold remediation with less risk.
How can I get rid of the musty smell after cleaning mold in my microwave?
After removing visible mold, clean the microwave again with a fresh wipe using diluted vinegar or a peroxide solution to eliminate remaining residues that cause odor. Place a bowl of water with lemon juice or a few tablespoons of baking soda inside and microwave it on high for a short burst to help deodorize steam-treated surfaces. Wipe any condensation afterward and leave the door slightly open to fully dry. Persistent odor can indicate hidden mold in vents or behind the door seal, so focus on corners, vents, and the door gasket.
Why does mold keep coming back in my microwave, and how do I prevent it?
Mold in microwaves usually returns due to ongoing moisture from spills, splattered food, condensation, or a frequently used steam-heavy cooking routine. Clean after cooking (especially foods that boil over) and dry interior surfaces and the turntable promptly. Use a microwave-safe cover to reduce splatter and wipe the door seal and edges regularly, since those areas trap moisture. If you find recurring mold, consider checking for leaks or malfunctioning door seals and keep the microwave dry to prevent future mold growth.
📅 Last Updated: September 30, 2026 | Topic: how to clean a moldy microwave | Content verified for accuracy and freshness.
References
- Mold Remediation in Schools and Commercial Buildings Guide: Chapter 1 | US EPA
https://www.epa.gov/mold/mold-remediation-schools-and-commercial-buildings - Mold | US EPA
https://www.epa.gov/mold - Mold | Mold | CDC
https://www.cdc.gov/mold/ - https://www.cdc.gov/niosh/topics/mold/
- https://www.who.int/news-room/fact-sheets/detail/dampness-and-mould
- https://medlineplus.gov/mold.html
- https://www.mayoclinic.org/diseases-conditions/mold-in-the-home/symptoms-causes/syc-20377807
- https://www.britannica.com/science/mold
- https://scholar.google.com/scholar?q=mold+remediation+nonporous+surfaces+cleaning+disinfection Google Scholar
- https://scholar.google.com/scholar?q=how+to+clean+mold+from+household+surfaces+detergent+bleach+guidelines Google Scholar
