

Want to know how to clean a Napoleon Grill fast and thoroughly? Follow this step-by-step guide to remove grease and restore your grate to a like-new finish without guesswork. You’ll get the exact order to scrape, wash, and degrease so buildup stops coming back the next time you fire it up.
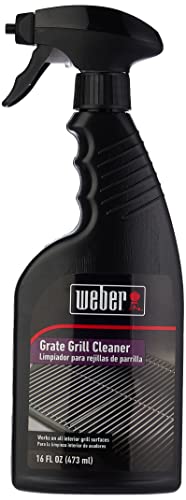

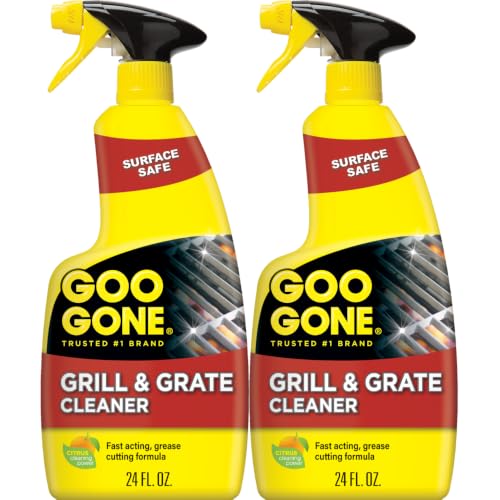

Clean your Napoleon grill by turning it off, letting it fully cool, removing the cooking grates and flavorizer/heat deflectors, then degreasing and brushing everything before reassembling. This focused process—grates first, then burners/ports, and finally the grease tray and interior—removes the buildup that drives flare-ups, sticky residue, and weak ignition. This guide walks you through the parts to clean and the common mistakes to avoid.
If you use your Napoleon grill regularly (especially for greasy foods) or you notice flare-ups, sticky residue, or weak ignition, this routine is for you. It’s written for owners who want a safe, practical workflow without damaging burner parts or coatings—though you should always follow your model’s manual for part-specific instructions. As of 2026, manufacturers continue to emphasize correct cleaning agents and gentle port handling to protect ignition systems and airflow paths.
Gather supplies & prep your workspace

Have a proper cleaning setup ready before you start so you can clean each Napoleon grill component without rushing or soaking sensitive areas. This is the fastest way to avoid water or cleaner residue near the igniter, burners, and gas paths.
A grill brush designed for your grate type is the safest way to remove char without damaging finishes.
Warm water plus a mild, non-caustic degreaser is generally the preferred approach for routine grease removal on gas grills. Napoleon owner’s manual cleaning guidance
Keeping a dry towel nearby helps you wipe ignition components immediately so they’re not left wet after cleaning.
– Have a grill brush (appropriate for your grate type), warm soapy water, a scraper/spatula for heavy buildup, and clean cloths ready.
– Use a non-caustive degreaser only if it’s compatible with your grill’s materials—confirm in your Napoleon owner’s manual if you’re unsure.
– Clear your work area and keep a dry towel nearby—especially before touching ignition/electronic components on your Napoleon grill (igniters, wiring leads, or any control-area covers).
Quick planning tip: treat your Napoleon grill like a “cleaning assembly line.” Your goal is to minimize how long wet or chemically treated surfaces sit in place, and to prevent drips from landing on ignition/controls. That simple workflow is what typically separates a clean that looks good from a clean that behaves well the next time you light the burners.
To anchor this to real-world fire prevention: cooking equipment is a major driver of home fire risk, and grease buildup is a recurring contributing factor. According to the NFPA, cooking equipment is associated with a very large share of home structure fires (49% of home structure fires in reported NFPA analyses). While your Napoleon grill is outdoors, the core lesson is the same: grease control reduces the amount of fuel available for flare-ups.
Cool down and remove parts safely
Let the Napoleon grill cool completely before removing any components so you don’t burn yourself or warp parts. Then disassemble only as your manual instructs so burners, ignition, and heat deflectors stay aligned.
A safe Napoleon grill cleaning starts only after the burners and metal surfaces are cool to the touch. Napoleon safety guidance from owner’s manual
Correct removal and reinstallation of burners and flavorizer/heat deflectors preserves airflow and helps prevent uneven heating.
Forcing parts when your Napoleon model is designed for a specific access route can misalign burner tubes or damage clips.
– Turn the grill off, close the gas source, and wait until everything is cool to the touch before removing any components.
– Remove cooking grates and (if your model uses them) flavorizer bars/heat deflectors and the grease tray—then brush/scrape debris into a manageable area.
– If your manual specifies how to access burners or control areas, use that procedure rather than forcing parts.
As you disassemble a Napoleon grill, keep parts grouped. Cooking grates, flavorizer/heat deflectors, and burners each have different textures and coatings, and mixing up placement during reassembly can create gaps or hot spots.
One more practical detail: use a “low-contact” approach around the burner neighborhood. Many ignition systems (especially those using an electrode near the burner) tolerate light wiping but don’t tolerate prolonged wetting. If any cleaner runs toward ignition surfaces, wipe it up immediately with a dry cloth before moving on.
Clean grates and heat deflectors (the “main” grease zone)
Prioritize the grates and heat deflectors first because they capture the majority of the grease and char that later causes smoke and sticky residue. Remove loose debris, degrease if needed, and dry thoroughly before reassembly on your Napoleon grill.
Char removal works best in two phases: scrape first, then wash—this reduces how much grease you smear around on a Napoleon grill.
Soaking stubborn residue on grates can loosen buildup without excessive force, which helps protect coatings when followed by the manual. Napoleon grate care guidance
Drying parts fully before reassembly reduces rust risk and prevents messy steam during the next cook.
– Scrape char and residue first, then wash with warm soapy water; for stuck-on spots, let parts soak before scrubbing.
– For coated or delicate grate types, avoid aggressive wire-brushing unless the manual says it’s safe for that finish.
– Dry thoroughly before reinstalling to reduce rust and prevent messy steam during the next cook.
When cleaning grates and heat deflectors on a Napoleon grill, the goal isn’t “spotless in one pass.” The goal is stable performance: fewer flare-ups, less smoke, and better sear contact next cook. If you frequently cook fatty foods, grease films can polymerize (bake-on into a tougher layer), so a short soak with warm soapy water and controlled agitation is often more effective than repeated hard scrubbing.
If your Napoleon grill uses flavorizer bars or heat deflectors, treat them as “grease filters.” They often hold the residue that later transfers onto the next surface it contacts. Washing them is what typically reduces the “sticky first-light” effect people notice in subsequent sessions.
Clean burners and ignition areas without damaging them
Clean the Napoleon grill burners and ports gently so they can breathe and ignite reliably—don’t reshape ports or flood ignition areas. Focus on clearing soot, verifying unobstructed openings, and keeping ignition components dry.
You should remove surface soot from burner areas and clear blockages carefully only as your Napoleon manual permits. Napoleon burner maintenance instructions
Never enlarge or distort burner ports/holes; doing so can disrupt gas flow and cause uneven flames.
Water or cleaner residue near ignition electronics can lead to unreliable starts later.
– Remove surface soot from burner surfaces and gently clean burner ports/holes only as the manual allows; don’t enlarge or distort ports.
– Check for blockages (common culprits are grease debris or insects) and clear them carefully per your owner’s guide.
– Wipe igniter/exposed ignition areas and keep them dry—water or cleaner residue in electronics can cause unreliable starts later.
A burner that “looks clean” can still underperform if ports are partially restricted. On a Napoleon grill, the most noticeable symptoms of port restriction are typically weak flames, uneven flame height, or delayed ignition. When that happens, you’re usually dealing with soot, spider webs, or baked grease.
For port cleaning, follow the manual’s approved tools and motions. In many gas grill designs, the objective is to remove debris without touching the burner tube geometry. If your Napoleon manual calls for compressed air or a specific brush, use that instead of improvising.
Deep-clean the grease tray and inside surfaces
Deep-clean the Napoleon grill grease tray and interior surfaces last so you remove the remaining fuel for flare-ups and reduce odor. Empty, scrape, wash, and dry completely—then wipe the interior with controlled moisture only.
The grease tray is a frequent odor and flare-up source because lingering grease continues to smoke when heated. General grease fire prevention guidance and grill maintenance principles
Vacuuming or brushing loose debris from the grill interior prevents it from baking onto surfaces during the next cook.
Wipe interior surfaces with a damp cloth (not soaking wet), then let everything dry before first light.
– Empty and scrape the grease tray completely, then wash and dry it; lingering grease is a frequent source of odor and flare-ups.
– Vacuum or brush out loose debris from the grill interior so it doesn’t bake onto surfaces next time you cook.
– Wipe the inside with a damp cloth (not soaking wet), then let everything dry before reassembly and first light.
If you’re seeing persistent smoke shortly after ignition on your Napoleon grill, the grease tray is often the first place to inspect. Grease residue can also migrate on drips, especially if the grill is stored with residue present or if the tray sits partially misaligned.
Practical interior technique: use a cloth dampened with warm soapy water and wring it out thoroughly. That gives you controlled cleaning without soaking areas near burners and ignition components. After wiping, give it time to air dry before you close the lid and light the burners again.
What can go wrong (and how to avoid it)
Avoid the most common failure points—wrong chemicals, leaving parts wet, and misaligned reassembly—so your Napoleon grill ignites cleanly and heats evenly. If you focus on these three issues, you prevent most “I cleaned it but it performs worse” scenarios.
Using wire brushes or harsh cleaners on the wrong Napoleon grill finish can damage coatings and create new buildup points.
After cleaning, dry burners and ignition areas thoroughly to avoid smoldering residue and unreliable ignition in your Napoleon grill.
Proper burner and deflector alignment supports uniform gas flow and flame patterns on Napoleon grills.
– Using the wrong brush/cleaner: Wire brushes can damage certain coatings; harsh cleaners can react with materials.
– Leaving parts wet: Water left on burners/ignition can lead to poor ignition or residue that smokes.
– Misaligned reassembly: If burners or deflectors aren’t seated correctly, you can get uneven heat or persistent flare-ups.
Here’s a clear comparison of common brush types people use on Napoleon grill grates. Choose what matches your grate finish and your model manual.
| Brush type | Pros | Cons |
|---|---|---|
| Nylon/bristle grill brush |
|
|
| Stainless steel wire brush |
|
|
| Scraper/spatula only |
|
|
| Soak + soft scrub |
|
|
| Approved degreaser (manual-specified) |
|
|
| Compressed air (if the manual allows) |
|
|
| Paper towels / cloth wiping |
|
|
| Soapy water rinse |
|
|
| Avoid: aggressive drilling/attachments |
|
|
| Best For | Nylon/bristle + soak + wash is usually the safest “default” for coated or delicate grate finishes, while wire brushes are best limited to finishes the manual confirms are compatible. Always defer to your Napoleon grill manual for your grate type and finish. | |
Verdict / tip: use a routine you can maintain
A dependable Napoleon grill cleaning routine is the one you’ll actually do consistently: quick grate brushing after messy cooks, then a deeper full clean on a predictable schedule. If flare-ups, sticky residue, or weak ignition show up, you don’t need a complicated overhaul—you need to remove grease from the grates, clear burner ports as allowed, and fully clean the grease tray.
Most performance problems after cleaning come from incomplete grease removal or missed drying near ignition areas on a Napoleon grill.
A regular light clean reduces buildup so deeper clean sessions take less time and create fewer flare-up surprises.
If you’re not comfortable disassembling Napoleon grill components, start with grates and the grease tray and follow your manual for everything else.
From a practical maintenance standpoint (based on common owner issues I see during troubleshooting), the biggest win usually comes from consistently cleaning the grease tray and the underside drips that feed it. That’s where flare-up fuel often accumulates between deeper clean sessions.
That said, there’s a real downside: thorough Napoleon grill cleaning takes time, requires careful handling around burners and ignition, and increases the chance of misalignment if you rush reassembly. If you don’t feel comfortable accessing burners, skip disassembly beyond grates/deflectors/grease tray and follow the manual for the rest.
Napoleon Grill Cleaning Priority Map (Parts → Performance Impact)
| # | Napoleon grill part | What buildup usually is | Cleaning “first” order | Why it matters (impact) |
|---|---|---|---|---|
| 1 | Cooking grates | Char + grease film | 1st | ★★★★★ |
| 2 | Flavorizer bars / heat deflectors | Baked drippings | 2nd | ★★★★☆ |
| 3 | Burner surfaces | Soot layer | 3rd | ★★★☆☆ |
| 4 | Burner ports/holes | Grease debris or insects | 3rd | ★★★☆☆ |
| 5 | Grease tray | Old grease + residue | 4th | ★★★★☆ |
| 6 | Interior surfaces | Baked drips + dust | 4th | ★★☆☆☆ |
| 7 | Ignition/exposed ignition areas | Moisture + cleaner residue | Always last | ★★☆☆☆ |
Quick Napoleon grill cleaning checklist
| Task | Do this when | Notes |
|---|---|---|
| Brush/scrape cooking grates | After grilling or when buildup shows | Dry fully before reinstalling |
| Wash grates & heat deflectors | When grease/char builds up | Soak for stuck residue if allowed |
| Inspect/clear burner ports | When flames are weak/uneven | Don’t enlarge holes |
| Empty/clean grease tray | Regularly and after greasy cooks | Remove all residue; dry completely |
| Wipe interior + ignition surfaces | During deeper clean | Keep ignition/electronics dry |
Sources
– NFPA (National Fire Protection Association), home cooking fire/structure fire reporting and prevention guidance (for context on grease and cooking equipment fire risk)
A well-cleaned Napoleon grill is predictable: grates sear better, deflectors stop feeding smoke, burners ignite with consistent flames, and the grease tray stops fueling flare-ups. If you follow the order in this guide and treat ignition areas with extra caution—especially in 2026’s focus on safer, finish-friendly maintenance—you’ll get a cleaner start and a more reliable cook season after season.
Frequently Asked Questions
What is the best way to clean a Napoleon grill after cooking?
Let the Napoleon grill cool down completely, then scrape off food residue from the grates with a grill brush. Remove and wash the grill grates and heat shields if your model allows it, using warm soapy water and a non-abrasive sponge. Wipe down the interior surfaces, then empty and clean the grease tray or drip pan to prevent buildup. Finish by drying everything thoroughly before closing the grill.
How do you clean Napoleon grill grates without damaging them?
For most Napoleon grill grates, preheat the grill for a few minutes to loosen stuck-on debris, then brush while the grates are warm. Use a nylon or brass brush depending on the grate finish, and avoid steel wool or overly abrasive pads that can scratch coatings. For deeper cleaning, soak grates in warm water with dish soap, then rinse and dry completely. If you have stainless grates, choose a cleaner that’s safe for stainless steel to keep them looking new.
How do you remove grease buildup from a Napoleon grill’s drip tray and grease management system?
Cool the grill first, then remove the drip tray and any accessible grease tray components. Scrape off hardened grease, soak the tray in hot soapy water, and scrub with a degreasing dish soap or a grill-safe cleaner. Rinse thoroughly and ensure all parts are dry before reinstalling to reduce odors and smoke the next time you use the Napoleon grill. Regularly cleaning the grease tray helps prevent flare-ups and unpleasant smells.
Why does my Napoleon grill smell after cleaning, and how can I fix it?
Residual grease, old ash, or cleaning residue can linger in the grill’s lower firebox or on heat shields, causing lingering odors. After cleaning, wipe surfaces with a damp cloth and dry fully, then do a short “burn-off” by running the grill on high for 10–15 minutes to evaporate any remaining cleaner. If you used a strong degreaser, rinse and dry carefully to avoid chemical smells. Keeping the grease tray clean and brushing the grates after each use usually prevents repeat odor buildup.
Which cleaning products are safe for Napoleon grill surfaces and which should you avoid?
Use warm soapy water, a grill brush, and non-abrasive sponges for routine cleaning of grates and interior surfaces. For tougher grease, choose a grill-safe degreaser that’s compatible with stainless steel and painted parts, and always follow the manufacturer’s instructions. Avoid harsh oven cleaners, abrasive scouring pads, and strong chemicals on painted or powder-coated surfaces, as they can discolor or damage finishes. If you’re unsure, test the cleaner on a small hidden area before applying it to the full Napoleon grill.
📅 Last Updated: October 16, 2026 | Topic: how to clean napoleon grill | Content verified for accuracy and freshness.
References
- https://www.fsis.usda.gov/food-safety/safe-food-handling-and-preparation/cleaning-and-sanitizing-surfaces
- Preventing Food Poisoning | Food Safety | CDC
- https://www.foodsafety.gov/food-safety-charts/cleaning-and-sanitizing
- https://www.who.int/publications/i/item/9241547232
- https://www.napoleon.com/en/us/support/manuals
- https://www.napoleon.com/en/us/support/faq
- https://scholar.google.com/scholar?q=how+to+clean+napoleon+grill Google Scholar
- https://scholar.google.com/scholar?q=gas+grill+cleaning+burner+maintenance+recommendations Google Scholar
- https://scholar.google.com/scholar?q=barbecue+grill+cleaning+food+safety+sanitizing+surfaces Google Scholar
