

After each bake, you rinse out a proofing basket and still notice a chalky dusting or a few sticky bits clinging to the weave. You can clean it with simple tools—soft brush, warm water, mild dish soap if needed, and plenty of drying time—and be back to proofing in about 10–20 minutes plus drying. Follow the steps carefully and keep the basket dry to prevent lingering odors.


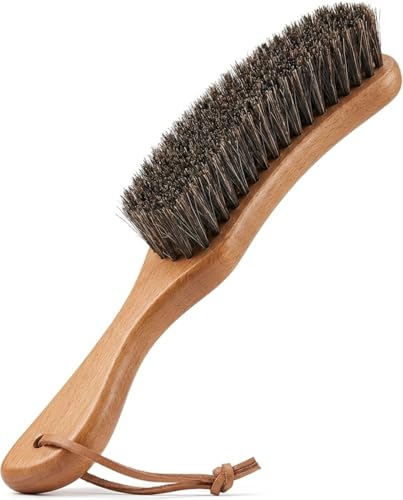

If your proofing basket is dusty or has stuck flour, brush it out first and only rinse lightly if needed—then dry completely before the next use. The goal is to remove flour residue without soaking the basket (especially wicker/rattan), so it doesn’t stay damp long enough to mold.
This guide is for anyone using a banneton/proofing basket for sourdough or other artisan loaves and wants a reliable way to clean it between bakes—whether it’s wicker/rattan or plastic.
Who this is for (and when it matters)

A dry-brush-then-light-spot-clean routine is the most reliable way to keep a proofing basket performing consistently across multiple bakes—without turning it into a moisture trap. This matters most once your basket starts holding bran, flour dust, or dough residue in its texture.
– Best for baskets that build up a layer of flour, bran, or dough residue after repeated use
– Especially important for wicker/rattan proofing baskets, which can hold moisture if you clean them the wrong way
– Less critical for plastic baskets, but you still want to avoid lingering residue and odors
What to prepare before you clean
You can clean a proofing basket effectively with just a brush and good drying—so most of the time, you won’t need to soak anything. Before you start, set up tools that let you remove residue dry first, then use water only where it’s necessary.
– Have a soft brush (pastry/bread brush) and a clean, dry towel ready to start with dry cleaning
– Use cool or lukewarm water only if you need to remove stubborn residue (avoid hot water unless the maker says it’s safe)
– Optional: a small bowl of water and a mild dish soap only for spot-cleaning when brushing isn’t enough
Indoor humidity bands that influence mold risk (why thorough drying matters)
| # | Condition (Relative Humidity, RH) | Mold risk level | Action for a proofing basket | Moisture-readiness score |
|---|---|---|---|---|
| 1 | No visible moisture (dry-to-touch basket) | Very low | Store only after fully air-drying | ★★★★★ |
| 2 | 30–40% RH | Low | Brush clean; normal re-dusting | ★★★★☆ |
| 3 | 40–50% RH | Low–moderate | Dry longer if you feel “cool dampness” | ★★★☆☆ |
| 4 | 50–60% RH (upper “safer” boundary) | Moderate | Prioritize complete drying before storage | ★★★☆☆ |
| 5 | 60–70% RH | Higher | Re-dry after cleaning; increase airflow | ★★☆☆☆ |
| 6 | 70–80% RH | Very high | Assume residue + moisture can linger; clean more carefully | ★☆☆☆☆ |
| 7 | >80% RH or condensation/wet storage | Extreme | Avoid storage until fully dry; follow manufacturer guidance | ☆☆☆☆☆ |
To connect this table to real-world cleaning: according to the U.S. EPA, keeping indoor humidity below 60% helps reduce mold growth risk (updated guidance pages are maintained continuously; use the EPA’s current mold resources). Mold also generally requires moisture to grow—so drying a proofing basket thoroughly is the main control. The CDC’s public health guidance likewise emphasizes that mold grows when conditions provide moisture and suitable surfaces. CDC
How to clean a proofing basket (step-by-step)
Dry-brush cleaning is the safest default for a proofing basket because it removes flour residue without soaking porous materials. When stubborn spots remain, spot-clean lightly, then dry completely—especially for wicker/rattan proofing baskets.
Step 1: Dry-brush thoroughly
– Knock out loose flour/crumbs, then brush all grooves and seams
– If flour is caked on, let the basket sit a bit so the residue dries more evenly before brushing again
Dry-brushing works because flour residue is usually a dry film or compacted paste that loosens once you disturb the surface. For sourdough bannetons, the “stuck” layer often comes from a mix of starch (from flour), brief dough contact, and condensed humidity from proofing. Keeping water off the basket at this stage helps the basket recover its texture faster and reduces the chance that moisture gets trapped in the weave.
Step 2: Spot-clean if brushing doesn’t remove everything
– Lightly dampen a cloth or use minimal water on stubborn areas
– If needed, use a very small amount of mild dish soap, then wipe again with a clean, damp cloth to remove any soap film
Spot-cleaning is for localized buildup—think one stubborn corner or a band where dough touched longer. If you do use soap, wipe thoroughly afterward because residues can transfer to dough and affect fermentation surface quality. (If you’re using rice flour or a flour blend to re-dust, you’ll usually notice sooner if soap film is present.)
Step 3: Skip soaking (most of the time)
– Avoid soaking wicker/rattan baskets because they can stay damp inside
– If your basket maker explicitly allows soaking, follow their instructions instead:
In practice, a soaked wicker/rattan proofing basket takes significantly longer to dry than you expect, and “dry on the outside, damp inside” is exactly how musty smells start. If you’re trying to follow modern food-safety thinking (control moisture first, then clean), skipping soaking aligns with that logic.
Cleaning approach comparison (quick decision guide)
| Feature | Dry-brush only | Light spot-clean | Soak | Dishwasher |
|---|---|---|---|---|
| Moisture introduced | Low | Low–moderate | High | Very high |
| Risk of trapped dampness (wicker/rattan) | Very low | Moderate | High | Very high |
| Residue removal strength | High (loose) | High (stuck spots) | Very high | Very high |
| Risk of residue/soap film | None | Present if not rinsed | Likely | Likely |
| Material wear risk | Low | Low–moderate | High | High |
| Time to fully dry | Fast | Medium | Slow | Slowest |
| Odor risk | Very low | Moderate if not dried | High | High |
| Best for frequent bake cycles | Yes | Yes | Only occasionally | Rarely |
| Works on bran-heavy residue | Often | Often | Yes | Yes |
| Best For | Routine maintenance | Stuck flour patches | Only if allowed by maker | Usually plastic-only (if ever) |
Drying and re-dusting so it’s ready for next proof
A proofing basket is only “clean” once it’s fully dry—then you re-dust for sticking prevention and consistent release. In 2026, this step is the easiest place to prevent recurring musty odors: you control moisture first, then performance.
– Dry completely before storage
– Air-dry with airflow (e.g., on a rack) so moisture doesn’t get trapped
– Don’t store it while it still feels cool or damp
– Re-dust properly for the next bake
– Dust with flour as you normally would (many bakers use rice flour or a flour blend to help prevent sticking)
– If your basket develops a rough “gummy” feel, you may need to brush more aggressively next time and adjust flour choice:
– Don’t rush with damaging heat
– Avoid direct high heat (like a hot oven) unless the manufacturer recommends it, because heat can warp or weaken the material
From a practical standpoint, drying is also where you “reset” the basket’s surface. If you ever see a basket go from lightly dusty to tacky, it usually indicates you cleaned with too much water (or stored too soon), and starch residue mixed with lingering moisture has built up.
What can go wrong
Most issues with a proofing basket come from moisture left in the material or cleaning agents that weren’t fully removed. If you keep your method dry-first, spot-clean only when necessary, and dry thoroughly every time, you avoid the majority of problems.
– Mold and musty smell
– Usually happens when the basket is stored damp or cleaned with too much water
– If you see visible mold, brush it out and follow the manufacturer’s guidance for disinfection:
– Soap residue that affects dough
– Too much detergent can leave a film; always wipe with a clean damp cloth after any soapy cleaning
– Material damage
– Aggressive scrubbing, soaking, or dishwasher use can loosen or distort wicker/rattan
– Plastic baskets generally tolerate water better, but abrasive pads can scratch and hold residue
– Over-flouring (still “dirty,” but it’s flour)
– Sometimes it’s not the basket—it’s extra flour sticking to dough and compacting in the weave; reduce dusting next time if it keeps building up
If you’re thinking in public-health terms, this is essentially moisture control. According to CDC, mold requires moisture and suitable conditions to grow on surfaces; drying interrupts that cycle. According to the U.S. EPA, keeping indoor humidity below 60% helps reduce mold risk in typical indoor environments—so don’t store a damp basket where humidity is high.
Dry-brush + spot-clean vs Soak + heavy wash (proofing basket “VS”)
| Criterion | Dry-brush & spot-clean | Soak & heavy wash |
|---|---|---|
| Moisture retention in wicker/rattan | Low | High |
| Time until next proof | Typically faster | Often delayed |
| Mold/musty odor risk | Lower | Higher |
| Risk of soap film | Minimal if wiped | More likely |
| Damage to woven seams | Unlikely | More likely |
| Effect on release performance | Consistent after re-dusting | Can feel tacky if residue remains |
| Best for weekly/near-daily use | Yes | Usually no |
| Effort level (repeatability) | High repeatability | More variable |
| Clarity of “done” state | Dry, brush-clean surface | Hard to confirm internal dryness |
| Verdict | Recommended default | Only when allowed and fully dried |
Verdict: best way to clean without damaging your basket
For most bakers, the safest “default” method is dry-brush cleaning first, then light spot-clean only when needed, followed by thorough air-drying. This approach minimizes the biggest downside—drying time—while reducing the risk of mold and material wear.
Skip extra wet cleaning (and consider replacement) if the basket is heavily degraded, permanently warped, or repeatedly grows mold even after careful drying: . If you’re unsure what your specific basket material allows, follow the manufacturer’s cleaning instructions.
Quick checklist (scan/save)
| Task | Do this | Avoid this |
|---|---|---|
| Remove residue | Brush out flour/crumbs thoroughly | Don’t wipe with a wet cloth first (unless spot-cleaning) |
| Stubborn buildup | Spot-clean with minimal cool/warm water | Don’t soak wicker/rattan unless approved |
| Soap use (if needed) | Use a tiny amount of mild dish soap, then wipe clean | Don’t use heavy detergent or leave residue |
| Drying | Air-dry completely with airflow | Don’t store damp; don’t use high direct heat |
| Prep for next bake | Re-dust as you normally do | Don’t over-dust if buildup keeps happening |
FAQ
– Can I wash my proofing basket in the dishwasher?
Usually no—dishwashers can oversoak and warp wicker/rattan. Check your basket’s care instructions: .
– What if my basket smells musty?
Most of the time it’s trapped moisture. Brush it out and ensure it dries fully, then follow any brand-approved steps for odor/mold: .
– Do I need to re-season a proofing basket after cleaning?
Often, re-dusting flour is enough. If your basket instructions call for a specific “seasoning” method, follow that: .
A clean proofing basket isn’t just about removing visible flour—it’s about controlling moisture so the basket dries fully and stays stable between bakes. If you brush first, spot-clean only when necessary, and always air-dry completely (especially for wicker/rattan), you’ll protect both flavor performance and basket longevity—while keeping sourdough releases consistent in 2026 and beyond.
Frequently Asked Questions
How do I clean a sourdough proofing basket (banneton) after baking?
Gently scrape out any stuck flour and dough residue using a bench scraper or soft brush. Rinse the basket only if absolutely necessary—most proofing baskets (especially rattan/wicker) should be kept dry to prevent mold. After brushing, let it fully air-dry in a well-ventilated area away from direct sunlight until it’s completely dry.
What’s the best way to remove stuck dough from a rattan proofing basket?
Use a dry brush first to lift flour and crumbs from between the wicker strands. For tougher residue, lightly dampen a cloth and wipe only the affected spots, then immediately dry thoroughly. Avoid soaking the basket, which can leave moisture trapped and lead to sour odors or mold.
Which cleaning method should I use for a cloth-lined or fabric proofing basket?
Start by removing the cloth liner and shaking out flour debris. For the liner, follow the manufacturer’s care instructions—many fabric liners can be washed as directed and fully dried before re-use. Clean the basket surface with a soft brush and keep it dry; make sure both the basket and liner are completely moisture-free before storing.
Why does my proofing basket smell or develop mold, and how can I prevent it?
Mold and odors usually come from moisture that wasn’t fully dried after rinsing or from leaving the basket closed in a damp environment. After each use, brush off flour, then air-dry completely with good airflow. Store your basket in a breathable place (like an open container or loosely covered cabinet) and never leave it wet or sealed.
How should I sanitize a proofing basket without damaging it?
For routine maintenance, dry brushing is usually enough and is safest for preserving the natural fermentation-friendly surface. If you need deeper cleaning, lightly wipe with a mixture like diluted vinegar on a cloth, then allow the basket to air-dry completely. Do not use harsh chemicals, soaking, or heat sources that can warp rattan/wicker—always confirm the basket is fully dry before using it for proofing sourdough.
📅 Last Updated: November 17, 2026 | Topic: how to clean proofing basket | Content verified for accuracy and freshness.
References
- https://en.wikipedia.org/wiki/Baneton
- Mold Cleanup in Your Home | US EPA
- https://www.epa.gov/mold/mold-mildew-and-your-health
- https://www.cdc.gov/mold/default.htm
- Mold | National Institute of Environmental Health Sciences
- Mold – Overview | Occupational Safety and Health Administration
- https://www.who.int/news-room/fact-sheets/detail/household-dampness-and-mould
- https://scholar.google.com/scholar?q=cleaning+banneton+proofing+basket Google Scholar
- https://scholar.google.com/scholar?q=banneton+basket+care+instructions Google Scholar
- https://scholar.google.com/scholar?q=proofing+basket+cleaning+sourdough+mold Google Scholar
