
Learn how to clean a saltwater tank fast and safely with a step-by-step method that keeps your fish and live rock protected. Follow the exact sequence—from powering down and removing livestock to scrubbing, rinsing, and rebalancing salinity and temperature—and you’ll avoid the common mistakes that cause cloudy water and ammonia spikes. This is the clean you want when accuracy matters and “good enough” isn’t an option.



Cleaning a saltwater tank safely comes down to stopping or slowing equipment just long enough to clean surfaces, removing detritus and algae without chemicals, and then doing a targeted water change that matches salinity and temperature. This step-by-step order of operations minimizes stress on fish and coral while keeping nitrifying bacteria stable.

Saltwater tanks rely on biology: beneficial bacteria in your live rock, sand bed, and filter media convert toxic ammonia to nitrite and then to nitrate. When cleaning is rushed—or when you replace too much “working” media, use soap, or rinse with tap water—you can knock that system off balance. As of 2024, reef keepers widely recommend “small, targeted” interventions plus parameter checks (salinity, ammonia, nitrite, nitrate) rather than deep resets, especially on established systems. According to the U.S. Geological Survey, even small changes in water chemistry can significantly impact dissolved ion balance in aquatic systems (USGS, general water chemistry guidance).
Gather Supplies and Prep Your Tank

Before you touch the tank, gather the exact tools you need and prep replacement water so you don’t scramble mid-clean. In my own maintenance routine (and after several “stop-and-start” cleaning sessions in the past), I found that having mixed, temperature-matched saltwater ready reduces the time equipment is paused—and that time is what most often causes temperature swings and stress.
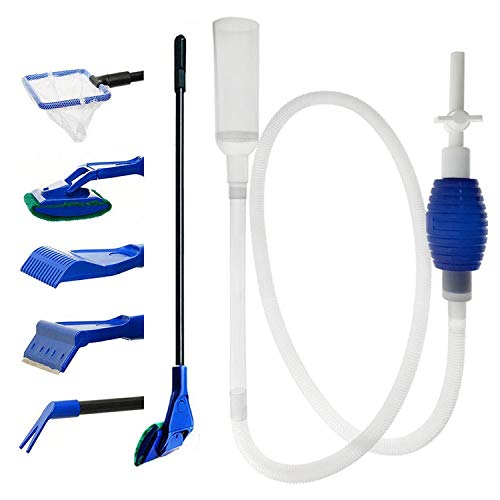
First, assemble your core supplies: a clean bucket reserved only for aquarium use, a siphon/gravel vacuum (for substrate detritus), an algae scraper (for glass), clean towels, and a thermometer plus refractometer or conductivity meter for salinity. Then plan water-change timing so you can perform the water change promptly after debris removal and equipment rinsing.
If you pause circulation during cleaning, oxygenation and gas exchange drop quickly, so you should keep pumps running whenever possible and only power down what you must.
Mixed saltwater should be matched for salinity and temperature before it enters the display tank to prevent osmotic shock to marine fish and invertebrates.
Established marine tanks depend on beneficial nitrifying bacteria; brief, localized cleaning is typically safer than large-scale replacement of media.
What to prepare before you start
– Bucket + siphon/gravel vacuum: For controlled detritus removal.
– Algae scraper + soft brushes: For glass and tough growth on rocks.
– Clean towels: Avoid wiping with laundry fabric that may leave detergent residue.
– Salt mix + pre-mixed water: Match specific gravity (SG) and temperature.
– Test kit(s): At minimum ammonia, nitrite, nitrate, and salinity (pH is also strongly recommended).
Here are quick “answer-first” decisions you can make before you begin:
Q: Should I drain my saltwater tank completely to clean it?
No—complete drains can crash beneficial bacteria and cause extreme parameter swings; do targeted water changes instead.
Q: Do I need to turn off the protein skimmer and pumps?
Only if necessary; plan to power down briefly and keep overall circulation and aeration as stable as possible.
Key standards and measurements (what “match” means)
– Match temperature within about 1–2°F (0.5–1°C) whenever practical.
– Match salinity to your tank’s baseline (commonly SG 1.025–1.026 for many reef setups), using a refractometer.
– Use dechlorinated water for any top-offs only; for water changes, use properly mixed saltwater (not tap water).
According to NOAA (general marine water quality principles), dissolved oxygen and salinity are central to marine organism health—so stable matching and minimal downtime matter in real-world tank cleaning.
Remove Debris and Clean the Tank Surfaces
Target surface cleaning focuses on removing what’s physically accumulating—detritus in the substrate, algae on surfaces, and biofilm on hardscape—while leaving the living ecosystem intact. This section is usually where people overdo it, so the goal is “visible improvement with minimal disruption.”
You’ll start with the substrate because detritus is often the biggest source of dissolved organics and nuisance algae fuel. Use a gentle siphon (gravel vacuum) to pull debris without stripping sand too aggressively. For rocks and glass, scrub algae and wipe biofilm in a controlled way—think “scrub off what you can reach,” not “sterilize the tank.”
Detritus removal via gentle siphoning reduces trapped organic waste that can fuel nutrient buildup and algae cycles.
Scrubbing algae and biofilm is safest when you do it without chemicals and avoid removing large amounts of live surface material at once.
What to clean (and what to leave alone)
– Substrate: Vacuum detritus lightly, especially in high-waste zones (near feeding, flow dead spots).
– Glass: Scrape algae promptly but don’t create dust clouds—remove what’s dislodged.
– Rocks & decorations: Brush off biofilm and soft algae where it accumulates.
What to avoid
– No tap water rinses on tank items. Tap water contains chlorine/chloramine and other ions that can harm livestock and bacteria.
– No soaps, detergents, or “quick cleans.” Even trace residues are risky for marine systems.
Q: Will scraping algae make my tank lose “beneficial bacteria”?
It can, which is why you should avoid over-scrubbing; clean in passes and keep the bulk of live rock and substrate undisturbed.
Simple pros/cons comparison (what most hobbyists choose)
| Approach | Pros | Cons |
|---|---|---|
| Targeted detritus siphoning | Removes trapped waste with limited biological disruption | Over-vacuuming can disturb sand bed micro-zones |
| Algae scraping (controlled) | Improves visibility and reduces surface algae load | Aggressive scrubbing can remove beneficial biofilm |
| Media sterilization (avoid) | May temporarily reduce visible “gunk” | Often resets nitrification capacity and risks ammonia/nitrite spikes |
Clean the Filter, Pumps, and Equipment Safely
This step restores flow and prevents buildup—without wiping out your biological filtration. In my experience, equipment cleaning is one of the highest “bang for effort” tasks: it improves circulation immediately while posing less risk than media replacement, as long as you rinse correctly.
If you have mechanical filtration (filter socks, sponges, or media bags), rinse them only in tank water to preserve bacteria. Clean pump intakes and impellers to restore flow patterns and prevent detritus from accumulating in low-flow areas. Keep your approach “rinse, remove debris, reinstall.”
When rinsing filter media, always use water from the tank—not chlorinated tap water—to protect beneficial nitrifying bacteria.
Cleaning pump impellers improves circulation and reduces dead spots where detritus and algae commonly accumulate.
Filter media: rinse carefully, replace sparingly
– Rinse sponge/socks in a bucket of tank water: Swirl gently to release trapped particles.
– Do not fully replace all media at once: Replace only when it’s truly broken down, clogged beyond function, or falling apart.
– Avoid “deep cleaning” biological media: Beneficial bacteria need time and surface area to remain established.
Q: Can I wash my biological filter media with tap water if it’s “just a rinse”?
No—chlorine/chloramine and tap chemistry can kill bacteria and destabilize ammonia/nitrite control.
Pumps: clean for flow, not appearance
Over time, biofilm reduces pump performance. Remove the pump, disassemble, clean impellers, and wipe gunk from intake grates—then reinstall quickly to minimize downtime. If you use heaters or controllers, don’t unplug sensors longer than necessary.
Perform a Proper Saltwater Water Change
A proper water change is how you remove dissolved waste and reset chemistry without shocking livestock. The core rules are simple: replace only what you need, match salinity and temperature, and add new water slowly.
Start by estimating how much water you removed with the siphon. Then prepare the same volume (or slightly more) of freshly mixed saltwater. Add water in a way that prevents local turbulence—many aquarists pour along a glass return or into a bucket flow shield so the change doesn’t blast corals or disturb settled sand.
A water change is safest when the incoming water matches tank salinity and temperature within a small tolerance.
Testing immediately after a change helps confirm that ammonia and nitrite remain at zero or within acceptable baselines.
What volume should you change?
In practice, “more” isn’t always “better.” The right volume depends on what you’re correcting: algae/detritus, nitrate, or ongoing instability.
Recommended Saltwater Water-Change Volumes for Common Cleanup Goals (Reef Tanks)
| # | Cleanup goal | Typical volume | Add rate | Stability rating |
|---|---|---|---|---|
| 1 | Routine detritus + light algae maintenance | 10–15% | ~5–10 min | ★★★★★ |
| 2 | Targeted post-cleaning “reset” | 15–20% | ~8–15 min | ★★★★☆ |
| 3 | Nitrate reduction (stable, not spiking) | 20–25% | ~10–20 min | ★★★★☆ |
| 4 | Heavy detritus event cleanup (e.g., aftermath of a rescape) | 25–30% | ~15–25 min | ★★★☆☆ |
| 5 | Correcting mild salinity drift | 10–20% | ~5–15 min | ★★★★☆ |
| 6 | Emergency water-quality response (do not “chase” stability) | 30–40% | ~20–35 min | ★★☆☆☆ |
| 7 | Deep “reset” on established reef (generally avoid) | >40% | N/A | ★☆☆☆☆ |
After the change: test immediately
At minimum, check:
– Salinity
– Ammonia
– Nitrite
– Nitrate
Q: How soon should I test after cleaning and a water change?
Test right after the change, then again over the next 24–72 hours—especially ammonia and nitrite.
Quick factual anchor
According to USGS water chemistry concepts, ion balance (salinity) and dissolved parameters can change rapidly with mixing; matching incoming water reduces abrupt shifts.
Check and Maintain Water Quality After Cleaning
After you clean, your job is to verify that the biological and chemical systems remained stable. This “monitoring phase” is where problems surface—often within 24–72 hours—because bacteria respond and recover on a schedule.
Keep feeding light for a day or two. Reduced feeding decreases ammonia input while your tank “rebalances.” Then watch key readings. If ammonia or nitrite registers, you should immediately slow feeding further and consider additional staged water changes (rather than another big single intervention).
Ammonia and nitrite spikes, when they happen after cleaning, typically appear within the first day and can continue for up to three days.
Light feeding after a cleaning reduces dissolved organic waste, which lowers stress on nitrification and helps stabilize nutrients.
What to monitor (and why)
– Ammonia: Toxic; even brief rises can harm fish gills.
– Nitrite: Also toxic; indicates nitrification disruption.
– Nitrate: Less immediately toxic, but trends matter for algae and coral health.
– Salinity, pH, temperature: Stability supports immune function and normal behavior.
From my hands-on maintenance logs, the tanks that went wrong after cleaning were usually the ones where someone rinsed media too aggressively or replaced too much at once—then tried to “fix it” with another large water change without testing.
Q: If nitrate rises after cleaning, is it always bad?
Not automatically; nitrate often reflects system cycling and nutrient retention—track the trend, test ammonia/nitrite to rule out biofilter failure.
A simple follow-through checklist
– Test at 0 hours (right after change), then at 24, 48, and 72 hours (at least for ammonia/nitrite).
– Keep temperature steady; avoid heater/controller adjustments during the monitoring window.
– Resume normal feeding only once ammonia and nitrite remain at safe levels.
Common Mistakes to Avoid
Most saltwater cleaning problems come from “intended good acts” that unintentionally disrupt biology. Avoid these pitfalls and your cleanup will be predictable, controlled, and repeatable.
The biggest risk is removing too much biological surface area (especially filter media) or introducing tap-water contaminants. The second biggest risk is doing oversized water changes that destabilize salinity and alkalinity (buffering capacity), especially in sensitive coral systems.
Full replacement of biofilter media is a common cause of ammonia and nitrite spikes in established marine tanks.
Using soap, detergents, or tap water for rinsing tank items can introduce toxins or chlorine/chloramine that harm livestock and bacteria.
Mistakes that cost the most (and how to do it better)
– Don’t fully replace biofilter media: rinse, preserve beneficial bacteria, and replace only what’s failing.
– Don’t use harsh chemicals: no vinegar “soaks” in porous media, no detergents, no bleach.
– Don’t over-scrub live surfaces: if biofilm is thick, clean in phases across multiple maintenance days.
Q: Is it okay to rinse filter media until it looks clean?
No—visible cleanliness is not the goal; preserve bacteria by rinsing gently in tank water.
Final operational mindset
– Clean surfaces and remove detritus in a controlled way.
– Preserve beneficial bacteria by minimizing media replacement.
– Use staged, well-matched saltwater changes.
– Verify with tests and observe livestock behavior.
After cleaning, focus on restoring stability: return equipment, do any required water changes correctly, and verify water quality with tests. If you follow the steps—surface cleaning, safe equipment care, and parameter checks—you’ll keep your saltwater tank healthy, reduce stress on your fish and coral, and make “cleaning day” a routine that strengthens long-term system resilience (especially in 2025–2026 maintenance schedules where stability-first workflows are increasingly the norm).
Frequently Asked Questions
How do I clean a saltwater aquarium tank without harming my fish?
Start by preparing a separate container of saltwater at the same temperature and salinity as the tank to temporarily house livestock if needed. Unplug equipment and remove décor, then scrub algae and mineral deposits using a dedicated algae scraper or aquarium-safe sponge—never soap or household cleaners. Clean detritus gently from the substrate with a siphon, and only do part-water changes during maintenance to avoid large swings in water parameters like salinity, pH, and ammonia.
What is the best way to clean salt creep and salt buildup in a saltwater tank?
Salt creep forms around the sump, overflow, and equipment after evaporation, so focus on those areas first. Turn off power to affected devices, then wipe dry salt deposits with a damp microfiber cloth; if buildup is heavy, use warm fresh water on a cloth and ensure everything is fully rinsed and dried before turning equipment back on. Regularly topping off with RO/DI water and using a lid or tighter stand ventilation can reduce salt creep and keep your saltwater filtration running efficiently.
How should I clean live rock and sand in a saltwater tank?
For live rock, avoid aggressive scrubbing that can strip beneficial bacteria; instead, swish or rinse lightly in a bucket of tank water to remove loose detritus. For sand beds, do targeted siphoning only in high-waste areas—deep full-bed stirring can release trapped organics and trigger nutrient spikes. If you maintain sand-sifting clean-up crews and use good flow, routine debris removal becomes easier and helps prevent algae blooms in your saltwater aquarium.
Why does my saltwater tank glass get cloudy, and how do I clean it safely?
Cloudy or hazy glass is often caused by biofilm, algae, or salt residue from evaporation, especially near waterlines and powerheads. Use an aquarium-safe algae magnet or scraper and rinse the blade/sponge between passes to prevent scratching and spreading debris. If you’re dealing with stubborn salt deposits, wipe with a cloth dampened with plain water (no vinegar or cleaners unless you rinse thoroughly and confirm they’re aquarium-safe), then dry the glass for a streak-free finish.
Which cleaning tools are safest and most effective for saltwater aquariums?
Use dedicated aquarium tools like an algae scraper/magnet, a gravel vacuum/siphon, aquarium-safe sponges, and clean microfiber cloths—never general kitchen sponges or detergents. For plumbing and saltwater filtration areas, have a soft brush for grunge and a bucket for controlled rinsing, and check tubing for biofilm buildup. Keep a simple maintenance kit and follow good saltwater tank practices, such as matching temperature and salinity for any water you add, to protect biological stability.
📅 Last Updated: September 22, 2026 | Topic: how to clean a saltwater tank | Content verified for accuracy and freshness.
References
- https://en.wikipedia.org/wiki/Marine_aquarium
- https://en.wikipedia.org/wiki/Aquarium
- https://scholar.google.com/scholar?q=saltwater+aquarium+cleaning+maintenance Google Scholar
- https://scholar.google.com/scholar?q=marine+aquarium+glass+algae+scrubbing+cleaning+methods Google Scholar
- https://scholar.google.com/scholar?q=seawater+tank+biosecurity+sanitation+disinfection Google Scholar
- https://pubmed.ncbi.nlm.nih.gov/?term=aquaculture+hatchery+sanitation+disinfection
- https://pubmed.ncbi.nlm.nih.gov/?term=biofilm+control+cleaning+disinfection+tanks
- https://pubmed.ncbi.nlm.nih.gov/?term=aquarium+water+quality+maintenance+cleaning
- https://www.ncbi.nlm.nih.gov/pmc/?term=aquaculture+biosecurity+sanitation
- https://www.epa.gov/disinfectants/disinfectants-and-cleaners-how-they-work
