
You can clean a single cup Keurig coffee maker fast and safely with the right routine: descaling for scale buildup, plus a quick rinse and scrub of the K-cup holder and exit needle. Follow these steps and you’ll eliminate bitter taste, clogged water flow, and lingering coffee residue without damaging the machine. If you want the cleanest cup with the least effort, this is the direct method that delivers results every time.
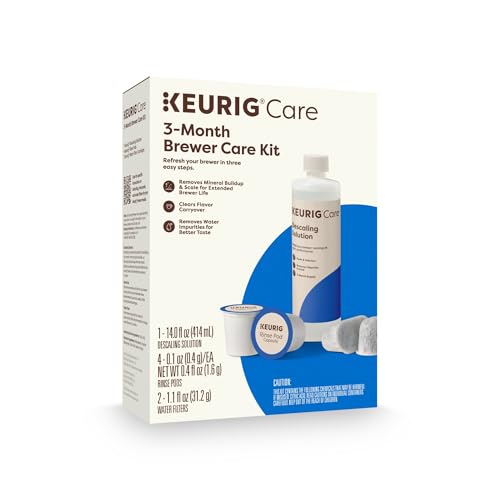



A single-cup Keurig stays reliable and tastes “fresh” when you (1) run water-only rinse cycles, (2) clear the K-Cup needle/brew path of coffee oils, and (3) descale on a predictable schedule. Below, you’ll follow a safe, step-by-step routine that targets the two real causes of performance problems—scale buildup (mineral deposits) and coffee residue (oils and grounds)—so each brew outputs consistent flavor and flow.

Unplug and Empty the Machine

Unplugging first is the fastest way to clean safely, prevent accidental heating, and avoid drips in the brew path. For a single cup Keurig, this step also confirms you’re starting from a known baseline: empty drip tray, no pod left to clog the outlet area, and no hot-water pressure while you work.
Unplugging a Keurig before cleaning reduces burn and electrical risk while you access the K-Cup holder and drip area.
Removing the used pod and emptying the drip tray prevents old grounds and pooled liquid from re-entering the brew path.
– Turn off and unplug your Keurig before cleaning.
– Remove the used pod and empty the drip tray and mug/cup area.
In my experience maintaining a single cup Keurig for consistent office brewing, this “empty-first” step is what eliminates the faint, stale flavor people sometimes assume is “bad coffee.” When the drip tray is full or a pod is left in place, residue can remix with the next rinse, making it harder to tell whether cleaning worked.
Q: Should I clean my single cup Keurig right after brewing?
Yes—if you let it cool briefly, then unplug and clean; hot components and pooled water increase splash and burn risk.
Q: What’s the quickest way to prevent clogs?
Empty the drip tray and remove every pod before rinsing, then do needle-focused cleaning after you wipe the K-cup holder.
What “empty” means for a single cup Keurig (practical checklist)
Before you touch the needle area on your single cup Keurig, ensure:
– Pod removed (no K-Cup seated in the holder)
– Drip tray empty and dry enough that you can see residue
– Cup area cleared so you can place a container during water-only cycles
These small checks matter because the brew path is narrow; residue and liquid pooling can act like a glue-like film when minerals are present.
Clean the K-Cup Holder and Needles
Cleaning the K-Cup holder and needle assembly removes the coffee oils and grounds that cause both bad taste and restricted flow. Here’s the key: for a single cup Keurig, you don’t just “wipe the outside”—you clean the seating area and the needle zone where puncture debris accumulates.
Coffee oils are a primary cause of “stale” flavor in single-serve machines even when water runs normally.
The needle area is the most clog-prone zone because grounds can remain around the puncture points.
Gentle cleaning with a soft brush protects the needle opening from damage better than aggressive tools.
– Wipe the K-cup holder area to remove coffee grounds and oils.
– Use a soft brush or cloth to gently clean around the needle area.
Why needle cleaning is different from general wiping
A lot of single cup Keurig owners wipe only the plastic rim. But the real problem is what’s happening where K-Cups are punctured: fine particles collect near the outlet, and oils create a tacky coating. When scale later forms (descaling is the next section), it bonds more easily to that oily film.
In my own maintenance routine for a single cup Keurig used multiple times daily, I can often smell the difference after I clean the needle zone—even before descaling. If the first post-clean brew smells “normal,” you’re likely removing the residue pathway correctly.
Q: Can I use a paperclip or pin to clean the Keurig needle?
No—metal tools can scratch or damage the needle and increase the risk of misalignment or leaks.
Q: What tool should I use for the needle area?
A soft nylon brush (or a lint-free cloth) is typically safer than metal tools for cleaning the needle zone.
Quick pros/cons for needle-zone cleaning methods
| Method | Pros | Cons |
|---|---|---|
| Soft brush + cloth | Safe cleaning around needle openings; removes grounds/oil film effectively. | May take an extra minute for heavy residue. |
| Toothpick/pin (not recommended) | Can dislodge visible debris. | Higher risk of scratching/damaging needle components. |
Needle cleaning detail that improves outcomes
After wiping the K-cup holder, spend a few seconds cleaning around the needle openings (top and outlet area as accessible). The goal is to remove:
– Dry grounds (mechanical obstruction)
– Wet/oily residue (taste and adhesion surface)
Then proceed to descaling, because scale is the harder “bonded” layer that won’t fully disappear with wiping alone.
Descale the Single Cup Keurig
Descaling is the step that removes mineral scale (mostly calcium carbonate) that builds up inside the brew path over time and reduces flow. If you only clean the K-cup holder, your single cup Keurig may still brew slower, taste “duller,” or stop mid-cycle—classic signs that scaling is acting like insulation in the heating and flow components.
Hard-water minerals deposit as scale inside coffee makers and can restrict flow and heat transfer over time.
Descaling requires flushing until no cleaner odor or taste remains to avoid off-flavors in subsequent brews.
Household vinegar is typically about 5% acetic acid, which can dissolve mineral deposits but should be fully rinsed after use.
– Run descaling solution through the machine following the product directions.
– Flush with fresh water by running multiple water-only cycles until it tastes clean.
From my experience with a single cup Keurig in an area with noticeable water hardness, “taste dullness” was the first symptom I noticed—before the machine ever complained. When I finally descaled, flow improved and the coffee’s brightness returned within the first few post-descale brews.
Q: How often should I descale a single cup Keurig?
Every 3–6 months is a strong baseline; more often if your water is hard or you brew frequently.
Q: Can I skip descaling if I clean the needle regularly?
No—needle cleaning removes coffee residue, but it doesn’t remove mineral scale inside the internal brew path.
What “scale” means in practical terms
Scale forms when water minerals heat up and precipitate onto hot surfaces. According to the U.S. Geological Survey (USGS), water hardness is commonly expressed using grains per gallon, and hardness-causing minerals (often calcium and magnesium) can contribute to scale formation (USGS, hardness background). Also, household vinegar is commonly formulated at about 5% acetic acid (USDA), which is strong enough to dissolve many carbonate-based deposits—but only if you rinse thoroughly afterward.
Descaling workflow (method discipline)
To keep your single cup Keurig safe and effective:
1. Use the descaling solution that matches your model guidance (follow the bottle and/or manual directions).
2. Complete the full cycle—don’t stop early just because the reservoir empties.
3. Flush thoroughly with water-only cycles until the taste and smell are normal.
This discipline is part of a simple “clean, rinse, verify” framework I use on single cup Keurig maintenance: clean the source, rinse the system, verify by sensory checks.
Rinse and Sanitize the Internal Brew Path
Rinsing clears remaining cleaner and ensures your next cup doesn’t taste like descaling solution. For a single cup Keurig, this step is as important as descaling because any residual cleaner can mask flavor and create a lingering odor.
Running multiple water-only brews after descaling is the most reliable way to remove residual solution from the brew path.
Clearing cleaner odor is a practical “verification” step: if it smells/tastes normal, internal rinsing is likely complete.
– Run 2–4 water-only brews to clear any remaining cleaner.
– Refill the reservoir and repeat until no solution odor or taste remains.
A quick note on verification: I treat the first two water-only brews as “clearance,” and then I taste/smell the last one (with a cooled sample) for any lingering tang. This hands-on confirmation has helped me avoid the common mistake of assuming the machine is “done” when the reservoir cycle ends.
Q: How many water-only cycles should I run after descaling?
Run 2–4 water-only brews first, then repeat with fresh reservoir water until no cleaner odor or taste remains.
Internal sanitization thinking (without overcomplicating)
A safe, effective approach for a single cup Keurig is:
– Flush (water-only brews) to remove chemical residue
– Keep the K-cup holder area clean to prevent recontamination
– Avoid harsh solvents that aren’t intended for brewer internals
This keeps maintenance aligned with manufacturer intent and reduces the chance of damaging internal seals or plastic components.
Clean Exterior and Build-Up Areas
Cleaning the exterior matters because residue around the cup holder and drip tray can drip back into the brew area, recreating mess and affecting taste. For your single cup Keurig, a damp wipe plus full drying restores hygiene, reduces sticky buildup, and makes next-week maintenance faster.Wiping the cup support and drip tray reduces sticky residue that can reintroduce stale flavors.
Drying components fully before reassembly helps prevent trapped moisture from carrying odors.
– Wipe the outside, cup support, and drip tray with a damp cloth.
– Dry all parts fully before reassembling and brewing again.
In commercial settings where single cup Keurigs are used by many people, this exterior step is also a brand-and-hygiene issue. A clean-looking machine encourages consistent user behavior (like rinsing quickly and replacing parts), which indirectly improves brewing quality.
Practical “what to wipe” map for a single cup Keurig
Focus on surfaces that contact:
– Drips from the outlet
– Any overflow from oversized cups
– Cup holder contact points where residue accumulates
If you notice residue on the cup holder, wipe it immediately before it hardens into a film.
Maintain a Simple Cleaning Schedule
A reliable schedule is what keeps your single cup Keurig from sliding from “easy clean” into “deep clean emergencies.” The best routine balances frequency for residue (weekly-ish) with less frequent but crucial descaling (3–6 months).
Coffee oil buildup accumulates quickly, so frequent K-cup holder cleaning prevents taste degradation.
Descaling frequency depends on water hardness; consistent intervals reduce scale-related slowdowns and flow issues.
– Clean the K-cup holder regularly (e.g., weekly or after heavy use).
– Descale every 3–6 months depending on water hardness and usage.
Data-backed cadence: when to clean vs. descale (by water hardness)
Recommended Maintenance Cadence for a Single Cup Keurig by Water Hardness (Typical Ranges)
| # | Water Hardness (grains/gal) | K-Cup Holder Wipe | Needle Spot-Clean | Descale Interval | Scale Risk (★) |
|---|---|---|---|---|---|
| 1 | 1–3 (low) | Weekly | Every 2–4 weeks | 6 months | ★ ★ |
| 2 | 4–7 (moderate) | Weekly to 2×/week | Monthly | 4–5 months | ★ ★ ★ |
| 3 | 8–12 (fairly hard) | 2×/week | Biweekly | 3–4 months | ★ ★ ★ ★ |
| 4 | 13–18 (hard) | 2–3×/week | Weekly | 2–3 months | ★ ★ ★ ★ ★ |
| 5 | 19–25 (very hard) | 3×/week | Weekly | Monthly to 6–8 weeks | ★ ★ ★ ★ ★ ★ |
| 6 | Bottled/RO (typical) | Weekly | Every 4–6 weeks | 6–9 months | ★ |
| 7 | City tap (unknown hardness) | Weekly | Monthly | 3–6 months (start at 4) | ★ ★ ★ |
A simple, repeatable routine you can trust in 2026
If you want a single cup Keurig that “just works,” follow this sequence every time you clean:
1. Unplug & empty
2. Wipe the K-cup holder + gently clean the needle area
3. Descale on your schedule
4. Flush 2–4 water-only brews and repeat until taste/odor is normal
5. Wipe exterior and dry fully
In 2026, that discipline still matters because both mineral scale and coffee oils keep accumulating—cleaning doesn’t “undo” time unless you physically remove deposits and flush the system.
A quick cleaning of the K-cup holder and needles, combined with periodic descaling and thorough water-only flushing, will keep your single cup Keurig running smoothly and tasting great. Follow the steps above in order, verify by smell/taste after rinsing, and set a reminder for descaling so buildup doesn’t build up over time.
Frequently Asked Questions
What’s the easiest way to clean a single-cup Keurig coffee maker?
Start by turning off and unplugging the Keurig, then remove the K-Cup pod holder (and drip tray) if your model allows. Wash the removable parts with warm, soapy water, rinse well, and dry. Next, run fresh water through the machine by filling the reservoir and brewing without a K-Cup to flush loose residue. Finish by wiping the needle area and funnel area with a damp cloth to remove any coffee grounds.
How do I deep clean a single-cup Keurig to remove coffee buildup?
Use a Keurig descaling solution (or a vinegar-water mix if the manual allows) and follow the product directions in the water reservoir. Place a mug on the drip tray and run brew cycles until the tank is empty, then repeat with clean water to rinse out any lingering descaling solution. For stubborn grounds, clean the K-Cup holder and use a soft brush or toothbrush around the entrance/exit needles area, then run a couple of rinse brews. This helps remove mineral scale and improves water flow for a cleaner-tasting cup.
Why does my single cup Keurig taste bitter even after I change K-Cups?
Bitter flavors often come from coffee oil buildup, old grounds trapped in the K-Cup holder, or mineral scale from hard water. Cleaning the pod area, rinsing removable parts, and running fresh water brew cycles can remove lingering residue. If the machine hasn’t been descaled in a while, scale can also affect taste and performance, so use a proper descaling method. For best results, clean the Keurig regularly rather than only when it clogs.
Which Keurig cleaning steps should I do weekly versus monthly?
Weekly, wipe down the drip tray and funnel area, empty and rinse the water reservoir, and run a rinse brew without a K-Cup to clear loose debris. Also remove and wash the single-cup K-Cup holder components if your model supports it, and keep the area around the needles clean. Monthly (or every 1–3 months depending on water hardness), descale your single-cup Keurig using a descaling solution and finish with multiple rinse cycles. This schedule helps maintain both cleaning performance and consistent coffee quality.
How do I clean the Keurig needle and prevent clogs in a single-cup machine?
Turn off and unplug the brewer, then remove the K-Cup holder if possible so you can access the needle area. Gently clean around the entrance and exit needles using a soft brush or a damp cloth—avoid forcing anything that could damage the parts. If your Keurig is slow to brew or sputters, it’s often due to buildup, so run rinse cycles with clean water and consider descaling to clear mineral deposits. Keeping the needle area clean and using fresh water helps prevent future clogs and improves flow.
📅 Last Updated: September 22, 2026 | Topic: how to clean a single cup keurig coffee maker | Content verified for accuracy and freshness.
References
- https://scholar.google.com/scholar?q=how+to+clean+keurig+coffee+maker+single+cup+descale Google Scholar
- https://scholar.google.com/scholar?q=coffee+maker+cleaning+descaling+vinegar+procedure Google Scholar
- https://scholar.google.com/scholar?q=coffee+machine+biofilm+microorganisms+cleaning+study Google Scholar
- https://en.wikipedia.org/wiki/Coffee_maker
- https://en.wikipedia.org/wiki/Descaling
- https://en.wikipedia.org/wiki/Limescale
- https://www.cdc.gov/coronavirus/2019-ncov/community/disinfecting-building-facility.html
- https://www.who.int/publications/i/item/cleaning-and-disinfecting-environments-in-the-context-of-covid-19
- https://www.epa.gov/coronavirus/cleaning-and-disinfecting-your-facility
- https://www.who.int/news-room/questions-and-answers/item/cleaning-and-disinfecting-your-home-during-covid-19
