

Scrubbing a stainless steel gas grill can feel frustrating when baked-on grease dulls the finish and you are worried about streaks or scratches. You can get it looking clean again in about an hour with the right tools and a simple step-by-step routine for the grates, burners, and body. Before you start, gather a soft cloth or sponge, grill brush, mild dish soap or stainless cleaner, and a non-abrasive pad for stubborn spots.
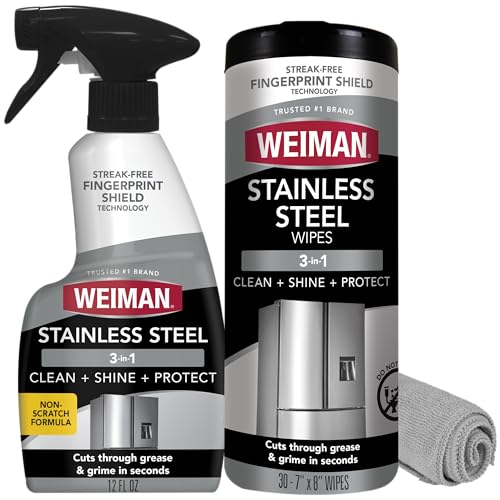

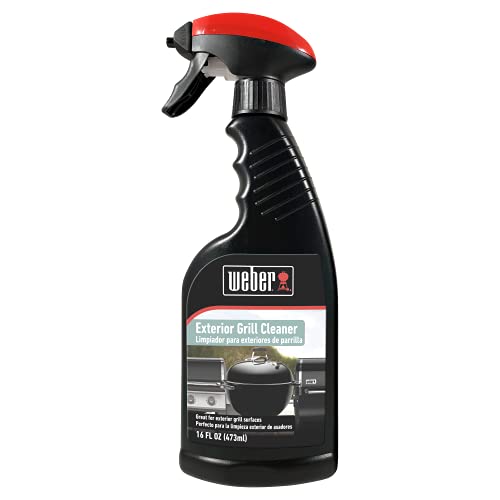

Cleaning a stainless steel gas grill is mainly about controlling heat, using the right cleaners, and preventing scratches. Start by turning off the burners, letting the grill cool, then remove grates and wipe down surfaces with a gentle degreaser—followed by thorough rinsing and drying.
This is for homeowners who want to keep their stainless burners and hood looking clean without damaging the finish. It’s especially useful if you’re dealing with greasy buildup, cooking residue, or spots that look “stuck on” after the grill has been used a few times.
Prep it safely before you clean

You’ll get the best stainless results when you prep the grill so you don’t fight heat, fumes, or hard-to-reach grease. Treat this as your “reset step,” because any moisture or cleaner applied to a hot or pressurized system can create residue you’ll have to remove again.
– Turn off the gas supply (and burners) and let the grill cool completely.
– Remove grates and any removable parts so you can clean every surface evenly.
– Give yourself good airflow and protect the floor with a liner or newspaper if needed.
Start by confirming the burners are off and the gas supply is shut before you do anything else. Stainless looks simple, but the hood, burner tubes, and valve area all behave differently—heat, grease, and moisture can combine into stubborn films. According to ASTM A240/A240M, many stainless grill components use alloys like Type 304 (typically 18–20% chromium and 8–10.5% nickel) which resist corrosion but are still vulnerable to chloride-driven pitting when conditions are wrong (ASTM A240/A240M (reviewed 2022)). That’s why “cool and dry” is not optional—especially as we move through 2026 and grills are used more frequently during summer grilling seasons.
Next, remove grates, and any parts the manual allows you to lift out (some systems let you remove grates and flavorizer plates; fewer let you remove burners safely). If your grill has a grease tray or drip system, pull the tray so you can clean it separately—this prevents the greasy layer from smearing across the stainless hood while you work.
Finally, create airflow and protect your floor. Degreasers and hot grease residue can be messy; even a careful wipe-down can leave slippery runoff. A liner or newspaper makes cleanup faster and reduces the chance you drag grit across stainless finishes.
Strip off grease and food residue
You’ll loosen most “stuck-on” grime fastest by removing loose particles first, then using mild degreasing and grain-aligned wiping. This step determines how scratch-prone the rest of the cleaning will be, because grit + scrubbing is what creates permanent dull patches on brushed stainless.
– Brush off loose debris first (a grill brush helps, especially on grates).
– Use warm water plus a mild degreasing cleaner for stainless surfaces; wipe with the grain.
– For stubborn spots, use a non-scratch sponge or nylon brush rather than abrasive pads.
Begin with the grill brush on grates while everything is still dry-ish and loose debris is easiest to dislodge. For stainless hood panels, use a soft cloth or non-scratch sponge first; you’re trying to lift residue, not grind it in. When you move to warm water and a mild degreaser, keep the contact controlled. Warm water (not boiling) helps dissolve grease without forcing it into tiny surface pores and weld seams.
Wipe with the grain. Brushed stainless has a directional finish, and rubbing across it tends to create “swirl” patterns—especially when a cleaner dries and leaves a thin film. In my own maintenance routine, the biggest visual improvement usually comes from two habits: wiping with the grain from the start, and switching to a clean side of the cloth often so you’re not re-depositing loosened grease.
For stubborn spots, avoid abrasive pads. Non-scratch sponges and nylon brushes are designed to work without embedding metal particles that can dull stainless permanently. If you’re tempted to use something “stronger,” check whether your grill manual specifies approved stainless cleaners first—some formulations can etch or discolor even when they look “safe” on other surfaces.
Clean grates, burners area, and drip trays
You’ll prevent odor and flare-ups by cleaning grates thoroughly, keeping cleaner away from burner components, and staying on top of drip trays. Stainless burners and hood panels often look best when you treat this as a three-zone workflow: grates, burner area, and grease management.
– Soak grates if buildup is thick, then scrub gently and rinse.
– Wipe the burner area carefully—avoid flooding components with cleaner or water.
– Empty and clean drip trays regularly to reduce odor and flare-ups.
Soak time depends on how heavy the buildup is, but the principle is straightforward: let the degreaser do the work rather than forcing harsh scrubbing. After soaking, scrub gently, then rinse. Rinsing matters because residue from degreasers can bake on the next cook and create a “new” film that looks like you never cleaned.
When you get to the burner area, moisture control becomes critical. Burner tubes and their ignition systems (electrodes and igniters, depending on model) don’t tolerate flooding well. Wipe the area rather than spraying cleaner everywhere. If your grill has visible burner ports, use a careful wipe around them and keep liquid from pooling under components.
For drip trays, frequency is your friend. Grease and oils that collect under the grill can turn into a persistent smell source and can raise the risk of flare-ups when residue ignites. Emptying and cleaning drip trays on a consistent schedule reduces both odor and the amount of baked-on grime you’ll face later.
Tackle stainless streaks, spots, and discoloration
You remove streaks and discoloration by rinsing completely and drying immediately with microfiber—then using a stainless-friendly polish only if needed. Most “mystery spots” after cleaning are either soap residue, dissolved grease that re-deposits, or water minerals left behind as the surface air-dries.
– After cleaning, rinse well and dry with a microfiber cloth to prevent water marks.
– Use a stainless-friendly polish or cleaner if streaking persists (avoid harsh scouring powders).
– Keep wiping consistent with the grain to reduce visible “swirl” marks.
First, rinse thoroughly. If cleaner remains, it can dry into a film that looks like streaking or haze. Then dry with a microfiber cloth rather than air-drying. Microfiber helps lift remaining moisture without dragging fine particles across the finish, which is a common cause of dullness.
If streaking persists, choose a stainless-friendly polish. Avoid harsh scouring powders—they may remove residue but they also abrade the finish. When you polish, do it consistently with the grain so you’re reinforcing the existing brushed pattern instead of introducing cross-scratches.
One reason stainless hood “spots” can vary between grills is the alloy used. Different grades handle corrosive conditions differently, which affects how easily surface blemishes develop and how they respond to cleaning. Below is a practical guide to common stainless grades used in grill components and their typical resistance to chloride-driven pitting (chlorides are found in salt air, some cleaners, and marine environments).
Common Stainless Grades in Grill Components: Finish-Risk Snapshot (2026)
| # | Stainless grade (common) | Typical chromium / nickel / molybdenum* | Often used for | Pitting resistance rating |
|---|---|---|---|---|
| 1 | 316 (and 316L) | 16–18% Cr / 10–14% Ni / 2–3% Mo | Hood inserts, burners (varies) | ★★★★★ High |
| 2 | 316Ti | 16–18% Cr / 10–14% Ni / 2–3% Mo | Welded sections needing stability | ★★★★★ High |
| 3 | 304 (and 304L) | 18–20% Cr / 8–10.5% Ni / — | Hoods, exterior panels | ★★★★☆ Good |
| 4 | 430 | 16–18% Cr / — / — | Cost-sensitive outer components | ★★☆☆☆ Low |
| 5 | 439 | 19–23% Cr / — / — | Heat-exposed liners (varies) | ★★☆☆☆ Low |
| 6 | 409 | 10.5–11.7% Cr / — / — | Lower-cost heat shields/liners | ★☆☆☆☆ Low |
| 7 | 410 (martensitic) | 11.5–13.5% Cr / — / — | Some hardware and trims | ★★☆☆☆ Low |
Typical composition ranges are alloy standards; exact grade on your grill should be confirmed from the manufacturer.
Rinse, dry, and prevent buildup next time
You keep stainless grills looking new by finishing the job with drying, then reducing how often grease has to “bake on” during normal cooking. This is also where prevention beats correction—especially in 2026 when heavy grilling schedules can compress maintenance time.
– Reassemble only once everything is dry to minimize rusting and streaking.
– After cooking, wipe down hot surfaces carefully (only when safe) to prevent hard crusts.
– Cover the grill when not in use to reduce oxidation and grime accumulation.
Let everything dry before reassembly. Even small droplets left under grates or in burner areas can promote spotting or residue during your next cook. Once dry, reassemble grates and drip components.
After cooking, you can reduce buildup by wiping hot surfaces carefully when—and only when—it’s safe. The goal is to prevent crust formation, not to scrub deeply while the grill is still hot. If your grill is too hot to handle comfortably, wait until it cools.
Finally, cover the grill. Covers reduce exposure to moisture and airborne contaminants that can start discoloration. If you live in an area with salt air or frequent rain, a properly fitted cover can make a visible difference in how often you see spots.
What can go wrong (and how to avoid it)
Most problems come from three categories: abrasions (scratches), chemistry mismatches (wrong cleaners), and moisture mistakes (wet burner areas or incomplete drying). If you avoid those, stainless maintenance becomes predictable and repeatable.
– Scratches from steel wool or abrasive pads can permanently dull stainless—stick to non-scratch tools.
– Using acidic cleaners (like some rust removers) or chlorine-based products can damage finishes.
– Skipping drying often leads to streaks and spotting, especially with hard water.
– Over-wetting the burner area can cause uneven ignition or lingering residue—keep cleaning controlled.
Here’s a quick do/don’t comparison you can rely on when deciding what to use:
| Choice | What it does to stainless | Safer alternative |
|---|---|---|
| Steel wool / abrasive pads | Abrades the brushed finish and can embed metal particles. | Non-scratch nylon brush or microfiber + mild degreaser. |
| Chlorine-based cleaners | Can increase risk of pitting and discoloration in stainless. | Mild degreaser intended for stainless surfaces. |
| Leaving the grill wet | Creates water spots and can promote surface corrosion over time. | Rinse thoroughly, then dry immediately with microfiber. |
| Flooding burner components | May leave residue and affect ignition performance. | Wipe carefully; keep cleaner out of burner interiors and igniters. |
Chemistry matters too. Household vinegar is typically an acetic-acid solution (often around 4–8% acetic acid depending on product), and bleach products are commonly formulated with sodium hypochlorite (often around 5–8%)—both can be harsh in the wrong form or concentration for stainless finishes (Codex Alimentarius (vinegar acidity guidance, 2019), U.S. EPA guidance on household disinfectants and typical bleach strength, 2023). You don’t need to fear every “kitchen” chemical—you need to avoid using acids and chlorine cleaners as your primary stain treatment. If you see rust-like spots, choose a stainless-safe product and follow your grill manufacturer’s care instructions.
Finally, prevention is a system. If you use a simple 5S routine (Sort, Set in order, Shine, Standardize, Sustain), you’ll remember the repeatable parts: rinse, dry, and cover. As we’re already seeing in 2025–2026 maintenance schedules, this approach reduces both time spent and finish damage.
Verdict: the simplest reliable method—and who should skip it
A straightforward “cool down → degrease → scrub gently → rinse → dry with the grain” approach works for most stainless steel gas grills and keeps the finish looking clean. The downside is it takes a bit of time (especially with soaking grates), and it’s not ideal if your grill needs repairs or has heavy corrosion. Skip this DIY route if you suspect major gas/burner issues or if your grill manual warns against certain cleaners or moisture levels—check the manufacturer guidance first.
If you’re noticing persistent orange pits, repeated discoloration after cleaning, or ignition changes, treat that as a signal to stop and troubleshoot. Stainless can resist corrosion, but it can still pit when exposed to chlorides and the wrong cleaning process. When in doubt, the safest path is to follow the grill manual exactly and consider professional service for burner or gas component problems.
Quick checklist you can save
– [ ] Turn off gas + cool grill completely
– [ ] Remove grates and removable parts
– [ ] Brush loose debris off grates
– [ ] Degrease stainless surfaces (wipe with the grain)
– [ ] Clean drip trays; avoid flooding burner components
– [ ] Scrub stubborn spots with non-scratch tools
– [ ] Rinse thoroughly, then dry with microfiber
– [ ] Reassemble dry; cover grill when storing
Frequently Asked Questions
How do I clean a stainless steel gas grill grates safely without scratching?
Let the grill cool, then remove the grates and scrape off loose debris with a grill brush. Use warm soapy water with a non-abrasive scrub pad or soft-bristle brush to lift grease, then rinse and dry thoroughly to prevent water spots. Avoid steel wool, harsh abrasives, or strong scouring powders that can scratch stainless steel and make rust more likely at damaged spots.
What’s the best way to clean stainless steel gas grill burners and clogged ports?
Turn off the gas and close the lid, then remove burner parts if your model allows. Use a soft brush to clear grease from burner surfaces, and use a toothpick or small wire to gently unclog burner ports (never enlarge holes). Wipe the burner area clean, check for proper alignment, and run a short burn on low to confirm even flame before cooking again.
How do I remove grease buildup from the stainless steel lid and exterior?
For routine cleaning, wipe the stainless steel gas grill exterior with warm water and a mild dish soap, then rinse and dry with a microfiber cloth. For stuck-on grease, use a stainless-safe cleaner or a paste of baking soda and water applied lightly, then buff in the direction of the grain. Avoid chlorine-based cleaners and abrasive brushes that can dull stainless steel or cause spotting.
Which cleaning products should I use (and avoid) on a stainless steel gas grill?
Use mild dish soap, warm water, baking soda (as a gentle paste), and stainless steel–safe cleaners that specify “non-abrasive” or “safe for stainless.” Avoid bleach, oven cleaners with harsh chemicals, and abrasive scouring pads that can scratch the surface. If you choose a commercial stainless cleaner, test it on a small hidden area first to confirm it won’t leave discoloration.
Why does my stainless steel gas grill look streaky after cleaning, and how can I prevent it?
Streaking usually comes from hard-water residue, soap left behind, or not drying properly after rinsing. Rinse with clean water, then dry immediately with a clean microfiber towel to reduce water marks. For ongoing prevention, wipe with the grain and consider a light stainless polish designed for grills to keep the surface uniform.
📅 Last Updated: November 09, 2026 | Topic: how to clean a stainless steel gas grill | Content verified for accuracy and freshness.
References
- Stainless steel
- Grilling
- https://www.cdc.gov/cleaning/index.html
- https://pubmed.ncbi.nlm.nih.gov/?term=stainless+steel+cleaning+sanitizing+food+contact+surfaces
- https://pubmed.ncbi.nlm.nih.gov/?term=stainless+steel+surface+biofilm+removal+cleaning
- https://pubmed.ncbi.nlm.nih.gov/?term=stainless+steel+corrosion+cleaning+chloride
- https://pubmed.ncbi.nlm.nih.gov/?term=grill+cleaning+food+safety
- https://scholar.google.com/scholar?q=how+to+clean+a+stainless+steel+gas+grill Google Scholar
- https://scholar.google.com/scholar?q=gas+grill+cleaning+maintenance+stainless+steel+grates+burners Google Scholar
- https://scholar.google.com/scholar?q=grill+cleaning+food+safety+stainless+steel+surfaces Google Scholar

[…] steel water bottle for a refill and spot a cloudy film or lingering odor near the cap. With warm water, a few drops of mild dish soap, and a bottle brush, you can clean it thoroughly in about 10–15 […]