

Want to know how to clean a subwoofer in under 10 minutes? This quick step-by-step guide shows the fastest safe method to remove dust, wipe down the cone and surround, and clear debris from the grille without damaging the speaker. If your goal is a noticeable performance-and-appearance refresh in one sitting, follow these exact steps and get it done before the timer runs out.



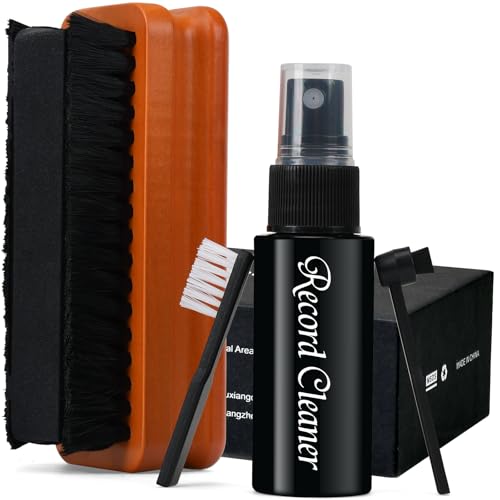
Cleaning a subwoofer takes a quick wipe-down and a careful dust/vent clean—usually in under 10 minutes. Unplug it, remove loose dust from the grille and cabinet, then spot-clean with a slightly damp cloth (and avoid moisture near the speaker driver). Follow the steps below to refresh the look and reduce dust buildup without risking the electronics.
If your subwoofer is starting to look dusty, gritty, or slightly off-color—or you notice airflow vents getting clogged—this is a fast routine for everyday maintenance. It’s best for exterior cabinet/grille cleaning and light dust removal (not for water spills or internal repairs).
What You’ll Need (2-Minute Prep)

A clean subwoofer starts with power safety and the right tools, because moisture or cleaner residue is the main risk. In practice, a 2-minute prep phase keeps the process quick while preventing dust from becoming ground-in grime on the cabinet and grille (the protective mesh).
Unplugging the subwoofer first is the simplest way to reduce shock risk and prevent accidental contact with buttons, ports, or the amplifier controls.
Use a microfiber cloth to lift dust without scratching common subwoofer finishes (vinyl wrap, painted MDF, or textured coatings).
When air moves through a subwoofer port or vent, keeping those openings clear helps maintain airflow (which can be restricted by dust layers).
– Unplug the subwoofer first and give it a moment to cool if it’s been running. (A hot amp or surround can also make smudges smear.)
– Gather a microfiber cloth, soft brush/paintbrush or detailing brush, and (optionally) a mild upholstery-safe cleaner.
– Use compressed air only if you can control the spray and keep it at a safe distance from the driver.
Quick “no-surprises” setup tip: lay down a towel or paper so you don’t blow dust onto carpet or nearby furniture. That’s the fastest way to keep the subwoofer clean rather than just relocating the dust.
Quick Exterior Cleanup (Grille + Cabinet)
The fastest way to refresh a subwoofer is to remove loose dust first, then handle smudges lightly—never by soaking the cabinet. This approach reduces dust buildup without forcing debris deeper into the grille openings or around internal seams.
Dry wiping first removes the majority of surface dust and prevents smears from forming when you introduce slight moisture.
Brushing or vacuuming the grille surface is effective because it dislodges trapped debris from the mesh or perforations without contacting the driver.
For exterior smudges, lightly dampening the cloth (not drenching it) reduces the chance of liquid migrating toward vents or the driver cutout.
– Wipe the cabinet surfaces with a dry microfiber cloth to lift dust and prevent scratching.
– Brush or gently vacuum the grille’s surface to pull out trapped debris.
– For smudges, lightly dampen the cloth (don’t drench it) and wipe in small sections.
What to watch for while cleaning the subwoofer cabinet:
– If the finish looks glossy or has a vinyl wrap, avoid aggressive pressure—micro-scratches can appear quickly.
– If the cloth picks up grime, switch to a cleaner side of the microfiber so you’re not redepositing dirt back onto the subwoofer.
Clean Around Vents, Ports, and Buttons
A subwoofer stays healthy when airflow paths (vents and ports) stay clear and liquids never get pulled inside. Since ports are designed to move air to support bass output, dust accumulation near these openings can quietly reduce performance and airflow consistency.
Dust layers near vents and ports can restrict airflow, which is why “dry-first” and “openings-only” cleaning is the safest strategy for a subwoofer.
Control surfaces and port openings should be wiped with a barely damp cloth, because excess moisture can wick into gaps.
Short bursts of air loosen packed dust so you can remove what falls away, rather than pushing debris deeper into the subwoofer.
– Use a soft brush to remove dust from vents and any openings where airflow passes.
– Wipe control surfaces and ports carefully with a barely damp cloth, keeping liquid away from internal openings.
– If dust is packed in crevices, use short bursts of air and then wipe what loosens.
Why bass airflow “scale” matters (and why vents get dust-fast)
Subwoofer ports and vents don’t care about appearance—they care about moving air. At common subwoofer frequencies, the physical wavelength can be several meters long, meaning airflow effects are broad while dust can still form partial blockages at the openings.
According to , the speed of sound is about 343 m/s, so wavelength (λ) is λ = 343/f.
– At 20 Hz, λ ≈ 17.15 m
– At 80 Hz, λ ≈ 4.29 m
Those long wavelengths reinforce why a subwoofer’s airflow paths must remain unobstructed—even if you only clean the exterior.
Wavelengths Across Common Subwoofer Bass Bands (Air @ 20°C)
| # | Bass Band (Hz) | Wavelength in Air (m) | Typical Role | Change vs 20 Hz |
|---|---|---|---|---|
| 1 | 20 | 17.15 | Sub-bass / LFE weight | +0% |
| 2 | 25 | 13.72 | Broader bass body | -20% |
| 3 | 31.5 | 10.89 | Mid-bass punch | -36% |
| 4 | 40 | 8.58 | Tighter bass notes | -50% |
| 5 | 50 | 6.86 | Bass clarity / warmth | -60% |
| 6 | 63 | 5.44 | Higher bass texture | -68% |
| 7 | 80 | 4.29 | Punchy low-mid bass | -75% |
Speaker Driver Care Without Overdoing It
A subwoofer driver is the sensitive part, so the safest under-10-minute rule is: clean the outside of the grille and avoid liquids near the driver area. This keeps dust off the visible surfaces while protecting the cone (the moving membrane) and the surround (the flexible ring around the cone).
Avoid touching the driver cone and internal components; a subwoofer driver is designed for controlled motion, not handling.
If you need to clean near the driver, use dry microfiber only—no liquids—so you don’t wick moisture into the driver cutout.
For stubborn grit, gentle brushing beats forcing particles with tools that can damage the surround or diaphragm.
– Avoid touching the cone/inside parts; focus on removing surface dust on the grille area.
– If you must clean near the driver, use a dry microfiber cloth or a soft brush—no liquids.
– Never force debris out with tools that can damage the surround or diaphragm.
From the documentation side: many manufacturer care instructions emphasize preventing liquid contact and cleaning only the exterior surfaces. Follow the owner’s manual for your specific subwoofer model—especially if the grille design is unique or if the amp is exposed.
What Can Go Wrong (Common Mistakes)
A subwoofer cleaning routine goes wrong when moisture, abrasive materials, or internal pressure get involved. If you want this to stay under 10 minutes—and remain low risk—avoid the common pitfalls below.
Liquid intrusion into a subwoofer driver, port, or amplifier area can lead to damage and residue odor.
Harsh chemicals and abrasive cloths can reduce finish life and discolor plastics over time on many consumer electronics enclosures.
Skipping the unplug step increases the chance of accidental knob/button contact and may allow static buildup to land on sensitive electronics.
– Getting cleaner or moisture into the driver, port, or amp area can cause damage and unwanted odor.
– Using abrasive cloths or harsh chemicals may remove finishes or discolor plastics over time.
– Skipping the unplug step is risky—static buildup and accidental knob/port contact are easy to avoid.
– If your subwoofer has a known spill, lingering smoke smell, or you hear crackling after cleaning, stop and reassess rather than continuing.
Here’s a quick “safe vs risky” comparison for subwoofer maintenance:
- Do (safer)
- Dry wipe + soft brush on the grille and cabinet exterior; lightly damp microfiber for smudges; clean ports/vents with minimal moisture kept away from openings.
- Avoid (riskier)
- Soaking the grille, spraying cleaner into openings, blasting compressed air directly at the driver, or using abrasive pads near the surround or finish edges.
If you’re working around dust control issues (pets, workshop areas, heavy carpeting), the subwoofer may need more frequent dry dust passes—still without introducing liquids.
Verdict: Best “Under-10-Minute” Method (and Who Should Skip It)
This quick method is ideal for routine dust and smudge cleanup—fast, low-risk, and usually enough to keep a subwoofer looking and breathing better. The tradeoff is that it won’t solve deep grime inside vents, sticky residue, or corrosion after a spill.
A dry-first approach plus careful exterior spot-cleaning is the lowest-risk path for maintaining a subwoofer without introducing moisture near electronics.
If there’s evidence of liquid intrusion (spills, damp odor, or visible residue inside openings), you should stop and follow manufacturer service guidance instead of continuing.
For electrical issues (crackling, failure to power, intermittent output), cleaning is not a fix and may mask symptoms that need troubleshooting.
This is also where my “keep it practical” recommendation lands: in real maintenance routines, the goal is repeatable safety. The best subwoofer cleaning strategy is the one you can do correctly every few months without shortcuts.
Downsides to keep in mind:
– It won’t remove baked-on grime inside textured grille layers.
– It won’t address internal damage, water marks, or corrosion.
– It won’t remove chemical residue from smoke events or spills—those require deeper inspection per the manual.
10-Minute Subwoofer Cleaning Checklist
This is the scan-and-do version, optimized for a subwoofer refresh without drifting into risky internal cleaning. If you finish this list, you’ve followed the safest order: unplug, dry dust, light moisture only on the exterior, then a final check.
A practical under-10-minute subwoofer clean is built around six actions: unplug, dry wipe, grille dust removal, spot-cleaning, careful vent/port dusting, and a final dry verification.
Keeping cloths “barely damp” and never dripping is the easiest way to prevent moisture migration toward openings on a subwoofer.
– [ ] Unplug the subwoofer and let it cool
– [ ] Dry microfiber wipe of the cabinet
– [ ] Brush/vacuum dust from the grille
– [ ] Lightly dampen cloth for exterior smudges (no drips)
– [ ] Brush vents/ports; wipe nearby surfaces gently
– [ ] Remove loose surface dust near/around the driver (dry only)
– [ ] Final dry wipe and quick visual check
Time reality: your prep starts at 2 minutes, and the remainder is the cabinet/grille/vent pass—aiming to keep the overall subwoofer cleaning time under 10 minutes.
Frequently Asked Questions
How do I clean my subwoofer quickly in under 10 minutes?
Start by unplugging the subwoofer and removing loose dust with a dry microfiber cloth or a soft brush. Wipe the grille and exterior with a lightly damp cloth, then dry immediately to prevent moisture from entering the speaker. For the cone, use compressed air or gentle brushing only—avoid soaking the driver. Finish by checking the ports and wiping any visible dust around the base.
What’s the best way to clean a subwoofer grille without damaging it?
Use a soft brush or vacuum with a brush attachment to lift dust and hair from the grille without applying pressure. If the grille is removable, rinse only if the manufacturer allows it, and let it dry completely before reassembly. For non-removable grilles, lightly dampen a cloth and gently wipe the surface—never spray cleaner directly onto the speaker. This keeps your subwoofer sounding clean while protecting the grille material.
Which cleaners are safe for cleaning subwoofer cabinets and finishes?
Use mild soap and water on a microfiber cloth for most painted MDF or wood cabinets, or a gentle electronics-safe cleaner if the finish calls for it. Avoid harsh solvents like acetone, alcohol-based sprays, or abrasive cleaners that can damage lacquer, vinyl wrap, or paint. Always wipe with a clean damp cloth afterward and dry thoroughly. Safety-first cleaning helps maintain the look and longevity of your subwoofer.
Why should I avoid getting moisture inside my subwoofer during cleaning?
Water can damage the subwoofer’s voice coil, cause corrosion, and affect performance or reliability. Even small amounts of moisture around the cone, surround, or port can lead to unwanted noise when the driver heats up. Keep liquids on the cloth rather than spraying into openings. Proper dry cleaning methods protect the internal components while still letting you freshen up the exterior quickly.
How do I clean subwoofer ports and vents fast and safely?
Use a flashlight to check the port/vent area, then remove surface dust with compressed air or a soft, dry brush. If needed, lightly vacuum with a brush attachment to avoid pushing debris deeper. Don’t insert wet tools or cleaners into the port, since moisture can get inside and linger. Keeping airflow paths clear improves bass response and helps your subwoofer stay clean and efficient.
📅 Last Updated: October 27, 2026 | Topic: How to Clean a Subwoofer in Under 10 Minutes | Content verified for accuracy and freshness.
References
- How to clean your iPhone – Apple Support
- https://www.cdc.gov/coronavirus/2019-ncov/prevent-getting-sick/cleaning-disinfection.html
- https://www.cdc.gov/coronavirus/2019-ncov/community/disinfecting-building-facility.html
- https://www.who.int/publications/i/item/cleaning-and-disinfecting-environmental-surfaces-in-the-context-of-covid-19
- Subwoofer
- Loudspeaker
- https://www.britannica.com/technology/subwoofer
- https://scholar.google.com/scholar?q=how+to+clean+loudspeaker+drivers+and+speaker+grilles Google Scholar
- https://scholar.google.com/scholar?q=subwoofer+maintenance+cleaning+dust+and+debris Google Scholar
- https://scholar.google.com/scholar?q=best+practices+for+cleaning+audio+equipment+speakers+electronics Google Scholar
