

You can clean a subwoofer with cotton swabs safely and effectively—if you follow the right steps to avoid damaging the cone or pushing grime deeper. This guide delivers a clear, risk-minimizing method for removing dust around the surround, terminals, and speaker frame without soaking or forcing anything into the driver. You’ll learn exactly what to swab, what to leave alone, and how to confirm the subwoofer is clean before you play it again.


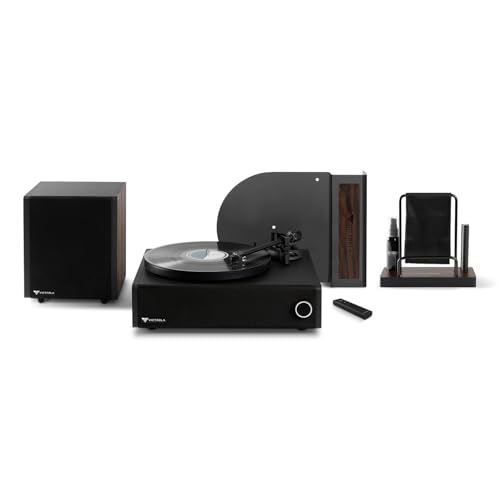
Cleaning a subwoofer with cotton swabs is usually safe for surface grime and oxidation in tight gaps—as long as the subwoofer is unplugged, the swab is barely damp (not dripping), and you avoid pressing on the cone. You’ll lift dust and residue around the grille and accessible frame edges without introducing excess moisture into the driver assembly, which is the key risk to manage in 2026.
If you notice dust buildup around the grille, specks on the cone surround, or residue near the speaker frame, cotton swabs are a practical tool for careful spot-cleaning. This approach is best for surface-level dirt and grime—not for internal repairs or heavy contamination.
What You’ll Need (and What to Skip)

You can do safe, targeted cotton-swab cleaning with a few basic supplies—then avoid anything that can soak the driver, dissolve coatings, or shed lint. The goal is controlled contact: precision on the grille and edges, minimal moisture, and no abrasive action.
“Cotton swabs” are commonly used for precision cleaning because they deliver small, localized contact pressure in tight speaker gaps.
When using liquids on audio hardware, the safest approach is “barely damp” application rather than soaking to prevent moisture migration into the driver.
Here’s the practical kit, plus the items that usually cause avoidable damage:
– Cotton swabs (soft tips) for precision cleaning in small gaps and corners
– A lint-free cloth plus a suitable cleaning liquid (mild cleaner or —check the label/specs first)
– Avoid soaking the speaker or using harsh solvents, dripping liquids, or abrasive tools that can damage the cone/surround
Liquid choice matters more than people expect
Cotton swabs are forgiving, but the cleaning liquid isn’t. Solvents with fast evaporation can still be risky if they dissolve rubber compounds, cloud plastic finishes, or drive residue deeper into seams—especially around the cone surround and spider area.
To frame that risk, consider volatility: lower boiling point generally means faster evaporation. For example, according to standard chemical property references, acetone boils at ~56.05°C, while isopropyl alcohol (2-propanol) boils at ~82.6°C (, ). Methanol boils at ~64.7°C (). In practice, faster-evaporating solvents can reduce soaking time, but they can also increase the chance of residue redistribution if you oversaturate a swab.
Solvent Volatility at a Glance (Boiling Point → Faster Drying)
| # | Solvent (commonly discussed for cleaning) | Boiling point (°C) | Volatility index (100/°C) | Practical implication for cotton-swabs |
|---|---|---|---|---|
| 1 | Acetone | 56.05 | 1.78 | Evaporates fastest; use only a barely-damp swab to avoid finish/adhesive exposure |
| 2 | Methanol | 64.70 | 1.55 | Also fast-drying; can be harsh on plastics/rubber—avoid unless the manufacturer explicitly allows it |
| 3 | Ethanol | 78.37 | 1.28 | Moderate volatility; still use “barely damp” to prevent residue migration and swelling risks |
| 4 | Methyl ethyl ketone (MEK) | 79.60 | 1.26 | Can be quite aggressive; avoid for speaker materials unless expressly approved |
| 5 | Isopropyl alcohol (2-propanol) | 82.60 | 1.21 | Often used for electronics when safe for materials; prioritize minimal moisture and full dry time |
| 6 | n-Propanol | 97.20 | 1.03 | Slower evaporation than IPA/acetone; oversaturation increases dry time and residue risk |
| 7 | n-Butanol | 117.70 | 0.85 | Much slower evaporation; highest chance of lingering moisture—avoid for speaker cleaning |
Prep the Subwoofer Before You Swab
Before you touch the grille with cotton swabs, you need the subwoofer fully safe and dry. Turn it off and unplug it first so you’re not working around electrical power or while parts are moving.
Unplugging powered audio equipment reduces electrical risk and prevents accidental signal activation during cleaning.
Dry-dusting before wet swabbing prevents grit from turning into a grinding paste on speaker finishes and edges.
– Turn the subwoofer off and unplug it (so you don’t risk electrical issues or moving parts while you clean)
– Remove the grille if your model allows easy removal without forcing clips/screws ()
– Use a dry cloth first to remove loose dust so swabbing doesn’t grind debris into the speaker surface
Why unplugging is non-negotiable
A subwoofer’s amp board and driver assembly can be sensitive to unexpected power states. Even if you never intend to operate the system, cleaning around the frame with cotton swabs can dislodge dust into vents or ports. Unplugging ensures that if dust ever shifts onto a circuit area, you won’t be energizing anything while debris is in motion.
If the grille won’t come off, don’t force it
Many grilles attach via pins, magnets, or plastic clips. If your model allows easy removal, you can clean the grille itself more thoroughly (and keep cotton swabs off the cone). If it doesn’t, clean around it instead and avoid prying—prying is one of the fastest paths to bent frames and damaged mounting points.
Prepare the swabs so they behave predictably
Before you start swabbing a subwoofer, lightly dampen the cotton tip using your chosen liquid—mild cleaner or . The practical standard is “barely damp” (no visible drips, no pooling). When the subwoofer is properly unplugged and your swab is controlled, cotton swabs become a precision tool rather than a liquid delivery mechanism.
Clean the Grille, Frame, and Accessible Areas
You can clean most surface grime on a subwoofer with cotton swabs by focusing on the grille openings and frame seams. Use short, controlled swabs that lift dust rather than pushing it deeper.
Short, gentle strokes with cotton swabs lift debris by adhesion and capillary pickup instead of forcing it into speaker gaps.
Replacing swabs frequently reduces the chance of smearing oxidation residue across the grille or frame.
– Lightly swab along the grille openings and the speaker frame where dust collects
– Use short, gentle strokes and replace swabs often so you’re lifting dirt, not smearing it
– If the grille has removable pads or mesh, clean them separately rather than trying to push grime out through the speaker
Focus where dust actually accumulates
On many subwoofers, grime collects at three main zones: the grille mesh pattern (including corners), the frame edge where the grille seats, and any recess around branding or mounting points. Cotton swabs are especially useful here because your contact point stays small, which matters when the grille openings are narrow.
Work from “dry dust” toward “light residue”
For best results, treat cotton swabs like a two-stage tool:
1. First, dry-lift dust with a lint-free cloth and dry swabs.
2. Then, only if needed, move to barely-damp cotton swabs for sticky residue or mild oxidation.
This approach prevents wet cleaning from turning loose particles into a paste.
Keep your pressure light—think “lift,” not “scrub”
When you apply pressure to a subwoofer frame or grille edge, you risk flexing the grille and transferring debris onto the cone surround. Cotton swabs are meant for careful lifting. If you feel resistance or the swab is “dragging,” stop, switch swabs, and reassess the amount of liquid.
Clean the Cone Surround Carefully (Where Swabs Help)
You should only clean the cone surround with cotton swabs if you’re staying on visible edges and avoiding direct cone contact. Keep the swab barely damp and let all moisture fully evaporate before powering the subwoofer again.
Swabbing near a cone surround is safest when you avoid pressing into the cone or dislodging surround material.
Allowing complete evaporation time before powering helps prevent moisture-related distortion and odor.
– Only swab around edges you can clearly see—avoid pressing into the cone itself
– If using a damp swab, aim for “barely damp” (no drips) and let any moisture fully evaporate before powering on
– For textured surrounds (rubber/foam/vinyl), swab lightly to avoid dislodging material or pulling fibers
Understand what “cone surround” means for your cotton swabs
The cone surround is the flexible boundary that connects the cone to the frame. It’s often made from rubber, foam, or treated vinyl—materials that can react differently to solvents. Cotton swabs can remove surface dust, but they can also snag foam fibers or leave lint behind if you press too hard.
Use moisture control as your primary safety method
Because cotton swabs are absorbent, they can carry liquid “capillary-style.” That means a tiny amount of moisture on the swab tip can still transfer to edges. The right technique is:
– Touch the swab tip to the visible residue.
– Use minimal pressure.
– Move to a fresh cotton swab as soon as you see discoloration transferring.
What if you see oxidation that won’t lift?
If residue near the cone surround isn’t coming off with cotton swabs and barely damp contact, don’t keep scrubbing. Persistent oxidation may be bonded to a coating. Continued mechanical action can harm the surround—especially foam. At that point, follow manufacturer service instructions () or use a qualified repair technician.
What Can Go Wrong (Common Mistakes to Avoid)
The biggest failures with cotton swab cleaning are liquid oversaturation, too much scrubbing pressure, and powering back on before the speaker is truly dry. Avoid these pitfalls and you’ll keep the subwoofer driver protected.
Oversoaking can drive moisture into gaps where drying is slower, increasing the likelihood of distortion or odor.
Aggressive scrubbing can scratch finishes and mechanically stress the cone surround or grille frame.
– Too much liquid: dripping or oversoaking can enter the speaker assembly and cause distortion or longer drying times
– Over-aggressive scrubbing: can scratch finishes, lift coatings, or stress the cone surround
– Cleaning while powered: even accidental power can create risk and can also make any loosened debris more problematic
– Using the wrong cleaner: unknown chemicals can harm rubber/foam surrounds—stick to products compatible with speaker materials ()
Quick comparison: cotton-swap cleaning vs. “heavy cleaning”
Here’s a practical contrast table to keep decisions clear for your subwoofer and cotton swabs:
| Approach | What it’s best for | Main risk |
|---|---|---|
| Cotton swabs + barely damp contact | Grille dust, light residue, oxidation on accessible edges | Slow progress if contamination is heavy |
| Soaking, scrubbing, or spraying liquid broadly | Not recommended for drivers—often causes recontamination and moisture migration | Moisture trapped in the assembly; potential coating or surround damage |
Edge cases where you should stop
If your subwoofer shows signs of internal moisture, water exposure, or physical surround tearing, cotton swabs are not enough. Also stop if the surround is brittle, flaking, or visibly separating. In those cases, the safest action is to consult manufacturer service instructions or a qualified repair tech rather than trying to “fix it cleanly” from the outside.
Verdict: Is Cotton Swabs the Right Method?
Cotton swabs are a solid choice for careful, low-risk spot-cleaning of a subwoofer’s exterior and accessible areas—especially around the grille and edges. They work best for surface dust and light residue, and they give you fine control over contact and liquid transfer in 2026.
At the same time, cotton swabs have clear limitations: they’re slow for heavy dust loads, and they can’t address internal contamination or mechanical damage. Skip this DIY swabbing method if you suspect internal damage, if the cone surround is torn, or if the subwoofer has been exposed to spills/water—then you’ll want .
Practical downside checklist
If you want the “real-world tradeoffs” up front, here are the common downsides of cotton swab cleaning:
– Time cost: deep grille grime often takes multiple swab passes
– Coverage limit: cotton swabs don’t clean broad internal cavities
– Material sensitivity: some rubber/foam surrounds can react to certain cleaners even if they’re “just mild”
Quick Checklist (Scan + Save)
Use this scan-friendly list right before you start cotton swabbing. It’s designed to keep moisture and pressure under control on your subwoofer.
A safe cotton swab process starts with unplugging and ends with verified dryness before reconnecting power.
Dry-dusting first prevents grit from being ground into finishes during subsequent gentle swabbing.
– Unplug subwoofer and keep it powered off
– Dry-dust first with a lint-free cloth
– Use cotton swabs with barely damp cleaning (or none, for dry dust)
– Short, gentle strokes; replace swabs frequently
– Avoid cone pressure and prevent any dripping
– Let everything dry fully before reconnecting
Sources
– If using isopropyl alcohol or another cleaner:
– Chemical property references for boiling points (used to explain volatility):
Cleaning a subwoofer with cotton swabs is effective for dust, light oxidation, and residue on accessible grille and edge areas—provided you unplug first, use barely-damp swabs (no dripping), and avoid pressing into the cone or surround. When you keep the process controlled and let everything dry fully before powering back on, you protect both the appearance and integrity of the driver.
Frequently Asked Questions
What’s the safest way to clean a subwoofer using cotton swabs?
Power off your subwoofer and unplug it so you don’t damage the driver or risk electrical issues. Lightly dampen a cotton swab with distilled water or a small amount of isopropyl alcohol (70–90%) and wipe only the outer trim, grille edges, and the accessible areas around the dust cap. Avoid pushing liquid into the speaker cone, surround, or any openings, and let the subwoofer dry fully before powering it back on.
How do I clean dust and grime from the subwoofer grille and edges with cotton swabs?
Start by using a dry, clean cotton swab to lift surface dust along the grille seams, speaker frame, and corners where dirt builds up. For sticky grime, use a barely damp swab (distilled water for light dirt, alcohol for tougher residue) and make gentle, controlled strokes. If the grille is removable, you may clean the grille more thoroughly separately, but keep swabbing around the installed parts to avoid damaging the cone.
How can I clean around the subwoofer dust cap without damaging the cone?
Use a cotton swab with minimal moisture and keep it at the outer boundary of the dust cap—don’t scrub across the cone surface. Let the swab touch lightly and remove only visible debris, working in small sections so you don’t snag the surround or leave liquid residue. If debris won’t lift easily, stop and use a soft brush or compressed air instead of forcing with wet swabs.
Why should I avoid using too much liquid when cleaning a subwoofer with cotton swabs?
Excess liquid can seep into the subwoofer’s cone suspension, voice coil area, or wiring openings, which may cause corrosion, odor, or performance issues. Cotton swabs work well because they help you apply cleaning solutions precisely, but only use a slightly damp tip—never dripping. After cleaning, allow the subwoofer to air dry completely before turning it on to prevent moisture-related damage.
Which cleaning solution is best to use with cotton swabs on a subwoofer?
For most dust and light smudges, a tiny amount of distilled water is the safest option and helps avoid harsh residues. For sticky grime, isopropyl alcohol (70–90%) on a cotton swab is often the best choice because it evaporates faster and is effective on many residues. Avoid strong cleaners, bleach, or abrasive pastes, since they can damage finishes and leave films that attract more dirt.
📅 Last Updated: October 27, 2026 | Topic: How to Clean a Subwoofer With Cotton Swabs | Content verified for accuracy and freshness.
References
- Subwoofer
- Loudspeaker
- Diaphragm (acoustics)
- Speaker grille
- Cotton swab
- Cleaning
- Compressed air
- https://scholar.google.com/scholar?q=subwoofer+cleaning+speaker+cone Google Scholar
- https://scholar.google.com/scholar?q=how+to+clean+speakers+driver+cone+care Google Scholar
- https://scholar.google.com/scholar?q=cotton+swab+safe+cleaning+electronics Google Scholar
