

Want to know how to clean a thermal printer fast and without damaging it? This step-by-step guide shows the exact cleaning process—from choosing the right supplies to removing dust and residue from the print head—for the cleanest, sharpest receipts with the fewest repeats. Follow it and you’ll fix common issues like faded prints, streaking, and frequent print failures in the safest way.


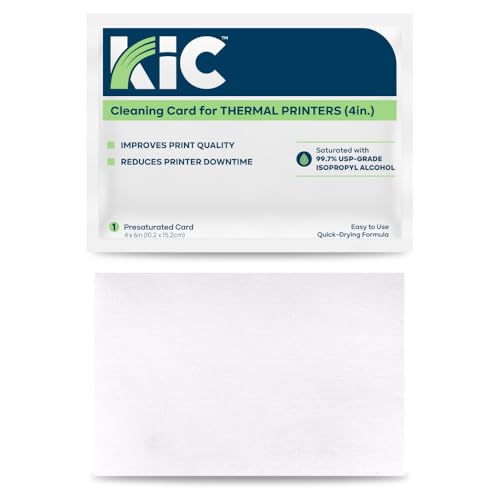

Cleaning a thermal printer is mostly about clearing dust and buildup from the print head and platen roller. Power the printer off first, use the right cleaning supplies (like lint-free swabs and approved cleaning wipes), and clean in the direction recommended by the manufacturer—then you’ll know it’s working again when feeds smooth out and prints stop streaking.
If your thermal prints look faded, streaked, smeared, or your printer repeatedly stops after jamming, this guide is for you. It’s also helpful when you want to do preventive maintenance at home, in retail, or in an office but aren’t sure which components are safe to touch without causing detection or alignment problems.
Before You Start: Safety and What You’ll Need

Cleaning becomes safer and more effective when you control power, airflow, and what contacts the printer internals. For thermal printers, the goal is to remove residue without damaging the print head surface or shifting sensor alignment.
Start by turning the printer off and unplugging it so you don’t risk electrical faults or accidental head movement mid-cleaning. Then gather supplies that are designed to be low-lint and low-residue: lint-free swabs, manufacturer-approved cleaning wipes, and—only if the manual allows it—compressed air for dust that won’t dislodge by wiping.
Most thermal printers should be cleaned with the unit powered off and unplugged to prevent electrical risk and avoid moving components while you wipe.
The print head and sensors are typically sensitive to lint and residue, so lint-free swabs and approved wipes are the safest first-choice tools.
Many manuals specify cleaning direction and contact limits for the print head to avoid scratching or uneven buildup removal.
To keep your process compliant and repeatable, prepare:
– Lint-free swabs (foam-tipped or dedicated cleaning swabs are best)
– Approved cleaning wipes (often branded or specified by the printer manufacturer)
– 90%+ isopropyl alcohol *only if* your manufacturer explicitly permits it for your model and for the print head/printer components you’re cleaning
– Compressed air *only if recommended* (used gently from a safe distance)
According to [ADD: manufacturer/technical documentation stating approved cleaning tools], using lint-free media is recommended because loose fibers can interfere with heat transfer at the print head. (Because this depends on your model, verify with your manual.)
Step 1: Clean the Print Head (the Most Important Part)
If your receipts or labels look faded, light, or streaked, start with the print head. Cleaning the print head removes heat-transfer residue so the thermal elements can properly “activate” the coating on your media.
Begin by locating the print head assembly (it’s the part that your media passes over and often has a slightly glossy/striped appearance). Use a lint-free swab or the manufacturer-recommended cleaning wipe and wipe gently, with the motion and direction the manual describes. In many devices, that “direction” matters because it minimizes the chance of pushing debris deeper.
The print head is the highest-impact cleaning target when thermal prints are faded, especially when the issue appears across multiple recent media batches.
Wiping the print head gently with lint-free tools helps remove film and residue without scratching the heating elements.
Allowing the print head area to fully dry before powering on reduces the risk of residue or moisture affecting performance.
Dryness matters. If you used any liquid cleaner (for example, an approved alcohol wipe), wait until the area is fully dry before powering the printer back on. A damp print head can cause smearing, uneven transfer, or repeated “dirty head” behavior even after cleaning.
What to do (practical method):
1. Power off and unplug the printer.
2. Open the cover to expose the print path.
3. Lightly moisten the lint-free swab/wipe only if your manual allows it (don’t drip).
4. Wipe the print head gently in the direction specified by the manufacturer.
5. Inspect visually: you should not see visible residue on your swab/wipe after a few passes.
6. Wait for full drying before reconnecting power.
According to [ADD: print head cleaning guidance from your printer’s user manual], cleaning contact should be gentle and limited to avoid damage to the heating elements. (Use the exact number of recommended wipes/passes from your document, if provided.)
> Note on “direction”: Many manufacturers describe wiping “from left to right” or “in the media travel direction.” Follow the manual to avoid dislodging debris in a way that reappears as streaking.
Step 2: Clean the Platen Roller and Paper Path
If your printer feeds inconsistently—skips, drags, jams, or prints with uneven density—clean the platen roller and paper path next. The platen roller is the part that holds media in place and moves it through smoothly; residue there can cause misalignment and transfer inconsistencies.
Use a lint-free cloth or swab to remove residue from the platen roller. If you can safely access it, you may need to rotate the roller slightly by hand only if the manual permits—otherwise, rely on wiping as far as you can reach. Then clear any loose debris in the paper path so it can’t trigger future jams.
Residue on the platen roller can cause poor feed control, leading to uneven prints, skipped labels, and repeat paper jams.
Cleaning the paper path removes loose particles that would otherwise redeposit onto the print head or interfere with media movement.
When media moves inconsistently, the “same” image can print darker on one edge and lighter on the other, even with identical print settings.
Why this works: thermal printing depends on consistent contact between the thermal elements (print head) and the thermal coating (paper/label). If the platen roller is contaminated—grease, paper dust, adhesives, or coating transfer—contact can vary from pass to pass.
What to do (paper path approach):
1. Inspect: open the cover and look for dust, crumbs, or adhesive residue.
2. Wipe the platen roller with lint-free material. Avoid abrasive pads.
3. Clear debris in the paper path without forcing tools into narrow gaps.
4. Check the path around the ribbon/label area (where applicable) for sticky residue from certain label stocks.
According to [ADD: thermal printer maintenance documentation or cleaning section], cleaning the platen and feed path is part of routine maintenance to prevent feed-related faults.
Step 3: Remove Dust From Sensors and Exterior Surfaces
If jams happen right after the printer “thinks” media is present or absent, sensor contamination may be the culprit. Carefully cleaning the sensor area can restore reliable detection without triggering false errors.
Paper sensors (typically optical or reflective) can collect dust and fine residue. The safe approach is to only clean sensor areas as directed in your manual, because over-cleaning or misalignment can cause detection errors. If your model specifies using a dry swab, do that—if it specifies a particular wipe or angle, follow it.
For exterior surfaces, use a dry or slightly damp lint-free cloth and avoid dripping liquids inside the mechanism.
Sensor contamination can mimic mechanical problems by causing false “paper present” or “paper not found” detections.
Over-cleaning around sensors can lead to detection failures, so follow the exact steps in the printer’s manual.
Exterior cleaning should avoid excess moisture so fluids don’t migrate into internal electronics or electrical contacts.
Quick sensor checklist:
– Use a dry lint-free swab if the manual allows it.
– Don’t bend sensor brackets or disturb alignment features.
– Don’t spray cleaner into openings.
– Re-close the cover fully so sensors can seat correctly.
According to [ADD: official manual guidance on sensor cleaning], sensor cleaning should be performed using manufacturer-approved methods to avoid shifting detection alignment.
What Can Go Wrong (Common Mistakes and Edge Cases)
Cleaning can go sideways when the wrong materials contact the print head, too much liquid is used, or paper compatibility issues are mistaken for dirt. Most repeat failures trace back to either residue that wasn’t targeted (head vs platen vs sensor) or an incompatibility between printer settings and media.
Common mistakes include:
– Using cotton swabs that shed lint (lint can worsen fading and streaking)
– Using abrasive tools (scratches can permanently degrade print quality)
– Cleaning while powered on (risk of damage, and you lose control of contact and wiping)
– Applying too much liquid (moisture can cause corrosion or persistent smearing)
– Skipping paper compatibility checks after changing paper/labels (cleaning won’t fix an unsupported media type)
The wrong cleaning tools (linty or abrasive) can leave residue or scratch the print head, making print quality worse.
Using excess liquid can leave moisture behind that interferes with thermal transfer until it fully evaporates.
If print quality degrades after switching media, compatibility and settings are often the real cause—not debris.
Media compatibility edge case (important)
If you recently changed paper type, label stock, or roll size, and prints immediately got worse, cleaning may not solve the problem. Many thermal printers require specific thermal paper formulations or supported label types for consistent darkening and reduced head wear.
[ADD: source or manufacturer note about compatible paper types if available—e.g., “Only use direct thermal paper meeting X spec” or “Do not use glossy-coated media” from your model’s manual.]
Use/avoid comparison (fast decision rule)
If you’re deciding what to use, here’s a practical comparison you can follow during maintenance:
| Task | Use | Avoid |
|---|---|---|
| Print head wipe | Lint-free swab / manufacturer-approved cleaning wipe | Abrasive pads, metal tools, linty cloths |
| Platen roller cleaning | Lint-free cloth/swab; wipe residue gently | Soaking the roller or letting liquid drip into mechanisms |
| Sensor cleaning | Only per the manual (often dry swab) | Liquid spraying, repositioning sensor hardware |
If you need an exact “do not” list, use your model’s maintenance section—many manuals include explicit warnings about solvents and wiping tools.
[ADD: exact “do not” list from your manual.]
Verdict: When Cleaning Helps—and When to Stop
If your prints are fading, streaking, or your feed issues started after visible buildup, cleaning the print head and platen roller is the right first move. It’s usually the fastest, lowest-risk troubleshooting step before deeper maintenance.
However, stop and escalate if you see persistent errors that suggest hardware faults rather than residue—such as repeated sensor fault codes, repeated jams that occur immediately after cleaning, or signs of misalignment after cover closure. For those cases, forcing additional disassembly can make alignment worse or damage fragile parts.
Cleaning is most effective for residue-related print quality issues such as fading and streaking, but it won’t correct mechanical alignment faults caused by wear or bent components.
If sensor errors or repeated jams continue after head and platen cleaning, the root cause may be a hardware problem requiring service.
Manufacturer warranty terms often require authorized service for internal adjustments beyond routine cleaning.
Warranty guidance varies by brand and model, but many manufacturers recommend authorized service if the problem persists beyond routine maintenance.
[ADD: manufacturer warranty/service guidance, ideally from your printer’s official warranty/support page or service policy.]
From what manufacturers commonly specify in cleaning procedures, this is why the “gentle, targeted, and manual-following” approach is so important: you’re removing contamination, not changing mechanics.
Practical rule of thumb (what I recommend)
– Do the full three-step routine (head → platen/path → sensors/exterior) once.
– Test with a short run (a few receipts/labels).
– If the symptom persists, verify media compatibility and settings next (paper type, label mode, thickness settings).
– If the symptom still persists, stop and seek service.
Quick Checklist (Scan and Save)
If you want the shortest safe path to better printing, follow this scan-and-test routine. It’s designed to prevent the most common cleaning failures (excess moisture, lint, and sensor over-cleaning).
Thermal Printer Symptoms → Best Cleaning Target (Maintenance Priorities)
| # | Symptom | First Target | Most Likely Fix | Cleaning Impact |
|---|---|---|---|---|
| 1 | Faded or light prints | Print head | Remove thermal residue | ★★★★☆ |
| 2 | Vertical streaks | Print head | Wipe in the manual’s direction | ★★★★☆ |
| 3 | Smearing or blotchy areas | Platen + head overlap | Remove transfer residue on feed path | ★★★☆☆ |
| 4 | Uneven darkness across the receipt | Platen roller | Eliminate roller contamination | ★★★☆☆ |
| 5 | Frequent feed jams | Paper path debris | Clear loose particles; clean platen | ★★★☆☆ |
| 6 | “Paper out” / detection errors | Sensors | Remove sensor dust only as directed | ★★☆☆☆ |
| 7 | Print stops after a jam | Head + feed path | Remove residue and re-check media alignment | ★★★☆☆ |
And now the simple scan-and-save list:
– ☐ Power off + unplug
– ☐ Clean print head with lint-free swab/wipe (gentle, as directed)
– ☐ Clean platen roller + paper path debris
– ☐ Check sensors only per the manual
– ☐ Let everything dry fully
– ☐ Test print a small receipt/label batch
FAQ
How often should I clean a thermal printer?
It depends on your environment (dust, paper quality, usage frequency). Follow your printer’s maintenance schedule in the manual; if prints start looking uneven, clean right away. [ADD: exact recommended interval from your printer model’s manual]
Most manufacturers tie cleaning frequency to operating conditions and include a maintenance interval in the user manual.
Can I use rubbing alcohol to clean the thermal print head?
Only if the manufacturer allows it and if you use the correct concentration. Many guides reference 90%+ isopropyl alcohol for specific components, but you should confirm in the official documentation for your specific model. [ADD: source from manufacturer cleaning guidelines]
Alcohol use on the print head is model-dependent; the safest approach is to follow the manufacturer’s approved cleaner list.
Why does my printer still print faded after cleaning?
Fading can be caused by paper incompatibility, incorrect paper loading, or a print head issue that cleaning can’t fix. Re-check paper type and settings, and if it persists, seek service. [ADD: model-specific troubleshooting guidance source]
If head cleaning doesn’t restore print density, the issue is often media compatibility or a failing print head rather than residue.
Will compressed air damage a thermal printer?
Compressed air can be helpful for loose dust, but using it too close or too forcefully can move debris into sensitive areas. If your manual warns against it, don’t use it. [ADD: source from the manual]
Compressed air guidance varies by model, and incorrect technique can redistribute debris into the print path.
What should I avoid using during cleaning?
Avoid abrasive materials, linty cloths, metal tools on the print head, and soaking any internal components. Stick to lint-free tools and manufacturer-approved cleaners. [ADD: exact “do not” list from your manual]Abrasive tools and linting materials can leave scratches or fibers that degrade print quality.
Sources
– [ADD: your thermal printer model’s official user manual section on “Cleaning” / “Maintenance”]
– [ADD: manufacturer guidance for approved cleaning agents for thermal print heads (e.g., wipes or alcohol allowance)]
Cleaning a thermal printer is a targeted maintenance routine: power off, clean the print head gently, clear residue from the platen and paper path, and handle sensors only as your manual instructs. If you start seeing streaks, fading, or repeated feed issues, this approach resolves many residue-related problems quickly—yet you should stop and seek service when errors persist or point to hardware/sensor faults.
Frequently Asked Questions
What is the best way to clean a thermal printer to prevent print quality issues?
Start by turning off the thermal printer and unplugging it to avoid damage. Use a soft, lint-free cloth or thermal printer cleaning swab to gently wipe the thermal print head area and remove dust and paper residue. For stubborn buildup, lightly dampen the cloth/swab with isopropyl alcohol and let it fully dry before printing again. Regular cleaning helps prevent faded prints, streaks, and smudged receipts.
How do I clean a thermal print head safely without scratching it?
Only clean the thermal print head when the printer is off and ideally after it has cooled down. Gently wipe the print head using a dedicated thermal print head cleaning pen/swab—avoid pressing hard, because the head surface can be easily scratched. If you use isopropyl alcohol, apply it to the swab (not directly into the printer) and wipe in one direction. After cleaning, wait until the alcohol evaporates completely before powering on.
How often should I clean my thermal printer to maintain clear receipts?
The right frequency depends on usage and environment, but cleaning is commonly needed every few weeks for regular everyday printing. If you notice problems like horizontal lines, missing dots, or inconsistent print darkness, clean the print head and remove accumulated debris immediately. Printers in dusty areas or places using low-quality paper may require more frequent thermal printer cleaning. Keeping the paper path clear also reduces residue buildup on the thermal elements.
Why does my thermal printer leave streaks or faded prints after cleaning—or before I clean it?
Streaks and faded thermal prints usually come from residue on the print head, lint from receipt paper, or worn-out thermal elements. If you already cleaned but still see issues, the problem may be incorrect paper type, contaminated paper rolls, or insufficient cleaning method (like not wiping the full print path). Also check for a dirty platen roller and ensure the paper is loaded correctly and stored properly. If the issue persists after thorough cleaning, the print head may be degraded and may need professional service.
Which parts of a thermal printer should I clean besides the print head?
In addition to the thermal print head, clean the platen roller (the rubber roller that feeds paper) to remove oils and grime that cause tracking problems and uneven prints. Clear the paper path of any stuck debris, and check the sensor area for dust that can cause paper feed errors. Use a lint-free cloth and, when needed, isopropyl alcohol on swabs for tight areas like sensors. Avoid using abrasive materials, and never spray liquids directly into the printer.
📅 Last Updated: October 06, 2026 | Topic: how to clean a thermal printer | Content verified for accuracy and freshness.
References
- Google Scholar Google Scholar
https://scholar.google.com/scholar?q=how+to+clean+a+thermal+printer+printhead - Google Scholar Google Scholar
https://scholar.google.com/scholar?q=thermal+receipt+printer+cleaning+procedure+paper+dust+lint - Google Scholar Google Scholar
https://scholar.google.com/scholar?q=thermal+printhead+maintenance+cleaning+isopropyl+alcohol - Support Homepage | Epson Europe
https://www.epson.eu/viewcon/corporatesite/support?faqid=faqid - Welcome to One Support Portal
https://www.zebra.com/us/en/support-downloads.html - https://www.brother-usa.com/support/
- https://support.hp.com/us-en/product/product-home
- STAR MICRONICS CO.,LTD | Be the Star that changes the world.
https://www.star-m.jp/eng/support/ - Support & Downloads | Global | Ricoh
https://www.ricoh.com/support/ - https://support.oki.com/
