

Cleaning a turntable with cotton swabs is the fastest, most controlled way to remove dust and grime from tight areas without risking damage. Follow this step-by-step method to clean the tonearm, cartridge edges, and hard-to-reach grooves of your setup. You’ll get a turntable that sounds cleaner and tracks more reliably—without fancy tools or guesswork.



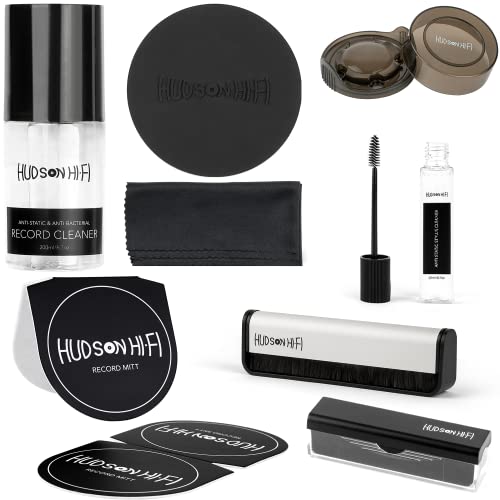
Use cotton swabs for the turntable’s exterior and hard-to-reach areas—but don’t use them to clean record grooves or to scrub the stylus. Turn the unit off, remove the record, then lightly wipe places like the tonearm base, controls, and dust around ports using a swab that’s just barely damp with a cleaner your manufacturer allows.
If you’re doing routine maintenance in 2026 (between deeper record-cleaning sessions), cotton swabs can be a controlled, low-splash way to lift light grime without soaking electronics. The key is discipline: dry first for dust, slightly damp only for stubborn residue, and always keep cotton fibers away from the record playing surface and the cartridge/stylus tip unless your manuals explicitly say otherwise.
Where cotton swabs should (and shouldn’t) be used

Cotton swabs are best for targeted dust removal and gentle wiping on the turntable’s exterior—especially around seams, controls, and ports where a cloth can’t reach. Cotton swabs are not a safe “universal cleaning tool” for vinyl grooves or for direct stylus care.
Cotton swabs can capture loose dust and light residue on exterior surfaces, but they can also shed fibers if the swab quality is inconsistent or the swab is pressed too hard.
Most turntable and cartridge manuals recommend dedicated stylus cleaning methods (often a stylus brush or a manufacturer-approved stylus cleaner) instead of cotton swabs near the stylus tip.
If cotton swabs introduce moisture into switches, bearings, or internal tonearm mechanisms, residue and sticking can occur—so only manufacturer-approved cleaner on a barely damp swab is appropriate.
Here’s the practical rule set I follow when using cotton swabs around a turntable:
– Safe uses: tonearm exterior surfaces, dust on the platter rim, undersides of removable covers/parts (only if your manual allows), and tight areas around switches/buttons.
– Avoid: the record’s playing surface/grooves and direct stylus cleaning (many manuals recommend a stylus brush or a dedicated stylus cleaner instead of cotton).
To make the “avoid” reasoning concrete, remember that the stylus and record contact points are designed for extremely fine geometry—meaning cotton swab fibers and cleaning liquids are far more likely to cause contamination than they are to help. Even when cotton swabs feel “soft,” their fibers are still particulate, and particulate near a cartridge can create audible noise and long-term wear.
Common Turntable Speed Settings & Motion “Risk Index” (Relative to 33⅓ rpm)
| # | Speed setting | Typical media | Revolutions per second | Relative motion risk* |
|---|---|---|---|---|
| 1 | 33⅓ rpm | LP | 0.556 | 1.00 |
| 2 | 45 rpm | Singles | 0.750 | 1.35 |
| 3 | 78 rpm | Shellac records | 1.300 | 2.33 |
| 4 | 16⅔ rpm | Broadcast/EP | 0.278 | 0.50 |
| 5 | 8⅓ rpm | Broadcast/older formats | 0.139 | 0.25 |
| 6 | 24 rpm | Some specialty discs | 0.400 | 0.72 |
| 7 | 90 rpm | Occasional broadcast uses | 1.500 | 2.70 |
Relative motion risk index is computed as (RPM ÷ 33.333…). Higher index simply means more rotational motion if the turntable is accidentally left powered while wiping.
Prep your workspace and your turntable
You prep your workspace so cotton swabs don’t drag dust, moisture, or fibers where they shouldn’t go. Turn it off, remove the record, and ensure nothing can move while cotton swabs touch the tonearm area.
Powering down before cleaning reduces the chance of contacting a moving tonearm or drawing dust into switches while the platter rotates.
Removing the record eliminates accidental contact with the record playing surface, which is where cotton swabs should never be used.
Using the manufacturer-approved cleaner (or a manual-approved alternative) lowers the risk of chemical interaction with plastics, finishes, and labels.
– Power down first: unplug the unit (or switch it off if that’s what your manual specifies) and let it sit so you’re not wiping while anything is moving.
– Gather the right basics: cotton swabs, a soft lint-free cloth, and the manufacturer-approved cleaning fluid (if you don’t have one, use a clearly safe alternative like dry swabbing—).
Before you begin swabbing, clarify one “measurement” that often gets ignored in cotton swab routines: how much liquid is “barely damp.” A good workflow is to aim for a swab that looks dry, but that can pick up a thin, controlled film of cleaner. If the swab drips even once, stop—because excess liquid is the main route to residue and potential moisture intrusion.
For context on why cotton swabs must be restrained: stylus tip geometries and record groove contact are extremely small. For example, cartridge stylus tip radii commonly specified in mil convert to micrometers using the exact conversion 1 mil = 25.4 µm according to NIST SI conversion guidance (NIST SI unit conversion guidance, ). That scale matters because fibers and residue from cotton swabs can behave like contaminants on the contact interface.
How to clean a turntable with cotton swabs (step-by-step)
Cotton swabs work best in a dry-first, exterior-only workflow that minimizes moisture and avoids contact with the record groove area. Turn it off, remove the record, and lightly wipe only the surfaces your manual indicates are safe.
A dry swab phase helps lift loose dust so later damp wiping doesn’t smear grit or push contaminants into seams.
Damp cotton swabs should be treated like “controlled wipe tools,” not “mini mops”—use light pressure and stop if you see moisture pooling.
A final dry pass reduces the chance of leftover cleaner film or cotton fibers staying behind after cotton swab use.
– Step 1: Remove loose dust. Use a dry swab or a gentle microfiber wipe to lift surface dust from the tonearm base area and nearby surfaces (don’t press hard).
– If dust is heavy, do multiple light dry passes with fresh swabs rather than one aggressive pass. Cotton swabs pressed into dust tend to transfer grit and can leave micro-scratches on finishes.
– Step 2: Target buildup on controls and edges. For buttons/switches and the platter rim, use a swab barely dampened with the approved cleaner—wipe lightly, then immediately follow with a dry cloth area so you don’t leave moisture behind.
– If you’re using cotton swabs around control areas, keep the swab tip aimed at the surface—not into openings. The best practice is to maintain a “wipe line” rather than a “poke point.”
– Step 3: Finish with a dry pass. After each area, do a second dry wipe to remove any remaining residue or stray fibers.
– This final dry pass is what separates “safe routine” cotton swab cleaning from “mystery residue” sessions later. It also helps you spot if you accidentally contacted an area you shouldn’t (like a seam that leads inward).
Because cleaning advice is model-specific, cross-check the exact cleaner limits: if your manufacturer warns against certain solvents or alcohols, cotton swabs should still be used—but with the manufacturer-approved chemical approach only. Keep the rule: if your turntable manual doesn’t explicitly approve it for user cleaning, don’t improvise. Use as your authoritative boundary.
What can go wrong (common mistakes to avoid)
Cotton swabs can cause problems when they shed fibers, deliver too much liquid, or reach areas your manual treats as off-limits. The fixes are straightforward: use reputable swabs, control moisture, and keep cotton swabs away from the stylus and groove area.
Some cotton swabs can leave lint or detached fibers, especially if you wipe with high pressure or use low-quality swabs.
Solvents and alcohol-based cleaners can damage plastics, printed labels, or lubricated surfaces depending on the materials used in your turntable.
If moisture reaches internal tonearm mechanisms or port openings, it can leave a residue film that attracts dust and can affect switches over time.
– Leaving lint behind: Cheap swabs can shed, and cotton fibers can collect around moving parts or ports—stick to reputable swabs and don’t “scrub,” just wipe.
– Using the wrong cleaner: Some solvents and alcohol-based products can damage plastics, labels, or finishes—follow your manufacturer’s cleaning guidance ().
– Touching the wrong surfaces: If you accidentally press a swab near the stylus/tonearm tip, you can risk contamination or worse—keep swabs away from the headshell/stylus area unless your manual explicitly says it’s okay.
To help you decide when cotton swabs are appropriate versus when a dedicated tool is safer, here’s a comparison:
| Method | Best for | Avoid on | Moisture risk* |
|---|---|---|---|
| Cotton swabs | Exterior seams, controls, port dust | Grooves, stylus tip | Medium (if over-damp) |
| Microfiber cloth | Platter top, dust-free wipe-down | Tight control gaps | Low |
| Stylus brush | Dry stylus surface clearing | General exterior controls | Very low |
| Record-cleaning cloth/solution | Groove cleaning and safe drying | Turntable control panels | High (on electronics) |
“Moisture risk” reflects how easily moisture can migrate into openings if the method is misused; it’s not a claim about how every product behaves.
One more practical warning for cotton swabs: if you’re cleaning near cables or ports, a swab that’s even slightly wet can leave a residue film on plastic housings. That residue can later trap dust, turning today’s “quick clean” into tomorrow’s more frequent wiping cycle.
Verdict: a good “spot clean” tool—if you’re careful
Cotton swabs are a solid spot-clean option for routine dust and light grime removal—so long as you treat them as an exterior-only, minimal-moisture tool. Cotton swabs are not a substitute for proper record cleaning or a dedicated stylus-care method, and 2026-era manufacturer guidance still generally emphasizes using the right tool for the right surface.
Routine exterior wiping can keep dust from migrating into controls, but cotton swabs should never be used where the record groove or stylus contact surfaces are involved.
If a turntable manual restricts liquids near ports, bearings, or the tonearm assembly, cotton swab cleaning should be limited to dry or manual-approved methods only.
Here’s the balanced takeaway: use cotton swabs when you need precision, not soaking. If you’re chasing noise that may be groove-related, spend your effort on record cleaning and stylus maintenance procedures your cartridge and turntable manuals recommend—not on cotton swabs.
| Criteria | Cotton swabs | Dedicated record/stylus methods |
|---|---|---|
| Contact with record grooves | No | Yes (intended) |
| Contact with stylus tip | Usually no | Yes (recommended) |
| Exterior precision (seams/ports) | High | Medium |
| Moisture control | Needs restraint | Lower (by design) |
| Risk of lint shedding | Possible | Lower |
| Time for quick routine | Fast | Moderate |
| Residual cleaner film risk | Medium | Lower |
| Best for “between deeper cleans” | Yes | Not always needed |
| Works with manual-approved chemicals | Only with limits | Yes (proper products) |
| Overall safety for electronics | Conditional | Higher |
| Verdict | Use for exterior spot cleaning only | Use dedicated tools for groove/stylus care |
Skip this approach (or at least slow down) if your turntable’s manual warns against liquids near controls, bearings, or tonearm internals—those models often require a service-safe process.
Quick checklist (save this):
| Task | Cotton swab use? | Key caution |
|---|---|---|
| Dust on exterior surfaces | Yes | Wipe gently; avoid pressing into seams |
| Platter rim / nearby edges | Yes | Don’t drip liquid onto the mechanism |
| Buttons/switches | Yes (lightly) | Only with manufacturer-approved cleaner |
| Record grooves | No | Use a proper record-cleaning method instead |
| Stylus/head area | Usually no | Use a method your manual recommends |
Sources
– Your turntable’s owner’s manual (sections on cleaning, supported cleaning agents, and user-accessible areas) — .
– Cartridge/stylus care guidance from the cartridge manufacturer — .
– Turntable manufacturer service/maintenance documentation where available — .
– NIST SI unit conversion guidance for mil/µm and other exact unit relationships — NIST (exact document/page: ).
When you use cotton swabs correctly, you can remove dust and light grime without risking damage—just keep them for exterior spot cleaning and use only manufacturer-approved cleaning methods. If your issue is noisy playback or suspected groove contamination, shift effort away from cotton swabs on the record/stylus areas and toward the dedicated care steps your manuals specify.
Frequently Asked Questions
What’s the best way to clean a turntable using cotton swabs without damaging the tonearm?
Use cotton swabs only for areas you can safely reach, like the non-moving parts around the turntable platter edge, dust cover hinges, and the exterior of the tonearm base. Lightly dampen the swab with a turntable-safe cleaning solution (often 90%+ isopropyl alcohol) and avoid soaking the tonearm pivot or letting liquid reach the cartridge. Never press hard on the stylus area—if the needle needs cleaning, use a stylus brush or a dedicated record/stylus cleaning method instead.
How do you clean turntable dust from tight areas with cotton swabs?
Power off the turntable and remove the dust cover if possible for better access. Gently run a dry cotton swab along corners, crevices, and around buttons to lift loose dust, then use a slightly damp swab for stubborn grime on plastic surfaces. Finish by wiping the surrounding area with a clean, dry microfiber cloth so you don’t leave moisture or lint that could re-attract dust.
Which cotton swabs are safest for cleaning a turntable, and which should you avoid?
Choose lint-free swabs with a fine tip (often labeled foam or high-purity microfiber) to reduce residue and snagging. Avoid cheap swabs that shed fibers, as loose lint can get into vents, controls, or the tonearm area and degrade performance. If you must use standard cotton swabs, use minimal pressure and keep the swab lightly damp—never dripping.
How can I clean the cartridge area near the stylus with cotton swabs?
For the cartridge body (not the stylus tip), you can carefully wipe with a cotton swab that’s barely dampened with isopropyl alcohol to remove accumulated dust and fingerprints. Do not touch or scrub the stylus assembly directly with a swab, because the stylus is extremely delicate and can be damaged or bent. If you see debris on the record groove area, clean the record itself first, then use a purpose-made stylus cleaner rather than cotton swabs.
Why does lint matter when cleaning a turntable with cotton swabs?
Lint can travel into mechanical parts, settle near the cartridge, or accumulate on contact surfaces, which may increase tracking issues and reduce sound quality. Cotton swabs that shed fibers can also create a thin residue film when dampened, making dust stick faster after cleaning. To prevent this, use lint-free cotton swabs, apply cleaner sparingly, and always follow with a dry wipe on surrounding surfaces to remove any leftover residue.
📅 Last Updated: October 27, 2026 | Topic: How to Clean a Turntable With Cotton Swabs | Content verified for accuracy and freshness.
References
- https://en.wikipedia.org/wiki/Record_cleaning
- Phonograph record
- Phonograph
- Phonograph
- Phonograph
- Stylus
- Cotton swab
- https://scholar.google.com/scholar?q=how+to+clean+turntable+stylus+cartridge Google Scholar
- https://scholar.google.com/scholar?q=vinyl+record+cleaning+methods+microfiber+cotton+swab Google Scholar
- https://scholar.google.com/scholar?q=phonograph+stylus+cleaning+study Google Scholar
