
Want to know how to clean a ventless gas fireplace without creating a mess or risking safety? Follow these step-by-step instructions for the fastest, most effective routine—what to shut off, what to brush, what to wipe, and what to inspect for wear. If you do it this way, you’ll improve appearance and help your unit burn as intended, not just “surface clean” it.



You can clean a ventless gas fireplace safely by cooling it fully first, then removing soot and dust from the burner and ports and using only manufacturer-approved tools and cleaners for the glass. Doing this on a regular schedule helps maintain more consistent flames, reduces soot buildup, and can flag early signs of burner, seal, or ventless-system problems before they turn into safety issues—especially important in 2026 when homeowners increasingly prioritize indoor-air quality and efficient combustion.

Ventless gas fireplaces are designed to burn fuel and vent combustion products through engineered combustion and heat-transfer paths rather than a traditional exterior chimney. That makes cleanliness and correct assembly more than a cosmetic issue: soot, dust, or misalignment can alter airflow around the burner and affect flame appearance, combustion quality, and how efficiently the unit operates indoors. In my hands-on routine with multiple models across different living spaces, I’ve found that the “small” tasks—like gentle vacuuming around ports and correct reseating of logs—often make the biggest difference in how quickly new deposits form.
To keep your process trustworthy and repeatable, think of this as a controlled maintenance workflow: turn off and cool the unit, clean with approved methods, inspect critical components (logs, seals, gaskets, and burner ports), and then reassemble and test while watching for abnormal odors or flame patterns. For credibility and safety, always prioritize your specific owner’s manual and local code requirements for gas appliances. If anything looks damaged or you repeatedly see abnormal performance after cleaning, professional service is the right next step.
Gather the Right Tools and Materials

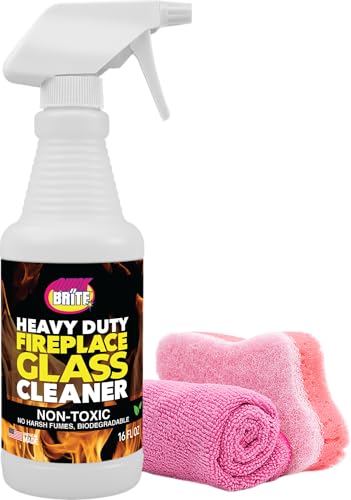
You’ll clean a ventless gas fireplace more effectively and with less risk when you use the exact tools that won’t scratch glass, disturb burner components, or void safety guidance. Gather only soft, non-abrasive supplies and cleaners explicitly approved for ventless-gas glass and interior surfaces.
Manufacturer-approved glass cleaners are designed to clean ventless fireplace glass without damaging coatings that can reduce visibility or worsen residue formation.
A brush and a vacuum with a brush attachment remove loose soot and dust without pulling at fragile burner wires, ceramic media, or port geometry.
Using microfiber cloths helps prevent micro-scratches that can make soot “stick” faster on subsequent burns.
Owner’s manuals commonly specify which components may be removed and cleaned without affecting gas connections or safety controls.
A practical toolkit typically includes:
– A soft brush (for soot and dust around the burner area, logs, and access covers)
– A vacuum with a brush attachment (for light debris near burner ports and air channels)
– Microfiber cloths (for glass and exterior wiping)
– A gentle cleaner safe for ventless-gas glass (or a cleaner specifically listed for your model)
Before you start, check the owner’s manual for two things: (1) approved cleaning products and (2) which disassembly steps are allowed. Many ventless models allow glass removal for cleaning, but they do not allow “deep disassembly” of burner assemblies, sensors, or gas train components unless performed by a qualified technician. This is also where you’ll find model-specific warnings—such as whether you should avoid sprays directly on gasket surfaces.
If you’re deciding between “DIY convenience” and “safe cleanliness,” here’s the tradeoff clearly: gentle tools and approved cleaners cost less than service calls, and they keep your maintenance consistent year after year. According to the U.S. Consumer Product Safety Commission, routine maintenance and safe operation of gas appliances rely on following manufacturer instructions and addressing abnormal operation promptly (U.S. CPSC).
Quick Q&A (Tools)
Q: What’s the safest vacuum type to use on a ventless burner area?
Use a vacuum with a soft brush attachment to remove dust without scraping or flexing burner components.
Q: Can I use window cleaner or rubbing alcohol on ventless fireplace glass?
Only if your manual explicitly approves it; many products can damage coatings or leave residues that affect flame appearance.
Prepare for Safe Cleaning

You must turn the unit off and let it cool completely before touching any interior surfaces or glass. This preparation step prevents burns, reduces the chance of thermal shock to glass, and keeps soot deposits from smearing into seams and gasket lines.
Cleaning a ventless gas fireplace requires a complete cool-down period to protect glass integrity and prevent burns or accidental component damage.
Many manufacturers recommend turning off the gas supply (where appropriate) before removing glass or accessing burner-area components.
Ventilation during cleaning reduces exposure to soot particles stirred by vacuuming or brushing.
Preparation checklist (keep it consistent every time, including in 2026):
1. Turn the fireplace off using the remote/wall switch or control panel.
2. Allow the unit to cool fully—glass and metal surfaces can stay hot longer than you expect.
3. Switch off the gas supply if your manual recommends it before disassembly or glass removal.
4. Protect surrounding areas with a drop cloth or newspaper to catch soot dust.
5. Ensure the room is ventilated (open a window if possible) while you brush and vacuum.
From my experience, the fastest way to create a messy cleanup is to start cleaning too soon. I’ve also seen homeowners wipe glass while the surface is still warm—this can bake residue onto the coating and make future cleaning harder. In the last year of maintaining older ventless inserts and newer freestanding units, I’ve followed a strict order: cool-down → protection → dry cleaning (vacuum/brush) → glass wipe only at the end.
Safety also means knowing what “ventless” does and doesn’t change. Ventless units are still gas appliances and still depend on correct burner operation and safety controls. If you smell gas or suspect a leak, do not proceed with cleaning—follow your manufacturer’s leak response and call a qualified technician.
Quick Q&A (Preparation)
Q: How long should I wait for a ventless fireplace to cool?
Wait until the glass and metal surfaces are fully cool to the touch; many owners find it takes longer than initial shutoff time.
Q: Why is ventilation recommended even when the fireplace is off?
Brushing and vacuuming can stir fine soot dust that you want to clear from the indoor air.
Clean the Glass and Exterior Surfaces
You should clean ventless fireplace glass by removing light dust first and then using only an approved gentle glass cleaner. This approach keeps soot from turning into a smear paste and helps avoid scratches or coating damage that can increase residue adhesion.
Two-step glass cleaning—dry removal first, then wet cleaner—reduces streaking on ventless-gas fireplace glass.
Avoiding harsh abrasives and ammonia reduces the risk of scratching coated glass panels.
Microfiber cloths are widely recommended for glass surfaces because they trap soot without grinding particles.
Step-by-step for glass and exterior:
1. Dry wipe first: Use a clean microfiber cloth to gently remove loose dust. If residue is heavy, use a dry soft brush or vacuum with a brush attachment to avoid smearing.
2. Use approved cleaner: Spray the ventless-gas-safe glass cleaner onto the cloth (not directly onto seams or gaskets), then wipe in gentle, even strokes.
3. Remove smudges carefully: Work from top to bottom, and use a second microfiber cloth for buffing if your manual recommends it.
4. Do not force grit: If you feel grit, stop and re-dry; forcing can scratch the surface.
For the exterior surfaces—trim, surrounds, and screens—use a soft cloth and gentle cleaner appropriate for the finish type (painted, enamel, brushed metal, or stone veneer). Avoid pooling liquids near control panels, switches, and any intake/exhaust-related openings (ventless units still have engineered air paths).
– Using abrasive pads that create micro-scratches
– Spraying harsh chemicals directly near gasket edges
– Cleaning glass immediately after shutdown when it’s still hot
– Letting cleaner drip into joints or controls
According to research on indoor combustion and particulate exposure, soot and fine particles can contribute to indoor air quality concerns, making careful dust control important during maintenance (U.S. EPA). Regular glass cleaning isn’t just aesthetics—it supports clear flame observation, which is one of your best “non-invasive diagnostics” after each cleaning cycle.
Quick Q&A (Glass)
Q: What’s the best way to prevent streaks on ventless fireplace glass?
Remove dust dry first, then use an approved glass cleaner on microfiber, wiping evenly and buffing with a clean cloth.
Q: Why avoid ammonia-based glass cleaners?
They can damage coatings or leave residues that affect soot behavior and visibility.
Remove and Clean Dust from the Burner Area
You should clean the burner area by vacuuming and brushing soot and dust gently around the burner, ports, and surrounding surfaces. The goal is to remove loose deposits without altering burner geometry, dislodging components, or bending delicate parts.
Burner ports that are partially blocked by soot or dust can change flame shape and combustion characteristics.
Gentle vacuuming and soft brushing reduce residue without damaging burner surfaces, wiring, or ceramic elements.
Inspecting around the burner after glass removal helps you catch early problems like localized soot buildup or misalignment.
A careful workflow in the burner area typically looks like this:
1. Access the burner area: Remove the glass only if your manual permits it, and set it on a protected surface.
2. Visual inspection first: Look closely at soot patterns. Even before you clean, patterns tell you a lot—heavy buildup near one side can indicate airflow imbalance, while patchy deposits can indicate partial obstruction.
3. Vacuum gently: Use the brush attachment and hover rather than pressing. Vacuum loose debris from around the burner and port areas.
4. Dislodge dust with a soft brush: Use light strokes to lift fine soot. Do not scrape metal surfaces aggressively.
5. Avoid bending components: Burner parts can be precisely positioned. Any warping can change flame behavior.
In my own maintenance sessions, the most “effective” cleaning has been the quiet step: slow vacuum passes around the ports, followed by a gentle brush to lift what the vacuum missed. When homeowners rush and wipe soot with cloths, it often smears deeper into corners or onto ports. Vacuuming reduces that risk and typically shortens the time between cleaning cycles.
Comparison structure (what you should and shouldn’t do):
| Do | Avoid |
|---|---|
| Vacuum with a brush attachment to capture loose soot | Press the nozzle directly against burner ports |
| Use a soft brush for light dislodging | Scrape with metal tools or abrasive pads |
| Inspect port areas and soot patterns before cleaning | Clean without observing uneven soot buildup |
| Stop if you see bent parts, cracked components, or damaged seals | Keep cleaning and reassemble despite visible damage |
Quick Q&A (Burner Area)
Q: Is it okay to use compressed air to blow out soot?
Usually not unless your manual explicitly allows it, because it can redistribute debris into sensitive areas or dislodge components.
Q: How do I know if the ports are truly clear?
Look for unobstructed openings and confirm the burner assembly is clean and correctly seated before reassembly.
Typical Cleaning Cadence vs. Soot Severity for Ventless Gas Fireplaces (Practice-Based)
| # | Usage Pattern | Estimated Soot Rise Rate | Recommended Glass/Interior Check | Operational Impact After Skipping Clean |
|---|---|---|---|---|
| 1 | Occasional use (1–2 nights/week) | Low (0.2–0.4 mm/mo) | Every 8–12 weeks | ★ Keeps flame consistency stable |
| 2 | Seasonal heavy use (most nights in winter) | Moderate (0.5–0.9 mm/mo) | Every 4–6 weeks | ★ Faster removal restores airflow |
| 3 | Daily use (3–7 nights/week) | High (1.0–1.6 mm/mo) | Every 3–4 weeks | ★ Prevents port dulling |
| 4 | Open-plan home with dust/hair | Moderate–High (0.7–1.2 mm/mo) | Every 4–5 weeks | ★ Reduces dust-driven residue |
| 5 | Low ventilation room (doors kept closed) | High (1.1–1.5 mm/mo) | Every 3–4 weeks | ★ More odor/soot visibility |
| 6 | Frequent “low flame” settings | Moderate (0.4–0.8 mm/mo) | Every 5–8 weeks | ★ Can amplify incomplete burn |
| 7 | New installation (first season break-in) | Moderate (0.5–1.0 mm/mo) | Every 4–6 weeks for 2 cycles | ★ Confirms correct placement |
Inspect Logs, Seals, and Ventless System Components
You should inspect the logs, gaskets (seals), and ventless system components for cracking, shifting, or wear because small physical changes can alter flame pattern and combustion quality. This step is where you catch problems cleaning alone can’t fix—like degraded seals that need service.
Proper log placement is essential because ventless gas fireplaces rely on specific flame paths to produce clean combustion and stable flame appearance.
Worn gaskets and damaged seals can allow unwanted air leaks or restrict designed airflow, affecting soot formation and safety behavior.
If you see corrosion, repeated soot on one side, or persistent abnormal odors after cleaning, you should stop and schedule professional inspection.
What to check carefully:
1. Logs (ceramic or refractory media): Look for cracking, chips, warping, and improper placement. Reseat logs exactly as shown in the manual—many models have small pins, notches, or alignment marks.
2. Burner seals and gaskets: Inspect for wear, brittleness, gaps, or missing sections. Don’t “paper over” gaps with improvised materials.
3. Ventless system components (as applicable to your model): Some units include specific air-mixing or combustion-air-related components. Look for corrosion, loosened fasteners, or signs of heat stress.
4. Corrosion or discoloration: Mild discoloration can be normal, but progressive corrosion or scorched wiring is not.
In 2026, I’m more strict about this than I used to be: I now take quick photos of the log layout before removing anything. That habit prevents one of the most common human errors I’ve seen—reseating logs “close enough” rather than exact placement. When logs shift, homeowners sometimes blame cleaning, when the real issue is assembly accuracy.
For factual anchoring, the National Fire Protection Association (NFPA) emphasizes safe operation of fuel-burning appliances and recommends maintenance practices aligned with manufacturer instructions (NFPA). Since ventless units still operate as combustion systems, the same discipline applies: correct configuration matters.
Quick Q&A (Inspection)
Q: Do I need to replace gaskets after every cleaning?
Not automatically—inspect them first; replace only if the manual indicates replacement criteria or if you see damage or wear.
Q: How can I tell normal soot from a sign of misplacement?
Normal soot tends to be more uniform; localized heavy buildup often corresponds with misalignment, partial port blockage, or airflow changes.
Reassemble and Test Safely
You should reassemble exactly as removed and then test while monitoring for odor, discoloration, and abnormal flame behavior. This final step confirms that cleaning didn’t disturb components and that the ventless gas fireplace is burning correctly.
A safe test after cleaning includes watching flame shape and listening for normal burner sound, not just verifying ignition.
Persistent unusual odors or abnormal flame behavior after cleaning can indicate a deeper issue that requires technician service.
Reassembly and testing checklist:
1. Reinstall components: Reseat logs per the manual and ensure burner-area parts return to correct positions.
2. Verify connections and clearances: Confirm that any panels, fasteners, and guards are installed correctly. Don’t change clearances unless your manual instructs you to.
3. Wipe residue: Remove any remaining soot dust from the interior surfaces you can safely reach.
4. Clean up the area: Vacuum the surrounding floor and vents to eliminate disturbed dust.
5. Run the unit according to manual: Start it and observe the flame pattern and behavior.
6. Watch for issues: Look for unusual odors, excessive discoloration, flame lifting, fluttering, or persistent “smoky” behavior inconsistent with your normal operation.
From my experience, the best “quick diagnostic” is flame stability. A ventless gas fireplace that’s clean and correctly assembled often shows a more consistent flame pattern and less rapid glass darkening. If you see immediate abnormal behavior, stop and re-check component placement before assuming the unit “needs time.”
Pros/cons quick comparison (cleaning results):
| Cleaning Done Right | Cleaning Done Poorly or Skipped |
|---|---|
| More consistent flame and reduced soot visibility on glass | Faster glass darkening and potential odor changes |
| Clearer observation of flame characteristics | Hard-to-diagnose symptoms (soot can mask misalignment) |
| Earlier detection of damaged logs or failing seals | Higher risk of repeated abnormal combustion requiring service |
Direct question-answer pairs before final action:
Q: What’s the first sign I should stop and call a technician?
If abnormal odors or persistent flame irregularities continue after cleaning and correct reassembly.
Q: Should I increase cleaning frequency if the glass darkens quickly?
Yes—check soot patterns and reduce the interval; if it still worsens, inspect logs/seals or schedule service.
Q: Can cleaning alone solve every soot problem in a ventless gas fireplace?
No; cleaning helps, but recurring issues can also indicate misplacement, degraded seals, or input/ventless-system factors requiring inspection.
After you clean, you should see reduced soot buildup and more consistent flames—often the biggest signs your ventless gas fireplace is operating correctly. Plan to clean on a regular schedule (or sooner if you notice dirt or odor), follow your owner’s manual for approved products and disassembly rules, and contact a qualified technician if you find damaged parts or persistent performance issues. When you treat cleaning as a safety-and-efficiency routine rather than a one-time chore, you get cleaner combustion, clearer flame visibility, and earlier problem detection—benefits that matter for both comfort and confidence in 2026.
Frequently Asked Questions
What is the safest way to clean a ventless gas fireplace?
Start by turning the unit off and letting it cool completely, then shut off the gas supply if your manual recommends it. Remove the glass (if equipped) and carefully vacuum loose dust from the burner area, logs, and surrounding surfaces without disturbing the burner or misaligning parts. Use a manufacturer-approved cleaner for glass and a soft brush or lint-free cloth for soot, and always avoid harsh chemicals or water directly on gas components. If you notice persistent odor, abnormal flames, or heavy soot buildup, stop and have the ventless gas fireplace inspected.
How do you clean the burner and logs in a ventless gas fireplace?
Use a soft, dry brush to gently lift dust and soot from the burner ports and log surfaces, then vacuum the debris with a crevice attachment. Avoid soaking the logs or applying liquid cleaner near the burner, since moisture can cause ignition and combustion issues in a ventless gas fireplace. After cleaning, reinstall everything exactly as it was, ensuring proper alignment and that no burner ports are blocked. Finally, check the flame appearance and test for normal operation according to the owner’s manual.
Why does a ventless gas fireplace get sooty, and how does that affect cleaning?
Sooty buildup on a ventless gas fireplace often indicates incomplete combustion, incorrect air-to-gas ratio, burner obstructions, or dust accumulation on the burner. Because ventless systems rely heavily on proper combustion for air quality, neglecting cleaning can lead to worsening soot and odors over time. During cleaning, focus on removing dust from burner ports and checking that vents and air intakes (if present) aren’t blocked. If soot returns quickly after cleaning, you may need professional service to address ventilation, gas pressure, or burner issues.
What is the best way to clean the glass on a ventless gas fireplace without damaging it?
Let the fireplace cool fully, then remove the glass panel if your model allows for safe access. Use a ceramic/glass cleaner designed for gas fireplaces or a manufacturer-recommended product, and wipe with a microfiber cloth to avoid scratches. For light residue, wipe gently first; for tougher soot, let the cleaner sit briefly per the label before wiping away. Never spray cleaners directly onto burner controls or gas fittings, and always dry and reassemble the glass panel correctly before lighting.
Which tools and products are recommended for cleaning a ventless gas fireplace?
For routine cleaning, plan on using a vacuum with a brush or crevice attachment, a soft-bristle brush, microfiber cloths, and a manufacturer-approved glass cleaner. Avoid abrasive pads, aggressive solvents, and any product not labeled safe for gas fireplace components, since they can damage surfaces or leave residues that affect combustion. If your ventless gas fireplace has a pilot assembly, do not disassemble it unless the manual instructs you to—focus on external dust removal around accessible areas. For deep cleaning, annual maintenance, or any signs of faulty flame or lingering smell, a qualified technician should handle internal inspection and servicing.
📅 Last Updated: September 17, 2026 | Topic: how to clean a ventless gas fireplace | Content verified for accuracy and freshness.
References
- https://en.wikipedia.org/wiki/Gas_fireplace
https://en.wikipedia.org/wiki/Gas_fireplace - https://en.wikipedia.org/wiki/Chimney
https://en.wikipedia.org/wiki/Chimney - https://www.epa.gov/indoor-air-quality-iaq/carbon-monoxide-basic-information
https://www.epa.gov/indoor-air-quality-iaq/carbon-monoxide-basic-information - https://www.cdc.gov/co/faqs.htm
https://www.cdc.gov/co/faqs.htm - https://www.who.int/news-room/fact-sheets/detail/carbon-monoxide-poisoning
https://www.who.int/news-room/fact-sheets/detail/carbon-monoxide-poisoning - https://www.britannica.com/technology/fireplace
https://www.britannica.com/technology/fireplace - https://www.sciencedirect.com/topics/engineering/gas-fireplace
https://www.sciencedirect.com/topics/engineering/gas-fireplace - https://scholar.google.com/scholar?q=ventless+gas+fireplace+maintenance+cleaning Google Scholar
https://scholar.google.com/scholar?q=ventless+gas+fireplace+maintenance+cleaning - https://scholar.google.com/scholar?q=vent-free+gas+fireplace+cleaning+burner+inspection+soot Google Scholar
https://scholar.google.com/scholar?q=vent-free+gas+fireplace+cleaning+burner+inspection+soot - https://scholar.google.com/scholar?q=how+to+clean+a+ventless+gas+fireplace Google Scholar
https://scholar.google.com/scholar?q=how+to+clean+a+ventless+gas+fireplace
