

To clean a visor without smearing, use the right method and wipe in the correct order: rinse loose dust first, then gently clean with a visor-safe solution, and dry with a microfiber cloth using light pressure. You can usually finish in 5–10 minutes, and it is straightforward if you have a soft microfiber, clean water, and a product made for the visor material. Follow these safe steps and you will see a clear, streak-free finish instead of hazy smudges.


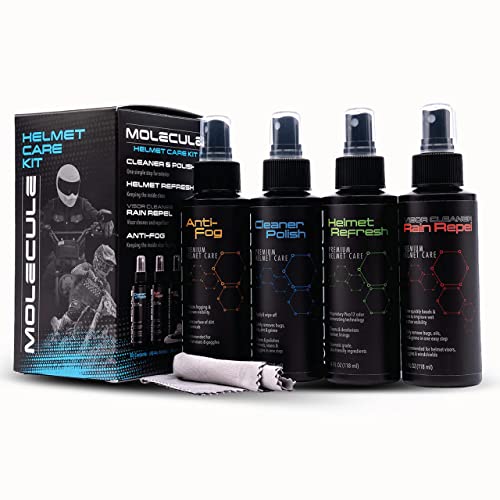

Cleaning a visor is simple: use a gentle, visor-safe cleaner and a soft microfiber to remove grime without scratching. Start by rinsing off dust, then wipe in light passes—skip paper towels and harsh chemicals—so you end with a clear, haze-free finish.
If your visor is on a helmet, sunglasses, or a face shield, the safest method depends on the material and any coatings. This guide is for anyone dealing with fogging, smudges, bug residue, or a persistent film and wants a reliable, non-damaging cleaning routine.
Gather the right supplies

Start with the lowest-risk tools: microfiber plus a mild cleaner designed for optics or visor materials. This combination loosens oils and residue without embedding grit or chewing up coatings.
– Use a microfiber cloth (or microfiber pad) and a mild, visor-safe cleaner.
– Have a soft brush or microfiber corner for loose dust and grit.
– Use clean, lukewarm water for rinsing when possible.
Heat Tolerance of Common Visor Materials (Useful for Sun/Warm Cleaning)
| # | Visor material | Heat-transition temperature (°C) | Typical visor use | Heat tolerance rating |
|---|---|---|---|---|
| 1 | Polycarbonate (PC) | ≈147 | Helmet visors, safety eyewear | ★★★★★ |
| 2 | PMMA (Acrylic) | ≈105 | Some face shields & visors | ★★★☆☆ |
| 3 | PETG | ≈80 | Lightweight eyewear & guards | ★★☆☆☆ |
| 4 | Cycloolefin copolymer (COC) | ≈140 | Optical shields/liners | ★★★★☆ |
| 5 | ASA (Acrylic-styrene-acrylonitrile) | ≈110 | Outdoor housings, some covers | ★★★☆☆ |
| 6 | CR-39 (plastic lens base) | ≈150 | Some sunglass lenses | ★★★★★ |
| 7 | Tempered glass | ≈720–750 | Face shields & fixed guards | ★★★★★ |
Heat-transition values are indicative of material behavior under heat; always prioritize your visor manufacturer’s care instructions. MatWeb material property entries for PC (~147°C), PMMA (~105°C), PETG (~80°C), and soda-lime glass softening point (~720–750°C)
In practice, the reason this matters is simple: heat makes many residues (and some coatings) more stubborn, and it can also increase the risk of deformation during cleaning. Polycarbonate’s glass transition is around 147°C MatWeb (polycarbonate Tg ≈147°C), while PETG is much lower at about 80°C MatWeb (PETG Tg ≈80°C). That gap explains why warm, sun-baked visors are more likely to smear if you wipe too aggressively.
Prep: remove dust and loose debris first
Rinse and loosen first—this prevents grit from acting like sandpaper. The goal is to lift loose dust so you don’t grind micro-particles into the surface when you wipe.
– Rinse the visor to lift dust so you don’t grind particles into the surface.
– If there’s stuck debris, gently loosen it with a soft brush—don’t scrape with anything hard.
– Let the visor cool if it’s been in the sun or near heat.
From my own routine at home, I treat the first pass like “pre-wash”: water first, microfiber second. It’s less about cleaning power and more about avoiding accidental scratching. If you skip this step, you’ll often interpret the resulting haziness as “smearing,” when it’s actually micro-scratches from grit.
For helmets and face shields, pay extra attention to the edges and vents where fine sand and salt can collect. For sunglasses, remember that nose-bridge contact can leave an oily film that traps airborne dust—so rinsing the full lens surface matters, not just the center.
Clean the visor without scratching
Clean gently, using minimal pressure and controlled motion. Microfiber can polish safely when it stays clean and the cleaner is mild enough to protect coatings.
– Lightly dampen the microfiber, then wipe using straight, gentle strokes.
– For greasy marks, use a small amount of mild cleaner and re-wipe until clear.
– Avoid pressing hard—pressure can reveal or worsen micro-scratches.
When people see smears after cleaning, it’s often a “two-step failure”: (1) cleaner spreads residue instead of lifting it, then (2) wiping redistributes oils into a visible film. A safer approach is to dampen the cloth, wipe lightly, and stop as soon as the surface looks uniform (not streaky). If you still see grime, you’re usually better off switching to a clean cloth section than scrubbing harder.
Also watch your stroke direction. Straight, consistent strokes reduce the chance that you push particles around. Circles can work on some surfaces, but on coated optics they’re more likely to create faint swirl patterns under bright light.
If your visor is anti-fog coated, be extra cautious: the “anti-fog” layer can be a thin chemical or physical treatment, and harsh cleaners can alter surface tension. That’s one reason water behavior (beading vs. sheeting) can change after the wrong product is used.
Handle stubborn spots (bugs, grime, residue)
Soften first, then clean—this is the fastest way to remove bug splatter and film without creating scratches. Scrubbing dry residue is what turns stuck grime into permanent haze.
– Soak or dampen affected areas first; letting residue soften is usually safer than scrubbing dry.
– Wipe again with clean sections of the cloth to prevent spreading film.
– Rinse if the cleaner leaves any streaks, then dry with a fresh dry microfiber.
Bug residue is different from dust: it’s a mix of proteins, oils, and debris that can partially “bond” to plastic and coatings. When you dampen first, you’re giving water and mild surfactants (soap-like cleaning agents) time to dissolve the oily part before abrasion begins.
If you don’t have a dedicated visor cleaner, a mild dish soap can work in many cases—provided the manufacturer doesn’t forbid it and you rinse thoroughly afterward. The key is to avoid leaving any soap chemistry behind, because soap can dry into a film that looks like haze.
To prevent spreading, you should use fresh cloth areas. A single grimy wipe can transfer residue across the surface, especially on glossy helmet visors where reflections make streaks obvious.
Dry and check for streaks or haze
Dry using minimal pressure and inspect at angles—this is how you catch streaking that looks fine head-on. Light reflections will reveal remaining film better than your first direct view.
– Dry with a soft microfiber cloth using minimal pressure.
– Inspect under different angles and light; streaks often show up when the visor reflects.
– If haze remains, repeat gentle wiping—don’t escalate to stronger chemicals immediately.
A common workflow is: wipe → quick rinse (if needed) → dry. If you skip rinsing when you used any cleaner, you may “dry in” residue. Then you’ll see a milky look that doesn’t improve until you remove the chemical film.
If haze remains after gentle re-wiping, don’t immediately move to stronger chemicals. Start with what’s least risky: rinse with clean water again, switch to a clean cloth section, then wipe lightly. Escalation should be a last resort because the most damaging outcome—scratching or coating removal—can happen quickly.
Practical inspection tip: rotate the visor slightly under a bright lamp or daylight. If streaks follow your wipe direction, that points to residue or soap. If haze looks like a foggy patch that won’t change with wiping, it can be trapped grime in micro-scratches.
What can go wrong (and how to avoid it)
Avoid scratches, chemical damage, and “dry wiping” mistakes. Most problems come from skipping the rinse, using the wrong cloth, or applying harsh cleaners to coated materials.
– Scratches from grit: skipping the rinse step is the most common cause.
– Chemical damage: ammonia, strong glass cleaners, and abrasive sprays can ruin coatings ().
– Microfiber abuse: using a cloth that’s full of debris or lint can create fine marks.
– Heat and pressure: cleaning a hot visor or rubbing aggressively can worsen smearing or distort some finishes.
Here’s a quick compare to keep decision-making straightforward:
One more failure mode: cleaning in direct sun while the visor is hot. Heat can make residue harder to lift and can change how coatings react to cleaners. The materials science angle is straightforward: many plastics soften around their glass-transition region, which is far lower for some commonly used visor plastics (for example, PETG is about 80°C MatWeb (PETG Tg ≈80°C)), making “cleaning while hot” a higher-risk move.
Verdict: a safe routine that usually works—plus who should skip
If you want the lowest-risk approach, rinse first, wipe with microfiber, and use only mild cleaners meant for the material/coating. This method is generally safe for most visors, but you should skip guesswork if your visor has special coatings (anti-fog, anti-scratch) and the manufacturer instructions are unclear—follow the manual instead.
There’s also a practical downside: this routine can take longer than “spray and wipe,” especially on bug-heavy surfaces or when the visor has been neglected for a while. If you’re in a hurry, resist the temptation to compensate with pressure or tougher chemicals—those shortcuts usually trade minutes now for replacement later.
Who should be extra cautious?
– Anyone cleaning older visors with unknown coatings
– People using occupational face shields with proprietary anti-fog layers
– Anyone who sees persistent hazing that doesn’t improve after gentle re-cleaning (stop and verify the care guidance)
And a small reminder: if you suspect coating damage, you’ll often notice it as haze that returns quickly or a change in how water behaves on the surface. At that point, further cleaning attempts can do more harm than good.
Quick checklist (scan/save)
– Rinse off dust/loose grit first
– Use microfiber only (no paper towels)
– Clean with mild soap/cleaner + gentle passes
– Soften stubborn residue before wiping
– Dry with a clean microfiber, inspect for streaks
Frequently Asked Questions
How do I clean a visor without scratching it?
Rinse the visor with lukewarm water to remove dust and grit first, since particles are the main cause of scratches. Use a microfiber cloth or a soft visor brush with a gentle, non-abrasive cleaner (like mild dish soap diluted in water). Wipe in straight lines, avoid paper towels, and never use scouring pads or window cleaners with strong solvents unless the manufacturer says they’re safe.
What’s the best way to remove bug splatter and grime from a windshield or helmet visor?
Let water or a warm, damp cloth sit on the bug marks for a few minutes to soften residue before wiping. For helmet visors, use a visor-safe cleaner and gently work the spots with a microfiber cloth; for windshields, a bug remover formulated for automotive glass can help if compatible with coatings. Avoid scraping with blades or rough tools, and repeat gentle cleaning rather than applying excessive pressure.
Which cleaners are safe for tinted or anti-fog visor coatings?
Check the visor’s manual for approved products, because many anti-scratch and anti-fog coatings can be damaged by ammonia, alcohol, or abrasive chemicals. In most cases, a mild soap-and-water solution and a microfiber cloth are the safest option for cleaning a tinted visor. If you need a disinfectant, choose a visor-safe, coating-friendly option and test it on a small, hidden area first.
Why does my visor look hazy after cleaning, and how can I fix it?
Haze often comes from using the wrong cleaner, rubbing debris into the surface, or wiping when the visor is dry. Start by washing again with lukewarm water and a mild cleanser, then dry with a clean microfiber cloth using light pressure. If the haze persists, you may need a visor-specific polish or a manufacturer-approved restoration product—avoid household polishes that can thin coatings.
How should I clean an anti-fog visor so it stays effective?
Clean your anti-fog visor regularly with mild soap and water, and avoid harsh chemicals that can strip the anti-fog layer. After washing, rinse thoroughly to remove any soap film, then air-dry or dry gently with a clean microfiber to prevent residue buildup. Don’t use abrasive wipes, and store the visor properly when not in use to reduce oil and grime accumulation that can interfere with performance.
📅 Last Updated: November 09, 2026 | Topic: how to clean a visor | Content verified for accuracy and freshness.
References
- Face shield
- 1910.133 – Eye and face protection. | Occupational Safety and Health Administration
- https://www.cdc.gov/coronavirus/2019-ncov/hcp/ppe-strategy/index.html
- https://www.cdc.gov/coronavirus/2019-ncov/community/disinfecting-building-facility.html
- https://www.who.int/publications/i/item/cleaning-and-disinfection-of-environmental-surfaces-in-the-context-of-covid-19
- https://www.cdc.gov/infectioncontrol/guidelines/disinfection/index.html
- https://pubmed.ncbi.nlm.nih.gov/?term=face+shield+decontamination+disinfection
- https://scholar.google.com/scholar?q=how+to+clean+face+shield+disinfection Google Scholar
- https://scholar.google.com/scholar?q=face+shield+decontamination+reuse+study Google Scholar
- https://scholar.google.com/scholar?q=helmet+visor+cleaning+anti-fog+coating Google Scholar

[…] Yes—when used correctly, it can dissolve buildup and help the unit heat more efficiently without harsh chemicals. You can usually complete the vinegar flush in about an hour, and you will need only white vinegar, […]