

To clean a wooden shoe rack without leaving sticky residue, use a gentle vinegar-and-water wipe followed by a quick dry and light conditioning—this is the safest approach for real wood finishes. If you’ve been fighting tacky buildup from cleaner residue or shoe scuffs, this method removes grime while keeping the surface smooth, not tacky. Expect a clean rack that looks fresh without hazy streaks or gummy spots.
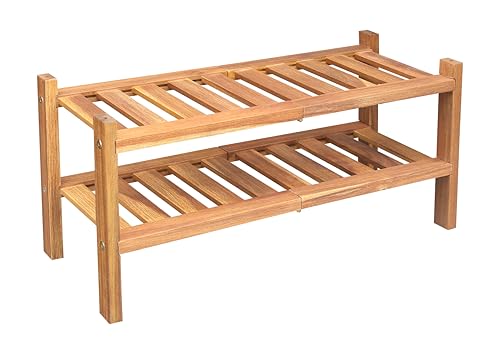


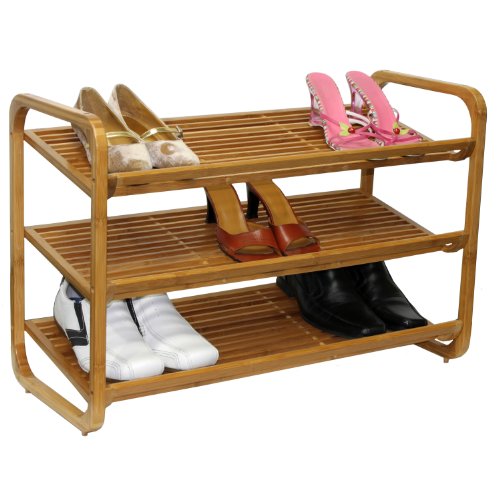
If your wooden shoe rack feels tacky after cleaning, the fix is simple: use a lightly soapy, barely-damp microfiber wipe (then dry), and avoid leaving any cleaner behind. For true “sticky spots,” you’ll likely need to remove the old wax/polish residue carefully—only on the affected area—using a finish-safe approach. This guide walks you through both the everyday clean and the sticky-spot rescue without making the problem worse.
This works best for most sealed or varnished wooden shoe racks (common in entryways and closets). If your rack is unfinished/raw wood, or you’re not sure what finish it has, do a small hidden-area test first because solvents and too much moisture can change the surface.
Prep first: figure out the finish and gather gentle cleaners

You can prevent sticky residue before you start by identifying the shoe rack’s finish and sticking to “mild + minimal” cleaning steps. The fastest path to a clean wooden shoe rack is usually warm-water wipe + thorough drying—before any solvent ever touches the wood.
Before you clean a wooden shoe rack, check whether the wood looks sealed/shiny (varnish, polyurethane, lacquer) or unfinished/matte. As a baseline, sealed surfaces tolerate light wiping; raw surfaces absorb more moisture and are more likely to grab onto oils/waxes.
A finished/varnished wooden shoe rack is typically less moisture-sensitive than raw wood, which reduces the risk of tackiness returning from trapped moisture.
Wood movement increases as moisture changes; manufacturers and wood references commonly warn that extra water can cause edge swelling or uneven surface behavior.
The safest first approach for a tacky wooden shoe rack is to remove residue with a barely-damp microfiber wipe and then fully dry, rather than adding more cleaner.
Identify what you’re actually cleaning (sealed vs unfinished)
– Look for a sheen: polyurethane/varnish reads “glossy” or “uniformly smooth,” while unfinished wood often looks “dry” or “chalky” in pores.
– Check the seams, grooves, and carved feet: tackiness often lives there because it traps cleaner film and old wax/polish.
– If the rack has previously been polished, assume there’s wax/polish residue until proven otherwise.
Use only the minimum chemistry that won’t leave a film
For a wooden shoe rack, “gentle” means the combination of mild chemistry and low liquid volume:
– Microfiber cloths (lint-free and non-scratching)
– A bowl
– Warm water
– A small amount of mild dish soap
If you suspect sticky residue from old polish, plan for a finish-safe spot method—but only after testing. In wood-finishing terms, you’re working around the surface film: if you dissolve it unevenly, you can create dull halos.
Quick factual grounding: why moisture and buildup matter
According to the USDA Forest Service “Wood Handbook” (2010), wood’s fiber saturation point is around 30% moisture content, meaning moisture behavior changes dramatically as wood moves away from dry equilibrium. That’s why a wooden shoe rack can look fine at first and then feel tacky later—especially in grooves where moisture + residue get trapped.
According to ASTM D4442-21, wood moisture content is calculated from the difference between wet and oven-dry mass, reinforcing that “how wet it gets” is not a cosmetic detail—it affects the material itself.
The residue-free way to do a full clean
For most sealed wooden shoe racks, the residue-free method is dry-dust first, then do a barely-damp mild-soap wipe, followed by a plain-water rinse wipe and immediate drying. This sequence removes surface grime without leaving a soap or cleaner film behind.
The goal for your wooden shoe rack is to clean without re-depositing anything. Sticky residue is commonly a thin leftover layer—soap film, polymer residue, or softened wax/polish—often reactivated when you leave the surface slightly damp.
A “barely-damp” wipe reduces the chance that cleaner pools in grooves and dries into a tacky film on a wooden shoe rack.
Rinsing after a soap wash matters because residual surfactants can dry into a slightly sticky layer on horizontal surfaces and ledges.
Dry microfiber drying immediately after the final wipe helps prevent moisture from lingering in seams, carved feet, and join lines.
Step 1: Dry-dust (don’t smear grit)
– Dry wipe or gently vacuum first so you’re not dragging grit into any tacky areas.
– Use light pressure; smearing grit is a fast way to create “polished dirt” that later looks sticky.
Step 2: Clean with a barely-damp microfiber wipe
– Mix warm water + a tiny amount of mild dish soap.
– Wipe in the direction of the grain (for most wooden shoe racks, this also keeps the surface looking uniform).
– Use the smallest amount of liquid that still lets you lift grime.
Step 3: Remove soap fully (the step most people skip)
– Do a second pass with a cloth dampened with plain water—no soap added.
– Immediately dry thoroughly with a clean towel.
Mandatory data table (use-case framing: solvent strength & volatility risk)
If your wooden shoe rack has sticky spots that don’t respond to soap wipe-and-rinse, you’ll eventually consider solvent spot cleaning. The table below provides objective volatility risk via flash point, which is one reason stronger solvents should be handled cautiously and only in small areas.
Flash Points of Common Solvents Used for Spot Cleaning (Reference Values)
| # | Solvent / Cleaner Type | Common Use Case | Solvent Strength | Typical Flash Point (°C) |
|---|---|---|---|---|
| 1 | Mineral spirits (Stoddard solvent) | Light wax/polish thinning & spot residue testing | ★★★☆☆ | 38 |
| 2 | Turpentine | Old wax/polish and adhesive residue testing | ★★★☆☆ | 35 |
| 3 | Isopropyl alcohol (2-propanol) | Grease film removal & residue spot tests | ★★★★☆ | 11.7 |
| 4 | Ethanol / denatured alcohol | Light polish film testing (finish-dependent) | ★★★★☆ | 13 |
| 5 | Methyl ethyl ketone (MEK) | Strong film dissolution (high risk for finishes) | ★★★★★ | -9 |
| 6 | Acetone | Fast dissolution of many finishes/polishes | ★★★★★ | -20 |
| 7 | Solvent “degreaser” blends (general) | Unknown mixtures; residue tests only | ★★☆☆☆ | Varies |
Note: “Varies” reflects the reality that degreaser blends differ by manufacturer. For any wooden shoe rack, always test the exact product you plan to use in a hidden spot first.
Fix sticky spots without damaging the wood finish
If your wooden shoe rack has true sticky patches, the safe fix is to start with the least aggressive cleaning step on just the affected area, then escalate only if needed. Most stickiness that survives soap-and-rinse is wax/polish residue or trapped cleaner film in micro-grooves.
This matters because a wooden shoe rack finish is typically a surface film. Over-treating can create a dull, blotchy surface where you removed (or softened) the top layer unevenly.
Sticky patches are often wax/polish film that softened during cleaning, so repeating a mild soap wipe can remove fresh residue without disturbing the finish.
Finish-safe solvent spot cleaning should be applied to a cloth, not directly to a wooden shoe rack, to avoid over-wetting edges and joints.
Stopping when the surface dulls or turns blotchy is a key decision point; continuing typically causes the “halo” effect.
Step 1: Retry mild soap on the exact sticky area
– Repeat the mild soap wipe on the sticky spot only.
– Follow with a plain-water wipe for that same area.
– Dry immediately with a clean towel.
Step 2: Treat wax/polish residue with a finish-appropriate spot method
– If it’s tacky from wax/polish, remove residue only on the spot.
– Apply solvent to a cloth (finish-dependent amount), then gently work the area.
– Test in a hidden area first. Stop if the surface dulls or becomes blotchy.
Step 3: Use “less, not more” to prevent tide-marks
– Apply to the cloth, not directly onto the wooden shoe rack.
– Work small sections so moisture and dissolved residue don’t spread.
– Use fresh cloth sections as you lift residue.
Comparison (soap wipe vs solvent spot-clean)
This table helps you choose the lowest-risk approach for your wooden shoe rack’s finish.
| Feature | Mild-soap wipe + rinse | Finish-safe solvent spot clean |
|---|---|---|
| Primary target | Soap film, general grime, light residue | Old wax/polish buildup |
| Best for sealed wood | Yes (typically) | Yes, but only with testing |
| Best for unfinished/raw wood | Generally safer | Usually higher risk |
| Risk of finish halo | Low | Moderate to high |
| Speed of visible improvement | Often quick for soap film | Often quick for wax/polish |
| Moisture exposure | Low if “barely-damp” + fast drying | Low in theory, but overuse can still harm finish |
| Need for hidden-area test | Helpful but usually unnecessary | Critical |
| Work size | Whole rack is fine | Only the affected area |
| Cleanup after treatment | Rinse wipe + dry towel | Dry thoroughly; avoid re-wetting the spot |
| Bottom-line tradeoff | Lower risk, may not remove old wax | Higher power, higher finish risk |
| Best For | Tacky feeling caused by soap film or cleaner residue after routine cleaning | Sticky patches that persist and match wax/polish buildup behavior |
Drying and preventing future tackiness
If your wooden shoe rack stays tacky, it’s usually because moisture or cleaner is trapped in seams and grooves. The best prevention is immediate drying after every wipe and avoiding excess product.
Sticky residue that “comes back” is commonly reactivated by trapped humidity and repeated surface treatments. With wooden shoe racks, feet, carved supports, and horizontal ledges are especially prone.
Tackiness often returns when a cleaner layer is left in crevices; fast drying reduces trapped film that can feel sticky later.
Over-applying wood “shine” products can leave a remaining film that feels tacky even after wiping—especially in textured areas.
Air-drying fully before placing shoes back helps prevent humidity buildup that can re-soften residues on a wooden shoe rack.
Dry right away—especially in grooves
– After rinsing or spot treatment, dry immediately with a clean towel.
– For deeper carved feet or slotted bases, give extra dry time before returning shoes.
Don’t over-polish
If you’re using any wood “shine” product, follow the label exactly—and wipe off excess. Many people apply too much, then the extra product becomes a tacky base for dirt.
Let the rack fully air-dry
– Let it dry completely before shoes go back.
– Even a small amount of trapped moisture plus residual film can reintroduce tackiness.
What can go wrong (and how to avoid it)
Most tackiness problems come from over-wetting, skipping the rinse, or using the wrong chemistry for the wooden shoe rack’s finish. If you avoid those three, you’ll prevent most “sticky after cleaning” outcomes.
Here’s a practical risk map for your wooden shoe rack: the finish is usually stable within its design limits, but it fails when you change moisture too much or dissolve/re-deposit top-layer material.
Soaking a wooden shoe rack can swell wood edges and pull residue into joints and seams, which later reappears as tackiness.
Skipping the plain-water rinse can leave surfactants behind; soap film can dry into a sticky layer on ledges and rails.
Abrasive scrubbing can roughen the finish, making grime stick more permanently in future cleanings.
Common mistakes
– Soaking the rack: too much water can swell wood edges and draw residue into pores/joints.
– Using the wrong cleaner: strong degreasers, some all-purpose cleaners, and heavy oils can leave film.
– Skipping the rinse: soap left behind can dry into tacky residue.
– Scrubbing aggressively: abrasive pads can roughen the finish and worsen adhesion of future grime.
– Not testing solvents: even finish-compatible solvents can dull or blotch delicate finishes—test first.
Safe decision point: when to stop
If the wooden shoe rack surface starts to dull, discolor, or look uneven during spot treatment, stop. Continuing often enlarges the affected area. Then the next step is usually “less intervention” rather than more chemistry.
Verdict / tip + quick checklist
If you want the lowest-risk path for a wooden shoe rack, do the mild-soap wipe + plain-water wipe + full drying every time. Only move to solvent-based spot cleaning if you’re confident the stickiness is old wax/polish film and you’ve tested in a hidden area first.
That said, there’s a downside: solvent spot cleaning can still alter sheen or color even when you’re careful. You should skip solvent approaches if the rack is clearly unsealed/unvarnished or if you can’t safely perform a spot test.
VS (decision clarity) table: what to do when it’s tacky
| Criteria | Mild soap wipe + rinse | Solvent spot clean |
|---|---|---|
| Finish safety | High | Lower (test required) |
| Effectiveness on wax/polish | Sometimes insufficient | Often effective |
| Moisture risk | Low if barely-damp | Low if applied to cloth only |
| Halo/uneven sheen risk | Very low | Moderate to high |
| Control over affected area | Whole-rack clean is controlled | Spot-only control is possible |
| Ease of execution | High (simple steps) | Medium (testing + ventilation) |
| Best timing | First attempt after cleaning | After mild cleaning fails |
| Risk of reactivating residue | Lower with correct rinse/dry | Lower if you stop when residue lifts |
| When to avoid | If rack is very rough/unfinished and needs manufacturer guidance | If finish is unknown and you can’t test |
| Result stability | Stable for routine grime | Depends on finish—can change sheen |
| Verdict | Choose this first for most sealed wooden shoe racks | Use only as a tested spot treatment for stubborn wax/polish film |
If you want the lowest risk path, do the mild-soap wipe + plain-water wipe + full drying every time. Only move to solvent-based spot cleaning if you’re confident the stickiness is old wax/polish film (and after a hidden-area test). Avoid this approach if your rack is clearly unsealed/unvarnished and you can’t test safely—then you may need a gentler “finish-free” method or manufacturer-specific guidance.
Quick scan checklist (save this):
| Step | Do | Avoid |
|---|---|---|
| Dust | Dry wipe first | Scrubbing grime into the finish |
| Clean | Mild dish soap + barely-damp cloth | Over-wetting or heavy cleaner |
| Rinse | Plain-water wipe to remove soap | Skipping the rinse step |
| Dry | Dry immediately with a clean towel | Letting moisture sit in grooves |
| Sticky spots | Small-area treatment + test | Applying solvent directly to wood |
Frequently Asked Questions
How do I clean a wooden shoe rack without leaving sticky residue?
Start by dusting the rack thoroughly with a dry microfiber cloth to remove grit that can smear when wet. Use a slightly damp cloth with a mild wood-safe cleaner (or a solution of warm water and a few drops of gentle dish soap), then wipe immediately with a clean, damp cloth to remove any soap film. Finish by drying with a towel and letting it air-dry fully; this prevents sticky buildup from cleaner residue that can happen with excess product or over-wetting.
What’s the best way to remove sticky spots from a sealed wooden shoe rack?
For sticky residue, lightly dampen a microfiber cloth with a wood-safe cleaner and gently rub the affected area in small sections. If the stickiness persists, use a 1:1 mix of water and white vinegar on the cloth (not directly on the wood) and wipe again with a damp cloth to rinse. Always dry thoroughly afterward, since moisture left in the grain can damage the finish and make future residue harder to remove.
Why does my wooden shoe rack feel tacky after cleaning?
Tacky feel is usually caused by leftover soap, cleaning sprays, or polish that wasn’t fully wiped off, or by using too much cleaner. It can also happen when you use harsh degreasers or alcohol-based products on certain wood finishes that become dull and tacky. To avoid this, use minimal product, wipe with a damp cloth to “rinse,” and dry completely to stop residue from clinging.
Which cleaner should I use for a wooden shoe rack finish—soap, vinegar, or something else?
The safest approach is a mild, wood-safe cleaner designed for finished wood, used sparingly with a soft cloth. Vinegar works well for light stickiness on sealed wood when diluted, but it’s not ideal for unfinished or heavily distressed wood finishes. Avoid all-purpose sprays, degreasers, and furniture polishes unless you know they’re compatible with your rack’s specific sealant, because they’re common sources of sticky residue.
How do I deep-clean a wooden shoe rack while preventing sticky buildup?
Remove shoes, then vacuum or dry-brush the rack to lift dust from corners and slats. Clean with a minimal amount of wood-safe cleaner on a damp microfiber cloth, working section-by-section, and follow immediately with a separate cloth lightly dampened with plain water to remove any remaining residue. Finally, dry with a towel and leave the rack in a well-ventilated area until fully dry before reloading—this keeps your wooden shoe rack clean, fresh, and non-sticky.
📅 Last Updated: October 26, 2026 | Topic: How to Clean a Wooden Shoe Rack Without Leaving a Sticky Residue | Content verified for accuracy and freshness.
References
- https://www.cdc.gov/coronavirus/2019-ncov/community/disinfecting-building-facility.html
- https://www.who.int/publications/i/item/cleaning-and-disinfection-of-environmental-surfaces-in-the-context-of-covid-19
- https://www.epa.gov/coronavirus/using-disinfectants-covid-19
- Wood finishing
- Wood finishing
- Cleaning
- Detergent
- https://scholar.google.com/scholar?q=cleaning+finished+wood+without+residue Google Scholar
- https://scholar.google.com/scholar?q=remove+sticky+residue+from+wood+surface+cleaning Google Scholar
- https://scholar.google.com/scholar?q=wood+furniture+cleaning+proper+detergent+rinsing+residue Google Scholar
