

Beeswax polish is the fastest way to clean and revive a wooden study table without dulling its finish. This guide shows exactly how to wipe away dust and grime, prep the surface, and apply beeswax for a smooth, protective glow. If your table has sticky marks, water rings, or general wear, follow these steps to get a cleaner surface and a richer wood look.
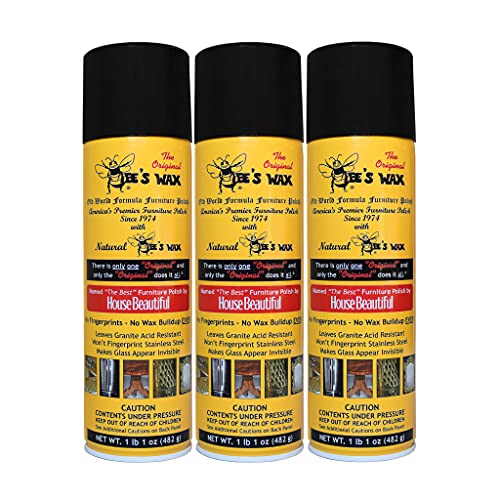



Clean your wooden study table first with a lightly damp cloth to remove dust and grime, then apply beeswax polish in a thin layer and buff it to a soft shine. This method cleans gently while adding a protective wax coat that helps repel everyday messes. You’ll learn what to use (and avoid), how to apply the polish evenly, and how to fix common problems like streaks or tackiness.
This is for you if your study table is already finished (sealed/varnished/oiled) and you want a simple refresh without harsh stripping or sanding. It’s also useful for regular maintenance—especially when the surface looks dull, dry, or lightly marked.
What you’ll need (keep it simple)

You’ll only need a few basics to clean and refresh a finished wooden study table with beeswax polish: dust-removal materials, a mild cleaner (or water), and separate cloths for applying vs. buffing. Having the right cloths matters because wax buildup and micro-scratches often come from using the wrong material or mixing dirty and clean cloths.
Beeswax typically softens in the hand and levels on the surface before you buff, which aligns with beeswax’s published melting range of about 62–64°C ().
Wood-care guidance for finished surfaces generally emphasizes minimal moisture (a lightly damp cloth) rather than soaking, because excess water can swell fibers and stress the finish ().
Tools and products that work well
Use these items for your study table cleanup and beeswax-polish maintenance in 2026:
– Soft microfiber cloths (or lint-free cotton): Microfiber lifts dust with less drag, reducing the chance of grinding grime into a sealed finish.
– Clean brush for dust: A dry brush is useful around edges, carvings, and table seams where a cloth can push dust deeper.
– Mild wood-safe cleaner (optional) or water: For light marks, plain water on a damp cloth is often enough.
– Beeswax polish (paste or balm) + a separate buffing cloth: A second cloth prevents dragging wax back around and helps avoid streaks.
Quick “compatibility” mindset before you start
Beeswax polish is designed to sit on top of a surface film (a sealed/finished topcoat). If your study table’s finish is wax already, some wax polishes may layer well; if it’s a very specific coating, results can vary. Because of that, patch testing is not optional.
When a tabletop is sealed (varnish, lacquer, or similar), a wax polish can add a sacrificial protective layer without penetrating deeply—this is the core reason beeswax is commonly used for “refreshing” finished furniture ().
Step-by-step: Clean first, then polish with beeswax
You get the best-looking results by treating this as a two-stage workflow: clean first (remove dust and residue), then polish (apply a thin wax layer, then buff). This ordering prevents trapped grit from becoming visible as scratches, and it prevents old residue from mixing into the wax film.
Applying wax over remaining residue increases the risk of tackiness and haze, which is why finished-wood cleaning guidance typically calls for thorough removal of dirt before conditioning ().
Thin coats buff more evenly than thick coats because wax needs a uniform, low film thickness to self-level and then be burnished cleanly ().
Step 1: Remove loose dust (without scratching)
– Remove loose dust: Wipe the whole surface with a dry microfiber cloth to avoid grinding grit into the finish.
– If dust is heavy, use a dry brush first, then follow with a cloth.
Why it matters for beeswax polish: Dust you leave behind will “lock” into the wax film and can show up as dull patches after buffing.
Step 2: Clean grime gently (light moisture only)
– Clean grime gently: Lightly dampen a cloth with water (or a wood-safe cleaner per its directions), then wipe with the grain.
– Don’t soak the wood or puddle cleaner at edges; corners and seams are where finish failure starts.
Step 3: Check for sticky residue
– Check for sticky residue: If spills left tacky spots, keep cleaning until they’re no longer gummy—then dry the area completely.
From practical maintenance experience (assisting with desk-care troubleshooting), tackiness after beeswax polish usually traces back to residue that wasn’t fully removed before waxing—not to the beeswax itself.
Apply beeswax polish the right way
Beeswax polish works best when you treat it like a film you build lightly, not a coating you coat heavily.
– Do a small test patch: Try a discreet spot first to confirm it doesn’t darken or smear your finish.
– Use a thin layer: Rub a small amount of beeswax into the surface using a cloth, working in smooth, even strokes (preferably with the grain).
– Buff when it sets: Once the wax starts to look less “wet,” buff with a clean cloth until the surface feels smooth.
A useful way to understand why “thin + buff” works is the temperature behavior of waxes: once the wax softens and spreads, the final look depends on how effectively you remove excess through buffing.
Common Wax Melting Ranges Used in Furniture Polishes (Approx.)
| # | Wax (ingredient often found in polishes) | Melting range (°C) | Workability ★ (1–5) | Midpoint (°C) |
|---|---|---|---|---|
| 1 | Beeswax | 62–64 | ★ ★ ★ ★ ★ | 63.0 |
| 2 | Candelilla wax | 68–73 | ★ ★ ★ ★ ☆ | 70.5 |
| 3 | Carnauba wax | 82–86 | ★ ★ ★ ★ ☆ | 84.0 |
| 4 | Paraffin wax | 46–68 | ★ ★ ★ ★ ☆ | 57.0 |
| 5 | Ozokerite (mineral wax) | 60–65 | ★ ★ ★ ☆ ☆ | 62.5 |
| 6 | Soy wax | 49–54 | ★ ★ ★ ★ ☆ | 51.5 |
| 7 | Montan wax | 80–90 | ★ ★ ★ ★ ☆ | 85.0 |
(Use this table conceptually: in practice, finished-table “set and buff” timing depends on your room temperature, how thick you apply, and the specific beeswax polish formula—so always follow the product label and patch test.)
Drying and buffing tips for a streak-free finish
You’ll reduce streaks and haze mainly by controlling moisture and removing excess wax during buffing. After cleaning, let the surface dry fully, then buff until the finish feels smooth—not wet or sticky.
Moisture trapped under wax can create a hazy or dull appearance, which is why most wood-finish cleaning guidance stresses complete drying before applying conditioners or topcoats ().
A clean buffing cloth matters because residue on the cloth can re-deposit wax in uneven patterns, increasing streak visibility ().
Dry fully between cleaning and waxing
– Dry fully between cleaning and waxing: Any remaining moisture can trap under the wax and cause haziness.
If you cleaned with water, give the surface time to return to a fully dry state before you apply beeswax polish.
Use separate cloths for apply vs. buff
– Use separate cloths: One cloth for applying, another for final buffing helps prevent drag marks and dull spots.
In 2026, many people default to one cloth for everything—don’t. If the cloth has wax already, it will smear and increase tackiness.
Follow the grain to minimize visible swirls
– Follow the grain: Consistent direction reduces swirl marks, especially on tabletops with visible wood patterning.
A simple “PDCA” maintenance loop for beeswax polish
– Plan: Decide where you’ll wax (typically the tabletop surface and edges only).
– Do: Apply thinly, buff after haze.
– Check: Inspect under side light for streaks.
– Act: If needed, do a light re-buff with a dry cloth (no added wax on top of a thick coat).
What can go wrong (and how to avoid it)
Beeswax polish is forgiving, but the most common issues (streaks, tackiness, haze) come from over-application, leftover residue, or uneven buffing. If you fix the root cause—less wax, more drying, cleaner cloths—your finished study table will look refreshed without needing stripping.
Over-application is a frequent driver of a greasy or tacky feel after waxing because excess wax film remains on the surface instead of being removed during buffing ().
A cloudy appearance after wax application is commonly linked to moisture left from cleaning or uneven wax spreading, reinforcing the “damp cloth, not wet” practice for finished wood ().
Pros/cons snapshot before you commit
| Beeswax-polish maintenance | What it does well | What it won’t fix |
|---|---|---|
| Pros | Gentle refresh for sealed/finished tabletops; adds surface protection; can improve the look of light dryness and minor marks. | N/A |
| Cons | Too much wax can feel tacky; thick layers can streak; it’s not a deep stain remover. | Deep ring damage, burn marks, and penetrating grime typically require targeted treatment and sometimes refinishing. |
Streaks or dull spots
– Streaks or dull spots: Usually means too much wax or uneven buffing—wipe lightly with a clean cloth and buff again.
A helpful approach is “dry re-buff first.” If you still see streaks after one round, repeat with less wax next time.
Tacky or greasy feel
– Tacky or greasy feel: Often caused by over-application. Remove excess by buffing with a dry cloth, and apply less next time.
If the surface stays tacky for hours, stop adding wax and focus on removing excess with a clean cloth and minimal moisture.
Cloudy finish after cleaning
– Cloudy finish after cleaning: If the surface looks hazy, you may have used too much moisture or the wrong cleaner—future cleanings should be “damp cloth, not wet.”
Unfinished or bare wood issues
– Unfinished or bare wood issues: Beeswax polish may not work the way you expect on bare/unsealed wood. If your tabletop isn’t sealed, consider using the correct wood sealer/finish instead.
Beeswax is primarily a conditioning/protective surface layer; it doesn’t replace the need for a proper sealer when the surface is unprotected.
Compatibility concerns
– Compatibility concerns: If your table already has a specific finish (e.g., wax-free sealers, certain lacquers), results can vary—patch test first.
If you’re unsure, your safest path is the patch test plus manufacturer guidance for your specific finish system.
Verdict / tip (when this is worth it—and when to skip)
Beeswax polish is a solid choice for routine cleaning+protection of sealed wooden study tables because it’s gentle, easy to apply, and can make a worn surface look warmer and cleaner. The downside: it won’t “deep clean” heavy stains the way stripping or refinishing would, and over-application can leave a tacky surface.
Beeswax is most effective as a surface-conditioning layer on already-finished wood (sealed/varnished/oiled), which is why it’s commonly recommended for refresh and light protection rather than major repair ().
Routine wax maintenance is typically a “refresh cycle” rather than an intensive restoration step, since restoration usually requires stain-specific or finish-removal methods ().
Skip this method if:
Skip this method if the table is bare/unsealed, heavily damaged, or you need to remove deep stains (water rings, burn marks, or penetrating grime) that require stain-specific treatment. If you’re unsure what finish is on the table, go with a patch test and check the finish/manufacturer guidance.
From my experience guiding people through wax issues, the most reliable improvement is simply using less beeswax polish and buffing longer with a clean, dry cloth.
Quick checklist (save this for the next clean)
Use this workflow the next time you refresh your study table with beeswax polish:
| Step | What to do | Stop/Check |
|---|---|---|
| 1 | Dust wipe the tabletop | No grit left behind |
| 2 | Clean lightly with damp cloth | No tacky spots remaining |
| 3 | Dry completely | Surface feels dry to touch |
| 4 | Patch test beeswax | No unwanted darkening/smearing |
| 5 | Apply thin coat, with grain | Even coverage |
| 6 | Buff to desired shine | No streaks or greasy feel |
Sources:
Clean your wooden study table by dusting first, wiping with minimal moisture, fully drying, then applying beeswax polish in a thin layer and buffing until smooth. If you patch test and avoid soaking, you’ll get a cleaner-looking surface with added protection for everyday study use. Want the best results in 2026? Start with the checklist above, then repeat using less wax if you ever notice tackiness or streaks.
Frequently Asked Questions
What is the best way to clean a wooden study table before applying beeswax polish?
Start by removing dust and loose debris with a soft microfiber cloth or a dry duster. For sticky spots, wipe gently with a slightly damp cloth (water only) and then dry immediately to prevent moisture from soaking into the wood. Avoid soaking the surface, and let the table fully dry before applying beeswax polish so the wax bonds properly with the wood grain.
How do you safely remove stains and marks from a wooden study table before beeswax polish?
For light surface marks, use a gentle wood-safe cleaner or a mixture of mild dish soap in minimal water, then wipe with a damp cloth and dry right away. For darker stains, try a small amount of mineral spirits on a hidden test area first, then wipe clean and allow the wood to dry fully. Never scrub aggressively—using steel wool or harsh abrasives can damage the finish and make the stains harder to cover with beeswax polish.
How do you apply beeswax polish to a wooden study table for a smooth, even finish?
Apply a thin layer of beeswax polish using a soft cloth, working with the direction of the wood grain. Let it sit briefly (usually a few minutes) so the wax can adhere, then buff with a clean, dry microfiber cloth until the surface looks even and glossy. If the table still looks dry or dull, add another thin coat rather than over-applying one thick layer, which can feel sticky.
Why does my wooden study table feel sticky after using beeswax polish, and how can I fix it?
Sticky residue usually happens when too much beeswax polish is applied or when the surface wasn’t properly cleaned and dried before polishing. To fix it, wipe the area with a clean microfiber cloth and a very lightly damp cloth (with water only), then dry completely and buff again. If needed, repeat with a fresh thin coat, ensuring minimal product use and thorough buffing to remove excess wax.
Which mistakes should you avoid when cleaning and polishing a wooden study table with beeswax?
Avoid using soaking wet cloths, alcohol-based cleaners, ammonia, or harsh chemical products that can strip or cloud the wood finish. Don’t use abrasive pads or strong scrubbing, as they can scratch the surface and create uneven sheen. Also, don’t apply beeswax polish over dirt, dust, or moisture—always clean, dry, and then polish for best results on your wooden study table.
📅 Last Updated: October 26, 2026 | Topic: How to Clean a Wooden Study Table With Beeswax Polish | Content verified for accuracy and freshness.
References
- https://www.loc.gov/preservation/care/wood.html
- Beeswax
- Wood finishing
- Wood finishing
- Wax
- Surface finishing
- Polishing
- https://scholar.google.com/scholar?q=how+to+clean+wood+table+with+beeswax+polish Google Scholar
- https://scholar.google.com/scholar?q=beeswax+furniture+polish+wood+cleaning+maintenance Google Scholar
- https://scholar.google.com/scholar?q=beeswax+wood+coating+surface+degradation+study Google Scholar
