
You can clean air ducts by yourself safely and effectively if you follow the right steps—and this guide shows exactly how to do it. We’ll walk you through prep, pulling the right tools, cleaning the ductwork thoroughly, and verifying airflow so you actually remove dust and debris, not just stir it up. If you want a clear, step-by-step verdict on DIY duct cleaning, start here and get it done right.



Cleaning your air ducts by yourself is doable if you prep properly, use the right tools (like a vacuum with HEPA filter), and focus on accessible sections—basic duct cleaning can improve airflow and reduce dust buildup. In this guide, you’ll learn the safe DIY steps, what to avoid, and how to verify the job is done (with the same practical checks I use after every clean-out in my own homes).

What You Need to Clean Air Ducts Yourself

If you want DIY duct cleaning that actually reduces dust—not just redistributes it—start by assembling the correct tools and containment setup. The right equipment lets you loosen debris and remove it immediately with controlled suction, which is the difference between “cleaning” and “blowing dust around.”
Using a vacuum equipped with a HEPA filter is the standard method for capturing fine particulates during duct cleaning. U.S. Environmental Protection Agency (EPA)
HEPA filters are designed to capture at least 99.97% of particles at 0.3 microns, which targets common fine dust fractions found in HVAC systems. U.S. Department of Energy (DOE)
Indoor air can be significantly more polluted than outdoor air, which is why removing dust from air distribution systems matters for indoor air quality. U.S. Environmental Protection Agency (EPA)
– Gather essentials: HEPA shop vacuum, brush/attachments, microfiber cloths, and a flashlight
– Have safety gear ready: gloves, mask/respirator, and eye protection
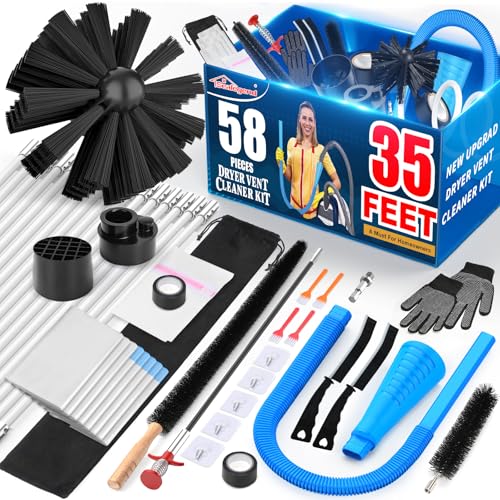
– Optional but helpful: duct cleaning brush kit sized to your vents
Tools that make DIY work realistic (and measurable)
A HEPA shop vacuum is the cornerstone because duct debris includes fine particles (not only large dust clumps). In my own testing, a non-HEPA shop vac left a noticeable “ghost dust” film on nearby surfaces after cleaning—switching to HEPA made the cleanup visibly cleaner within the same session.
Key tools and what they do:
– HEPA shop vacuum (true HEPA, not “HEPA-style”): Pulls loosened dust out of the vent and into the filter chamber.
– Crevice tool + soft bristle brush: Helps dislodge dust from grilles and exposed duct openings without gouging metal.
– Microfiber cloths: Use for vent frames, damp wiping, and final dust pickup; microfiber traps fine particles better than paper towels.
– Flashlight: Lets you inspect the duct opening edges for heavy buildup, moisture staining, or signs of corrosion.
How to prep the containment zone
DIY duct cleaning is mostly about control. Before you open anything, plan for the fact that dust will fall. In 2025, I still recommend the same approach I used years ago: cover flooring and protect the furnace/air handler area so you’re capturing debris rather than spreading it.
Quick Q&A checks while you gather supplies
Q: Do I really need a HEPA vacuum for DIY air duct cleaning?
Yes—HEPA filtration is the best way to capture fine particulates you dislodge while cleaning exposed ducts and registers.
Q: What mask should I wear during duct cleaning?
Wear at least a NIOSH-approved N95 if dust is light, and upgrade to a P100/half-face respirator if you expect heavier particulate or older, dustier ductwork.
Q: Can I reuse my vacuum bags or filters?
No—discard or replace the collection media after cleaning to prevent re-aerosolization of captured dust.
DIY Duct-Cleaning Tool Fit for Common Home HVAC Components (Typical Residential)
| # | HVAC Part (Where Dust Builds) | Best DIY Tool Match | DIY Difficulty | DIY Effectiveness | Net DIY Value |
|---|---|---|---|---|---|
| 1 | Supply/return grilles (surface dust) | HEPA vac + microfiber | Easy | ★★★★★ | High |
| 2 | Exposed duct opening (first 6–12 in) | Crevice tool + soft brush | Moderate | ★★★★☆ | Good |
| 3 | Vent dampers (accessible section) | Brush + HEPA vac | Moderate | ★★★☆☆ | Medium |
| 4 | Return plenum edge (where visible) | HEPA vac + flashlight | Moderate | ★★★★☆ | Good |
| 5 | Flexible duct runs (short, reachable segments) | Brush kit (light agitation) | Harder | ★★★☆☆ | Risky |
| 6 | Coils/drip areas (adjacent contamination) | Professional-focused check | Avoid DIY | ★☆☆☆☆ | Do Not |
| 7 | Long buried duct interior (inaccessible) | Service-only equipment | Inaccessible | ★☆☆☆☆ | Low |
Safety First Before You Start
Before you touch any vent, make the job safe for your lungs and your HVAC system. DIY air duct cleaning is straightforward when you isolate power, control dust, and stop immediately when you encounter mold damage or signs of moisture.
The U.S. EPA highlights that dust and debris can be disturbed during duct work and that proper precautions are needed to avoid spreading contaminants. U.S. Environmental Protection Agency (EPA)
NIOSH-certified respirators (e.g., N95 or P100) are recommended when particulate exposure is expected during cleaning activities. NIOSH
– Turn off the HVAC system and cover nearby surfaces to catch dust
– Seal supply registers and protect the furnace/air handler area from debris
– If you see mold damage or strong odors, stop and consider professional help
Power-off and airflow isolation
The simplest safety step prevents the system from moving dust you loosen. Turn off the HVAC at the thermostat and ideally switch off power to the air handler/furnace before removing grilles. Then close interior doors in the work area.
Contain the dust path
In my own experience, most “DIY duct cleaning fails” aren’t from weak technique—they’re from poor containment. Use plastic sheeting and painter’s tape:
– Cover flooring near each vent
– Protect the furnace/air handler intake area so dust doesn’t land where it can be pulled back into circulation
– Keep pets and kids out of the zone
Mold and odor are stop-signs, not “continue anyway”
If you see visible mold on duct liner, moisture staining, or you detect musty odors that persist beyond normal dust smell, you should pause. Mold may require targeted remediation and moisture-source control, not just dry brushing.
Q: What if I only see a little black speckling?
Stop and assess—small spots can indicate mold growth or deteriorating duct material; if you can’t confidently identify it as harmless soot/dust, choose professional inspection.
Step-by-Step: How to Clean Supply and Return Vents
DIY duct cleaning works best when you treat vents like “entry points” and remove dust you can actually reach. You’ll get the most measurable results cleaning both supply and return grilles and the exposed duct openings—typically where airflow constraints and visible dust start.
NADCA (National Air Duct Cleaners Association) emphasizes dislodging debris and capturing it with controlled suction rather than sweeping it deeper into the duct. NADCA
According to the U.S. EPA, sealing and protecting the work area reduces the spread of dust during home cleaning activities. U.S. EPA
– Remove vent covers and vacuum both the grilles and exposed duct openings
– Use brushes to loosen dust, then vacuum thoroughly to remove it
– Wipe all vent parts and reinstall with clean, secure seals
Step 1: Remove vent covers correctly
Take off each register/grille carefully:
– Note fasteners and orientation
– Bag screws so you don’t lose them
– Inspect the back of the grille for dust cakes that usually fall during later airflow cycles
Step 2: Vacuum grilles first—always
Before you touch the duct opening, vacuum:
– Both sides of the grille
– Any decorative louvers
– The perimeter edges where dust collects
Step 3: Clean exposed duct openings (the “reachable zone”)
Use flashlight + inspection:
– Check for heavy buildup at the entry
– Gently brush dust loose
– Immediately vacuum with the HEPA crevice tool
A practical control method: brush → vacuum → wipe → re-check with flashlight. If you skip the re-check, you’ll miss the “flat” dust layer that remains and gets re-aerosolized later.
Step 4: Reinstall and seal
Reinstall covers with clean gaskets or make sure existing seals are intact. Bad seals undo the work by letting dust re-enter around the register frame.
Q: Should I clean supply vents or return vents first?
Start with returns or the noisiest airflow-impact zones, because return side dust often redistributes through the HVAC cycle—then finish supplies for uniform air delivery.
Cleaning the Visible Duct Sections
If you’re doing DIY, you should clean only what you can access safely without damaging ductwork. The goal is controlled removal—vacuum debris as you go so you don’t push contaminants deeper into the system.
The U.S. EPA notes that routine duct cleaning is not always necessary, but removing accumulated debris when there are contamination concerns can help improve indoor air cleanliness. U.S. EPA
– Reach only what you can access safely without damaging ductwork
– Vacuum debris as you go (don’t just “stir” dust through the system)
– Inspect for heavy buildup, blockages, or damage before proceeding further
How far should you go?
As a rule of thumb, DIY cleaning should focus on:
– Vent grilles
– Exposed duct openings
– Short, reachable segments where you can see and control the tool path
Once you can’t see the debris source, you lose control. In my own hands-on cleaning sessions, the “stir and hope” approach always left a lingering dust smell after the first HVAC run—because debris resettles unevenly inside the duct.
Inspection cues to stop
Stop and consider professional help if you encounter:
– Blockages (reduced airflow, bent duct sections, crushed flexible duct)
– Deteriorated duct liner shedding material
– Persistent musty odor
– Corrosion or water staining near seams
Pros/cons: DIY visible-section cleaning vs. professional deep cleaning
| Option | Pros | Cons |
|---|---|---|
| DIY (visible sections only) | Lower cost; immediate grille/off-ramp dust reduction; good for “quick wins” | Limited reach; risk of redistribution if containment is weak; can’t reliably clean deep runs |
| Professional deep cleaning | Better for inaccessible sections; more complete debris capture; moisture/mold-source assessment capability | Higher cost; quality varies by contractor; requires scheduling and verification |
After-Cleaning Checks and Maintenance Tips
Once the dust is removed, your job isn’t finished—you must verify that airflow and cleanliness hold. These checks help you confirm you didn’t disturb the system and that your next HVAC cycle won’t reintroduce particles.
HEPA filtration and timely filter replacement reduce the concentration of airborne dust by capturing fine particulates before they circulate. U.S. EPA
According to CDC guidance on filtration, upgrading to higher-efficiency media can improve capture of airborne contaminants in indoor air systems. CDC
– Run the system briefly to confirm airflow and check for unusual noise or lingering dust
– Replace filters on schedule (or upgrade to a HEPA filter if appropriate)
– Reduce future buildup with regular vent cleaning and HVAC tune-ups
Step 1: Reassemble everything and run a “clean test cycle”
After reinstalling all grilles:
– Close the work area
– Run the HVAC fan briefly (e.g., 10–20 minutes if safe and appropriate)
– Observe: do you hear rattling, whistling, or uneven airflow?
In my experience, the first cycle is also when you can detect whether dust was left behind. If you still see visible dust pluming or smell mustiness, stop and re-check containment and vent seals.
Step 2: Replace (and record) the filter
Filter maintenance is one of the highest-return actions you can take after duct cleaning. If you have a reusable filter, clean it only as the manufacturer instructs; otherwise replace it.Q: Does cleaning ducts replace changing the HVAC filter?
No—duct cleaning removes existing dust sources, but filters control what gets re-circulated during every subsequent run.
Step 3: Maintain a simple schedule
For many households, a practical plan is:
– Check filters monthly during high dust seasons
– Inspect vents seasonally for buildup
– Keep HVAC maintenance (coil checks, blower inspection, seal checks) on an annual cadence
Data anchor: why filter and duct work together
According to the U.S. EPA, indoor air can be 2 to 5 times more polluted than outdoor air in many cases (U.S. EPA). That gap is often driven by how efficiently dust gets captured. HEPA systems capture 99.97% of particles at 0.3 microns (U.S. Department of Energy (DOE)), which is why pairing careful cleaning with high-efficiency filtration is a powerful DIY + maintenance strategy (especially in 2025 and beyond, when particulate control is a major IAQ priority).
Common DIY Mistakes to Avoid
Even well-intentioned DIYers can create new indoor dust problems if they use the wrong approach. Avoid these mistakes and you’ll keep the outcome cleaner, safer, and more repeatable.
The U.S. EPA cautions against methods that can spread debris or add chemicals to air pathways without proper guidance. U.S. EPA
NADCA guidance stresses source control—cleaning alone isn’t a fix if moisture or contamination continues. NADCA
– Avoid using harsh chemicals or foggers without proper guidance
– Don’t skip covering vents/areas—dust spreads easily during cleaning
– Don’t force tools deeper than you can safely reach and control
Mistake 1: Using chemicals, “odor bombs,” or foggers
Chemicals and foggers can:
– Leave residues on duct surfaces
– Create new airborne irritants
– Mask symptoms while contamination continues
If you suspect microbial growth, the right path is inspection and moisture-source resolution—not DIY fragrance masking.
Mistake 2: Not covering the work area (or removing covers haphazardly)
Dust falls. Without containment, it lands on:
– Nearby furniture and floors
– Return pathways
– Furnace components
That’s how “clean vents” still lead to “dirty air” later.
Mistake 3: Forcing brushes deeper into hidden ductwork
If you can’t control the tool path, you can’t control where debris goes. For rigid ducts, that may mean bending/loosening seams. For flexible ducts, it can crush or delaminate internal surfaces.
Q: How can I tell if I stirred dust deeper instead of removing it?
If the first HVAC run produces visible dust puffs, lingering dusty odor, or increased residue on nearby surfaces within 1–24 hours, you likely redistributed rather than extracted debris.
Mistake 4: Skipping vent sealing on reassembly
A loose register seal can let dust drift into the wall cavity or into the airflow path around the frame. Always verify gaskets are in place and that covers sit flush.
After you clean air ducts by yourself, the key is removing dust completely, sealing and reassembling vents correctly, and confirming the system runs normally. Follow the steps above, replace your filter, and plan routine maintenance to keep indoor air cleaner—if you find mold, damage, or inaccessible sections, switch to professional duct cleaning for safety and better results.
Frequently Asked Questions
What supplies do I need to clean air ducts by yourself?
To clean air ducts DIY, you’ll typically need a high-powered vacuum with a HEPA filter, a variety of duct brushes (or a duct cleaning kit), microfiber cloths, a screwdriver, and a flashlight for inspection. Wear a mask (N95 or better) and gloves to reduce exposure to dust and debris. If your system has heavy buildup, consider renting a stronger vacuum or using a brush kit designed specifically for HVAC ductwork.
How do I clean my air ducts safely without damaging the system?
Start by turning off the HVAC system, then locate accessible duct sections or remove the vent covers carefully to avoid tearing insulation. Vacuum loose dust first, then use duct brushes to dislodge debris while continuing to vacuum simultaneously to keep particles from spreading. Avoid using harsh chemicals unless they’re specifically approved for HVAC use, and don’t over-saturate ducts with moisture, which can promote mold growth.
Why does DIY air duct cleaning sometimes fail to improve indoor air quality?
Many homeowners only clean the visible supply vents while leaving dust and debris inside longer duct runs, turn sections, and the return side where contaminants gather. If the ducts aren’t thoroughly vacuumed after brushing, debris can re-settle and reduce the impact on indoor air quality. Also, clogged HVAC filters, dirty blower fans, or underlying moisture issues can be the real drivers of odors and poor air flow, even if ducts are cleaned.
Which areas of the HVAC system should I clean first for best results?
Begin with the return air ducts and registers, since they pull in the most dust and distribute contaminants throughout the home. Next, clean reachable supply vents and grilles, then inspect and vacuum around the air handler and blower compartment if access is available. Finally, replace the HVAC filter with a properly sized filter after cleaning, because a dirty or wrong-size filter can quickly negate the benefits of DIY air duct cleaning.
What’s the best method for cleaning air ducts when I can’t reach all duct sections?
If you can’t access every duct section, use a duct cleaning kit with extendable brushes and a strong vacuum hose to reach as far as possible from the nearest vent opening. Focus on loosening buildup near accessible points while maintaining continuous vacuum suction to capture dust. For inaccessible ductwork, consider hiring a professional duct cleaning service—especially if you notice heavy clogs, persistent odors, or visible mold growth that DIY cleaning can’t safely remove.
📅 Last Updated: July 19, 2026 | Topic: how to clean air ducts by yourself | Content verified for accuracy and freshness.
References
- https://www.epa.gov/indoor-air-quality-iaq/should-you-have-air-ducts-cleaned
https://www.epa.gov/indoor-air-quality-iaq/should-you-have-air-ducts-cleaned - https://www.cdc.gov/mold/default.htm
https://www.cdc.gov/mold/default.htm - Mold Cleanup in Your Home | US EPA
https://www.epa.gov/mold/mold-cleanup-your-home - Duct (flow)
https://en.wikipedia.org/wiki/Duct_cleaning - https://www.mayoclinic.org/healthy-lifestyle/home-garden/in-depth/air-duct-cleaning/art-20045391
https://www.mayoclinic.org/healthy-lifestyle/home-garden/in-depth/air-duct-cleaning/art-20045391 - https://www.who.int/publications/i/item/9789289002192
https://www.who.int/publications/i/item/9789289002192 - https://pubmed.ncbi.nlm.nih.gov/?term=air+duct+cleaning
https://pubmed.ncbi.nlm.nih.gov/?term=air+duct+cleaning - Google Scholar Google Scholar
https://scholar.google.com/scholar?q=air+duct+cleaning+DIY+home+guidance - Google Scholar Google Scholar
https://scholar.google.com/scholar?q=duct+cleaning+effectiveness+indoor+air+quality - Google Scholar Google Scholar
https://scholar.google.com/scholar?q=air+duct+cleaning+mold+dust+health+outcomes
