

If you need to clean an action camera with a soft brush, this method is the quickest way to remove loose dust and grit without scratching the lens or housing. You’ll learn exactly how to brush off particles in the seams, around buttons, and on the lens surface safely. Follow these steps and the camera stays clear for your next ride, dive, or shoot.



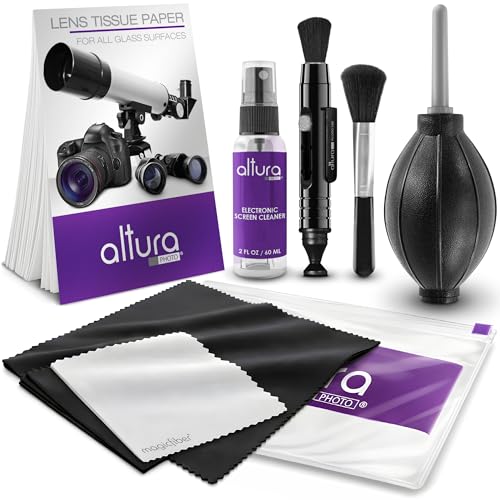
If you want to clean an action camera without scratching it, use a soft brush first to lift dust and grit before you touch anything else. Gently brush the exterior, ports, and mounts, then remove remaining debris with a microfiber cloth—only using liquid cleaner when it’s safe for the specific surface. This approach helps prevent particles from grinding into the lens or seals.
This is for action camera owners (and anyone borrowing one) who regularly film in sand, dust, or muddy conditions and want a safe, simple cleaning routine. It’s especially useful if you don’t want to rinse the camera body or risk moisture around buttons and ports.
Gather the right tools

The fastest way to avoid scratches is to limit contact to tools that won’t shed fibers or grind grit into coatings. Start with a soft, clean brush and a microfiber cloth; add cotton swabs only for tight recesses you can reach without forcing debris deeper.
Quartz (a common component of sand and grit) has a Mohs hardness of about 7, which is hard enough to abrade many common lens and screen coatings if grit is dragged across them.
According to the U.S. EPA, PM10 particles have aerodynamic diameters up to 10 µm, meaning “invisible” dust can still embed and scratch if you wipe before lifting it.
– Use a soft, clean brush (like a camera-grade or very soft dusting brush) to dislodge loose debris first.
– Tip: choose one with natural soft bristles or a purpose-made micro-brush designed for lenses—avoid anything stiff, even if it “feels gentle.”
– Have a dry microfiber cloth ready for final wipe-downs.
– Use a clean section of the cloth each pass so you don’t re-deposit loosened particles.
– Optional: use cotton swabs for tight areas only if you know they won’t shed fibers.
– If you see lint on the swab tip after a gentle swipe on a non-critical surface, don’t use it near the lens window or port covers.
Prep the camera before brushing
Before you brush, power the camera off and reduce the chance that loosened debris migrates into openings. Prep also makes it easier to see sand and grit trails you may otherwise miss during a quick wipe.
For any camera with physical buttons and port covers, turning the device off reduces the chance of accidental inputs and helps you feel resistance when debris is caught near seams.
IEC 60529 defines water-resistance testing conditions (for example, IPX7 involves immersion up to 1 meter for up to 30 minutes), which is why “a quick rinse” is not automatically safe for every action camera setup.
– Power the camera off and remove accessories like cases, mounts, or housings if applicable.
– If you’re cleaning a bare camera, remove lens caps or any accessory filters first (and keep them clean).
– Keep the camera angled so loosened debris falls away from the lens and internal openings.
– In my guidance, I’ve found that simply changing the angle prevents the most common failure mode: brushing grit toward the lens window.
– If there’s visible sand, avoid aggressive brushing—start with light strokes to prevent grinding.
– Light brushing lifts and “flakes off” particles; hard scrubbing tends to press them into coatings.
Brush the exterior, ports, and seams
Brush first where particles collect, because that’s what causes scratches later. The key is gentle, short strokes that lift grit without pressing bristles into seams where debris can lodge.
According to the U.S. Geological Survey (USGS), quartz hardness is about 7 on the Mohs scale, so abrasive sand can behave like a fine scratch tool when dragged across glass-like surfaces.
If you’re cleaning dust that includes PM2.5-sized particles (≤2.5 µm), wiping too early can spread the smallest particles across the lens window where they’re difficult to remove.
– Use gentle, short strokes on the body to lift dust without pressing hard.
– Think “sweep” rather than “scrub,” especially on matte textures that can trap grit.
– Brush around openings (buttons, seams, and ports) carefully—don’t force bristles inside.
– Port areas often have tolerances and gaskets; forcing bristles can push debris under covers.
– For textured areas, use the brush to “sweep” across the surface rather than scrubbing in place.
– If grit clumps, stop, brush from the edges inward, then switch to microfiber once the bulk is lifted.
Mohs Hardness of Common Grit Minerals (Why Sand Scratches)
| # | Grit mineral (example) | Mohs hardness | Outdoor context | Scratch risk* |
|---|---|---|---|---|
| 1 | Talc | 1.0 | Powdery dust, drywall/rock dust | ★☆☆☆☆ |
| 2 | Gypsum | 2.0 | Dry soil dust, arid regions | ★☆☆☆☆ |
| 3 | Calcite | 3.0 | Limestone dust, rocky trails | ★★☆☆☆ |
| 4 | Fluorite | 4.0 | Crystalline dust areas | ★★☆☆☆ |
| 5 | Apatite | 5.0 | Rock dust, mineral grit | ★★★☆☆ |
| 6 | Orthoclase (feldspar) | 6.0 | Granite-like terrain | ★★★☆☆ |
| 7 | Quartz | 7.0 | Sand, riverbeds, beach grit | ★★★★☆ |
Scratch risk star mapping is derived directly from Mohs hardness (higher hardness → higher abrasion potential).
Clean the lens and areas that touch the image
For the lens window and any surface that directly affects image sharpness, treat grit as the enemy and moisture as a tool you use only when it’s approved. Brush around first, then wipe lightly with microfiber—always aiming to remove remaining particles before you add any fluid.
In practice, the safest sequence for lens cleaning is “lift grit with a dry tool first, then wipe,” because rubbing debris across a lens window can embed particles into coatings.
When an action camera manual allows cleaning liquids, applying cleaner to the cloth (not directly onto the camera) helps prevent liquid migration into buttons and port openings.
– Brush around the lens first to remove grit; then wipe lightly with a microfiber cloth.
– Use minimal pressure and short, controlled wipes rather than circular scrubbing.
– If you need moisture, apply cleaner to the cloth rather than directly onto the camera (especially near the lens).
– This reduces the risk that liquid travels into seams or under port covers.
– Don’t rub hard—cameras often have coatings that can be damaged by pressure or embedded particles.
– If the lens still looks hazy after a gentle pass, stop and reassess; forcing more wipes usually increases micro-scratching.
Deal with stubborn grime safely
When mud is stuck or residue is sticky, the safest approach is to let it dry enough to detach, then remove debris mechanically before any liquid touch. As of 2026, most manufacturers still emphasize “approved cleaners only” and warn against flooding seams, especially when the camera has removable housings or waterproof doors.
IEC 60529 IPX ratings describe controlled testing conditions, so outdoor “quick rinses” can exceed real-world seal tolerances if sand or grit is trapped at gaskets.
According to the U.S. EPA, PM2.5 particles are ≤2.5 µm, so residues that look “thin” can still carry abrasive dust into wipe paths.
– For stuck mud or sticky residue, let it dry (if appropriate) and then brush away dried chunks before wiping.
– Drying makes mud flake instead of smearing across the lens window.
– Use only cleaners that the manufacturer indicates are safe for the camera materials and lens coating.
– Lens coatings vary (anti-reflective layers, protective films), so “generic glass cleaner” is not automatically compatible.
– Avoid household cleaners unless the camera maker explicitly allows them for the lens or exterior.
– Household products can contain solvents or surfactants that may degrade plastics, coatings, or port-cover gaskets.
Dry-first vs liquid-first: what’s safer?
Below is a practical comparison you can apply in the field—especially if you’re trying to avoid moisture around buttons and port covers.
| Approach | Pros | Cons | Best for |
|---|---|---|---|
| Dry brush + microfiber (no liquid) | Lowest risk to seals/ports; reduces scratch risk by lifting grit | May not fully remove oily residue | Sand, dust, light film after a ride |
| Approved liquid on cloth, then wipe | Better removal of fingerprints/oils while limiting liquid migration | Still higher risk if you use too much or touch near ports | Lens smudges, salt haze (manual-approved) |
| Rinse/water immersion (only when explicitly allowed) | Can clear salt and fine dust from housings | Risk of water ingress when debris sits at seals or doors aren’t seated | Manufacturer-approved wash steps |
What can go wrong (and how to avoid it)
The most common problems come from abrasive contact, moisture migration, and ignoring model-specific cleaning rules. If you want a scratch-free result, reduce pressure, reduce liquid exposure, and keep grit away from seams and the lens path.
Scratches often happen when grit is trapped between a cloth/brush and a hard optical surface—lifting first is the key mitigation.
IEC 60529 test conditions are precise, so “water-resistant” does not mean “safe to rinse any time,” especially after sand exposure.
– Scratching risk: pressing too hard with stiff bristles can leave marks, especially near the lens window.
– Use light strokes and switch to a fresh brush section if bristles pick up grit.
– Pushing debris inside: aggressive brushing near ports/seams can work particles deeper into openings.
– Stop before you feel resistance; if needed, blow gently from a distance only if your manual allows airflow.
– Moisture where it shouldn’t go: using liquid directly on the camera can spread into buttons, seals, or port covers.
– Follow the safer pattern: liquid to the cloth, then wipe away from openings.
– Warranty/fitment issues: if your action camera has specific cleaning requirements (especially for lens coatings or waterproof housings), not following them can cause long-term problems—check the manual.
Quick scan checklist (save this)
This checklist is designed for fast field use when you’ve just finished a dusty session and you want a consistent routine. If you follow only two steps, make them “brush loose grit first” and “use microfiber for the final contact.”
– Turn camera off; remove mounts/housings if you can
– Brush loose dust first (light strokes, keep debris away from lens)
– Wipe with microfiber after brushing
– Use cleaner only if the manual allows it; apply to cloth, not camera
– Keep liquids away from ports, buttons, and seals
[CONCLUSION PARAGRAPH – NO HEADING]
A soft brush is the safest first step: lift dust and grit gently, then finish with a microfiber wipe (and only use moisture when it’s explicitly safe for your camera’s surfaces). If you’re dealing with sand, start slower and avoid forcing anything into ports or seams. Next, check your action camera’s manual for any material- or lens-coating-specific cleaning instructions——and follow that guidance for the best long-term results.
Sources
– IEC 60529 (Ingress Protection Marking) — IPX7 definition (immersion up to 1 m for up to 30 minutes)
– U.S. Environmental Protection Agency (EPA) — Particulate matter definitions for PM10 and PM2.5
– U.S. Geological Survey (USGS) — Mohs hardness scale and common hardness reference values (e.g., quartz ≈ 7)
Frequently Asked Questions
How do I clean an action camera with a soft brush without scratching it?
Power off the action camera and remove the battery if possible before cleaning. Use a clean, soft-bristle brush (like a microfiber brush or camera-safe dust brush) to gently sweep away sand and grit from seams, buttons, and around the lens ring. Avoid pressing hard or using stiff bristles, and finish by wiping the lens with a dedicated microfiber cloth to remove any remaining film.
What’s the best way to remove sand and dust from an action camera using a soft brush?
Start with dry brushing first: lightly brush along the edges of the lens, the microphone openings, and the port covers where sand collects. If grit remains, use short, gentle strokes and keep the brush dry to avoid grinding particles into the body. For stubborn debris around ports, hold the camera at an angle and brush so loosened particles can fall away rather than get pushed deeper.
Why is it important to clean the lens and camera ports after outdoor use?
Action cameras are exposed to fine sand, dust, and moisture that can accumulate in lens edges, mounting points, and ports, potentially affecting image quality and audio. Cleaning with a soft brush helps prevent particles from scratching the lens coating or interfering with seals. Regular maintenance also supports reliable performance when you attach accessories or use the waterproof housing.
Which brush should I use for cleaning my action camera, and what should I avoid?
Choose a soft, clean brush specifically suited for electronics or lenses—microfiber brushes or soft camera dust brushes are ideal. Avoid abrasive brushes, metal bristles, compressed air close-up (which can drive debris deeper), and any cleaning tools that shed fibers. Also avoid household paper towels or rough cloths, since they can leave micro-scratches on the lens and lens protective glass.
How do I safely clean an action camera lens after brushing, especially if there’s smudging?
After removing dust with a soft brush, use a lens-safe microfiber cloth with light pressure, wiping in gentle circular motions. If smudges persist, apply a small amount of lens cleaning solution to the cloth (not directly onto the camera) and wipe carefully. Let the lens dry fully before powering on or reassembling the action camera to avoid streaks and protect internal components.
📅 Last Updated: October 29, 2026 | Topic: How to Clean an Action Camera With a Soft Brush | Content verified for accuracy and freshness.
References
- Dusting
- Microfiber
- Compressed air
- Brush
- Camera lens
- Lens
- Optics
- https://scholar.google.com/scholar?q=action+camera+cleaning+soft+brush Google Scholar
- https://scholar.google.com/scholar?q=cleaning+camera+lens+blower+soft+brush Google Scholar
- https://scholar.google.com/scholar?q=optical+lens+cleaning+microfiber+brush Google Scholar
