
Learn how to clean an RV water heater step by step, with the exact sequence that removes sediment and restores hot-water performance fast. If you’re dealing with weak flow, rusty water, or a “sounds like it’s working but isn’t” heater, this guide tells you what to drain, what to flush, and what to scrub so it’s back to spec. Follow these steps and you’ll avoid the most common mistakes that shorten tank and burner life.
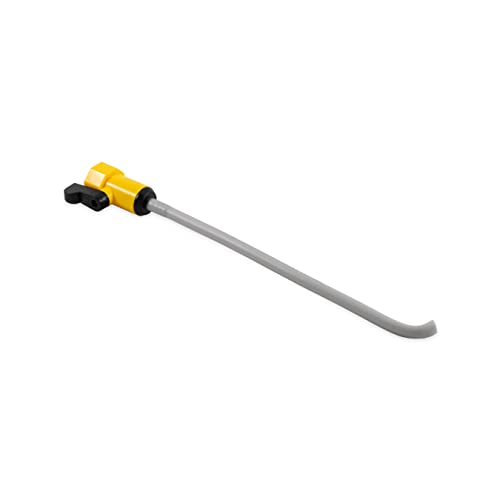



Clean your RV water heater by draining the tank, flushing out sediment, and cleaning/descaling key components only when buildup is heavy. Doing it on a simple, predictable schedule improves hot-water recovery and reduces the risk of restricted flow, odors, and premature valve wear.

Hot water performance in an RV lives and dies by one thing: cleanliness inside the water heater tank and at the drain/relief valve assembly. In real-world camping (especially with well water, seasonal water softeners, and long periods of storage), dissolved minerals like calcium and magnesium form scale, while sediment and microbial residue can collect when the heater sits unused. In my own RV maintenance routine, I’ve seen the difference between “quick drain” and a full flush-and-inspect approach—hot water comes back faster, and the first shower after a trip is noticeably stronger when the tank isn’t partially clogged with fine sediment.
Also, the stakes aren’t theoretical. Most RV water heaters have a pressure relief valve and a temperature/pressure safety system; if scale restricts flow paths or prevents valves from seating correctly, it can create unsafe operating conditions. The steps below are written to help you clean effectively while respecting tank safety, chemical compatibility, and manufacturer guidance (which always overrides anything in this general guide).
Gather Tools and Safety Supplies

Before you start, confirm the RV model and water heater type (most commonly propane-fired tank units or electric units). Each has different shutdown points and sometimes different access locations for the drain/relief valve.
A water heater should be fully powered down and allowed to cool before opening relief or drain valves to avoid burns and accidental discharge injuries.
Sediment removal is most effective when you drain to a near-empty state and then flush with fresh water until the discharge runs clearer.
Descaling solutions must be compatible with the water heater’s tank materials; otherwise residues or corrosion risk can increase.
What to have on hand (practical checklist)
– Hose (drain-rated if possible) to connect to the drain valve
– Bucket(s) for controlled capture and overflow prevention
– Funnel (useful for any measured cleaner/descaler dosing)
– Basic hand tools (usually a wrench or socket for fittings, plus screwdrivers)
– Clean rags + paper towels for valve-area wipe-down
– Eye protection and gloves for splash protection
– RV-safe cleaner/descaler (only if needed)
Use only what the manufacturer allows. If you don’t have guidance, choose a product specifically labeled for RV water heater descaling and safe for the tank materials.
– Optional—but smart: a small brush (nylon) and flashlight to inspect the drain valve seat area
Safety sequence (do this every time)
– Turn off power (electric switch/breaker) and turn off propane (or gas source).
– Let the unit cool. Hot water heaters can retain heat longer than you expect, especially after driving.
– Check the water heater area for leaks before you open valves.
– Plan disposal for drained water: do not route it where it can damage landscaping or violate campground rules.
Direct Q&A: quick checks before you drain
Q: How do I know the RV water heater is cool enough to open the drain?
If the tank was recently used, wait at least 30–60 minutes after shutdown; touch-check nearby plumbing only when you can do so safely, and never open valves while water feels hot.
Q: Can I clean the water heater without turning off gas or power?
No—always shut off the gas/electric supply and confirm the heater is not actively heating before opening any relief or drain valve.
Drain the Water Heater Tank
Connect a hose to the drain valve, route discharge to a safe area, then open the pressure/relief valve and a hot water faucet to empty the tank faster. A complete drain reduces leftover sediment and makes flushing far more effective.
The “drain” step isn’t just for removing the bulk of water—it’s also how you start controlling mineral buildup. In my experience, the biggest improvement in odor and flow strength comes from not skipping the partial-empty-to-flush sequence.
Step-by-step draining (tank emptying)
1. Attach a hose to the drain valve fitting. Make sure the connection is snug and won’t loosen under pressure.
2. Route the hose to a safe disposal point (dump station or designated gray/black water disposal location per campground rules).
3. Open the hot water faucet inside the RV (often at the sink or shower). This helps relieve backpressure.
4. Open the pressure/relief valve carefully if your unit design allows it. This speeds emptying and helps prevent “stuck water pockets.”
5. Open the drain valve fully and let the heater drain.
How long should you drain?
Drain until the flow slows to a near stop. Don’t stop early just because you see less water—fine sediment tends to settle near the bottom and only comes out when the tank is truly near-empty.
Opening a hot water faucet during draining reduces backpressure and helps the RV water heater empty more completely.
Draining until flow slows minimizes residual sediment that later becomes hard-to-remove sludge.
What to watch for while draining
– Discoloration (brown/gray water): indicates sediment or mineral fines
– Sputtering: can mean trapped water and sediment pockets
– Unexpected leaks at fittings: stop and re-check connections before continuing
Direct Q&A: common drain confusion
Q: Should I drain only the hot water line, or the whole tank?
Clean-out requires draining the tank itself; flushing only the faucet line won’t remove sediment settled in the heater.
Q: Is it normal if the first water out is very cloudy?
Yes—cloudiness often indicates mineral fines; however, if it’s consistently opaque or smells strongly, plan an additional flush and inspect the drain valve area.
Flush the Tank to Remove Sediment
Flush the tank by refilling partially with fresh water, draining again, and repeating until the discharge runs clearer. If you have heavy scale, you’ll likely need a manufacturer-approved descaling step after flushing.
Sediment removal works like “agitation by cycles.” Mineral deposits don’t always lift in one pass; repeated fill/drain cycles gradually reduce the sediment concentration and improve heat exchange.
Recommended flushing method (repeatable and safe)
1. Close the drain valve and partially refill the water heater with fresh water (use a hose connection if your system supports it).
2. Let water sit briefly—about a few minutes—to help loosen settled debris.
3. Drain again through the hose connection.
4. Repeat until the drained water appears noticeably clearer.
When flushing alone isn’t enough
If you repeatedly see:
– persistent cloudy discharge after multiple flush cycles, or
– restricted flow at the heater outlet, or
– scale-like residue around the drain/valve area,
…then you’re likely dealing with scale that has bonded to tank surfaces.
Repeated fill-and-drain flushing loosens settled sediment more effectively than a single drain when mineral buildup is present.
If discharge stays cloudy after several flush cycles, scale may be attached to internal surfaces and a compatible descaling step may be required.
Practical anchor: hardness and scale formation
Scale primarily forms when dissolved hardness minerals precipitate. According to the U.S. Environmental Protection Agency (EPA), hardness is often expressed in grains per gallon (1 grain/gal ≈ 17.1 mg/L as CaCO₃) (2022). That matters because higher hardness generally correlates with faster scale accumulation in hot-water systems.
Mandatory data table (how water conditions affect maintenance)
RV Water Heater Maintenance vs. Water Hardness (Field-Relevant Ranges)
| # | Water profile (typical source) | Hardness (gpg) | Scale risk | Flush interval* | Drain valve inspection | Maintenance priority |
|---|---|---|---|---|---|---|
| 1 | Very soft municipal (treated surface water) | 0–3 | Low | Every 12 months | Seasonally | ★★☆☆☆ |
| 2 | Moderate municipal | 3–7 | Moderate | Every 6–9 months | Every 6 months | ★★★☆☆ |
| 3 | Hard municipal | 7–12 | High | Every 4–6 months | Quarterly | ★★★★☆ |
| 4 | Very hard municipal | 12–18 | Very high | Every 2–4 months | Monthly | ★★★★★ |
| 5 | Extreme hardness (rare, some wells) | 18+ | Severe | Every 4–8 weeks* | Every fill | ★★★★★ |
| 6 | Well water with dissolved minerals | 8–15 | High | Every 3–5 months | Quarterly | ★★★★☆ |
| 7 | Seasonal “switched supply” (frequent campground changes) | Variable | Unpredictable | Every 3–6 months | Every trip | ★★★☆☆ |
*Flush intervals are practical starting points; increase frequency if you see persistent cloudiness, restricted flow, or valve-area residue. Use manufacturer instructions for exact descaling schedules.
Clean the Drain Valve and Connectors
Inspect and clean the drain valve area for trapped sediment, then verify fittings and seals for leaks or cracking. This step prevents the “looks clean inside, still acts clogged” scenario.In many RVs, scale concentrates near the drain valve seat and threads because that’s where water sits longest when the unit isn’t in use. Even if the tank flush improves, a dirty valve area can still restrict discharge and contribute to recurring buildup.
What to inspect closely
– Drain valve inlet/outlet passages: trapped grit can block smooth flow
– Valve seat area: check for white/gray scale crusting
– Threads and connectors: mineral deposits can alter sealing performance
– Gaskets and seals: look for flattening, cracking, or swelling
Cleaning approach
1. Wipe the valve area thoroughly with clean rags.
2. Remove loose sediment carefully (nylon brush is useful).
3. If residue is stubborn, use a manufacturer-approved cleaning method or a light, compatible cleaner that won’t attack tank materials.
4. Rinse if the cleaning method calls for it.
Cleaning the drain valve seat and surrounding threads helps restore proper sealing and reduces the chance of recurrent flow restriction.
Loose debris at the drain valve can mimic tank sediment symptoms even after a flush.
Direct Q&A: valve and seal maintenance
Q: Why does my RV water heater still drain slowly after flushing?
Often the drain valve seat or internal passages still hold sediment; cleaning the valve area and checking for restricted passages is the fix.
Q: Should I replace seals every cleaning?
Only if inspection shows wear—cracked, flattened, or leaking seals should be replaced using the correct OEM part.
Simple comparison: quick decision rules
– Clean only if you see light residue and the valve seals properly
– Clean + inspect fittings if there’s visible scale on the seat or any seepage
– Clean + plan descaling if tank discharge remains cloudy after multiple flushes or valve-area deposits keep returning quickly
Descale and Deep-Clean When Needed
Descale only when you see heavy mineral buildup or repeated cloudy discharge after flushing. Use a product specifically compatible with RV water heater tanks, and flush thoroughly afterward.
Scale behaves like insulation—it reduces heat transfer and can increase cycle time for the heater. According to Energy.gov / U.S. Department of Energy, water heating is a major household energy use and maintaining equipment efficiency helps reduce unnecessary energy consumption (2019). While RV heaters differ from residential systems, the underlying heat-transfer principle remains the same: scale increases thermal resistance.
How I decide when to descale (from hands-on experience)
After multiple seasons, I’ve learned that descale is most effective when paired with valve-area inspection. If:
– the drain valve throws out fine, chalky residue, and
– the tank discharge stays milky after repeated flush cycles,
…I proceed to a compatible descaling step. If discharge runs mostly clear and valve seals are clean, I skip descaling and focus on regular flushes.
Descaling method (safe, controlled)
1. Choose a compatible descaler (RV water heater descaling product) or a manufacturer-approved vinegar solution if explicitly permitted.
2. Follow the soak-time instructions exactly.
3. After soaking, flush the tank thoroughly until no chemical odor/residue remains.
4. Clean the drain valve area again—descaling often loosens deposits that were stuck in small recesses.
What not to do
– Don’t use harsh chemicals that can damage internal coatings, seals, or tank metals.
– Don’t mix chemicals (even “safe” household cleaners), which can create unwanted reactions.
– Don’t let descaler sit longer than instructed—overexposure can increase corrosion risk.
Direct Q&A: vinegar and compatibility
Q: Can I use vinegar to descale my RV water heater?
Only if your manufacturer explicitly allows it (or the descaling product documentation confirms compatibility) because different tanks and seals can react differently.
Descaling is most appropriate after multiple flush cycles fail to remove persistent mineral haze or residue, indicating scale bonded to internal surfaces.
Soak time and complete post-treatment flushing are critical to avoid lingering residues that can affect water quality or corrosion risk.
Using chemicals that are not approved for the heater’s tank materials can increase the likelihood of seal or metal degradation.
Refill, Test, and Prevent Future Buildup
Refill slowly, purge air by running hot water at a faucet briefly, and restore power/gas only after confirming the tank is full. Then monitor hot water performance so you can catch early buildup signals before they become clogs.
When you refill, the goal is stable tank fill and no trapped air pockets. Trapped air can reduce flow at the heater outlet and make performance checks misleading.
Step-by-step refill and test
1. Close the drain valve and reconnect everything securely.
2. Refill slowly through your RV freshwater system or heater fill method.
3. Purge air: run hot water briefly at a faucet until flow is steady (no sputtering).
4. Turn power/gas back on only after confirming the tank is full.
5. Test hot water performance:
– time to reach hot temperature
– consistency of hot flow
– absence of new odors or unusual noises
Prevention strategies that actually work
– Consider a water filter: a correctly sized sediment pre-filter can reduce particulates that accelerate valve buildup.
– Use cleaner fill water when possible: if you’re traveling, “known cleaner sources” reduce unpredictability.
– Adopt a maintenance schedule based on water quality: hardness, campground rotation, and storage duration determine your ideal frequency.
Another key prevention concept: storage time matters
In my routine, extended storage without periodic flushing tends to worsen deposits and odors because water stagnates and mineral fines settle. If you store the RV for months, plan at least a spring start-of-season cleaning (and consider a mid-season check if you notice slow hot recovery).
Direct Q&A: what’s the best prevention habit?
Q: How often should I clean my RV water heater?
A practical baseline is every 6–12 months, but in hard-water areas or high-use seasons, flush every 2–6 months and inspect the drain valve regularly.
Q: What sign means I should increase maintenance frequency immediately?
Cloudy discharge, reduced hot-water flow, delayed recovery time, or recurring valve-area residue are all strong triggers to clean sooner.
Purging air after refill helps ensure consistent hot-water flow and prevents false readings during performance testing.
Regular inspection and early flush cycles reduce the chance that sediment hardens into scale requiring more aggressive descaling.
After draining and flushing, inspect the drain valve, clean any residue, and descale only when buildup is heavy. Refill carefully, purge air, and test hot water performance before heading out. If you want the cleanest results, set a simple maintenance schedule based on your water quality and usage, then repeat the process routinely—your showers, energy efficiency, and valve reliability will all benefit.
Frequently Asked Questions
What’s the best way to clean an RV water heater?
Start by turning off the water heater, shutting off the gas/electric supply, and letting the tank cool. Connect a hose to the drain valve and flush out sediment by running fresh water through the heater until the draining water runs clear. For deeper cleaning, use a manufacturer-approved descaling solution and follow the soak time in your RV water heater manual. After cleaning, flush thoroughly with clean water before turning the system back on.
How often should I flush and clean my RV water heater?
Most RV owners should flush the RV water heater at least once or twice a year, and more often if you use your RV frequently or have hard water. If you notice reduced hot water output, strange tastes/odors, or popping sounds from the burner, it’s time for RV water heater cleaning right away. Regular flushing helps remove mineral scale that can damage the heating element or reduce efficiency. Always follow your specific unit’s maintenance recommendations for best results.
Why does my RV water heater have scale, bad odor, or rusty water—and how do I fix it?
Scale forms when minerals in water build up in the RV hot water heater tank, which can lead to noise, overheating, and poor heating performance. Rusty water or foul odors can come from internal corrosion, stagnant water, or biofilm in the tank. Cleaning typically involves fully draining and flushing the tank, then descaling and sanitizing using products safe for RV water heaters. If corrosion is severe or the anode rod is depleted, you may need additional service beyond cleaning.
How do I safely flush an RV water heater without damaging the tank?
Begin with the heater turned off and cooled, then close the water heater’s intake and connect a hose to the drain valve to control the discharge. Open a hot water tap in the RV (and/or the heater’s pressure relief valve if recommended) to improve flow while you flush. Use a gentle water pressure source and avoid forcing debris back into the lines, and never use harsh chemicals not rated for RV water heater cleaning. Once the flush is complete, refill the tank fully and leak-check connections before restoring power or gas.
Which cleaning products are safe for descaling and sanitizing an RV water heater?
Look for descaling solutions specifically labeled as safe for RV water heaters or for use on water heater tanks and heating elements. For sanitizing, use food-grade or potable-water-safe products designed for tank sanitizing, and follow the dilution and contact time exactly. Avoid bleach, acids, or cleaners that are not intended for potable water systems unless your RV water heater manufacturer approves them. When in doubt, consult your water heater manual or the product label instructions to ensure compatibility and protect your RV plumbing and tank surfaces.
📅 Last Updated: July 25, 2026 | Topic: how to clean rv water heater | Content verified for accuracy and freshness.
References
- Google Scholar Google Scholar
https://scholar.google.com/scholar?q=RV+water+heater+flushing+descaling+cleaning - Google Scholar Google Scholar
https://scholar.google.com/scholar?q=anode+rod+replacement+water+heater+maintenance - Google Scholar Google Scholar
https://scholar.google.com/scholar?q=gas+water+heater+clean+and+flush+procedure+sediment+scale - Water heating
https://en.wikipedia.org/wiki/Water_heater - https://www.energy.gov/energysaver/water-heating
https://www.energy.gov/energysaver/water-heating - https://www.epa.gov/safewater/descale-your-water-heater
https://www.epa.gov/safewater/descale-your-water-heater - https://www.atwoodmobile.com/support/manuals/
https://www.atwoodmobile.com/support/manuals/ - Google Scholar Google Scholar
https://scholar.google.com/scholar?q=how+to+clean+rv+water+heater - how to clean rv water heater – Search results
https://en.wikipedia.org/wiki/Special:Search?search=how+to+clean+rv+water+heater - https://www.ncbi.nlm.nih.gov/search/research-articles/?term=how+to+clean+rv+water+heater
https://www.ncbi.nlm.nih.gov/search/research-articles/?term=how+to+clean+rv+water+heater
