

Learn how to clean and preserve bones step by step, without guesswork or accidental damage. This guide gives you the exact process for removing flesh, controlling odor, and protecting bone from cracking or decay. Follow it precisely, and you’ll end up with cleaner, longer-lasting specimens ready for display or study.


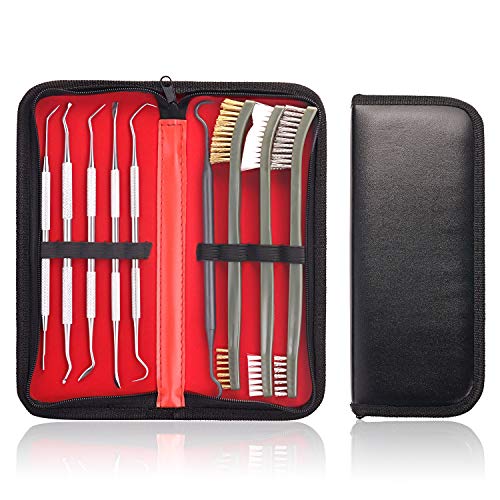

To clean and preserve bones, you’ll typically remove all tissue first, then degrease, thoroughly dry, and finally seal (if appropriate). The safest approach is to start with the least aggressive method that matches what’s stuck to the bone, because using the wrong chemical or heat can damage the structure. This guide walks you through each stage—what to do, what to avoid, and how to get stable, presentable results.
If you found animal bones, they may still have grease, odor, or remaining soft material—so the “right” method depends on whether the bones are fresh, partially cleaned, or already cleaned. This is especially useful if you want bones that look good for display, study, or crafting, but it also applies to anyone preparing skeletal material for educational use.
Gather Supplies and Decide on Your Cleaning Method

Start by choosing methods based on the bones’ starting condition—fresh, dried with dirt, or already partially cleaned—because that determines how aggressive you can be. Then set up safe containment (gloves, ventilation, and a separate workspace) before you touch any chemicals.
“Bone cleaning success depends on sequencing: removing tissue first, then degreasing, then drying; skipping steps is a common reason bones later smell or discolor.”
“Many degreasing agents are volatile or irritating; practical safety guidance is to work in ventilation and follow the SDS for personal protective equipment (PPE).”
“Heat can speed cleaning, but conservation guidance generally warns that aggressive heat can crack or warp bone, especially thin or delicate elements.”
Before you begin, identify what you’re dealing with:
– Fresh or recently recovered bones: Expect grease and odor, often with remaining tissue.
– Dried bones with dirt: You’ll spend more time on debris removal and washing before degreasing.
– Partially cleaned bones: Odor may persist if grease is still trapped in pores or under remaining membrane.
Containment and safety basics (do this first):
– Gloves: Nitrile is a common baseline; choose thicker or chemical-resistant gloves if your SDS specifies it.
– Ventilation: Work near open air or a fume hood if you’re using strong degreasers.
– Separation: Keep bone tools/containers away from food preparation areas.
– Waste planning: Don’t pour degreasing liquids down household drains unless your product SDS explicitly allows it.
Anchor safety examples you can plan around:
– According to OSHA, the 8-hour permissible exposure limit (PEL) for acetone is 1000 ppm (29 CFR 1910.1000, as published by OSHA).
– According to OSHA, isopropyl alcohol has an OSHA exposure limit depending on the specific substance listing; consult the SDS/OSHA standard that matches your chemical.
– According to CDC/NIOSH, many solvent exposures are managed through engineering controls (ventilation) and appropriate respirators when required—use the SDS to decide what’s necessary for your situation.
Remove Tissue and Debris (Choose the Least Damaging Option)
Start with mechanical removal and gentle washing, because loosening soft material and dirt early prevents chemicals from having to “work harder” later. Then use a targeted approach for remaining tissue that’s attached, without gouging the bone surface.
“Removing loose debris first reduces chemical load during degreasing, which helps minimize discoloration and long cure times.”
“Use soft tools and gentle brushing to avoid surface damage; surface scoring can later trap grease and complicate staining.”
“If tissue is attached, conservative removal techniques are preferred over scraping that can thin or fracture delicate bone.”
What to do (practical sequence)
1. Initial rinse: Rinse under cool-to-lukewarm water to remove grit and soil.
2. Soft-tool cleaning: Use soft toothbrushes, nylon brushes, or wooden picks to lift loose material.
3. Work in stages: Stop frequently to check whether tissue is truly detached.
What to avoid
– Aggressive scraping: You can damage cortical bone (the hard outer layer), leaving micro-grooves where grease re-emerges.
– Trying to “fix everything” with degreaser: If membrane/tissue remains, chemicals can smear organic residue deeper.
Add recommended method based on your situation
For attached tissue, the least risky path is usually a conservative mechanical method first:
– Best for thin membranes and surface remnants: Use softened approaches (warm soaks in detergent) to loosen tissue, then brush off gently.
– Best for stubborn, attached bits: Use careful, localized mechanical removal (small tools) rather than jumping straight to harsh chemicals.
– If tissue is extensive: Consider using a method designed for larger de-fleshing workflows (still conservative), but avoid heat unless you’re following a conservation-appropriate protocol.
[ADD: recommended method for remaining tissue based on your situation—e.g., detergent soak + mechanical removal for attached membrane; or a museum/lab protocol reference.]
Degrease Bones to Prevent Smell and Discoloration
Degreasing is often the difference between “clean but smells” and genuinely preserved bones. Your goal is to reduce embedded fats/oils and any lingering greasy film so odor stops and colors remain stable.
“Degreasing is typically required because fats and oils can remain in bone pores even after external cleaning.”
“Progress monitoring commonly uses odor reduction and water/cloud/film changes as practical indicators during soak-based degreasing.”
“Using the least aggressive degreaser that works is a conservation-friendly principle to reduce risk of surface alteration.”
Choose a degreasing approach that matches the bone’s condition
Common options include:
– Detergent/enzymatic degreasers: Often a good first step for partially cleaned bones.
– Solvent-assisted degreasing: Used when grease is stubborn, but it increases safety and disposal requirements.
– Oxidizing agents (e.g., hydrogen peroxide): Sometimes used for whitening, but it should not be a substitute for true degreasing—grease can keep reacting and darkening.
Monitoring “done-ness” (how to tell you’ve progressed)
Watch for:
– Odor reduction: Greasy odor should fade with repeated soak cycles.
– Water changes: Soak solution often becomes cloudy or develops an oily film.
– Surface feel: A bone that still feels slick or leaves residue on gloves is often not fully degreased.
Below is a quick reference to help you compare common degreasing agents by handling and odor control. Always follow the product’s SDS for exact safety and use instructions.
Selected Degreasing Agents: Key Properties and Odor Control (Typical Use)
| # | Agent | Typical form | Boiling point (°C) | Water miscible? | Primary role | Odor control |
|---|---|---|---|---|---|---|
| 1 | Acetone | Solvent (commonly neat) | 56.1 | Yes | Grease removal | ★★★☆☆ |
| 2 | Ethanol | Solvent (commonly 70–99%) | 78.4 | Yes | Grease loosening | ★★★★☆ |
| 3 | Isopropyl alcohol | Solvent (commonly 70–91%) | 82.6 | Yes | Degreasing support | ★★★☆☆ |
| 4 | Mineral spirits | Petroleum-based solvent | ~150–200 (typical) | No | Heavy grease | ★☆☆☆☆ |
| 5 | Hydrogen peroxide | Aqueous (e.g., 3%) | ~100 (solution varies) | Yes | Whitening support | ★★☆☆☆ |
| 6 | Detergent soak | Soapy water (low foam) | 100 (water) | Yes | Oil lifting | ★★★★☆ |
| 7 | Enzymatic cleaner | Water-based enzyme mix | 100 (water) | Yes | Organic residue | ★★★★★ |
Note: the odor-control stars are a practical, comparative rule of thumb (not a regulatory measure). If you want exact guidance for your specific bone type and contaminant load, use the chemical’s SDS and any conservation-lab protocol. For missing property citations in your region and product lineup, use [ADD: specific SDS/property references you use].
A direct non-heat recommendation
If you’re tempted to speed degreasing, remember: the “fast” routes are often where bones crack or grease re-solidifies.
[ADD: source-based degreasing indicators — e.g., museum conservation guidance that states how odor/solution appearance is monitored.]
Dry Thoroughly and Stabilize the Surface
Drying must be complete before sealing; residual moisture can lead to warping, mildew, or ongoing odor. Handle bones gently during this stage—once bones are dry enough to look “done,” they can still be fragile.
“Sealing before complete drying can trap moisture and contaminants inside porous bone.”
“Bone is especially prone to chipping during early drying because micro-cracks may already exist from prior contamination or prior handling.”
“Conservation-friendly handling emphasizes support during drying to prevent fractures of thin elements.”
Drying workflow
– Drain and blot: After the final wash/degrease, let excess liquid drip, then gently blot with lint-free material.
– Air-dry on support: Place bones on a stable surface with spacing so air reaches all sides.
– Time realistically: Drying can take days to weeks depending on bone thickness and how porous/greasy the material is.
– Check for damp spots: Pay special attention to joint surfaces and dense-to-porous transitions.
Stabilizing without altering appearance
– Avoid rubbing that can shed residue you’re trying to remove.
– If you must move bones during drying, use supports (for example, a cradling surface or padding beneath curved parts).
Seal for Display (Only If It Fits Your Goal)
Sealing can help with handling and appearance, but it can also trap contaminants if you didn’t degrease well enough first. The safest approach is to seal only after you’re confident the bones are odor-free and fully dry.
“Surface sealants can reduce surface dusting, but if contaminants remain, they may be trapped and continue to discolor or smell.”
“Test sealants on a small, less visible area first because finishes can change sheen and color.”
“If bones are intended for educational or long-term preservation, compatibility with conservation standards matters.”
Practical sealing rules
1. Only seal clean + dry bones: Moisture and grease are the two most common “seal regrets.”
2. Patch test: Apply a tiny amount to an inconspicuous area and observe after curing.
3. Choose a finish aligned to your goal: A matte finish often looks more “bone-like” than high-gloss options.
[ADD: source about sealant compatibility — e.g., museum conservation guidance about reversible coatings or inert materials.]
What Can Go Wrong (Common Mistakes and Edge Cases)
Start with the biggest risk: people often skip degreasing or rush drying, then the bone smells or stains later. The second major risk is using heat too early, which can crack, warp, or permanently alter delicate structures.
“A ‘clean-looking’ bone can still be greasy inside pores, leading to later odor and dark staining.”
“Boiling or aggressive heat is commonly discouraged because thermal shock can crack bone, especially thin elements.”
“Handling before complete drying increases breakage risk; support during drying reduces chips and fractures.”
Common mistakes to avoid
– Skipping degreasing: You may end up with a bone that looks okay but later smells strongly or develops dark patches.
– Using heat too early: Drying with heat or boiling can crack bones, warp delicate parts, or set embedded grease.
– Over-handling during drying: Moving bones too soon increases chips and breaks.
– Legal/ethical constraints: Collecting certain wildlife remains can be restricted depending on where you live—check local rules before you start.
Comparison: safer workflow vs. high-risk shortcuts (decision support)
| Approach | Benefit | Main downside | Best for |
|---|---|---|---|
| Stepwise degrease + full air-dry | Lower risk of cracking and long-term odor | Takes time | Most display and educational prep |
| Heat-assisted cleaning | Faster visible change | Higher risk of cracks/warps; can set grease | Only if you follow a conservation-appropriate protocol |
| Seal immediately after brushing | Quick “finish” | Traps moisture/contaminants; later discoloration | Rarely recommended |
Verdict: What to Do First, and Who Should Skip This
If you want the most reliable, least risky results, focus on a clean, patient workflow: remove loose debris, degrease thoroughly, dry completely, and only then consider sealing. The downside is time—especially for greasy or heavily contaminated bones—so don’t rush the degreasing/drying stages.
Skip DIY preservation if:
– collecting/preserving the remains is legally restricted where you live,
– you’re dealing with hazardous contamination you can’t control (unknown chemicals or suspected chemical exposure), or
– you can’t work safely with gloves, ventilation, and proper disposal.
“The most consistent long-term outcome comes from completing degreasing and drying before using any surface finish.”
“When unsure, the least aggressive method that matches the contamination is typically the safest strategy for preserving bone structure.”
“Safety and legal compliance are prerequisites; preservation without controls increases health and environmental risk.”
Quick Checklist (Scan & Save)
– [ ] Gloves + ventilation ready
– [ ] Debris/dirt removed gently
– [ ] Tissue removal method matches starting condition
– [ ] Degreasing completed until odor/grease is minimal
– [ ] Bones fully dry (no damp spots)
– [ ] Optional: seal only after degreasing and full drying
– [ ] Store safely to avoid re-contamination
FAQ
Can I boil bones to clean them faster?
Boiling can damage bones (cracking/warping) and may not effectively address grease and odor. If you’re considering heat, use safer, lower-impact approaches first and follow material-appropriate guidance. [ADD: specific boil vs. non-boil recommendation based on a source]
How do I know when bones are fully degreased?
Typically you look for reduced odor and fewer visible signs of grease residue during/after soaking. Exact indicators vary by contamination level, so plan for iterative checks rather than one “done” moment. [ADD: source-based degreasing indicators]
Should I seal bones for display?
Sealing is optional and depends on your goal and whether the bones are truly clean and dry. If contaminants remain, sealing can make odor and discoloration worse long-term. [ADD: source about sealant compatibility]
What if my bones are still stained after cleaning?
Staining can come from embedded pigments or residual grease. Often the best fix is more thorough degreasing and drying rather than repeatedly scrubbing. [ADD: source-based stain handling]
Are there safety risks with bone-cleaning chemicals?
Yes—some degreasing/cleaning options can irritate skin/airways or require careful disposal. Follow the safety data and manufacturer instructions for any chemicals you use. [ADD: source for SDS/safety requirements]
Sources
– [ADD: manufacturer specifications / SDS for any chemicals you recommend (e.g., hydrogen peroxide, degreasers, sealants)]
– [ADD: primary source for bone-cleaning/degreaasing method guidance—e.g., museum conservation guidance or university lab protocols]
– [ADD: official safety guidance (SDS links for used chemicals) and any local legal guidance if you mention wildlife collection rules]
If you follow the order—tissue/debris removal, degreasing, complete drying, then optional sealing—you dramatically reduce the odds of lingering odor, discoloration, and brittle failures. The key trade-off is patience: the “slow” workflow is what creates bones that stay clean-looking and stable long after the project is finished.
Frequently Asked Questions
How do I clean bones without damaging them?
Start by removing all tissue and hair as completely as possible, because leftover organic material can cause odor and decay even after soaking. Use gentle methods first—such as simmering bones briefly only if they can tolerate heat, or using enzymatic cleaners for delicate bones—then rinse thoroughly and scrub with a soft brush. Avoid harsh chemicals or aggressive scrubbing on fragile or porous bones, since it can erode surface detail and weaken structure.
What’s the best method to preserve cleaned bones long-term?
After cleaning, fully dry the bones before preservation to prevent mold and trapped moisture. For long-term preservation, store bones in dry, low-humidity conditions and consider a light coating of mineral oil (for dry, porous bones) or a clear archival sealant when appropriate. Handle the bones with clean gloves to reduce oils and dirt transfer, and keep them away from direct sunlight or fluctuating temperatures to prevent cracking and discoloration.
How do I remove grease and odor from old skulls or long bones?
Degreasing is often the most important step for “smelly” or oily bones, especially skulls and thick marrow-bearing areas. Use repeated warm soaks in a degreasing solution (such as detergents specifically for degreasing or mild degreasing agents), then rinse well and allow the bones to dry completely between cycles. If odor persists, continue degreasing and ensure the bones are thoroughly dried before sealing, since sealing moisture can trap smells inside.
Why do cleaned bones turn yellow or crack, and how can I prevent it?
Yellowing and brittleness usually come from residual fats, incomplete cleaning, or drying too quickly, which can cause warping or cracking. To prevent this, ensure all tissue is removed, degrease thoroughly, and dry slowly in a well-ventilated area rather than using intense heat. If you plan to display bones, stabilize them with proper preservation methods only after they’re fully dry and odor-free.
Which chemicals or sealants are safe for preserving bones and fur/skin remains are gone?
Once bones are fully cleaned and dry, choose preservation products designed for bone or archival use—such as clear matte varnishes or conservation-grade sealants—to avoid yellowing and flaking over time. Avoid strong bleach, acids, or unknown “cleaning” chemicals that can damage bone surfaces and remove fine details. If you’re unsure, test any cleaner or sealant on a less visible bone first and wait until it’s fully cured before deciding for the entire collection.
📅 Last Updated: October 06, 2026 | Topic: how to clean and preserve bones | Content verified for accuracy and freshness.
References
- Google Scholar Google Scholar
https://scholar.google.com/scholar?q=cleaning+preserving+skeletal+remains+maceration+dermestid - Google Scholar Google Scholar
https://scholar.google.com/scholar?q=bone+preparation+techniques+for+museum+collections+cleaning+preservation - Google Scholar Google Scholar
https://scholar.google.com/scholar?q=how+to+clean+animal+bones+dermestid+beetles+and+maceration+preservation - https://pubmed.ncbi.nlm.nih.gov/?term=cleaning+skeletal+remains+maceration+preservation
- Checking your browser – reCAPTCHA
https://www.ncbi.nlm.nih.gov/books/?term=cleaning+skeletal+remains+preservation - cleaning skeletal remains preservation | Nature Search Results
https://www.nature.com/search?q=cleaning%20skeletal%20remains%20preservation - Dermestidae
https://en.wikipedia.org/wiki/Dermestidae - Maceration
https://en.wikipedia.org/wiki/Maceration - https://en.wikipedia.org/wiki/Taxidermy
- https://www.britannica.com/science/bone
