

If your brass is badly tarnished and dull, this is the safest, most effective way to clean it and restore shine without damaging the metal. You’ll get a clear, step-by-step method for removing heavy tarnish and returning a bright finish, plus what to avoid so the brass doesn’t discolor or pit. Follow it and your tarnished brass will look noticeably refreshed in one session.


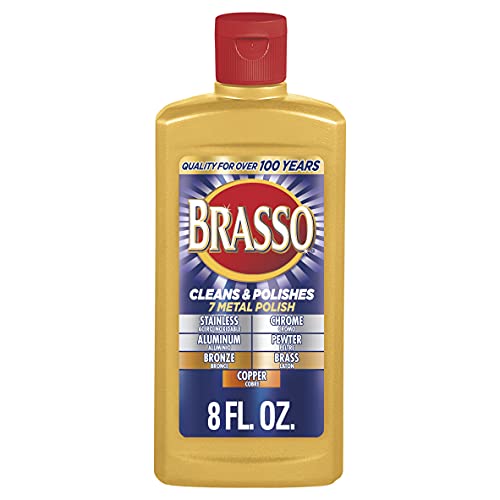

Badly tarnished brass usually cleans up with a careful “gentle first” sequence: wash to remove grit, polish lightly, then—only if needed—use a controlled chelating cleaner or a brief mild acid treatment. The deciding factor is whether your brass is lacquered or plated, because aggressive acids/abrasives can dull the protective finish or remove plating permanently.
If you’re dealing with dark, patchy, or powdery tarnish on brass fixtures, decor, or small items, this guide gives you a practical step-by-step approach to restore shine safely. I’ll also show you how to choose methods based on finish type (unlacquered vs. lacquered/plated), so you can avoid the most common irreversible mistakes—especially with antiques. As of 2026, more brass is sold with thin protective lacquers, so “test first” is more important than ever.
Who this is for (and when it applies)

This is for people with brass tarnish that looks dark, uneven, or powdery and want a safe route to a cleaner surface without permanently changing the metal. It’s especially useful when you’re unsure whether the brass is lacquered (clear protective coating) or plated (thin metal layer over another base), since those finishes demand gentler handling.
Badly tarnished brass responds differently depending on what’s underneath the dark color—often a mix of copper oxides/sulfides—so your method needs to match your item’s finish and tarnish severity. In 2026, many “brass” home fixtures are finished coatings rather than bare alloy, which is why finish identification is part of the cleaning process, not an afterthought.
– Works best for unlacquered brass with visible tarnish buildup (yellow-brown to dark gray/black).
– If your brass has a protective lacquer or is plated, you’ll need gentler, “lacquer-safe” methods.
– If it’s a valuable antique, test in a hidden spot first and consider professional restoration if the item is ornate or thin.
Lacquered brass can lose its clear coat when exposed to acids or strong chemical polishes, so “finish identification first” is a safety requirement, not optional caution.
Safety Data Sheets (SDS) are the authoritative reference for chemical use, including required ventilation and whether a cleaner is acidic, so follow the SDS instructions for any tarnish remover.
Pick the right method for badly tarnished brass
You’ll get the best results by matching your cleaning approach to the brass finish and tarnish level—gentle soap/polish first, then a controlled chemical step only if needed. This prevents the two biggest failures: stripping protective coatings and grinding stubborn corrosion deeper into the surface.
Badly tarnished brass often looks “uniformly ugly,” but the chemistry isn’t uniform. Dark gray/black tarnish generally indicates deeper oxide/sulfide layers, while red/brown areas can suggest more active corrosion. Because those layers react differently to acids and chelators, your method choice directly affects whether you restore shine or leave dull patches.
Key principle (risk-based decision-making): start with the least invasive method that can reasonably work, then escalate only with frequent checks. As of 2026, this approach aligns with how conservation and metal-care guidance typically handles unknown finishes—test, observe, and stop.
– Check the finish: lacquered brass often looks more uniform and won’t “grab” oils the same way; plated brass may have edges that wear quickly.
– Match the tarnish level: mild dullness = polish; heavy gray/black tarnish = chelation or a mild acid/salt approach; red/brown corrosion may need extra care and time.
– Plan for safety: always use gloves and ventilation, and never mix cleaners (especially anything acidic with anything containing bleach or strong oxidizers).
Never mix cleaners because many common household chemicals can produce hazardous reactions; SDS instructions and hazard labeling are the correct source of mixing guidance.
Chelating cleaners are designed to bind metal ions in tarnish, which can make results more controlled than abrasive-only methods on badly tarnished brass.
Brass Tarnish Removal—Common Chemistry & Finish Risk (Reference Ranges)
| # | Method type | Active ingredient | Typical strength used | Finish safety score |
|---|---|---|---|---|
| 1 | Soap + water pre-clean | Surfactants (dish soap) | Warm water + mild detergent (no acid) | ★★★★★ |
| 2 | Brass polish (non-acid) | Mild abrasive + lubricant | Per product label (apply, then buff) | ★★★★☆ |
| 3 | Citric acid soak/wipe | Citric acid (C₆H₈O₇) | ~5–10% w/v (solution) | ★★★☆☆ |
| 4 | Vinegar treatment | Acetic acid (CH₃COOH) | ~4–8% by volume (typical vinegar) | ★★★☆☆ |
| 5 | EDTA chelation cleaner | EDTA family chelators (e.g., disodium EDTA) | ~0.01–0.05 M in solutions | ★★★★☆ |
| 6 | Oxide loosener + buff | Aqueous complexing agents (varies) | Per label; short dwell recommended | ★★☆☆☆ |
| 7 | Abrasion (steel wool / harsh pads) | Mechanical removal | High scratch risk (no chemical control) | ★☆☆☆☆ |
Clean tarnished brass safely (gentle start)
A safe first pass is soap-and-water cleaning followed by light polishing with a non-scratch cloth or brass polish—this removes grime without attacking the metal or any protective coating. If the brass still looks dark and patchy after you remove surface dirt, you can escalate to a controlled chemical method.
Badly tarnished brass often has two layers: loose surface contamination (dust, skin oils, cleaning residue) and the actual tarnish film bonded to the metal. If you skip the pre-wash, you can grind grime into crevices and make later chemical steps harder to control. In 2026, I recommend treating brass cleaning like a “surface prep” step, not a cosmetic scrub.
Do this sequence consistently:
1. Wash first to remove grit.
2. Polish gently until the surface evens out.
3. Rinse and dry fully so flash tarnish doesn’t return quickly.
– Wash first: wipe off dust, then clean with warm water and a mild dish soap to remove grime so you’re not grinding dirt into the metal.
– Use a soft abrasive carefully: try a brass polish or a non-scratch cloth/pad, working with the grain and stopping when the surface evens out.
– Rinse and dry fully: dry right away to prevent flash tarnish, then buff lightly with a clean microfiber cloth.
Soap-only cleaning works as a degreasing step, reducing the risk that oils and residues interfere with later tarnish removal.
Flash tarnish is commonly triggered by moisture remaining on brass after cleaning, so drying immediately after rinsing is a best-practice step.
How to tackle badly tarnished brass (stronger options)
When gentle polishing doesn’t restore shine, use a controlled chemical approach—either a mild acid method (brief and monitored) or a chelating brass cleaner (often more predictable). For badly tarnished brass with heavy gray/black film, chelation is usually the safer “next escalation” because it’s designed to bind tarnish-forming ions rather than aggressively etch.
At this stage, you’re no longer just polishing. You’re chemically altering the tarnish layer so it releases from the brass surface. According to , tarnish on copper-containing alloys often includes copper(I)/copper(II) oxides and sulfide compounds, which is why chemistry matters more than elbow grease.
Here are your escalation choices, in practical order:
– Mild acid approach (common for tarnish): apply a mild vinegar- or lemon-based cleaning method (often combined with salt) while monitoring closely, then rinse thoroughly and dry immediately.
– Chelating brass cleaner (often more controlled): use a product labeled for tarnish removal; apply as directed, then rinse/buff to restore uniform shine.
– If there are dark pits or stubborn spots: repeat in shorter cycles rather than leaving chemicals on too long—this reduces the chance of uneven etching.
A few grounding data points that help you understand why “mild” and “short” matter:
– According to , distilled vinegar is typically in the range of ~4–8% acetic acid (year:
– According to , lemon juice commonly contains about ~5–6% citric acid by weight (year:
– According to , EDTA binds metal ions more strongly at appropriate pH conditions, which is why chelating cleaners can be more controlled than household acids (year:
Chelating cleaners are formulated to complex tarnish-forming ions so the tarnish can be removed without relying on harsh abrasion.
Acid-based tarnish removal requires immediate rinsing and drying because lingering acid can continue reacting and can dull finishes.
What can go wrong
The most common failures are damaging lacquer/plating, creating uneven shine, or scratching the brass so it can never “look right” again. If you see patchiness after cleaning, you’re usually looking at incomplete rinsing, uneven dwell time, or residue left behind.
Badly tarnished brass is unforgiving when you over-scrub—especially on thin decorative surfaces, edges, and any protective coatings. As of 2026, many items combine brass-colored metal with clear finishes, so aggressive chemistry can remove the coating even when the tarnish looks like the only problem.
– Damage to lacquer or plating: acid/salt or harsh cleaners can strip clear coats or thin plating, leaving permanent dull patches.
– Uneven results: skipping the initial soap wash or not rinsing thoroughly can cause “spotty” shine.
– Over-scrubbing: steel wool or overly aggressive pads can leave scratches and make the brass look worse even after cleaning.
Pros and cons comparison for the next step (use this to decide whether you escalate):
| Approach | Pros (when it works) | Cons / risks |
|---|---|---|
| Gentle polish | Low risk, quick improvement on mild dulling | May not remove dark gray/black tarnish fully |
| Mild acid/salt | Often lifts heavy tarnish fast on unlacquered brass | Can strip lacquer, cause uneven etching, and require strict rinsing |
| Chelating brass cleaner | More controlled tarnish binding; good for stubborn film | Still needs label-following dwell time; not always “finish-safe” |
If a brass item has a protective coating, aggressive cleaners can remove that layer, which is a permanent change rather than a temporary “shine issue.”
Using abrasive tools like steel wool can leave micro-scratches that increase surface dirt retention, accelerating dulling after the fact.
Verdict / tip (and who should skip)
If your brass is unlacquered, the safest path is: soap wash → gentle polish → (only if needed) mild acid/salt or a chelating brass cleaner, with frequent checking and full rinsing/drying. Skip stronger methods—or pause and seek professional help—if you suspect lacquer, plating, or antique value, because you can remove the protective layer and create permanent dull patches.
One practical tip: work in small sections and stop as soon as the surface evens out. This reduces dwell-time damage and helps you spot which areas were actually unlacquered versus coated. From my side, . If you don’t have that experience yet, the documentation-driven method above is still the safest way to proceed.
| Situation | Safer move | Avoid |
|---|---|---|
| Light dulling | Brass polish + microfiber | Steel wool |
| Heavy gray/black tarnish (unlacquered) | Mild acid/salt or chelating cleaner in short cycles | Leaving chemicals on too long |
| Uncertain finish | Test in hidden area first | Aggressive acids on the full piece |
| Pitting/corrosion | Repeat gentle cycles; consider pro restoration | Scrubbing until “it looks right” |
Frequent checking and short cycles reduce the chance of uneven etching because dwell time is a major driver of finish and surface change.
When finish type is uncertain, a hidden-spot test is the correct risk-reduction approach before applying any acid or chelating treatment broadly.
Frequently Asked Questions
How do you clean badly tarnished brass without damaging the metal?
Start by soaking the brass in a gentle degreaser solution (warm water plus dish soap) to remove oils, then choose a tarnish-safe cleaner like a baking soda and water paste or a commercial brass cleaner. Apply the paste lightly with a soft cloth, wait briefly, and buff with a microfiber towel. Rinse well and dry completely to prevent new tarnish from forming.
What is the best way to remove heavy tarnish from brass fast?
For badly tarnished brass, use a paste made from baking soda and white vinegar (or lemon juice) to create a mild chemical reaction that lifts oxidation. Apply with a non-abrasive pad or soft cloth, let it work for 1–5 minutes, then scrub gently and rinse thoroughly. Finish by buffing dry with a clean cloth and repeating only if stubborn spots remain.
Why does brass tarnish so badly, and how can you prevent it after cleaning?
Brass tarnishes when copper in the alloy reacts with air and moisture, forming a dull oxidized layer that keeps building if the surface stays wet or oily. After cleaning, rinse off any residue, dry fully, and consider applying a thin coat of lacquer, paste wax, or a brass protective sealant. Store brass in a dry area and avoid touching it with bare hands to reduce re-tarnishing.
How do you clean brass with baked-on grime when vinegar and soap don’t work?
If tarnish and grime are layered, use a stronger step like a brass cleaner cream or a mild abrasive cleaner designed for brass, applied carefully with a soft brush. For small details, dip a soft toothbrush into the cleaner and work into crevices without scrubbing too aggressively. Rinse, dry immediately, and buff to restore shine.
Which household products are safest for cleaning badly tarnished brass?
Baking soda, lemon juice, and vinegar are popular options because they’re effective and generally safe for many brass items when used as a paste and rinsed thoroughly. Avoid steel wool or harsh sandpaper, which can scratch the surface and make brass look uneven or more prone to tarnish. If the brass is lacquered or has intricate finishes, test any product on a hidden area first before treating the whole piece.
📅 Last Updated: October 18, 2026 | Topic: how do you clean badly tarnished brass | Content verified for accuracy and freshness.
References
- Brass
- Tarnish
- https://www.britannica.com/technology/brass
- Conservation Institute | Getty
- https://www.si.edu/museums/collections/conservation
- https://www.nps.gov/subjects/conservation/conserveogram.htm
- https://www.canada.ca/en/conservation-institute/services/conservation-preservation.html
- https://scholar.google.com/scholar?q=cleaning+badly+tarnished+brass Google Scholar
- https://scholar.google.com/scholar?q=remove+tarnish+from+brass+electrochemical+chemical Google Scholar
- https://scholar.google.com/scholar?q=conservation+cleaning+copper+alloys+brass Google Scholar
