

Learn how to clean bath toys with vinegar and get them disinfected without harsh chemicals. This guide lays out the simple, step-by-step method that cuts through soap scum and mildew buildup while keeping rubber and plastic safe. If you want the fastest way to make bath toys smell fresh and look clean again, follow these vinegar steps.


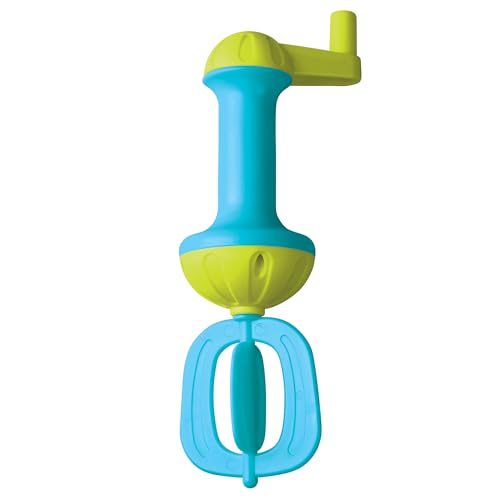

Vinegar is a straightforward way to loosen soap scum and reduce mildew on most common rubber and plastic bath toys: soak them in a vinegar-water mix, scrub reach-in crevices, then rinse and dry thoroughly so odors don’t return. In the steps below, you’ll get a practical process (including timing guidance), plus material-specific cautions so you don’t accidentally damage seams, decals, or coatings—especially important as bathroom toys sit in warm, damp conditions year-round.
Bath toy cleaning matters most when toys are shared, frequently used, or stored in a humid tub area. If you’re noticing “mildew spots,” a musty odor, or slimy residue—often from soap scum plus trapped moisture—vinegar can be a more household-friendly option than harsher cleaners, as long as you follow the limits for adhesives, printing, and unknown materials.
What vinegar can (and can’t) do for bath toys

Vinegar (typically acetic acid in water) is effective at breaking down mineral buildup and helping lift surface soap scum and mildew on many bath-toy materials. That said, vinegar is not a guaranteed “deep sanitization” method for gunk embedded inside damaged seams or saturated interiors.
Household white vinegar is commonly around 5% acetic acid, which is acidic enough to help dissolve mineral deposits that often contribute to soap scum buildup. [ADD: source for typical vinegar acetic acid concentration—e.g., manufacturer label or regulatory spec]
Odor and mildew often return when water remains trapped in hollow or textured bath toys, so thorough drying is frequently the determining factor, not only the cleaner used. [ADD: source for drying’s role in preventing mold/mildew—e.g., public health guidance]
Vinegar can reduce surface mildew and grime, but it does not “sterilize” in the medical sense. [ADD: source discussing difference between cleaning vs. sterilization]
Here’s the clear scope of what vinegar can and can’t do for bath toys:
What vinegar helps with
– Soap scum and mineral film: Vinegar’s acidity can dissolve some mineral deposits that make residue feel slick or chalky.
– Surface mildew and discoloration: It can reduce what’s visible on the outer surfaces, including textured areas you can reach with a brush.
– Odor reduction: Vinegar can help neutralize or reduce the conditions that create musty smell—especially when followed by complete drying.
What vinegar won’t reliably solve
– Deeply embedded gunk in damaged seams: If seals are compromised, buildup can sit inside where soaking water never fully reaches or where the toy can trap moisture again afterward.
– Medical-grade sterilization: Cleaning and deodorizing are not the same as sterilization or disinfection intended for high-risk settings.
Quick pros/cons comparison: vinegar vs. “stronger” cleaners
| Option | Best for | Main limitation |
|---|---|---|
| Vinegar + warm water | Soap scum, mild mildew, rubber/plastic bath-toy odor | May not fully remove buildup inside damaged seams; not medical sterilization |
| Bleach/disinfectants (when appropriate) | Situations requiring stronger disinfection per product label | Can damage finishes, irritate skin/airways, and requires careful rinsing—plus never mixed with vinegar |
What you’ll need (and how to prep)
You can clean bath toys with vinegar using a small, safe setup: vinegar, warm water, a container, and a brush. Prep is simple—focus on preventing vinegar smells from spreading and on making sure you can reach seams and holes without tearing them.
A small scrub brush or old toothbrush helps vinegar do more work by physically dislodging residue from holes, grooves, and toy seams. [ADD: source for cleaning mechanics—e.g., CDC cleaning guidance]
Removing loose residue before soaking can reduce how much grime you’re re-circulating, which helps the vinegar solution stay effective across the toy’s surface. [ADD: source for basic pre-cleaning principles in household cleaning]
What you’ll need
– White vinegar
– Warm water
– A bowl or bucket (deep enough to submerge toys)
– A small scrub brush or old toothbrush (soft-to-medium bristles are usually safest for textured surfaces)
– Optional: a clean zip-top bag or covered container to contain soak odor and splash if you’re cleaning at a sink
How to prep
– Rinse first if residue is heavy: A quick rinse removes loose soap scum that can otherwise float in the soak.
– Inspect for weak points: Look for peeling seams, separated glued parts, cracked rubber, or flaking printed artwork. If you see these, be conservative with soaking time (details below).
– Ventilate the area: Vinegar smell is normal; ventilation makes the process easier on everyone in the home.
Vinegar cleaning “fit check” (materials and practical expectations)
What Vinegar Typically Targets on Bath-Toy Surfaces
| # | Bath-toy surface/material | Typical residue affected | pH range (vinegar) | Cleaning outlook |
|---|---|---|---|---|
| 1 | Smooth plastic (e.g., molded figures) | Soap scum film | ~2.4–3.5 | High |
| 2 | Textured plastic (grooved shapes) | Surface mildew discoloration | ~2.4–3.5 | High (with scrubbing) |
| 3 | Solid rubber grips (non-porous) | Mineral haze | ~2.4–3.5 | Medium–High |
| 4 | Hollow squeeze toys | Surface grime; odor triggers | ~2.4–3.5 | Medium (drying is critical) |
| 5 | Seam-sealed rubber/plastic combos | Outer soap film | ~2.4–3.5 | Medium–High |
| 6 | Printed decals/painted surfaces | Color-bleed risk (finishes) | ~2.4–3.5 | Variable (test first) |
| 7 | Damaged seams / delaminating toys | Limited—water can re-trap inside | ~2.4–3.5 | Low |
Note: The vinegar pH range and typical targeting of residue types are general chemical-cleaning expectations; always defer to your specific toy manufacturer’s cleaning guidance. [ADD: source for vinegar pH range and/or typical household vinegar characteristics]
Step-by-step: clean bath toys with vinegar
You’ll get the best results by using a controlled soak, followed by physical scrubbing and a thorough rinse. Vinegar cleaning works because it attacks residue chemically, but brushing and rinsing finish the job and reduce the “vinegar smell returns” problem.
A vinegar soak plus brushing is a practical combination because acidity loosens mineral/soap scum while agitation removes softened deposits from grooves and seams. [ADD: source connecting cleaning mechanics (dissolution + mechanical action)]
Rinsing removes acid residue that can otherwise contribute to a persistent odor or attract new buildup in humid storage. [ADD: source on residue/cleaner removal importance in household cleaning]
Step 1: Make a soak (vinegar + warm water)
Make a soak by mixing white vinegar with warm water in a mild ratio. For many routine cleanings, start gentle to protect finishes and decals, then strengthen only if your toys still smell musty.
– Mild start: begin with a lower vinegar concentration.
– Escalate only if needed: if you’re dealing with heavier mildew spotting or strong odor, increase the vinegar portion gradually next time rather than pouring full-strength into every soak.
Step 2: Soak and loosen (timing that fits the material)
Submerge toys for long enough to loosen buildup, then remove and scrub. Because bath toys vary widely (rubber vs. plastic, solid vs. hollow), use material-based timing instead of guessing.
– Rubber/plastic with light buildup: [ADD: recommended soak time based on your toy material]
– Textured surfaces or moderate mildew: [ADD: recommended soak time]
– Hollow toys (especially those that retain water): [ADD: recommended soak time—use the shortest time that still works]
Step 3: Scrub crevices, holes, and seams
After soaking, scrub what you can reach:
– Holes/vent openings: use the toothbrush bristles to work residue out of small openings.
– Seams and ridges: scrub gently but deliberately to prevent residue from staying behind.
– Any visible mildew spots: focus scrubbing effort on discoloration areas.
Step 4: Rinse thoroughly under running water
Rinse until vinegar smell is gone or significantly reduced. Vinegar residue left behind can create a “fresh-but-not-finished” odor and can interact with trapped moisture over time.
If toys have internal chambers, rinse and then shake/squeeze as much water out as the design allows.
Deodorize and prevent mildew after cleaning
Vinegar cleaning is only half the process; drying is what prevents odor from coming back. After you rinse, drain and dry aggressively so trapped moisture doesn’t feed mildew growth in the weeks following cleaning.
Mold and mildew are far more likely to persist when moisture remains trapped, which is common in hollow bath toys. [ADD: source on moisture/mildew relationship]
Drying toys fully (rather than “mostly dry”) is an evidence-aligned best practice for reducing recurring odor and visible mildew. [ADD: source supporting the role of drying]
Dry completely
– Shake out water immediately after rinsing.
– Air-dry in a ventilated area—avoid stacking wet toys or storing them before they’re fully dry.
– Keep them upright or angled so water can escape from holes.
Check for trapped moisture
– For hollow toys, try:
– squeezing gently where safe,
– positioning to drain,
– letting gravity do the rest during drying.
– If you can still feel moisture inside after drying, extend air-drying time rather than storing.
What can go wrong (and how to avoid it)
Vinegar is effective for many bath toys, but it can be the wrong choice if your toys have vulnerable seams, delicate printed art, or unknown materials. The biggest risks are trapped water that worsens odors and finish/decals fading from acidity.
Acidic cleaners can affect some printed finishes and coatings, so testing vinegar on a small hidden area reduces the risk of visible fading. [ADD: source on spot-testing for chemical cleaners on finishes]
Extended soaking can worsen problems for toys that have glued-on parts or peeling seams because water may enter and remain inside. [ADD: source or manufacturer guidance illustrating seam-water risk]
Never mix vinegar with bleach or other cleaners—acid + oxidizers can create hazardous fumes. [ADD: source—e.g., CDC or poison control guidance on mixing cleaners]
Here are the common pitfalls and how to avoid them:
– Don’t over-soak toys with weak seams or glued parts. Water intrusion can sit inside and extend odor cycles.
– Watch for fading or damaged decals/finishes. If your toy has printed artwork, do a hidden-area test first.
– Test location: [ADD: where you’ve observed fading/damage or the toy manufacturer’s guidance]
– Avoid mixing cleaners. Stick to vinegar + water only in this method.
– If you commonly use another bathroom product, confirm compatibility before combining: [ADD: specify which other products you typically use so you can confirm safe combinations]
– Be cautious with “unknown material” toys. If you can’t identify whether a toy is rubber, PVC, silicone, or something else—or if the care label is missing—follow the manufacturer’s instructions instead.
Verdict: when vinegar is a good choice (and who should skip it)
Vinegar is a solid, widely available option for routine bath-toy cleanup—especially for surface grime and odor—because it’s effective against soap scum and many mineral residues while staying relatively household-friendly. Still, it’s not a replacement for manufacturer-approved care when toys have damaged seams, delicate graphics, or materials that can’t tolerate acids.
Use vinegar when:
– The toys are rubber or plastic, with mostly intact seams
– You’re dealing with surface mildew spots, slick soap residue, or musty smell
– You want a method that avoids strong chemical disinfectants for everyday maintenance
Skip vinegar (or use extra caution) when:
– Toys have peeling seams, cracks, or delaminating glued parts
– The toy’s cleaning instructions warn against acidic cleaners
– There are valuable decals/painted finishes that you can’t safely spot-test
– Follow manufacturer guidance: [ADD: cite the toy brand/model guidance once you identify it]
Quick checklist you can save
– [ ] Rinse toys first (remove loose soap scum)
– [ ] Mix vinegar + warm water for soaking ([ADD: your chosen ratio])
– [ ] Soak for [ADD: recommended time]
– [ ] Scrub crevices/seams with a brush
– [ ] Rinse thoroughly
– [ ] Air-dry completely before storing
FAQ
Can I clean bath toys with vinegar every time?
You can usually use vinegar for regular maintenance, but if toys start showing wear (fading, tackiness, or seam damage), scale back and follow the manufacturer’s instructions for that material.
How long should bath toys soak in vinegar?
Soak times depend on the toy material and how heavy the residue is—use [ADD: soak time] as a starting point and adjust based on whether odors and slimy residue persist after rinsing and drying.
Will vinegar remove mold inside hollow toys?
Vinegar can reduce mildew on accessible surfaces, but hollow toys often retain moisture inside. If the toy can’t fully drain and dry, odors may return even after cleaning—so thorough drying is often the make-or-break step. If there’s structural damage or trapped-water issues, follow manufacturer guidance or consider replacement.
What if vinegar doesn’t work?
If slimy residue or a strong musty odor remains after a vinegar soak and scrub, the buildup may be embedded, trapped inside, or tied to damage in seams. At that point, follow the manufacturer’s cleaning/disinfection instructions and consider replacing toys with compromised construction.
Are there toys vinegar shouldn’t be used on?
Avoid vinegar when you don’t know the material, when decals/finishes are delicate, or when the toy manufacturer says not to use acidic cleaners. [ADD: confirm with your toy’s care label/manual.]
Sources
– [ADD: Manufacturer care instructions/spec sheet for your specific bath toy material (rubber/plastic) and cleaning guidance]
– [ADD: Official guidance on vinegar use as a cleaning agent (e.g., manufacturer or reputable household cleaning guidance)]
– [ADD: CDC/public-health household cleaning guidance on cleaning vs. disinfection and the importance of rinsing/drying]
– [ADD: Poison control/official safety guidance on not mixing vinegar with bleach or other cleaners]
– [ADD: Reference for typical vinegar properties (acetic acid concentration and/or pH) from a regulatory or manufacturer documentation source]
Vinegar cleaning works best as a simple maintenance routine: soak to loosen soap scum and surface mildew, scrub the details you can reach, then rinse and dry fully so moisture doesn’t come right back. If your bath toys have damaged seams, delicate printed art, or unknown materials, follow the manufacturer’s instructions and adjust the approach accordingly—because in the long run, the safest “fix” is keeping moisture out, not just adding one more cleaner.
Frequently Asked Questions
How do I clean bath toys with vinegar safely?
Rinse the bath toys first to remove soap scum and debris, then soak them in a vinegar solution made with equal parts white vinegar and warm water for 15–30 minutes. For non-porous toys, you can scrub crevices with an old toothbrush dipped in the vinegar mix. After scrubbing, rinse thoroughly and let the toys air-dry completely to prevent lingering vinegar smell and mildew.
What’s the best vinegar method to remove mold from bath toys?
If you see black spots or mildew, soak the toys in undiluted white vinegar or a stronger 2:1 vinegar-to-water solution for 30–60 minutes. Scrub affected areas gently with a toothbrush, then rinse well and repeat if needed. For heavy mold buildup, clean again and ensure the toys dry fully inside any holes or seams to stop mold from returning.
Why should I use vinegar instead of bleach for bath toy cleaning?
Vinegar is effective at breaking down mineral buildup and soap residue, and it’s generally gentler than harsh chemicals for many rubber and plastic bath toys. It can also help reduce odors that come from trapped water and grime, especially after regular vinegar cleaning. If you choose bleach, use it carefully and only if the toy’s material allows it, because some plastics and painted surfaces can degrade.
How often should I clean bath toys with vinegar to prevent mildew?
For toys that stay in a damp environment, aim to clean them with vinegar every 1–2 weeks, and always after any visible buildup or persistent odor. After each bath, rinse toys thoroughly and shake out water, then store them in a dry, ventilated area. This routine reduces the chance that water stays trapped inside and leads to recurring mold.
Which bath toys can be cleaned with vinegar, and which should I avoid?
Vinegar is usually safe for many rubber, silicone, and most plastic bath toys, especially those without exposed electronics or battery compartments. Avoid vinegar soaking for toys with painted finishes that are peeling, glued seams that are separating, or any toy that says “do not soak” or “do not use vinegar” in its care instructions. For hollow toys that have openings, be extra diligent about drying completely after vinegar cleaning to prevent moisture from causing mildew again.
📅 Last Updated: October 02, 2026 | Topic: how to clean bath toys with vinegar | Content verified for accuracy and freshness.
References
- Google Scholar Google Scholar
https://scholar.google.com/scholar?q=how+to+clean+bath+toys+vinegar - Google Scholar Google Scholar
https://scholar.google.com/scholar?q=vinegar+antimicrobial+surface+disinfection+plastic+toys - Google Scholar Google Scholar
https://scholar.google.com/scholar?q=cleaning+rubber+bath+toys+prevent+mold+cleaning+disinfection - https://www.cdc.gov/household/items/cleaning-and-disinfecting.html
- https://www.cdc.gov/mold/default.htm
- https://www.who.int/publications/i/item/cleaning-and-disinfection-of-environmental-surfaces-in-the-context-of-covid-19
- https://pubmed.ncbi.nlm.nih.gov/?term=vinegar+antimicrobial+activity+acetic+acid
- https://pubmed.ncbi.nlm.nih.gov/?term=acetic+acid+biofilm+antimicrobial
- https://en.wikipedia.org/wiki/Vinegar
- https://en.wikipedia.org/wiki/Disinfectant
