

After a careful, non-abrasive tile clean, your bathroom floor and wall tiles will look brighter and your grout lines will stay intact and stain-resistant. You’ll learn which products are tile-safe, how to spot the difference between soap scum, hard-water marks, and mildew, and how to scrub and rinse without etching or scratching. With the right tools and a simple method, you can complete the job in a manageable timeframe and avoid costly repairs.


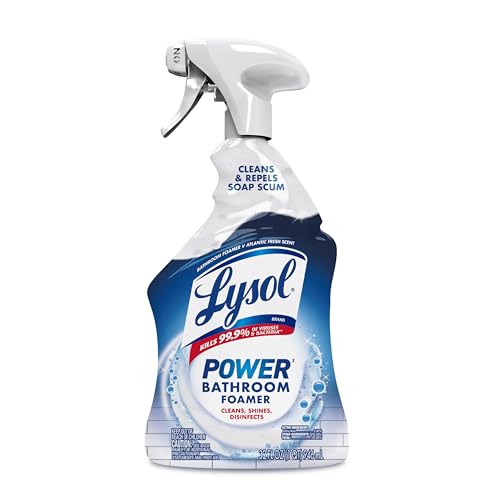

Scrub bathroom tiles with a pH-neutral cleaner and soft tools, then rinse thoroughly to keep soap scum and grime from building up. Avoid harsh acids/bleach on natural stone and don’t use abrasive pads that can scratch glazed surfaces or wear down grout.
This is for anyone cleaning tile walls, floors, and grout in a shower/tub area who wants a method that’s effective but safe—especially if you’re not sure what your tiles are made of (ceramic vs. natural stone) or how old the grout is.
Start With the Right Cleaner and Tools

Use a pH-neutral approach and non-scratch tools as your default, because they reduce the risk of etching (for stone) and surface dulling (for tile finishes). In practice, this also makes the process more forgiving if your tile type or grout condition isn’t fully clear—something that’s increasingly common as bathrooms age in 2026.
– Use a pH-neutral tile cleaner (or mild dish soap solution) for routine cleaning.
– Choose non-scratch tools: microfiber cloths, a soft sponge, and a nylon brush for grout lines.
A quick reality check: “pH-neutral” means around pH 7 (neutral). Stronger cleaners aren’t just “stronger”—they can change surfaces at a chemical level. For example, household vinegar is typically 4–8% acetic acid, which is acidic enough to etch many stones over time (USDA FoodData Central). And household bleach commonly contains sodium hypochlorite (often in the ~5–9% range for consumer products), which can be aggressive toward some grout and can react with other cleaners if misused (U.S. EPA).
Typical Household Cleaner Strengths and Natural-Stone Compatibility (General Ranges)
| # | Cleaner category | Typical pH range* | Target use | Natural-stone compatibility |
|---|---|---|---|---|
| 1 | pH-neutral tile cleaner | ~6.5–8.5 | Routine film/soap-scum | ★★★★★ |
| 2 | Mild dish soap solution | ~7–9 | Light grime and daily wipe-down | ★★★★☆ |
| 3 | Baking soda paste | ~8–9 | Spot lift for film (gentle) | ★★★☆☆ |
| 4 | Hydrogen peroxide (common) | ~3–5 | Mold/organic staining (label-based) | ★★☆☆☆ |
| 5 | Household vinegar | ~2–3.5 | Hard-water scale (use cautiously) | ★☆☆☆☆ |
| 6 | Bleach (sodium hypochlorite) | ~11–13 | Disinfection (risk-managed) | ★☆☆☆☆ |
| 7 | Ammonia-based cleaners | ~10–12 | Grease/film (some tile products) | ★★☆☆☆ |
Ranges vary by brand and dilution; always check the product label. Compatibility scores reflect general risk to common natural stones (marble, travertine, limestone) and older grout. (As of 2026 guidance expectations remain centered on label compliance and stone-safe chemistry.)
Step-by-Step: Clean Tiles Safely (Shower or Floor)
Use warm pre-rinse, a pH-neutral cleaner, gentle scrubbing, and a thorough rinse to remove buildup without stressing tile surfaces. This sequence matters because many “stubborn stains” are actually soap scum films—softening them first reduces the temptation to over-scrub later.
– Pre-rinse with warm water to loosen loose dirt, then apply cleaner and let it sit briefly per the label (don’t leave it until it fully dries).
– Scrub gently in small sections, rinse well, and dry if you can to reduce water spots and new buildup.
Here’s the safe workflow I recommend for shower walls and tub surrounds:
1. Ventilate and protect yourself first. Run the fan if you have one and keep the area dry underfoot. If you’re using any chemical cleaner, follow its label and check the Safety Data Sheet (SDS) for hazards and compatibility guidance.
2. Pre-rinse with warm water. This loosens dust, body oils, and early soap-scum layers so your cleaner doesn’t have to do all the work.
3. Apply pH-neutral cleaner in sections. Work one wall panel or a foot-wide section at a time. Let it dwell only long enough for the label’s chemistry to work (commonly a few minutes, but follow your product).
4. Scrub with softness, not force. Use a microfiber cloth for glaze and a soft sponge for edges. For grout lines, switch to a nylon brush so you avoid grinding out mortar.
5. Rinse thoroughly until the surface feels “clean,” not slick. Rinsing is where most DIY mistakes happen: leaving residue creates a hazy film that attracts new grime faster.
6. Dry when feasible. A squeegee or towel reduces standing water, which reduces mineral spotting—especially on floors.
If you’re dealing with heavy mineral deposits (hard-water scale), don’t jump straight to vinegar or bleach. In 2026, a more controlled approach is to test the product label’s recommended method on a hidden spot first, then escalate only if the surface remains intact.
Clean Grout Without Eroding It
Use grout last and apply targeted scrubbing so you lift staining without wearing down mortar joints. Grout is porous (unsealed grout absorbs liquids), so soaking time and chemical strength directly affect how quickly it can fade or deteriorate.
– Work grout last and use a grout brush or old toothbrush to target lines instead of “power scrubbing” everything.
– If you’re using a stronger cleaner (like hydrogen peroxide-based options), test a hidden spot first and follow the product directions exactly—grout can vary.
A practical, grout-safe routine looks like this:
1. Rinse tiles first. This prevents loosened grit from grinding into grout while you work.
2. Use a nylon grout brush. A toothbrush-style brush helps you get mechanical action exactly where the stain lives.
3. Keep dwell time short at first. Stronger cleaners can lighten organic stains, but prolonged contact can also change grout color, especially older cement-based grout.
4. Rinse aggressively after dwell. Any leftover chemistry becomes part of the residue layer that attracts future deposits.
5. If grout is sealed, respect the seal. Sealed grout often tolerates mild cleaners better, but it can still be affected by oxidizers and harsh solvents.
For reference, hydrogen peroxide products are commonly sold around 3% strength for household use, and that’s a chemical environment that can be powerful even when diluted (CDC). That’s why label-following and spot testing matter when grout color and surface integrity are on the line.
Match the Method to Tile Type (This Prevents Damage)
Use pH-neutral cleaning on unknown tiles, then adjust based on whether you have ceramic/porcelain or natural stone. This is the fastest way to avoid irreversible damage, because natural stones (marble, travertine, limestone) are more sensitive to acidic chemistry than glazed tile.
– Ceramic/porcelain: generally tolerate pH-neutral cleaners; still avoid abrasives that can dull finishes over time.
– Natural stone (marble, travertine, limestone): skip acidic cleaners (vinegar, descalers) and harsh chemicals; use stone-safe products only.
Ceramic vs. natural stone—how to think about compatibility
Ceramic and porcelain tiles are manufactured with a glaze layer that resists water and many cleaners. Natural stone doesn’t have the same protective glaze, so acids can etch (dull/roughen) the surface and create permanent visual changes.
Here’s a quick comparison of “safer default” vs “high-risk escalations”:
| Approach | Pros | Cons / Risks |
|---|---|---|
| pH-neutral cleaner + soft tools | Lower risk of etching/dulling; effective for routine soap scum; easier to repeat safely. | May take more passes for heavy scale or long-neglected grout. |
| Acid/bleach-based “descale” | Can lift scale faster when chemistry matches the deposit type. | High risk for natural stone etching; can weaken some grout and damage sealers if misused. |
Sealed vs. unsealed grout (a decision that changes dwell time)
If you know your grout is sealed, you typically need gentler dwell time and a cleaner that won’t attack the sealer film. If it’s unsealed, it will absorb more liquid, so dwell time and rinse thoroughness become even more important. When you’re unsure, treat it like unsealed: shorter contact times, gentler tools, and thorough rinsing.
What Can Go Wrong (And How to Avoid It)
Use the safest method as a baseline, then avoid common “DIY accelerators” that cause permanent problems. In 2026, the most frequent bathroom failures still come from using the wrong chemical category (acid/oxidizer) or using abrasive tools that gradually erode grout and finish.
– Scratches and dulling: abrasive pads, powder cleaners, and stiff bristles can leave micro-scratches—worse for matte or decorative finishes.
– Etching or discoloration: acids (including “DIY vinegar” mixes) can etch stone and can weaken some grout over time.
– Residue left behind: cleaning without a thorough rinse can create a hazy film that attracts grime faster. Rinse until water runs clear.
– Sealed vs. unsealed grout: sealed grout needs gentler handling; unsealed grout is more absorbent, so dwell time and cleaner strength matter.
Common failure modes, explained clearly:
1. Micro-scratches from “safe-looking” abrasives. Even if a tile looks glossy, abrasive powders can dull it over repeated cleanings. Matte finishes are particularly vulnerable.
2. Etching from acidic cleaners. Natural stone etching is often visible as a dull patch after the cleaner dries and the surface chemistry changes.
3. Chemical residue that recreates buildup. If the surface feels slippery or leaves a film on your fingertip, you haven’t fully rinsed—and grime will cling faster next time.
4. Over-scrubbing grout that’s already compromised. If grout is missing, cracking, or crumbling, aggressive scrubbing won’t restore it; it can worsen separation.
If you want a “risk-managed” approach, treat bathroom cleaning like a small operational plan using a hierarchy of controls: start with the least aggressive method, verify results on a hidden area, then escalate only if needed—while staying within the product label and surface compatibility.
Inspection point: If grout joints show visible failure (gaps, missing sections, or loose edges), stop and address the underlying repair before repeated chemical cleanups.
Verdict: The Safest Approach (With Limits)
Use pH-neutral cleaner + soft scrub + thorough rinse as your default. It’s the most reliable way to avoid typical tile damage, but it won’t always remove heavy mineral scale or deeply stained grout without additional (and more targeted) steps.
Skip or be extra cautious if:
– You have natural stone and don’t know what cleaners are safe for it.
– Your grout is crumbling or missing—aggressive scrubbing won’t “fix” that and can worsen separation.
– Stains are from unknown sources (rust, hard-water scale, mold that returned quickly). In those cases, you may need a targeted approach rather than repeating the same routine.
The realistic downside: if you’re trying to remove long-term hard-water deposits, the “safe” routine can take multiple cycles. That’s still usually preferable to permanent etching or eroded grout, especially when you’re cleaning areas where moisture constantly cycles.
Quick Scan Checklist (Save This)
| Task | Do | Don’t |
|---|---|---|
| Daily/weekly tile cleaning | Use pH-neutral cleaner + soft sponge/cloth | Use abrasive powders/pads |
| Rinsing | Rinse thoroughly; dry if possible | Leave cleaner to dry on the surface |
| Grout cleaning | Use nylon grout brush; gentle scrubbing | Aggressively scrape or grind |
| Natural stone | Use stone-safe products only | Use vinegar/acidic descalers |
| Stubborn buildup | Test cleaner strength in a hidden area | Apply the strongest chemical immediately everywhere |
Frequently Asked Questions
How do I clean bathroom floor or wall tiles without scratching the surface?
Start by sweeping or vacuuming to remove grit, which can scratch tile and grout during mopping. Use warm water with a mild, pH-balanced tile cleaner and a soft microfiber mop or non-abrasive sponge. Avoid steel wool, abrasive scrubbers, or powders that can dull glazed surfaces and wear down grout over time. Rinse well and dry to prevent soap scum and water spots.
What’s the safest way to remove soap scum and hard water stains from bathroom tiles?
For soap scum, use a non-abrasive cleaner and let it sit for a few minutes before gently scrubbing. For hard water stains, look for a cleaner labeled safe for tile and follow the label timing—overexposure to harsh acids can damage grout and some finishes. After treatment, rinse thoroughly with water and dry the area to keep mineral buildup from returning quickly.
How do I clean grout lines in the bathroom without damaging them?
First, remove loose dirt with a gentle brush and warm water, then use a grout-specific cleaner designed for your grout type (sealed vs. unsealed). Scrub with a soft-bristle brush or an old toothbrush to target grime without grinding grout. If the grout is sealed, use products that won’t strip the seal, and always rinse well. Re-seal grout if you notice increased staining or water absorption after cleaning.
Why do my bathroom tiles look streaky after cleaning, and how can I prevent it?
Streaks usually come from residue left behind by soap-based cleaners, dirty mop water, or insufficient rinsing. Use clean water for a final rinse and switch to a microfiber cloth to wipe tile and wipe-dry with a squeegee when possible. Also avoid overusing cleaner—more solution doesn’t mean better results, and it can leave a film that attracts dirt. Let tiles dry completely to reduce haze and mineral deposits.
Which bathroom tile cleaner is best for preventing damage to grout and tile finishes?
The best choice is a pH-neutral, non-abrasive cleaner that’s specifically labeled safe for ceramic, porcelain, and natural stone if applicable. For everyday cleaning, choose a mild cleaner to protect grout and sealed surfaces, and reserve stronger descalers for periodic deep cleaning. Always test a small hidden area first, follow dwell time instructions, and avoid acidic or bleach-heavy products unless the label explicitly says they’re safe for your tile and grout type. Regular gentle cleaning reduces buildup, making it much easier to clean bathroom tiles without damaging them.
📅 Last Updated: November 08, 2026 | Topic: How to Clean Bathroom Tiles Without Damaging It | Content verified for accuracy and freshness.
References
- https://www.epa.gov/coronavirus/cleaning-and-disinfecting-your-facility-home
- https://www.cdc.gov/coronavirus/2019-ncov/community/disinfecting-building-facility.html
- https://www.who.int/publications/i/item/cleaning-and-disinfection-of-environmental-surfaces-in-the-context-of-covid-19
- Mold Cleanup in Your Home | US EPA
- Mold Clean Up Guidelines and Recommendations | Mold | CDC
- Tile
- Grout
- https://scholar.google.com/scholar?q=cleaning+ceramic+tile+and+grout+without+damage Google Scholar
- https://scholar.google.com/scholar?q=acid+vs+alkaline+cleaners+effect+on+grout+and+tile Google Scholar
- https://scholar.google.com/scholar?q=mold+removal+bathroom+surfaces+guidelines+tiling Google Scholar
