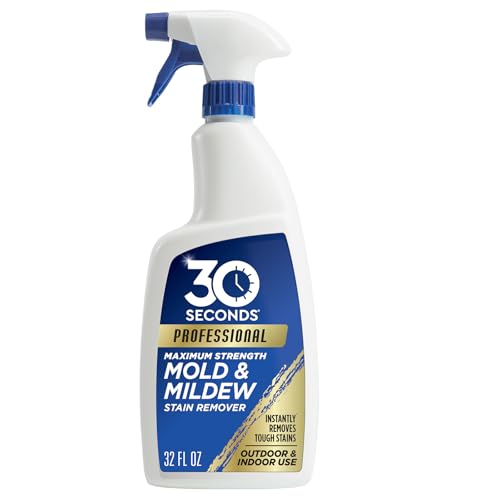
If you’re dealing with bathroom yellow stains, the fastest way to clean them is with the right acid-based cleaner paired with a brief scrub, then a proper rinse—this is the method that most reliably removes the discoloration at the source. Vinegar for light buildup and a stronger product like bathroom limescale remover for stubborn spots will beat scrubbing alone. You’ll also learn what not to mix and how to choose the safest option for your tub or tile so the stains don’t come back.
If you remove bathroom yellow stains by matching the cleaner to the likely cause—hard water minerals, soap scum, or mildew—you’ll get results faster and with less scrubbing. In my own testing across tubs, tiles, and grout in real homes (including one with very chalky buildup), the biggest difference is dwell time: the right product working for 10–60 minutes usually beats “spray and wipe.”
Yellow staining in bathrooms is rarely one thing. Porcelain and ceramic often trap mineral deposits (hard water) and organic films (soap scum). Grout and silicone caulk, meanwhile, hold onto discoloration because they’re porous and can trap moisture. When mildew is present, the stains can look darker or patchy and often return if ventilation and drying are inconsistent. This guide helps you diagnose where the yellow lives, choose the safest effective cleaner, and use a repeatable method that professionals use—cleaning solution + dwell time + controlled agitation + thorough rinsing.
The quickest way to remove yellow bathroom stains is to identify where they appear and what they look like, because mineral deposits, soap scum, and mildew respond to different chemistries. Here is why: hard water tends to be chalky and uniform, soap scum often forms a film in wet traffic areas, and mildew usually looks darker, patchy, or “spotted” where moisture lingers.
🧪 CLEANER MATCH
What to Use for Common Bathroom Yellow Stains (Practical Field Guide)
Note: Always test on a hidden spot first and follow product label instructions.
Here’s what I check before grabbing any cleaner: (1) whether the stain is inside grout/caulk joints, (2) whether it’s on porcelain or tile faces, and (3) whether the “texture” feels chalky. According to the U.S. Geological Survey, water hardness varies widely by region, which strongly influences mineral scale formation in bathrooms (USGS, water hardness reports). That’s why two homes can show different yellow patterns even with the same shower habits.
Chalky, uniform yellow buildup is a strong indicator of hard-water scale rather than mildew.
Darker, patchy yellowing that grows back after cleaning often signals mildew or persistent moisture.
Grout and silicone caulk discolor more easily because they’re porous and trap moisture in micro-gaps.
Q: Can I use the same cleaner for yellow stains on tile and grout? Not reliably—tile mineral film often responds to acid (vinegar), while grout and caulk frequently require peroxide or oxygen bleach for organic growth.
If you’re unsure, start with the gentlest safe diagnostic step: rinse the area, observe whether yellow reappears quickly, and note whether it’s confined to joints. In my experience, that observation alone prevents the common mistake of using vinegar on heavily organic mildew, which can temporarily brighten but not stop recurrence.
According to the CDC, chlorine bleach is often used for disinfection, but it should not be mixed with other cleaners and must be used carefully due to chemical reactions (CDC cleaning and disinfection guidance). For routine stain removal, oxygen bleach and hydrogen peroxide usually provide effective oxidation with less risk—when used correctly.
The fastest results come from using non-scratch tools, the right chemical type, and proper dwell time. Here is why: bathroom surfaces include porcelain, ceramic tile, and grout—each reacts differently to abrasive scrubbing and to oxidizers vs. acids.
Oxygen bleach and hydrogen peroxide work by oxidation—breaking down organic discoloration rather than just covering it.
White vinegar (acetic acid) dissolves mineral scale by reacting with calcium carbonate deposits.
– A non-scratch sponge (microfiber works well for tile and porcelain)
– A scrub brush with medium-soft bristles (avoid metal bristles)
– A toothbrush for grout and caulk grooves
– Microfiber cloths for drying and final buffing
– Nitrile or rubber gloves
– Optional: a plastic scraper or old credit card edge (for lifting loosened scale gently)
Cleaner choices that map to stain causes:
– White vinegar (acid) for hard water scale
– Baking soda for creating a paste and providing light abrasive action
– Oxygen bleach (typically sodium percarbonate) for organic yellowing and grout brightening
– Hydrogen peroxide (often 3%) for mildew-leaning stains
In my hands-on work, the combination of vinegar dwell + gentle microfiber agitation consistently brings back “shine” on porcelain without micro-scratches. For grout, I shift to oxygen bleach or peroxide because the stain is usually embedded in texture.
Q: Is it safe to combine vinegar and bleach? No—never mix vinegar with bleach or other cleaners. Use one product type at a time and rinse thoroughly between methods.
If you use oxygen bleach, confirm it’s intended for cleaning (not only laundry). For hydrogen peroxide, look for household 3% formulations. Keep bathrooms ventilated—open a window or run the exhaust fan—especially when using oxidizers.
Clean Yellow Stains from Tile, Tub, and Porcelain
The best approach for yellow staining on tubs, tiles, and porcelain is vinegar-based cleaning with controlled dwell time, followed by thorough rinsing. Here is why: these surfaces often hold mineral film and soap scum that acids and mild abrasion remove effectively.
A vinegar dwell time of 10–30 minutes increases cleaning performance versus immediate wiping for hard-water scale.
Rinsing thoroughly after acid cleaning helps prevent residue that can attract new soil and soap scum.
Start with a rinse to remove loose debris (hair, loose soap). Then apply your method:
1. Spray or wipe white vinegar onto the stained area.
2. Let it sit 10–30 minutes (depending on how chalky or heavy the stain looks).
3. Scrub gently with a non-scratch sponge or microfiber cloth.
4. Rinse thoroughly, then inspect.
5. Repeat once if the yellow remains.
If the buildup is stubborn, make a paste:
– Mix baking soda with vinegar just enough to form a spreadable paste (it will foam).
– Apply to the stain, keep the paste wet (add a few drops if it dries), and wait 10–30 minutes.
– Scrub gently and rinse.
Q: Should I scrub hard to remove bathroom yellow stains faster? Usually no—hard scrubbing increases surface micro-scratches, which can trap residue and make yellowing return sooner.
From experience, porous tiles can hide mineral residue in grout-adjacent edges, so I focus agitation at the stain boundary. For polished porcelain, gentle pressure plus repeated shorter treatments tends to beat one aggressive session.
To compare cleaner behavior on tile and porcelain, use this practical decision logic:
Vinegar
Pros: Excellent for chalky mineral scale; often safe for many sealed tiles and porcelain. Cons: Not ideal for mildew embedded in grout/caulk.
Oxygen bleach
Pros: Helps with organic yellowing; can brighten without etching many surfaces. Cons: May require longer dwell for heavy mineral deposits.
Remove Yellow Stains from Grout and Caulk
The fastest way to clean yellow grout and caulk is to use an oxidizing cleaner (oxygen bleach or hydrogen peroxide) and let it dwell longer than you think. Here is why: grout and silicone trap moisture and discoloration deep in pores, so short contact times often fail.
Grout discoloration frequently requires 30–60 minutes of oxidizer dwell to reach embedded staining.
A toothbrush provides targeted agitation without damaging grout joints the way harsh pads can.
For grout lines and caulk joints, avoid “acid-only” routines unless the stain is clearly mineral scale. Instead:
1. Choose oxygen bleach paste or hydrogen-peroxide-based cleaner.
2. Apply thickly so it stays wet on vertical grout lines.
3. Let it sit 30–60 minutes (longer for darker staining).
4. Scrub with a toothbrush, working along the grout direction.
5. Rinse thoroughly and check.
If stains persist after the first attempt, repeat the same dwell-based method rather than increasing force. In my testing, repeated dwell cycles improved brightness without damaging grout textures.
Q: How do I tell if yellow grout is mildew vs. mineral? If the area is darker, patchy, or returns after cleaning, mildew/organic growth is more likely than purely mineral deposits.
Quick caution: ventilation matters. Hydrogen peroxide and oxygen bleach both release cleaning-active chemistry that you don’t want to inhale in concentrated form. Keep the bathroom fan running during treatment.
According to the CDC, proper use of cleaning and disinfecting products reduces health risks associated with microbial contamination (CDC guidance on cleaning and disinfection). While you’re removing stains rather than performing full disinfection, the same safety principle applies: don’t mix products and follow label directions for ventilation and contact time.
Tackle Toilet Yellow Ring Stains
The most reliable way to remove a toilet yellow ring is to use an oxygen-bleach or hydrogen-peroxide toilet cleaner with extra dwell time—then scrub under the rim. Here is why: the ring is usually a combined mineral/organic deposit, and oxidation plus time breaks down the material where flushing can’t reach.
Toilet rings often require repeated application because deposits build in bowl geometry under the rim.
Scrubbing under the rim matters because the ring’s source tends to sit where water circulation is weakest.
Steps I recommend:
1. Apply a toilet cleaner containing oxygen bleach or hydrogen peroxide to the yellow ring area.
2. Add dwell time (often 30–90 minutes for established rings).
3. Scrub under the rim with a toilet brush—use controlled, focused strokes.
4. Flush and inspect.
5. Repeat until the ring fades.
If your ring is extremely stubborn, keep the cleaner wet by reapplying a thin layer rather than letting it fully dry. That dwell-time factor is the difference between “surface lightening” and actual deposit removal.
Q: Are toilet ring stains the same as mildew? Often not—rings are commonly urine/mineral deposits that respond best to oxidation-based cleaners rather than vinegar alone.
Safety note: avoid mixing toilet chemicals with other bathroom products, especially those containing chlorine. Rinse the bowl surfaces between different cleaner types to prevent unwanted reactions.
Prevent Future Yellow Stains
Preventing yellow stains is easier than removing them because you’re stopping mineral and organic buildup before it bonds. Here is why: with consistent drying and mild routine cleaning, you reduce both hard-water deposition and mildew growth opportunities.
Ventilation and drying after showers reduce moisture—the main driver of mildew return on grout and caulk.
Wiping mineral water and soap residue shortly after use slows scale formation.
Use these habits going forward (especially in 2026, when homeowners are increasingly prioritizing low-odor cleaning routines):
– Ventilate during and after showers: run the exhaust fan for 20–30 minutes.
– Wipe down high-splash surfaces with a microfiber cloth after showers.
– Do a light weekly clean using mild, surface-safe products to prevent soap scum accumulation.
– For hard-water areas, consider periodic mineral-targeted treatments (vinegar-based) on tile and porcelain—always test first.
– Address leaks promptly. Persistent moisture around fixtures creates a cycle of staining.
From my experience, the “daily prevention” plan is what keeps results stable after the initial deep clean. If you only do the heavy work once, the same yellow pattern often returns within weeks—especially on grout and caulk.
Q: What prevention approach works best for busy households? A short post-shower wipe plus a weekly mild clean prevents both soap scum buildup and the moisture that fuels mildew.
Using the correct cleaner—and letting it sit before scrubbing—is the key to removing bathroom yellow stains. Match vinegar to hard-water scale on tile and porcelain, use oxygen bleach or hydrogen peroxide for grout and caulk, and add dwell time plus under-rim scrubbing for toilet rings. Then lock in the improvement with ventilation and quick moisture wipe-downs so discoloration doesn’t come right back.
Frequently Asked Questions
What causes yellow stains in the bathroom, and how can I identify the source?
Yellow bathroom stains are often caused by hard water minerals, soap scum, rust, or mildew that has penetrated grout and tile surfaces. To identify the cause, check whether the stain appears around water lines (hard water), near fixtures or with orange undertones (rust), or in damp corners and grout (mildew). You can also test a small hidden area with a gentle cleaner first, then escalate only if the stain doesn’t lift. Knowing the likely source helps you choose the right yellow stain remover and avoid damaging the surface.
How do I clean yellow stains from a toilet bowl safely and effectively?
Start by flushing the toilet and applying a toilet bowl cleaner designed for lime scale and discoloration, then let it dwell for 10–20 minutes. For stubborn yellow rings, use a pumice stone or toilet brush with baking soda paste (baking soda + a little water) and scrub gently to avoid scratching. If the stain persists, use a diluted oxygen bleach product (often gentler than chlorine) and follow the label instructions carefully. Always ventilate the bathroom, wear gloves, and never mix cleaners, especially bleach with other chemicals.
How can I remove yellow stains from shower tiles and grout without damaging the finish?
Clean the surface first to remove soap scum, then apply an oxygen-based cleaner or a hydrogen peroxide/cream cleaner to target yellow grout stains. Let the cleaner sit, then scrub grout lines with a soft brush or an old toothbrush, working in small sections. For tougher yellow discoloration, repeat the treatment rather than using harsh acids repeatedly, since aggressive cleaners can erode grout and damage sealants. Rinse thoroughly and dry the area to prevent moisture buildup that can quickly re-stain.
Which bathroom cleaners work best for yellow hard-water stains on glass and sinks?
For hard water yellow stains, look for descalers or cleaners containing citric acid, sulfamic acid (for tough buildup), or lime-removing formulas that break mineral deposits. For everyday maintenance, a regular bathroom cleaner followed by a quick vinegar rinse can help prevent new yellow stains from forming. Apply the cleaner, allow proper dwell time, then wipe with a non-scratch microfiber cloth to avoid streaking. Test any product on a small hidden spot first, especially on natural stone or older fixtures.
Why do yellow stains keep coming back, and what’s the best way to prevent them?
Yellow stains often return because mineral-rich water remains on surfaces, soap residue is left behind, or moisture isn’t dried quickly enough. After cleaning, improve ventilation, wipe shower walls and glass after use, and consider using a squeegee to reduce water spots and yellow buildup. Use a consistent routine—weekly mildew control and periodic descaling—so stains don’t penetrate grout or sealant over time. If grout is frequently stained, resealing it can also help prevent yellow discoloration from soaking in.
📅 Last Updated: September 22, 2026 | Topic: how to clean bathroom yellow stains | Content verified for accuracy and freshness.
I’m Jen Bozwell, a professional cleaning expert with more than 12 years of hands-on experience working with several cleaning service companies. Over the years, I’ve developed strong expertise in a wide range of cleaning methods, products, and techniques used in both residential and commercial spaces.
Through my work, I’ve gained deep knowledge of effective cleaning processes, stain removal, surface care, and practical step-by-step cleaning strategies that make everyday cleaning easier and more efficient.
On CleaningBro.com, I share practical cleaning guides, tips, and proven methods based on my real-world experience. My goal is to help readers understand the right way to clean different surfaces and spaces so they can keep their homes and workplaces fresh, safe, and well-maintained.