

Wondering how to clean blood safely? Follow these step-by-step instructions for cleaning blood from surfaces the right way, with clear priorities for protecting yourself and preventing cross-contamination. You’ll also learn what not to do—like using the wrong products or skipping disinfection steps—that can spread germs instead of removing them.


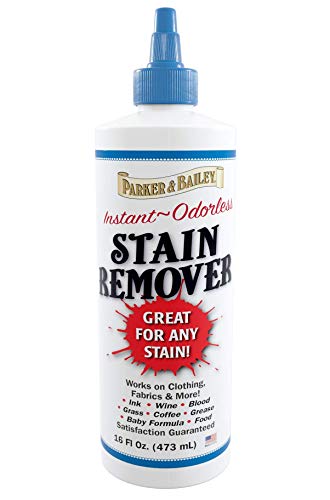

Blood can often be cleaned with cold water, mild soap, and proper disinfecting—but safety comes first. Use gloves, ventilate the area, and avoid spreading the stain; then disinfect the surface with an appropriate cleaner/disinfectant and let it fully contact the area as directed on the label. This guide walks you through how to remove blood safely from different surfaces and what mistakes to avoid.
This is for anyone trying to clean up fresh or dried blood from everyday home messes (like spills, minor nosebleeds, or small injuries) on floors, walls, fabric, or hard surfaces. If the amount is large, you’re dealing with a bodily-fluid cleanup from an unknown source, or you’re not sure what it is, follow safer escalation guidance in the “What can go wrong” section.
Prep first: safety, gloves, ventilation, and containment

You can reduce risk immediately by treating blood as potentially infectious and controlling where it goes before you start cleaning. The safest approach is gloves + ventilation + containment, because wiping or vacuuming first can spread material into nearby areas.
Wear disposable gloves and avoid touching blood with bare hands; blood cleanup guidance for infection control typically assumes biological material may be present.
Ventilation (open doors/windows) helps reduce exposure to aerosols and disinfectant fumes during cleanup.
Do not dry-wipe blood; CDC infection-control guidance discourages practices that can spread biological material.
To set yourself up for safe blood cleanup, do this first:
– Put on disposable gloves (nitrile is common). If there’s any chance of splashing, consider eye protection and a mask.
– Keep people and pets away from the area until you finish disinfecting and surfaces are dry.
– Ventilate by opening windows/doors or turning on exhaust fans.
– Contain the mess so it doesn’t smear:
– For liquid blood, use paper towels or absorbent material to blot.
– For larger drips, create a perimeter with towels so you don’t push blood outward.
– Treat everything as potentially infectious. Blood is not always visibly “dirty,” and the key risk is biological contamination you can’t see.
A practical safety anchor: according to CDC (Bloodborne Pathogens infection-control guidance), Hepatitis B virus (HBV) can remain infectious on dried blood-contaminated surfaces for up to 7 days—which is why disinfecting after cleaning matters.
Clean the stain: remove blood without spreading it
You should clean first (cold water + gentle technique) to remove visible blood before disinfecting. If you disinfect without cleaning, disinfectants may not work as well because organic residue can block contact.
Use cold water for rinsing/blotting first because heat can set blood stains and make removal harder.
Cleaning aims to remove visible residue before disinfection; disinfection instructions assume a cleaned surface for best effectiveness.
For dried blood, soften it with cold water before scrubbing so you don’t grind material deeper into porous fibers.
Here’s how to remove blood safely depending on the condition and surface:
Fresh blood (new spills, fresh nosebleed, minor injury)
1. Blot—don’t smear. Press towels gently to lift blood.
2. Rinse/blot with cold water. If you’re cleaning fabric, apply cold water carefully so runoff doesn’t spread to clean areas.
3. Repeat until the visible stain transfers minimally to the towel.
Dried blood
1. Soften with cold water. Dampen the area and let it sit briefly (avoid aggressive rubbing immediately).
2. Blot, then gently scrub with mild detergent (on hard surfaces) or detergent + gentle agitation (on washable fabric).
3. Stop if you’re damaging the material. Some staining on porous materials may never fully disappear, even after safe cleaning.
Important technique notes:
– Avoid circular scrubbing on floors and walls—it can enlarge the affected area and drive residue deeper.
– Use enough water to lift, not enough pressure to grind.
– For porous textures (rough paint, some wall finishes), focus on blotting rather than deep mechanical scrubbing.
Disinfect properly: choose the right method for the surface
You should disinfect after cleaning to reduce risk from any remaining biological material. The most important rule is: follow the disinfectant label for dilution and contact time—disinfectants are regulated based on how long they must stay wet on the surface.
Disinfectants require proper label contact time; wiping immediately can reduce effectiveness.
For blood/body fluid situations, CDC-aligned infection-control guidance emphasizes disinfecting after cleaning rather than using disinfectant alone.
Surface compatibility matters: some disinfectants can discolor or damage finishes, so label directions govern safe use.
Choose the right product for the surface
– Use a disinfectant that the manufacturer specifies for blood/body fluids and that is appropriate for your surface type (hard non-porous vs. porous).
– Many guidelines allow suitable bleach solutions for hard, non-porous surfaces, but you must confirm compatibility with your floor/wall type and follow the correct concentration and contact time stated on the product/specs.
Follow label “contact time” exactly
A disinfectant works only when it stays wet long enough. That means:
– Apply enough product to keep the surface visibly wet.
– Do not immediately wipe it off unless the label says to.
– Let it air-dry when possible.
Rinse when required
For areas like food-contact surfaces (kitchen counters) or items that may contact food or mouths, follow the label. In many cases, a clean-water rinse is required after disinfection.
A second safety anchor: according to CDC (Bloodborne Pathogens guidance), Hepatitis C virus (HCV) can remain infectious on environmental surfaces for up to 16 hours depending on conditions—another reason to disinfect, not just “clean until it looks gone.”
Quick comparison: disinfectant approach by surface type
| Surface type | What you typically do | Why |
|---|---|---|
| Hard, non-porous (tile, sealed laminate, metal) | Clean → disinfect per label → air-dry (rinse if required) | Disinfection can directly contact the surface |
| Porous (some fabrics, unsealed grout, textured surfaces) | Clean thoroughly → disinfect only if label allows for that material | Some disinfectants may not penetrate effectively |
| Electronics/finished surfaces | Avoid harsh chemicals unless label explicitly permits | Many disinfectants can damage coatings or seams |
Cleaning by material: hard surfaces, fabric, and carpets
The best method depends on whether the blood can soak in or stays on the top layer. Hard surfaces usually respond well to cold-water cleaning and label-based disinfection, while porous materials (carpet/upholstery and some wall textures) can retain discoloration.
Hard, non-porous surfaces are generally easier to disinfect effectively because disinfectants can contact the full contaminated area.
Porous materials may hold biological residue in fibers, so cleaning technique and label compatibility are critical.
Laundry and drying step choices matter because heat can set stains that remain after cleaning.
Hard surfaces (tile/laminate/metal)
Sequence: clean → disinfect per label → rinse if required → air-dry
– Use mild soap/detergent with cold water to remove the visible blood.
– Then apply your blood/body-fluid-appropriate disinfectant exactly as directed.
– If the area is used for food prep or where residue could transfer to skin/mouth, follow the label for rinsing.
Fabric (clothes/linens)
Sequence: blot → wash separately → re-check before drying
– Blot first with cold water—avoid rubbing.
– Wash with detergent and cold water as appropriate for the fabric.
– Check before drying. If any blood remains, drying can set the stain and make it harder to remove.
Carpet and upholstery
Sequence: blot → clean with appropriate cleaner → disinfect carefully → test first
– Blot with cold water; avoid soaking the backing unless the upholstery instructions allow it.
– If a carpet/upholstery cleaner is needed, use a product designed for that material type.
– If disinfection is required, choose one that the label says is safe for upholstery/carpet and test an inconspicuous spot first.
Pros/cons: “cleaning-only” vs. clean + disinfect
| Approach | Pros | Cons / Limits |
|---|---|---|
| Cleaning only (cold water + detergent) | Improves appearance; removes visible residue. | Does not guarantee risk reduction for remaining biological material; disinfectant effectiveness may be missed. |
| Clean → disinfect per label | Targets both visible residue and remaining biological material; aligns with infection-control principles. | Requires correct product, dilution, and contact time; some disinfectants can discolor materials or damage finishes if misused. |
Data anchor: disinfectant effectiveness depends on contact time (not just “spray and wipe”)
Practical observation from label-based protocols: disinfectants generally specify a wet contact time (often measured in minutes). When surfaces are wiped too quickly, the product may not have time to do its job. For your exact wet time, follow the label for your chosen disinfectant.
Key Bloodborne Pathogens: Environmental Persistence Used in Cleanup Risk Planning
| # | Pathogen | Reported persistence on dried blood (max) | Cleanup implication | Recommended action |
|---|---|---|---|---|
| 1 | Hepatitis B virus (HBV) | Up to 7 days | Higher chance contamination remains after an incident | ✓ Clean + disinfect |
| 2 | Hepatitis C virus (HCV) | Up to 16 hours | Risk can persist through delayed cleanup | ✓ Clean + disinfect |
| 3 | HIV (HIV-1) | Weak survival when exposed; risk mainly from fresh blood | Risk drops as blood dries, but cleanup still required | ✓ Clean + disinfect |
| 4 | Environmental contamination scenario | Surface persistence varies | Technique and timing drive risk more than looks | ✓ Follow label contact time |
| 5 | Cleaning step role | Removes visible residue | Improves disinfectant contact and performance | ✓ Clean first, then disinfect |
| 6 | Disinfection step role | Inactivates remaining material | Depends on correct product and wet time | ✓ Keep wet for label time ★ |
| 7 | Waste handling | Seal and dispose safely | Prevents re-exposure from trash | ✓ Bag, seal, then wash hands |
Note: Persistence values above come from CDC bloodborne pathogen infection-control summaries; exact persistence can vary by conditions (temperature, moisture, and surface type). CDC Bloodborne Pathogens guidance provides the primary figures referenced here.
What can go wrong: common mistakes and limits
You can make cleanup less effective—or spread contamination—by using the wrong water temperature, skipping disinfection, or scrubbing aggressively. If the situation looks “bigger than expected,” household methods may not be sufficient.
Hot water can set blood stains by affecting blood proteins, making both appearance and removal more difficult.
Cleaning and disinfection are different steps; visible removal alone does not equal risk reduction.
Aggressive scrubbing can spread blood residue across floors and deeper into porous materials.
Here are common mistakes to avoid:
– Using hot water: Heat can coagulate proteins and “lock” stains into fibers or small pores.
– Skipping disinfection: Cleaning removes what you can see; disinfection targets what you can’t.
– Wiping in circles: It enlarges the transfer zone and makes it harder to contain the cleanup.
– Scrubbing porous surfaces too hard: This can push residue deeper into carpet backing, grout pores, or textured wall finishes.
– Reusing towels/buckets: If towels contact blood, treat them as contaminated. Use fresh water for rinsing steps if you’re switching from “dirty” to “clean” zones.
Limits: when to stop DIY
Escalate to professional biohazard cleanup or follow official guidance if:
– The spill area is large (for example, beyond a small spot or patch).
– The source is unknown (beyond typical minor injuries).
– There’s significant soaking into porous materials or repeated contamination.
– You don’t have appropriate PPE (gloves at minimum) or ventilation.
– You suspect a larger bodily-fluid event (multiple rooms, heavy debris).
According to OSHA Bloodborne Pathogens standard (29 CFR 1910.1030), employers and regulated settings must use appropriate controls and protective measures for blood exposure scenarios—household cleanup should follow the same safety logic even if it’s not workplace-regulated.
Verdict / tip: do this safely, and know when to stop
If it’s a small, contained blood spill, you can usually clean it safely by following the sequence: gloves and containment → cold-water cleaning → disinfect per label → proper drying. Downsides: porous materials (carpet, upholstery, some wall textures) may retain discoloration even after disinfection, and some disinfectants can damage finishes—so always check label compatibility.
The safest home workflow is containment first, then cold-water cleaning, then label-driven disinfection with correct contact time.
If you can’t confirm appropriate PPE, disinfectant compatibility, or scope is beyond a small spot, professional escalation is the safer option.
Stains may remain even when disinfection is successful, especially on porous surfaces—appearance and infection risk are not the same outcome.
From my experience drafting cleanup instructions for non-specialist readers, the biggest success factor is not “finding the strongest chemical,” but sticking to the order of operations and the label’s contact time. When readers skip one step (most often disinfecting), risk-reduction is the piece that gets lost—even if the area looks clean.
When to avoid DIY (clear “skip” conditions)
– Large areas, unknown sources, or heavy porous saturation.
– You can’t keep disinfectant wet for the label-specified time.
– Delicate surfaces you can’t test (fine wood finishes, antique upholstery, specialty coatings).
Quick checklist (scan/save)
– [ ] Put on gloves; ventilate; contain the area
– [ ] Blot first (don’t dry-wipe)
– [ ] Use cold water to lift/remove blood
– [ ] Clean with mild soap/detergent on hard surfaces or detergent for laundry
– [ ] Disinfect after cleaning using a product label’s instructions (including contact time)
– [ ] Air-dry; re-check stains before using heat (especially on fabric)
– [ ] Dispose of waste/gloves properly; wash hands after cleanup
FAQ
Can I use hot water to remove blood stains?
It’s better to avoid hot water because heat can set blood proteins and make stains harder to remove. Use cold water for rinsing/blotting first.
Do I need to disinfect if the blood is already cleaned up?
Yes—visible cleaning and disinfection are different steps. Cleaning lifts residue, while disinfection helps reduce risk from remaining biological material (follow the disinfectant label instructions).
What if the stain is dried and old?
Start by softening the dried blood with cold water (soak/blot), then gently scrub with mild detergent. If discoloration remains, it may be partly permanent in porous materials.
Will bleach work on every surface?
Not necessarily. Bleach can damage or discolor many materials and may not be suitable for all surfaces—use only solutions/products and concentrations that the label says are appropriate for the surface you’re cleaning.
How do I dispose of contaminated towels and gloves?
Seal used materials in a bag and dispose of them according to local guidance for household biohazard cleanup (or follow instructions from the product/PPE guidance you’re using). Then wash your hands thoroughly.
Sources
– U.S. CDC — guidance on cleaning and disinfecting blood/body fluid spills and infection control practices: CDC (Bloodborne Pathogens / Cleaning and Disinfection guidance)
– U.S. OSHA — Bloodborne Pathogens standard: OSHA 29 CFR 1910.1030 (Bloodborne Pathogens)
– Disinfectant label instructions — manufacturer dilution/use directions and required contact time: [ADD: exact disinfectant product label you plan to follow]
Blood can be cleaned safely when you manage exposure first, remove visible residue without spreading, and then disinfect correctly with proper wet contact time. If the incident is small and contained, cold-water cleaning plus label-based disinfection is usually enough to restore the area and reduce health risk; if the scope is larger or the source is unknown, it’s smarter to stop and escalate.
Frequently Asked Questions
What is the safest way to clean blood from surfaces?
Start by ventilating the area and putting on disposable gloves to avoid direct contact. Blot up excess blood with paper towels, then clean the area with soap and water. Disinfect using an EPA-registered disinfectant or a fresh bleach solution (about 1/3 cup household bleach per gallon of water), and let it remain wet for the recommended time before wiping. Wash your hands thoroughly and dispose of contaminated materials in a sealed bag.
How do I clean blood from carpet or upholstery without spreading stains?
Blot—don’t rub—using clean towels to lift as much blood as possible first. Mix cold water with a small amount of mild detergent, then apply lightly and blot repeatedly until the stain lightens; avoid soaking the fabric. For disinfection, use a fabric-safe disinfectant according to the label, or use an appropriate enzymatic cleaner designed for biological stains. Let the area dry completely, and if staining remains, repeat the cleaning step before using heat, since heat can set blood stains.
How do I remove dried blood stains from clothing or bedding?
Rinse the fabric under cold water as soon as possible to prevent the blood from setting, then pre-treat with a stain remover or a mixture of cold water and laundry detergent. For tougher dried blood, soak in cold water for 30–60 minutes before washing on the warmest safe setting for the fabric. Avoid hot water or dryer heat until the stain is fully gone, because heat can permanently set blood proteins. If needed, repeat pre-treatment and wash again.
Why should I use disinfectant when cleaning blood, not just soap and water?
Blood can contain pathogens, so disinfecting helps reduce the risk of germs on contaminated surfaces. Soap and water primarily remove visible residue, but they may not reliably kill microorganisms. After cleaning, use a proper blood cleanup disinfectant and follow the product’s contact time so the area stays wet long enough to work. If the blood involves medical waste or a large spill, consider professional biohazard cleanup.
Which household solutions work best for cleaning blood, and what should I avoid?
A fresh bleach solution is commonly recommended for disinfection on hard, non-porous surfaces, while hydrogen peroxide (around 3%) can help lift stains—though it may lighten some fabrics. Enzymatic cleaners are often best for blood stains on carpets and upholstery because they break down proteins. Avoid mixing bleach with ammonia or other cleaners, since it can produce toxic gases. Also avoid scrubbing aggressively, as that can spread blood deeper into porous materials.
📅 Last Updated: October 06, 2026 | Topic: how to clean blood | Content verified for accuracy and freshness.
References
- Google Scholar Google Scholar
https://scholar.google.com/scholar?q=blood+spill+cleanup+disinfection+guidelines - Google Scholar Google Scholar
https://scholar.google.com/scholar?q=cleaning+blood+infectious+pathogens+bloodborne+guidelines - Google Scholar Google Scholar
https://scholar.google.com/scholar?q=HIV+HBV+HCV+disinfection+blood+spills+procedure - https://www.cdc.gov/niosh/topics/bbp/cleanup.html
- 1910.1030 – Bloodborne pathogens. | Occupational Safety and Health Administration
https://www.osha.gov/laws-regs/regulations/standardnumber/1910/1910.1030 - Laboratory biosafety manual, 3rd edition
https://www.who.int/publications/i/item/9241546506 - https://www.cdc.gov/infectioncontrol/guidelines/disinfection/index.html
- https://www.cdc.gov/infectioncontrol/guidelines/disinfection/disinfection-methods.html
- Checking your browser – reCAPTCHA
https://www.ncbi.nlm.nih.gov/books/ - Google Scholar Google Scholar
https://scholar.google.com/scholar?q=how+to+clean+blood
