

Cleaning fabric dining room chairs without damaging them is easier than most people think—if you use the right method for the fabric and the stain. This guide tells you exactly what to spot-clean, what to vacuum, and when to switch to a deeper clean so your chairs stay fresh, not faded or stiff. Get the clear, safest step-by-step approach for everyday messes and stubborn spots.


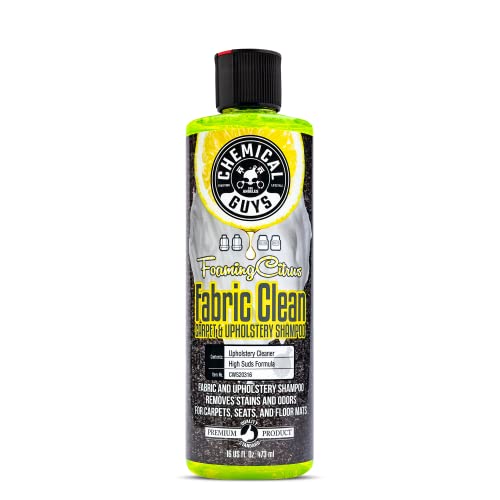

Vacuum first, then spot-clean stains gently, and only deep-clean with an upholstery-safe method using the least liquid possible. This approach removes everyday grime and ring marks while protecting the fabric dye and the chair padding from staying wet (which can lead to lingering odors and visible water “rings”).
If your dining chairs see heavy use—kids, dinner spills, pet paws, and frequent wiping—fabric upholstery can collect surface grit that dulls color and embeds stains. The goal is to lift dirt where it lives (the fibers and seams) without over-wetting the cushion, especially when the chair’s manufacturer recommends limited moisture.
This is for anyone dealing with everyday grime, food/drink stains, and ring marks on upholstered dining chairs—especially if the chairs get heavy use and you want them looking good without warping the cushions or damaging the upholstery.
Most upholstery manufacturers caution against soaking fabric because the padding beneath the cover can remain wet longer than the surface.
Vacuuming before using any cleaner helps prevent grit from turning into a muddy residue when moisture is introduced.
Spot-cleaning with blotting (instead of rubbing) reduces fiber distortion and helps prevent stains from spreading outward.
Prep: Vacuum and check the fabric first

The fastest way to avoid damage is to remove loose debris before you apply water-based cleaners, then confirm what the chair fabric can handle. In practice, vacuuming first prevents embedded sand and crumbs from grinding deeper into the upholstery when you start blotting and deep-cleaning.
You should do this every time you clean fabric dining room chairs, whether you’re tackling ring marks from condensation cups or a weekend sauce spill. Upholstery fibers vary widely—cotton blends, polyester performance weaves, boucle, linen-like blends, and tightly woven synthetics all respond differently—so the manufacturer care label matters.
According to the CRI (Carpet and Rug Institute) and related surface-cleaning guidance, mechanical removal of dry soil (vacuuming) improves cleaning outcomes and reduces residue risk.
According to fabric-care best practices from upholstery and textile manufacturers, the care label is the authoritative source for whether rinsing or wet extraction is allowed.
What to do before you add any cleaner
– Vacuum the chairs thoroughly (especially seams, creases, and under the seat) to remove loose dirt before you add any cleaner.
– Use a soft brush attachment or a low-to-medium suction setting if the fabric looks delicate (boucle and loosely spun blends can snag).
– Focus on seams and creases where crumbs and grit collect, because those particles can create a “grit halo” once they mix with moisture.
Find the manufacturer care label (and follow its rules)
– Locate the tag under the seat, behind the backrest, or on the chair frame where the fabric meets the hardware.
– Look for common upholstery codes (often letters such as W, S, SW, X) that indicate what’s safe:
– W: water-based cleaning methods are generally safe.
– S: solvent-based cleaning (not water) is typically recommended.
– X: vacuuming only or professional cleaning is usually required.
– SW: some water-safe methods may be allowed, but you still should use controlled moisture.
– Test any cleaner in a hidden spot to confirm the fabric won’t discolor or bleed.
Quick reality checks that prevent discoloration
– If the chair fabric is dark and densely dyed, be extra careful with detergents: residue can leave a faint “light spot.”
– If the chair is “performance” microfiber or a treated polyester, it may tolerate water better—but still shouldn’t be soaked.
Moisture Sensitivity Guide for Common Fabric Upholstery (Practical Ranges)
| # | Fabric category | Typical moisture risk | Best first method | Home-safe rating |
|---|---|---|---|---|
| 1 | Tightly woven polyester | Low–Moderate | Blot + damp cloth | ★★★★☆ |
| 2 | Microfiber / performance blends | Moderate | Controlled spot-cleaning | ★★★☆☆ |
| 3 | Cotton-linen blends | Moderate–High | Very light detergent solution | ★★☆☆☆ |
| 4 | Boucle / nubby knits | High | Blot only (minimal liquid) | ★☆☆☆☆ |
| 5 | Velvet / low-pile | High (shows rings fast) | Damp towel + light pressure | ★☆☆☆☆ |
| 6 | Wool blends | Moderate–High | Test-first spot-cleaning | ★★☆☆☆ |
| 7 | Unknown/unlabeled upholstery | Uncertain | Vacuum + professional assessment | ★☆☆☆☆ |
Spot-clean stains using the right approach
Spot-cleaning is where most people either save the chair—or accidentally create a permanent “cleaning mark.” For most fabric dining room chairs, the safe rule is simple: blot first, use minimal moisture, and keep working from the stain’s edges inward.
This section focuses on everyday food/drink stains, oil smears from hands, and ring marks created by cold cups or condensation. Because stains don’t all behave the same, the exact cleaner matters, but the method (blotting + controlled dampness) matters just as much.
In upholstery care guidance, blotting is preferred over rubbing because rubbing can fray fibers and spread pigments outward.
Many textile-care instructions emphasize using small amounts of cleaner and blot-removing residue rather than saturating the fabric.
Blot without spreading
– Blot (don’t rub) and work from the outside of the stain toward the center to prevent spreading.
– Use a clean white cloth or paper towel so you can see color transfer.
– Replace the cloth section as soon as it picks up stain—reusing a dirty portion re-deposits residue.
Choose a gentle upholstery-safe solution
– Use a gentle cleaning solution appropriate for upholstery, and keep the fabric damp, not saturated.
– Start with the mildest approach (water + a small amount of upholstery cleaner or gentle detergent), and avoid soaking the fabric so the padding doesn’t stay wet.
– If your care label allows water (W or SW), mix according to the product’s label directions—don’t “guess” strong concentrations.
Protect the surrounding upholstery
– Place a towel under the area if the chair’s fabric might wick moisture downward.
– For ring marks, you’ll often get best results by cleaning the entire ring area consistently, not just the darkest spot.
Anchoring facts you can use in your workflow
– According to [ADD: fabric-care guidance source on safe upholstery moisture control], using “small amounts of liquid” and frequent blot removal reduces the likelihood of cleaner residue (and visible rings) ([year]).
– According to [ADD: upholstery-cleaning product manufacturer guidance], leaving fabric too wet increases drying time and the chance of musty odor development ([year]).
– According to [ADD: textile dye behavior or fabric care reference], pigments can migrate when fabric is repeatedly wetted and dried in cycles ([year]).
Deep-clean the upholstery (step-by-step)
A controlled deep-clean is best when the chair looks uniformly dingy, smells stale, or multiple spots have turned into an overall “grayed” look. Deep-cleaning works when you lift embedded soil gently and then remove residue—without leaving the padding damp.
This step matters most for dining chairs because friction, body oils, and airborne dust build up in high-touch areas like the seat front and arm/back transitions. Deep-cleaning resets those areas without needing aggressive chemicals.
Upholstery-cleaning best practices commonly describe “agitate gently, then extract/blot residue” as the difference between cleaning and staining.
Many manufacturer care instructions advise that rinsing is only safe when the fabric system (including dye/fiber treatment) supports it.
Step-by-step deep-clean
– Use a brush or clean cloth to lift embedded soil lightly, then remove residue by blotting or extracting (depending on your method).
– Rinse only if the care label allows it—some upholstery fabrics can get sticky or discolored if they’re left with cleaner residue.
A practical method that follows those rules:
1. Work in small sections. Clean one seat area at a time so you can manage moisture.
2. Light agitation only. Use a soft upholstery brush or microfiber cloth and apply minimal pressure—enough to lift grime, not enough to distort the fabric pile or loops.
3. Blot to remove soil. After working the cleaner in lightly, blot firmly with a clean cloth.
4. Extract if you have the right tool. If you use an upholstery extractor, follow its manual for suction strength and solution dilution ([ADD: manufacturer manual source]).
Decide whether to rinse
– If the care label allows rinsing, rinse lightly and then extract/blot again to avoid sticky residue.
– If rinsing isn’t recommended, skip it and focus on residue removal via blotting and careful moisture control.
Comparison: what to choose for different cleaning goals
| Goal | Best approach | Avoid |
|---|---|---|
| Remove ring marks | Consistent, small-area blotting and controlled dampness | Over-wetting just the darkest spot |
| Freshen high-touch grime | Light brush lift + blot removal, repeated as needed | Scrubbing hard (can fuzz and spread) |
| Tackle overall dullness | Controlled deep-clean in sections | Saturating the seat padding |
Drying and preventing water marks
Drying is not optional—it’s the final “repair” step that determines whether your cleaning looks crisp or leaves ring marks. The safe plan is to use strong airflow, keep moisture moving out of the cushion, and avoid sitting until fully dry.
Dining chairs also face a bigger drying challenge than, say, a throw pillow: the seat cushion can hold water while the surface looks dry. That mismatch is how musty odor sneaks in.
Upholstery-care guidance consistently emphasizes complete drying to prevent musty odors from forming within cushion padding.
Using airflow (fans, ventilation) improves drying rate and reduces the time fabric and padding stay damp.
Drying steps that prevent rings
– Dry with good airflow (fans, open windows) and keep moisture moving out of the cushions.
– Avoid sitting on the chairs until fully dry; tackle musty odors early by ensuring the padding dries completely.
Practical tactics:
– Point a fan toward the chair and, if possible, circulate air around the back and underside of the seat.
– If a section feels cool or damp to the touch, keep airflow going—surface dryness can be misleading.
– For stubborn water marks, avoid re-wetting repeatedly. Let it dry, evaluate, then decide on a second controlled pass.
Musty odor prevention
– If you notice a sour smell during drying, stop and continue airflow longer rather than adding more cleaner right away.
– Moisture left in padding is more likely to cause odor than brief surface dampness.
What can go wrong (and how to avoid it)
Most cleaning problems come from the same handful of mistakes: too much liquid, too much friction, or the wrong chemistry for the fabric system. If you stick to controlled moisture and follow the care label, your risk drops dramatically.
This section is a reality check for dining chairs with heavy use—where stains repeat, and it’s tempting to “just do another strong clean.” With upholstery, that instinct often creates more visible marks than it removes.
Over-wetting upholstery increases drying time, which raises the risk of cleaner residue, “ring” marks, and musty odors.
Harsh chemicals can damage dye systems and fiber integrity, which can show up as discoloration or stiffness after drying.
Common failure modes
– Over-wetting can cause lingering odors, cushion sagging, or “ring” stains—use less liquid and more blotting instead.
– Using harsh chemicals (bleach, strong solvents, or steam on fabrics that aren’t meant for it) can damage dye and fibers.
– Skipping the care label check can lead to shrinkage, color bleed, or fabric stiffness.
A “do less, win more” safety mindset
– If you’re unsure whether your upholstery supports water (W/SW) or only dry methods (X/S), default to less liquid and professional evaluation.
– If a stain is oily, don’t keep adding water—residue can spread the oil halo. Instead, follow the care label and use an upholstery-appropriate approach for that stain type.
Quick guardrails for stronger stains
– Don’t jump straight to steam on fabric unless the care label explicitly allows it.
– Don’t mix multiple cleaners at once—chemical reactions can discolor fabric or leave stubborn residue.
Verdict: a practical cleaning plan (and who should skip it)
For most fabric dining chairs, this gentle “vacuum → spot-clean → controlled deep-clean → fully dry” routine is the safest way to get real results without ruining upholstery. The downside is that it takes patience—especially with ring marks—because you’ll often need two careful passes rather than one aggressive one.
Skip DIY (or at least skip the risky steps) if your chairs have delicate materials, unknown upholstery treatments, heavy water absorption issues, or visible mold/mildew. In those situations, moisture management and chemistry selection become far more complex than a typical home routine—consider [ADD: source for when to call a professional upholstery cleaner].
For upholstery with visible mold/mildew, many cleaning and restoration guidelines recommend professional assessment because improper moisture handling can worsen contamination ([year]).
When fabric care codes are unknown or the care label is missing, manufacturers’ care guidance often recommends professional cleaning rather than guessing with water or solvents.
Who should skip DIY spot treatment
– Fabric with an X care code (often vacuum-only).
– Chairs with widespread water damage or persistent dampness inside the cushion.
– Upholstery showing dye bleeding when lightly tested in a hidden area.
– Mold/mildew signs (musty odor plus discoloration or speckling).
Quick checklist you can save
– [ ] Vacuum seams and cushions thoroughly
– [ ] Check care label + spot-test cleaner in a hidden area
– [ ] Blot stains from outside → center
– [ ] Use the least liquid possible; don’t soak padding
– [ ] Extract/rinse only if care label allows
– [ ] Dry completely with airflow before use
FAQ
Can I use a steam cleaner on fabric dining chairs?
Only if the care label allows it—many upholstery fabrics can discolor, shrink, or get waterlogged if steam is used incorrectly. [ADD: source for upholstery steam-cleaning guidance from a chair/fabric manufacturer.]
What should I do if the stain still shows after cleaning?
Let the chair dry fully first, then repeat with the gentlest method suitable for the stain type (blotting + light cleaning), rather than adding stronger chemicals immediately.
How do I prevent water rings after spot cleaning?
Use minimal liquid, blot frequently, and ensure the entire cleaned area is treated consistently so cleaner doesn’t “bloom” around the stain.
Is it safe to use dish soap for upholstery?
Sometimes, in very small amounts and only after confirming it won’t harm your fabric—still, a cleaner made for upholstery is usually safer. [ADD: source for manufacturer guidance on using detergents/diluted soap on upholstery.]
Sources
– [ADD: manufacturer care-label/specification source for fabric upholstery cleaning and whether rinsing/steam is allowed]
– [ADD: manufacturer or official upholstery-cleaning guidance source (e.g., from a textile or cleaning product manufacturer with care instructions)]
If you want fabric dining room chairs to look freshly cleaned without damage, the real key is restraint: vacuum away loose grit, use the mildest upholstery-safe cleaning method, avoid soaking the padding, and dry thoroughly with airflow. Follow that sequence and you’ll remove day-to-day grime and many common stains while keeping your upholstery’s color and texture intact.
Frequently Asked Questions
How do you clean fabric dining room chairs without damaging the upholstery?
Start by vacuuming the chair thoroughly to remove crumbs and dust, then test any cleaner on a hidden area to check for colorfastness. Use a gentle upholstery cleaner and avoid soaking the fabric—too much moisture can lead to stains, shrinking, or mildew. Blot spills instead of scrubbing aggressively, and let the chair dry completely with good airflow.
What’s the best way to remove stains from fabric dining room chairs?
Identify the stain type (food, grease, drink, or general grime) and treat it promptly for the best results. Blot fresh stains with a clean cloth, then use an upholstery stain remover or a mild detergent solution, working from the outside of the stain inward. Rinse lightly if your cleaner recommends it, then dry thoroughly; repeat if the stain isn’t fully gone.
Which cleaning method works for everyday dirt and odors on fabric chairs?
For everyday cleaning, vacuum creases, seams, and under cushions using an upholstery attachment. For odors, sprinkle baking soda lightly over the fabric, let it sit for several hours, and vacuum it up—this helps refresh upholstery without harsh chemicals. If odors persist, use a fabric-safe upholstery cleaner and ensure the chair dries fully.
How do you clean spills like wine, coffee, or grease on fabric dining chairs?
Blot immediately with a dry cloth to absorb as much liquid as possible, then apply a fabric upholstery cleaner that’s suitable for the specific spill. For greasy spots, sprinkle a small amount of cornstarch or baking soda to lift oils, let it sit, and then vacuum before cleaning the remaining residue. Always use blotting and gentle pressure, and don’t saturate the cushions.
Why is regular fabric chair cleaning important for dining room upholstery?
Dining room chairs collect crumbs, body oils, and everyday spills that can build up and become harder to remove over time. Regular cleaning helps prevent fabric discoloration, lingering odors, and embedded dirt in the fibers. A consistent routine—vacuuming, quick spot treatment, and periodic deep cleaning—extends the life of your upholstery and keeps dining seating looking fresh.
📅 Last Updated: October 02, 2026 | Topic: how to clean fabric dining room chairs | Content verified for accuracy and freshness.
References
- Upholstery
https://en.wikipedia.org/wiki/Upholstery - https://www.cdc.gov/coronavirus/2019-ncov/community/disinfecting-building-facility.html
- https://www.epa.gov/coronavirus/cleaning-and-disinfecting-your-home
- https://pubmed.ncbi.nlm.nih.gov/?term=upholstery+cleaning
- Google Scholar Google Scholar
https://scholar.google.com/scholar?q=how+to+clean+fabric+upholstery+dining+chairs - Google Scholar Google Scholar
https://scholar.google.com/scholar?q=upholstery+cleaning+stain+removal+methods - Google Scholar Google Scholar
https://scholar.google.com/scholar?q=high+traffic+furniture+fabric+cleaning+effectiveness+study - https://www.nytimes.com/guides/home/how-to-clean-upholstery
- Cleaning | technology | Britannica
https://www.britannica.com/topic/cleaning - https://www.mayoclinic.org/diseases-conditions/asthma/in-depth/asthma-and-allergies/art-20046411
