

Want to clean brass door hardware without damaging the finish? The most effective method is gentle, targeted cleaning—using warm water and mild soap for everyday grime, then a brass-specific cleaner only when oxidation demands it. Follow the right process and you’ll remove tarnish, protect the surface, and avoid the common scratches and dulling caused by harsh abrasives or the wrong chemicals.


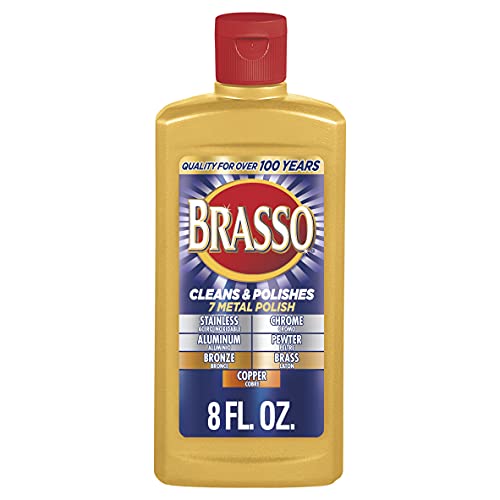

If your brass door hardware looks dull or grimey, the safest approach is to clean it gently with warm soapy water first, then use a brass-specific cleaner or a mild homemade solution to remove tarnish. Rinse and dry thoroughly, and avoid harsh abrasives that can scratch the finish and make tarnish come back faster. In this guide, you’ll learn what to use, what to avoid, and how to protect the hardware after cleaning.
This is for homeowners, renters, and property managers dealing with tarnished doorknobs, hinges, deadbolts, and door plates—especially when the metal has tarnish, fingerprints, or built-up residue. If the metal has a lacquered (protective) finish, choosing the wrong cleaner can lead to cloudiness or peeling, so the “what’s safe” step matters as much as the “how to polish” step.
Identify the finish (lacquered vs. unlacquered brass)

You can prevent most damage by identifying whether your brass is lacquered (clear protective coating) before you apply anything stronger than soap and water. Once you know the finish type, you can choose a cleaner that lifts tarnish without stripping or dulling the surface.
Lacquered brass typically appears more uniform and consistent, because the clear coating acts as a barrier between the metal and air.
If a cleaner leaves a dull, tacky, or uneven surface during a test spot, stop—this is a common sign the finish isn’t compatible.
Start with quick visual checks:
– Uniform sheen vs. “natural” variation: Lacquered brass often looks even in color and gloss. Unlacquered brass more readily shows natural tonal shifts as oxidation develops.
– Edge behavior: When tarnish forms on unlacquered brass, it usually darkens gradually across edges, screws, and high-touch contact points. On lacquered hardware, residue can still build up, but the “tarnish look” is often less progressive until the barrier is breached.
Then do a low-risk test spot:
– Choose an inconspicuous area (underside edge, back of a plate, or near a hinge leaf).
– Apply your planned method with a soft cloth (not directly as a wet pool).
– Wait briefly, then wipe clean and inspect under normal indoor lighting.
If the finish seems uncertain, default to the least aggressive path:
– Warm soapy water first (for grime and fingerprints).
– Mild polishing only if needed, and only after the test spot behaves normally.
From a maintenance standpoint, finish identification also determines how aggressively you should protect the surface afterward—wax/sealants can be appropriate for some unlacquered brass finishes but can interfere with lacquered surfaces depending on chemistry. If you’re responsible for multiple units, this step is especially worth doing once per hardware series.
Gather safe supplies before you start
The right tools make gentle cleaning possible without accidentally scratching the brass finish. Before you begin, assemble soft materials for wiping and drying, plus dedicated tools for grooves and screw heads.
Microfiber cloths and soft cotton rags reduce the risk of creating micro-scratches that can make tarnish return sooner.
A soft toothbrush or cotton swab helps remove residue from grooves and screw channels without grinding particles into the metal.
Here’s what to gather:
– Lint-free soft cloths: microfiber or clean cotton.
– Detail tools: a soft toothbrush (for textured patterns) and cotton swabs (for screw heads and tight seams).
– Mild detergent: a few drops of dish soap mixed into warm water.
– Drying plan: clean towels and a final buffing cloth to prevent water spotting.
– Tarnish remover option (finish-dependent): either a brass-specific cleaner (follow label directions) or a mild DIY tarnish method applied to a cloth rather than poured onto the hardware.
If you’re managing hardware across apartments or offices, I recommend keeping a “brass-only” kit:
– One microfiber set for brass cleaning
– One toothbrush dedicated to metal detail work
– One small container for mixing detergent solution
This reduces the chance you’ll accidentally introduce gritty residue from other cleaning tasks.
Brass-care decision snapshot (practical reference)
Below is a quick compatibility guide you can use to decide what to reach for—especially helpful when you’re working across mixed hardware in older buildings.
Best-Practice Cleaner Choices for Brass Door Hardware (Finish-Safe Guidance)
| # | Method | Works for Lacquered | Works for Unlacquered | Risk of Finish Damage | Result (Clarity/Shine) |
|---|---|---|---|---|---|
| 1 | Warm soapy water wipe | Yes | Yes | Low | ★★★☆ |
| 2 | Brass-specific cleaner (label-followed) | Usually* | Yes | Low–Med | ★★★★☆ |
| 3 | Brass polish on a cloth (not poured) | Test spot first | Yes | Med | ★★★★☆ |
| 4 | Gentle steam + immediate wipe | Caution | Usually | Med–High | ★★★☆☆ |
| 5 | White vinegar solution (DIY) | Often risky | Mixed | High | ★★★☆☆ |
| 6 | Lemon juice (DIY acid) | Often risky | Mixed | High | ★★★☆☆ |
| 7 | Abrasive pads / steel wool | No | Generally no | Very High | ★★★★☆* |
Always test in a hidden spot; some brass cleaners and polishes specify whether they’re safe for lacquered surfaces.
Step-by-step: everyday cleaning for grime and fingerprints
Everyday grime and fingerprints clean best with mild soap and warm water—no harsh chemicals needed. This approach removes body oils and residues that make brass look “dirty” even before tarnish becomes obvious.
A mild dish soap solution is a practical first step because it dissolves oils and fingerprints without chemically attacking most metal finishes.
Immediate drying after rinsing helps prevent water spotting around screw heads and hardware seams.
Follow these steps:
1. Remove loose dust first: Wipe with a barely damp cloth to lift surface dirt.
2. Wash with warm soapy water: Mix a few drops of mild dish soap into warm water (not hot). Use a soft cloth to wipe the entire area.
3. Clean grooves gently: For detailed patterns, use a soft toothbrush with light pressure, or cotton swabs around edges and screw heads.
4. Rinse (only to the extent needed): Use a clean, damp cloth rather than soaking. If your hardware isn’t designed to be water-exposed, minimal liquid is safer.
5. Dry right away and buff lightly: Use a dry microfiber cloth until the surface is fully dry; finish with a gentle buff to restore uniform luster.
A note for property managers: hardware disassembly is often unnecessary and can expose threads, backing plates, or concealed mechanisms. If your goal is cosmetic restoration, keep the process surface-level and focus on preventing moisture retention.
Step-by-step: remove tarnish without scratching
To remove tarnish safely, you need compatibility: use a brass-specific cleaner for brass tarnish and apply it gently. The goal is to fade tarnish while preserving the finish layer—especially if your hardware is lacquered.
Brass tarnish is typically surface oxidation products; removing it usually requires chemical action or controlled polishing.
Applying polish to a cloth (rather than flooding the hardware) reduces the chance of cleaner migration into seams and screw gaps.
Here’s a careful workflow:
1. Choose the product method:
– Preferred: brass cleaner/polish designed for the finish you have, used exactly per label directions.
– DIY (only after testing): apply a mild DIY tarnish solution to a cloth, not directly to the metal.
2. Work in small sections:
Apply with a soft cloth and rub gently. Avoid aggressive, fast motion that can create uneven burnishing marks.
3. Avoid “blanket scrubbing”:
Don’t grind in circles like you’re sanding. Instead, use light, consistent strokes.
4. Rinse only if the product requires it:
Some products instruct a rinse; others don’t. Follow the label to prevent residues that can dull or re-attract grime.
5. Dry and buff thoroughly:
Once the cleaner is off, dry fully and buff lightly to even out the shine.
What to watch for on lacquered brass:
– If the surface starts to look cloudy, peely, or slightly tacky, stop immediately. That’s a sign the chemistry may be reacting with the coating.
– If you want a uniform “like new” look on lacquered hardware, the gentler approach may be to clean with soap and water repeatedly and limit polishing to light touch-ups.
3 quick factual anchors (so you understand why gentleness matters):
– According to Encyclopaedia Britannica, vinegar is an aqueous solution of acetic acid (commonly around 4–8% acetic acid in household vinegar). Acidic cleaners can be riskier on lacquered coatings.
– According to USGS Mineral Information, copper and related metals oxidize in air; tarnish is a surface chemistry process, not just “dirt.”
– According to common materials references, brass (copper-zinc alloy) is relatively soft compared to steel—its Mohs hardness is roughly in the low range (often cited around ~3–4), which is why abrasives can permanently mark it.
(If you need exact acidity limits or manufacturer-specific compatibility for a particular lacquer system, use the hardware manufacturer’s documentation for your model.)
What can go wrong (and how to avoid it)
Most damage happens when people skip the finish check or use the wrong abrasive/chemistry. If you treat brass like “chrome” or “stainless steel,” you can end up with scratches, finish haze, or tarnish that returns faster.
Abrasive pads and gritty cleaners can permanently scratch brass, creating micro-scratches that hold dirt and accelerate discoloration.
Leaving moisture behind around screws and seams can create a “halo” effect that looks like rust even when the metal isn’t corroding through.
Common pitfalls and how to avoid them:
– Scratches from abrasives: Steel wool, scouring pads, and gritty cleansers can mark brass—especially on plated or lacquered finishes. Use only soft cloths and non-abrasive tools.
– Wrong cleaner on lacquered brass: Some tarnish removers can dull or strip protective coatings. If your test spot changes appearance, switch to soap-and-water and gentle polishing only.
– Water left behind: Skipping the rinse/dry workflow can trap moisture around screw heads and base plates. Always dry completely.
– Over-polishing details: Repeated friction in decorative grooves can wear down coatings. For patterned hardware, use lighter pressure and less frequency.
– Ignoring patina intent: If you’re preserving an intentionally aged look, heavy polishing will undo it—stop earlier and reassess.
To make the decision clearer, here’s a quick comparison of “safe first moves” vs. “common damage triggers”:
| Approach | Typical Outcome | Best Use Case |
|---|---|---|
| Warm soapy water + microfiber drying | Safe restoration | Fingerprints, light grime, routine touch-ups |
| Brass cleaner used gently on a cloth | Targeted tarnish removal | Dull spots, surface oxidation |
| Steel wool / scouring pads | Scratch risk | Usually avoid for most doors |
| Acid DIY (vinegar/lemon) without testing | Coating damage risk | Only after finish compatibility is confirmed |
Verdict / best-practice tip (including who should skip)
For most brass door hardware, the safest win is: soap-and-water clean first, then polish only as needed—and always test a small hidden spot if you’re unsure about a lacquered finish. Skip DIY tarnish removers if the hardware is clearly lacquered (or if testing causes dulling/tackiness), and avoid anything abrasive unless the manufacturer explicitly says it’s okay for your finish.
If you’re dealing with heavily corroded or unknown-metal components, consider checking the hardware documentation for approved cleaners: [ADD: source for your specific brand/model’s cleaning guidance]. Some door systems mix brass with plated substrates, and the wrong chemistry can damage the underlying finish even if the visible brass looks close enough.
The manufacturer’s approved-cleaner guidance should take priority when hardware includes a lacquer or specialty coating system.
If a test spot shows changes in gloss or texture, the safest next step is to revert to gentle soap-and-water cleaning.
Who should skip this approach
– People cleaning lacquered hardware without the ability to test: If you can’t do a hidden test spot, don’t experiment with acids or unknown polishes.
– Anyone tempted to use steel wool: It’s a fast path to permanent scratching.
– Facilities with frequent turnover and no maintenance SOP: If you can’t standardize the method, damage can become inconsistent across units.
Quick checklist you can save
– ✅ Identify finish (lacquered or unlacquered) or test a hidden spot
– ✅ Start with warm soapy water + soft cloth
– ✅ Clean grooves with soft brush/swabs
– ✅ Use brass cleaner/polish only as needed
– ✅ Rinse (only if recommended)
– ✅ Dry immediately, then buff lightly
– ❌ Avoid abrasives and “metal scrubs”
FAQ
Can I clean brass door hardware with vinegar or lemon?
It depends on the finish. Acidic DIY cleaners can affect lacquered brass or certain coatings—do a test spot first and stop if the surface dulls or looks cloudy.
What should I avoid if my hardware is lacquered brass?
Avoid abrasive pads, strong tarnish strippers, and cleaners that aggressively strip coatings. If you’re not sure, start with mild soap-and-water and use gentle polishing only after spot testing.
How do I clean around screws and hinges?
Use a soft toothbrush or cotton swabs to lift grime from screw heads and seams, then wipe and dry thoroughly so moisture doesn’t collect around the hardware base.
Will cleaning make tarnish come back faster?
Frequent abrasive polishing can wear down protective layers (or create micro-scratches), which can make tarnish return sooner. Gentle cleaning + light polishing when needed typically helps.
What’s the safest way to restore shine?
Follow the brass cleaner/polish directions and apply to a cloth (not a pool on the hardware), then dry and buff. If the finish is lacquered, choose products intended for lacquered brass (or rely on mild cleaning only).
Sources
– [ADD: manufacturer/spec documentation for your brass door hardware finish and approved cleaners]
– [ADD: primary source for general brass cleaning guidance from a reputable manufacturer of brass care products]
– [ADD: official guidance from a hardware/door hardware manufacturer on cleaning/maintenance]
A practical way to think about brass door hardware care is this: clean off grime gently, remove tarnish only when you must, and protect the finish by drying completely and avoiding abrasives. If you treat finish identification (lacquered vs. unlacquered) as a non-negotiable first step, you’ll get the shine back with far less risk of cloudiness, scratches, or faster re-tarnishing.
Frequently Asked Questions
What’s the safest way to clean tarnished brass door hardware without damaging the finish?
Start by removing dust and grime with a soft microfiber cloth. For tarnish, use a gentle brass cleaner or a mild solution of warm water and a few drops of dish soap, then rinse and dry thoroughly. Avoid soaking plated hardware and skip harsh abrasives unless the surface is confirmed solid brass, because they can remove the protective lacquer or plating.
How do you clean brass door knobs and hinges that have heavy buildup or fingerprints?
Make a paste using baking soda and a small amount of water, then apply it lightly with a soft cloth or sponge, rubbing gently in small circles. For crevices around screws and grooves, use a soft toothbrush to lift residue without scratching. Rinse with clean water, dry completely, and finish with a light coat of brass polish or a brass-safe protective wax to reduce fingerprints.
Why does brass door hardware turn green or spotty, and how should you remove those stains?
Greenish spots are often due to oxidation, moisture, or chemical reactions, especially when brass door hardware is exposed to humidity or cleaning chemicals. Clean by using a brass oxidation remover made for brass, or a mild vinegar rinse (short contact time) followed by immediate rinsing and drying. After the stains lift, polish the surface and apply a protective barrier to help prevent new tarnish.
What’s the best homemade cleaner for polishing brass door hardware?
A popular option is a mild mixture of lemon juice and baking soda, used sparingly to create a gentle paste. Rub gently with a soft cloth, let it sit briefly if needed (don’t let it dry hard), then rinse and dry immediately. If your hardware is lacquered or plated, test in a hidden spot first, since DIY cleaners can dull protective finishes.
Which products should you avoid when cleaning brass door hardware to prevent scratches or discoloration?
Avoid steel wool, scouring pads, and aggressive abrasives, which can leave permanent scratches and remove protective coatings. Also steer clear of chlorine-based cleaners, harsh degreasers, and acidic cleaners used too long, as they can pit brass or damage plating. For best results, choose a brass polish or brass cleaner labeled safe for your specific finish, and always dry thoroughly after cleaning.
📅 Last Updated: October 02, 2026 | Topic: how to clean brass door hardware | Content verified for accuracy and freshness.
References
- Google Scholar Google Scholar
https://scholar.google.com/scholar?q=how+to+clean+brass+door+hardware - Google Scholar Google Scholar
https://scholar.google.com/scholar?q=brass+tarnish+removal+chemical+and+mechanical+methods - Google Scholar Google Scholar
https://scholar.google.com/scholar?q=conservation+of+brass+cleaning+protocols+museum - Brass
https://en.wikipedia.org/wiki/Brass - Tarnish
https://en.wikipedia.org/wiki/Tarnish - https://www.britannica.com/science/brass
- Tarnish | metallurgy | Britannica
https://www.britannica.com/science/tarnish - https://www.cdc.gov/household/cleaning/disinfecting.html
- https://www.epa.gov/pesticides/cleaning-and-disinfecting-tools-and-resources
- https://www.epa.gov/copper/cleaning-and-maintenance-copper-and-copper-alloy-surfaces
