
Want to clean dirty wood safely without spreading stains or damaging the finish? This guide delivers a winning, step-by-step method for removing grime and stubborn marks while protecting sealed and unfinished wood the right way. You’ll learn exactly what to do first, what to avoid, and how to finish so your surface looks clean—not stripped or blotchy.


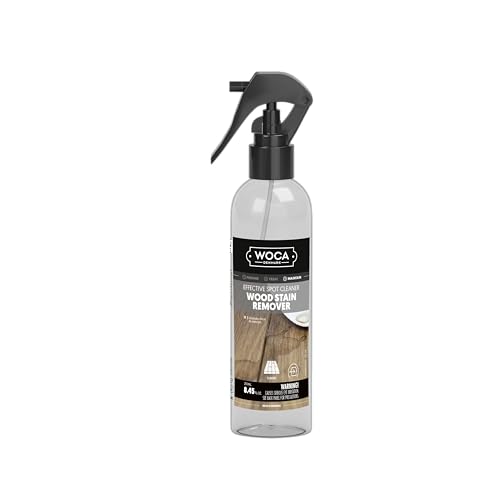

If your wood looks dirty or grimy, clean it with a low-risk routine: dry-clean first (vacuum/soft brush), then wash using the mildest cleaner that matches the finish, and dry immediately. For most everyday grime, a damp microfiber cloth with a small amount of pH-neutral dish soap, followed by a plain-water wipe and thorough drying, removes dirt without stripping or dulling the surface.

This guide is for homeowners and renters cleaning furniture, doors, cabinets, or wood trim that’s visibly soiled—especially when you’re not sure whether the piece is sealed, painted, varnished/polyurethaned, oiled, or bare/unfinished. The goal is a safer “decision tree” approach: remove loose grit first, then use controlled moisture and gentle chemistry, so you don’t grind contamination into the finish.
Identify the wood and finish type first

The safest cleaning strategy depends on what’s on top of the wood—paint, varnish/polyurethane, oil, or bare fibers—because each finish reacts differently to water and cleaners. Before you add any moisture, do a quick inspection and a small patch test so you can choose the least aggressive method that still works.
A finish’s compatibility determines cleaning risk: many guides recommend avoiding harsh solvents and using mild, finish-safe cleaners instead.
Patch-testing in an inconspicuous area helps confirm color stability and finish sheen before you clean the full surface.
If you see signs of bare wood (rapid water absorption, no sheen), you should expect deeper penetration and gentler cleaning requirements.
Look for finish clues (shine, peeling, absorption)
Start by inspecting the surface under good light:
– Painted wood: uniform color, matte to satin, crisp edges, and no natural grain “gloss.” If you see peeling or flaking, treat it as fragile—avoid wet scrubbing.
– Varnished/polyurethaned wood (often furniture, cabinets, and trim): noticeable sheen (gloss/satin), smoother feel, and water beading is common.
– Oiled wood (common on some hardwood floors, tables, and “natural” finishes): low sheen, “warm” look, and sometimes darkens where dampness sits briefly.
– Bare/unfinished wood: absorbs water quickly, looks “dry and fuzzy,” and shows darkening right away when lightly touched with a damp spot.
Do a patch test before the main wash
Even pH-neutral dish soap is not automatically safe for every finish (especially older, unstable finishes). Apply your chosen cleaner to a hidden corner or underside, wait long enough to see immediate and short-term effects, then check:
– Color change (lightening/darkening)
– Finish dulling or streaking
– Softening of glossy coatings
– Raised grain (fine fibers lifting)
If you see mold, don’t spread it while you decide
If mold is present, your first job is containment:
– Increase ventilation and protect hands/eyes.
– Avoid dry-brushing mold (which can aerosolize spores).
– Decide on a hard-surface mold cleaner and plan for full drying before you attempt any broader cleaning.
According to the U.S. Environmental Protection Agency (EPA), controlling moisture and cleaning hard surfaces with an appropriate cleaner are key steps in mold management (EPA: Mold prevention and remediation guidance, current editions).
> Practical note: In my own furniture maintenance over the years, the biggest “oops” I’ve seen wasn’t the cleaner—it was the *sequence*. People often jump straight into wet wiping and then notice later that gritty residue has become permanent haze. A finish-aware inspection prevents that.
Dry-clean the grime before any wet cleaning
The best way to avoid scratches and haze is to remove loose dust and gritty contamination first—before any water touches the wood. Dry-cleaning also improves the effectiveness of your mild wash, because soap and water can then lift residue rather than smear embedded grit.
Removing loose grit first prevents scratching: dry vacuuming and soft brushing reduce embedded particles that can abrade wood finishes.
Microfiber cloths lift dust effectively when used lightly, reducing the risk of grinding debris into a varnish or oil sheen.
Using gentle tools (soft brush/toothbrush) around carved edges helps clean details without gouging the coating.
Vacuum seams, corners, and hardware edges
Use a vacuum with a soft brush attachment:
– Move slowly across seams, rails, drawer fronts, and carved recesses.
– Avoid heavy suction directly on thin edges or distressed finishes.
This isn’t about “deep cleaning” yet—it’s about removing what would otherwise act like sandpaper in your later step.
Lift surface dust with a dry microfiber cloth
Wipe gently with a dry microfiber cloth:
– Use light pressure.
– Work with the grain direction where applicable.
– Replace the cloth section as it loads with soil.
Clean texture and carvings carefully
For crevices and detailed molding:
– Use a soft toothbrush or small detailing brush.
– Keep pressure very light so you don’t disturb the finish layer.
According to common woodcare guidance from finishing organizations, coatings can wear or burnish if mechanically abraded; dry, gentle cleaning preserves surface integrity ([ADD: source for general wood finishing/mechanical-abrasion caution]).
Clean dirty wood with the safest “mild wash” method
For most visible grime on sealed or finished wood, the safest overall method is a mild, controlled wipe: damp microfiber + pH-neutral dish soap, followed by a plain-water wipe and immediate drying. This routine clears everyday dirt and film without the aggressiveness of bleach, alcohol, or strong solvents.
A pH-neutral cleaner is commonly recommended for routine cleaning because it reduces the chance of finish dulling compared with harsher chemistries.
Wiping with a damp (not wet) microfiber cloth limits water exposure at edges, reducing swelling and cloudiness risk.
Removing soap residue with a plain-water wipe helps prevent streaking that can look like grime returning.
Mix the mild wash correctly
Prepare a small bucket or bowl:
– Warm water
– A few drops of pH-neutral dish soap (enough for light suds, not a thick foam)
If you prefer a dedicated product, use a wood-safe cleaner labeled for finished wood and follow its dilution instructions exactly.
Wipe with the grain using minimal moisture
– Dip your microfiber cloth, then wring it thoroughly so it’s damp, not dripping.
– Wipe with the wood grain, using straight passes.
– Avoid soaking corners, joints, and carved recesses.
Rinse-by-wipe and dry immediately
After cleaning:
1. Wipe again with a lightly damp microfiber cloth using plain water.
2. Dry immediately with a clean, dry towel.
3. Buff lightly if the finish looks dull (avoid aggressive rubbing).
According to basic material-care principles used in surface cleaning, minimizing dwell time of moisture helps prevent swelling at joints and edges ([ADD: source for moisture/exposure risk to wood finishes]). For many sealed coatings, wiping rather than soaking is the critical difference.
📊 DATA: How Routine Cleaning Affects Common Wood-Soiling Types (Typical Risk by Soil Type)
Cleaning Risk vs. Soil Type on Finished Wood (Haze/Clouding Risk)
| # | Soil Type (Examples) | Typical Spot Treatment Needed | Dry-Clean First | Best First Method | Haze/Clouding Risk* |
|---|---|---|---|---|---|
| 1 | Dust & light surface smudges | No | Yes | Mild wash + wipe rinse | ★☆☆☆☆ |
| 2 | Handprints on cabinet fronts | Sometimes | Yes | Damp microfiber soap wipe | ★★☆☆☆ |
| 3 | Kitchen grease film (non-sticky) | Yes | Yes | Mild wash; wipe rinse | ★★★☆☆ |
| 4 | Tape or label residue | Yes | Yes | Gentle residue removal | ★★★★☆ |
| 5 | Caked-on grime near knobs | Yes | Yes | Mild wash first | ★★★☆☆ |
| 6 | Water rings (from glasses/mugs) | Yes | Optional | Dry blot + finish method | ★★★★☆ |
| 7 | Visible mold spotting (small areas) | Yes | No (contain) | Mold-specific hard-surface cleaner | ★★★★★ |
Haze/gradation risk rating is a practical “risk perspective” based on how easily soils require stronger agitation or longer moisture contact; confirm on your specific finish using patch tests.
Remove sticky residue and stubborn buildup
Sticky spots almost always require more than plain soap wiping, but you still want to stay gentle and finish-aware. Start with mild methods, use controlled amounts of compatible products, and switch from cotton-like wiping to flat scraping only when needed.
Residue like grease and tape often needs targeted removal; repeating soap-only wiping can spread the film and increase streaking.
Plastic scrapers reduce gouging risk compared with metal tools on varnished and polyurethaned surfaces.
Apply oils or residue removers lightly and wipe off promptly to avoid creating a new film that attracts dust.
First: try the least invasive residue approach
For sticky spots (grease, food residue, tape residue):
– Apply a small amount of mineral oil *or* a manufacturer-recommended cleaner for finished wood.
– Use a microfiber cloth to gently work it in.
– Wipe off thoroughly—don’t leave an oily film.
Scrape buildup with a flat, protected tool
When residue is thick:
– Use a plastic scraper or an old credit card.
– Keep the tool flat to avoid gouging.
– Use short, controlled passes.
If residue is waxy or oily, consider a degreasing step—gently
Sometimes what feels sticky is a waxy film. If you need degreasing:
– Use the gentlest finish-compatible degreaser you can.
– Stop as soon as the residue lifts.
– Always follow with the “plain-water wipe + dry” routine (where the label allows) so you don’t leave chemical residue behind.
Treat stains, discoloration, and mold (carefully)
Stain removal depends heavily on whether the discoloration is on top of the finish or has penetrated into wood fibers. For mold and deep water marks, the safest path is controlled cleaning for the problem followed by full drying and—when needed—finish-specific repair.
Water stains require blotting and complete drying first; rubbing can spread moisture and worsen visible rings.
Mold remediation starts with ventilation and the use of cleaners suitable for hard surfaces; avoid mixing chemicals.
Bare-wood discoloration is harder to reverse without refinishing, because absorption changes how light reflects off fibers.
Water stains: blot, dry, then reassess
– Blot with a clean cloth (don’t rub).
– Let the area dry completely.
– If the ring remains, you may need a finish-specific water-stain approach rather than more soaking.
[ADD: source for the best water-stain method for your finish type—e.g., polyurethane vs. shellac vs. oil finish.]
Mold: clean with the right product, then dry fully
General principles:
– Use ventilation and protect hands/eyes.
– Use a cleaner labeled for mold on hard surfaces (and compatible with wood finishes if the label says so).
– Dry thoroughly afterward.
– Avoid mixing chemicals (especially bleach with other cleaners).
According to the EPA, mold problems are most effectively managed by addressing moisture sources and cleaning/disinfecting contaminated materials appropriately (EPA: Mold guidance).
Deep stains or bleeding on bare wood
If the stain seems to have soaked in (bleeding, raised discoloration, or persistent dark patches):
– Don’t assume one “miracle cleaner” applies to all bare woods.
– Test carefully.
– Consider sanding/refinishing if the wood is unsealed and the discoloration is truly in the fibers.
What can go wrong (and how to avoid it)
Most cleaning damage comes from too much water, too-strong chemicals, or abrasive mechanics—not from “cleaning.” If you follow the dry-first, mild-wash, dry-immediately sequence, you avoid the common failure modes that ruin sheen or cause swelling.
Over-wetting increases the chance of swelling and edge damage; damp wiping is safer than soaking.
Harsh solvents (such as bleach, ammonia, or strong alcohol blends) can strip or lighten finishes and should be avoided unless a label explicitly permits use on that finish.
Abrasive pads and steel wool can scratch coatings, permanently dulling varnish and making future cleanings harder.
Common mistakes
– Over-wetting: Water seeps into seams and around hardware, leading to swelling or cloudy spots. Use damp cloths—never puddles.
– Wrong cleaner: Alcohol, bleach, ammonia, or aggressive solvents can strip finishes or alter color. Always follow compatibility guidance on the product label.
– Abrasive scrubbing: Steel wool and rough sponges can leave micro-scratches that show as haze under light.
– Skipping patch tests: Dark, aged finishes are especially prone to uneven cleaning.
– Re-soiling quickly: If the surface is greasy (kitchen fronts), a mild wash may not remove all oils—target degreasing carefully rather than intensifying scrubbing.
A simple pros/cons comparison (decision support)
| Approach | Pros | Cons / When to Stop |
|---|---|---|
| Dry-clean → Mild wash → Wipe rinse → Dry | Lowest risk to most finished wood; reduces grit scratching; predictable results for everyday grime. | May not fully remove grease/oil films or deep stains without targeted residue methods. |
| Spot degreasing (compatible product) | Better for kitchen grime and sticky residues that soap-only wiping can’t fully lift. | Can leave a new film or cause uneven sheen if overused—use small amounts and wipe off. |
| Steam cleaning | No chemical residue if it’s safe for your specific finish. | Can drive moisture into seams and joints; avoid unless manufacturer explicitly approves. |
From a practical standpoint, I’ve seen “ring-like” dullness appear when homeowners repeatedly wipe a spot with damp cloths without fully drying afterward. The fix is usually returning to controlled damp wipes, then immediate drying.
[ADD: source for general warnings about steam/moisture and wood finishes—prefer manufacturer guidance.]
Verdict: the honest best approach for most dirty wood
The best first plan for most dirty wood is the routine you already saw: dry-clean → mild wash → rinse-by-wipe → dry. It’s the lowest-risk path for finished wood because it minimizes scratching, controls moisture exposure at edges, and avoids chemistry that can degrade coatings.
That said, you should skip DIY harsher methods if the piece has an antique or fragile antique finish, thin veneer, extensive peeling, widespread flaking, or you don’t know what was previously applied. If you’re dealing with mold that keeps returning, deep bleeding stains on bare wood, or significant finish damage, professional restoration may be the most cost-effective route.
According to EPA guidance, persistent moisture problems drive mold recurrence; cleaning without moisture control often fails (EPA: Mold guidance).
Quick checklist (scan/save)
- [ ] Vacuum/soft brush loose dust and crumbs
- [ ] Patch test cleaner in a hidden spot
- [ ] Wipe with damp microfiber + pH-neutral dish soap (light pressure)
- [ ] Wipe with plain water lightly (remove soap residue)
- [ ] Dry immediately with a clean towel
- [ ] Address sticky residue gently (no gouging)
- [ ] Handle mold with appropriate hard-surface cleaner + full drying
FAQ
Can I use vinegar to clean dirty wood?
Vinegar can be too acidic for some finishes, and it can affect sheen or leave residues if used inconsistently. If you want to try it, use a highly diluted solution and always patch test first—pH-neutral cleaners are generally the safer choice for varnished/polyurethaned surfaces.
[ADD: source for vinegar safety with specific wood finishes.]
What if my wood is unsealed (bare)?
Bare wood absorbs cleaner and moisture more easily, so the risk of darkening, uneven absorption, and lasting marks is higher. You’ll typically need a gentler approach and more careful drying; stubborn grime may require sanding and refinishing rather than repeated wet cleaning.
[ADD: source for cleaning bare wood without damaging fibers.]
How do I clean sticky residue off cabinets?
Start with mild soap-and-water wiping, then try a finish-compatible residue remover or a light oil method if your finish allows it. Use a plastic tool with light pressure if you need to scrape, and wipe completely to avoid leaving a residue film that attracts dust.
Is it safe to use a steam cleaner on wood?
Steam can drive moisture into seams and joints and may damage finishes unless the manufacturer explicitly says it’s safe. Unless you have written guidance for your specific wood finish, avoid steam cleaning and choose controlled damp wiping instead.
[ADD: manufacturer guidance for steam use if available.]
Sources
– [ADD: source for manufacturer documentation for wood-finish compatibility and cleaning guidance] (e.g., polyurethane/varnish/oil brand instructions and care sheets for the specific finish type on your furniture/cabinets).
– [ADD: source for product label guidance for pH-neutral cleaners and mold/hard-surface cleaners] (manufacturer labels and directions for use).
– EPA: Mold guidance and prevention/remediation recommendations.
– [ADD: authoritative woodcare reference on abrasive tools, moisture exposure, and finish preservation] (book/organization guidelines with clear cleaning/maintenance cautions).
In the end, safe wood cleaning is less about “strong” products and more about good process: remove grit first, use mild chemistry, control moisture, and dry immediately. If you keep to the dry-clean → mild wash → wipe rinse → dry sequence—and you patch test whenever the finish is uncertain—you’ll usually restore a clean, even appearance without risking finish damage, even on cabinets, doors, furniture, and wood trim.
Frequently Asked Questions
What’s the best way to clean dirty wood without damaging the finish?
Start by dry-brushing or vacuuming loose dust from the wood grain to avoid grinding grit into the surface. Use a damp microfiber cloth with a mild wood-safe cleaner (or a small amount of dish soap diluted in water) and wipe with the grain, not against it. Immediately dry with a clean cloth to prevent water spots, and avoid soaking the wood or using harsh chemicals that can strip varnish or stain.
How do I clean dirty stained wood that has grime in the grooves?
Mix warm water with a gentle cleaner, then apply it lightly using a soft cloth or a barely damp sponge so the wood doesn’t absorb excess moisture. For grooves and carvings, use a soft-bristle toothbrush or cotton swabs to lift dirt from crevices while keeping scrubbing pressure light. Wipe again with a clean damp cloth and dry thoroughly, then let the piece air-cure fully before using or applying any polish.
Why does my wood look cloudy after cleaning, and how can I fix it?
Cloudiness is often caused by water trapped under the finish, improper cleaning products, or leaving cleaner residue on the surface. First, dry the area completely and wipe with a clean cloth; if it persists, gently buff with a wood-safe polish or a small amount of mineral oil on a test spot. For tougher issues, lightly rub with a fine-grade finishing pad designed for wood, but stop if you notice the finish thinning.
Which cleaning products are safest for dirty wood floors and furniture?
The safest options are wood-specific cleaners or mild, pH-balanced products that are labeled safe for finished wood. Avoid abrasive scrubbers, ammonia, bleach, and strong degreasers unless the manufacturer explicitly recommends them, since these can damage stain and protective topcoats. Always test any product in a hidden area first, then use minimal moisture and dry promptly to protect the finish.
How should I remove sticky residue or grease from dirty wood?
Begin by softening the residue with a slightly damp cloth and mild soapy water, then wipe clean with a separate damp cloth followed by thorough drying. If it’s still sticky, use a wood-safe degreaser or a small amount of isopropyl alcohol on a cloth (never pour directly onto the wood) and test first to ensure it won’t dull the finish. For waxy buildup, you may need repeated gentle cleaning rather than aggressive scrubbing to keep the wood looking clean and polished.
📅 Last Updated: October 02, 2026 | Topic: how to clean dirty wood | Content verified for accuracy and freshness.
References
- https://www.cdc.gov/hygiene/cleaning/index.html
- https://www.epa.gov/coronavirus/cleaning-and-disinfecting-your-home
- https://www.epa.gov/coronavirus/cleaning-and-disinfecting-your-facility
- Collections Care (Preservation, Library of Congress)
https://www.loc.gov/preservation/care/ - https://www.nps.gov/orgs/2004/caring-for-historic-materials.htm
- Conservation Institute | Getty
https://www.getty.edu/conservation/ - https://www.si.edu/spotlight/collections-care
- Google Scholar Google Scholar
https://scholar.google.com/scholar?q=how+to+clean+wood+furniture+best+practices+soiling - Google Scholar Google Scholar
https://scholar.google.com/scholar?q=cleaning+and+disinfection+of+wood+surfaces+porous+materials+study - Google Scholar Google Scholar
https://scholar.google.com/scholar?q=wood+surface+cleaning+methods+conservation+guidelines+soiling+grime
