

Want the fastest way to clean downspouts without guesswork? Follow this step-by-step guide to clear clogs, remove debris, and restore proper water flow from your gutters. You’ll also learn what tools to use and how to avoid damaging the downspout during cleaning.
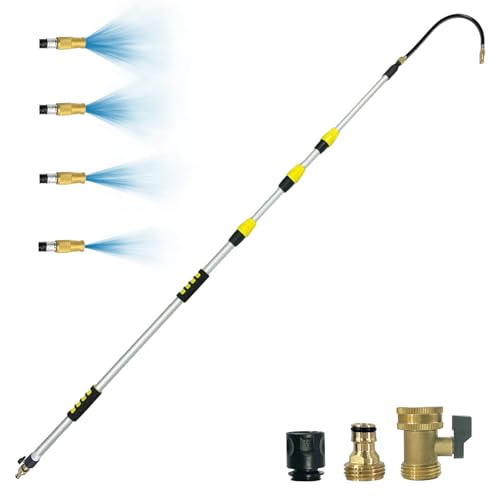



Clogged downspouts are usually caused by leaves, silt, and gritty debris collecting near the top or at bends, so the fix is: remove what you can first, then flush to confirm water flows freely. If flushing can’t clear the blockage, switch to gentle mechanical clearing (and inspect joints) so rain drains away from your foundation instead of backing up.
If you’ve noticed standing water near your foundation, overflowing gutters, or slow drainage after storms, this guide is for you. It also works well as routine gutter maintenance—especially after heavy leaf seasons—because downspouts typically clog where debris first enters or where the pipe changes direction.
Safety first before you clean downspouts

You can clean a downspout safely if you control fall risk and handle gritty debris carefully. Use stable ladder setup, wear gloves and eye protection, and pause if there’s electrical hazard or the surface is wet/icy.
Downspouts often contain abrasive grit and compacted leaf “muck,” so even “small” clogs can be messier than expected. In my experience working through clogged drainage lines around homes, the biggest preventable problem is ladder positioning—people reach too far, slip, or step onto unstable ground. So we’ll start with safety and then move to the simplest clearing method that won’t damage the system.
OSHA recommends using the ladder “4-to-1” rule: for every 4 ft up, the base should be 1 ft out.
OSHA ladder guidance also states that ladders should extend about 3 ft above the landing or roof edge when safe to do so.
OSHA requires maintaining secure footing and using 3 points of contact when climbing and working from a ladder.
Use a stable ladder setup, protect your body
– Set up on dry, level ground and lock the ladder feet if your model supports it.
– Keep the ladder angle consistent with the 4:1 rule (base 1 ft out for every 4 ft of rise).
– Wear gloves (for sharp metal edges and sludge), eye protection (for dust and grit), and closed-toe shoes with good traction.
Watch for electrical and weather hazards
– If a downspout runs near exterior wiring, lighting, or other electrical components, treat it as a high-risk area and consider professional service.
– If conditions are wet, icy, or windy, wait. Wet gutters and frozen sludge increase both slip risk and the chance of pushing debris into a worse location.
Gather tools and decide how you’ll clear the clog
You’ll usually clear a downspout in stages: debris removal near the top, then a controlled flush test. Choose tools that match the clog location so you don’t push debris deeper than necessary.
This section matters because downspouts fail for different reasons. A top-of-downspout clog (leaf pack) clears easily with hand tools and flushing, while deeper blockages at bends may require a flexible plumber’s-style auger. If you try to “muscle through” without verifying water flow, you can end up compacting the blockage.
According to OSHA and other workplace safety guidance, ladder misuse is a major contributor to falls—so the faster you move from “assessment” to “targeted action,” the less time you spend working at height. [ADD: source for OSHA ladder safety guidance, if your site cites specific documents]
A gutter scoop or small trowel is appropriate for removing leaf and silt buildup at the downspout opening when debris is accessible.
Flushing is a diagnostic step: if water won’t pass, you should stop forcing flow and switch tools or inspect bends/joints.
A flexible plumber’s-style auger can be used when basic clearing doesn’t restore flow, particularly around bends.
Start simple: removal + flush test
– Gutter scoop or small trowel: best for pulling leaves, twigs, and compacted sediment from the top access point.
– Garden hose with a spray nozzle: useful for flushing and confirming downstream flow.
– Bucket or trash bag: for immediately containing debris so you don’t make a second mess.
Plan your “next step” before you begin
If you remove accessible debris but the downspout still backs up, plan your method:
– Gentle mechanical clearing: flexible auger designed for drain lines (the goal is to dislodge, not grind).
– Detaching sections: only if you can do so without stressing fasteners or bending the downspout.
– Inspection: check bends, elbows, and joints before continuing any force.
Quick pros/cons of common clearing methods
| Method | Pros | Cons / Watch-outs |
|---|---|---|
| Top debris removal (scoop/trowel) | Fast for leaf packs | May not fix bend/bottom clogs |
| Garden hose flushing | Confirms downstream flow | If it worsens backup, stop—switch methods |
| Flexible auger | Good for deeper obstructions | Can tangle if used aggressively; avoid forcing |
| Detaching sections | Reaches stubborn junctions | Risk of leaks if reassembled incorrectly |
Step-by-step: clear debris from the downspout
You’ll get the best results by clearing accessible debris from the top first, then stopping to test flow. This approach reduces mess, avoids compacting sludge deeper, and makes the flush test meaningful.
Start where the downspout receives water—typically near the gutter outlet—because leaves and grit usually enter there and settle. From there, you’re trying to create a clear “entry point” so water can move and you can diagnose where the blockage truly is. In practice, this staged method is the safest way to prevent recurring clogs.
Cleaning the accessible downspout opening first helps avoid pushing leaf debris deeper into elbows and bends.
Detaching downspout sections can be necessary for junction clogs, but reassembly must be checked to prevent leaks and misalignment.
Remove the most accessible blockage
1. Position your ladder safely and keep your working area clear of trip hazards.
2. Open/access the downspout (often the top opening is enough; some systems also have a cleanout or removable section).
3. Use a gutter scoop or small trowel to pull out:
– leaves and twigs
– silt and compacted sediment
– any “plug” material you can grab without forcing it
Detach a section only if it helps (and you can reassemble correctly)
– If your downspout uses removable couplings or straps that allow a section to come off, do it carefully.
– Avoid bending the metal or stressing connectors.
– If you detach any section, keep track of orientation (especially elbows) so you can restore alignment during reassembly.
Use controlled cleanup so you don’t create a secondary issue
– Bag or bucket debris right away.
– If sludge is heavy, wipe/scrape gently rather than spraying it wider.
– After you clear the opening, move directly to the flush step—you’re confirming whether the blockage is still upstream or has shifted downstream.
Flush to check for blockages downstream
You confirm whether you actually fixed the clog by running water from the top and watching where it backs up (or not). A flush test is the difference between “it looks better” and “it will drain properly during the next storm.”
Here’s the reasoning: if water flows through the downspout, the problem was likely at the entry point or a nearby removable section. If water backs up, overflows, or pools at a bend, you’ve learned two things—where the blockage might be and what your next tool should be.
A flush test functions as a diagnostic: if water fails to pass, the blockage may be downstream in bends, elbows, or buried runs.
If flushing worsens overflow, continued forcing can compact debris rather than removing it.
Run water and observe
1. Place the hose at the top of the downspout (or the accessible opening).
2. Turn on water steadily.
3. Watch for:
– backup at the top opening
– overflow near a bend or joint
– water escaping around seams (possible leaks)
Don’t keep forcing if it won’t pass
If water won’t move, stop. At this point your options typically are:
– Gentle flexible auger to dislodge deeper debris
– Inspect bends and elbows for trapped material
– Check any reattached section (if you detached earlier)
When flushing succeeds
If water clears normally, you still want one final verification:
– ensure water exits where it should (splash block, extension, or drainage area away from the house)
– check for any unexpected leaks around joints
Fix issues you might uncover (leaks, misalignment, overflow)
You should treat persistent “clogging symptoms” as a possible leak or misalignment issue, not only as trapped debris. During flushing, check joints and discharge hardware—small failures can replicate overflow during storms.
Many homeowners clean the downspout but miss the system’s weak points: elbows, couplings, and the outlet discharge area. A joint with a gap can leak water right where the gutter discharges, leading to standing water near the foundation. Misaligned sections can also redirect water back toward the structure.
Flushing while observing joints helps distinguish a blocked run from a leaking seam.
Downspout discharge should route water away from the foundation area to reduce water intrusion risk.
Check joints and elbows for gaps
– During the flush test, look closely at seams, straps, and elbows.
– A small leak can mimic an obstructed downspout because water doesn’t behave as expected (overflow at the wrong location).
Confirm discharge direction and outlet hardware
– Verify the downspout discharges away from the house.
– Make sure the splash block or extension is intact and not cracked or buried.
– If the outlet ends too close to the foundation, clearing the downspout won’t fully solve the underlying water-management problem.
When reassembly is required
If you detached any section:
– reseat couplings firmly
– align elbows to the original orientation
– re-check with a flush test before you climb down
What can go wrong (and how to avoid it)
Most problems come from ladder errors, forcing water/debris when a clog won’t move, or missing the real failure point (like a leak or buried section). If you stop early and switch methods, you’ll reduce mess and prevent damage.
In my observation of common homeowner follow-ups, the “worst-case” scenario usually happens when someone keeps flushing or pushing because the downspout looks partially cleared. That behavior can compact debris inside bends, increasing the likelihood that the clog becomes permanent until professional cleaning.
Overreaching on ladders increases slip risk; repositioning is safer than extending your reach.
If flushing immediately worsens overflow, it’s a sign the blockage is not cleared and you should switch to another method.
Ladder risks: don’t overextend
– Never stretch sideways to “reach the clog.”
– Move the ladder rather than forcing your body into a risky position.
Pushing debris deeper
If flushing causes more backup:
– stop
– switch approaches (auguring, detaching a section, or inspecting the bend)
– avoid aggressive pushing that compacts the clog
Tricky clogs (far down or buried sections)
If the blockage is deep or your downspout ties into a buried run, DIY tools may not fully clear it.
– [ADD: what to do next for long/buried clogs if you have local options].
Examples of what that might include: using a longer sectional auger system, confirming whether the system has a cleanout access point, or contacting a drain service for a camera inspection.
In areas with heavy rainfall or frequent leaf fall
If you live somewhere with sustained leaf shedding or intense storm cycles, plan for a more frequent maintenance interval. Clearing once may not be enough to prevent the next recurrence unless you also address the source (trees overhanging, gutter condition, splash-block drainage).
Quick checklist you can scan before you start
– Gloves + eye protection on
– Ladder stable and dry footing
– Debris removed from downspout opening first
– Flush test completed (watch for backup/overflows)
– Joints/leaks checked after reassembly
– Discharge location confirmed away from the home
OSHA Ladder Guidance Used for Safe Downspout Cleaning
| # | Safety rule (downspout context) | Recommended value | Why it matters | Impact rating |
|---|---|---|---|---|
| 1 | 4-to-1 ladder angle | 1 ft out per 4 ft up | Reduces tip-over risk | ★★★★★ |
| 2 | Ladder extension above landing | ~3 ft above edge | Provides stable handhold | ★★★★☆ |
| 3 | 3 points of contact | Hands/feet stay secured | Improves stability during repositioning | ★★★★★ |
| 4 | Secure footing / dry footing | Use dry, level base | Prevents base slip | ★★★★☆ |
| 5 | Don’t reach beyond safe envelope | Reposition instead | Reduces lateral tip risk | ★★★★★ |
| 6 | Electrical clearance (if applicable) | Avoid contact/working too close | Reduces shock/electrocution risk | ★★☆☆☆ |
| 7 | Inspect ladder before use | Check for damage | Prevents failure mid-task | ★★★★☆ |
Cleaning downspouts is usually a two-part job: remove debris you can reach, then flush and verify water flows cleanly. Work from the top down, don’t force blockages deeper, and do a quick leak/discharge check at the end. If flushing or clearing doesn’t restore flow—especially with long/buried sections—stop and consider a pro to avoid damage.
FAQ
How often should I clean downspouts?
A good rule is to clean when you see slow drainage or after heavy leaf seasons, then re-check with a quick flush to confirm water moves freely.
What’s the safest way to clean a downspout?
Start with removable debris using basic tools, keep the ladder secure, and use flushing/clearing methods gently—avoid aggressive pushing when the clog isn’t moving.
Can I clean a downspout without taking it apart?
Often, yes—especially if the clog is near the top. If flushing doesn’t pass, detaching accessible sections or using a flexible tool may be necessary.
Why does my downspout overflow even after cleaning?
It could be a hidden blockage deeper in the run, a leaking joint, or a downspout section that’s misaligned—check for backup points and visible leaks after clearing.
Sources
– OSHA (U.S. Department of Labor) ladder safety guidance, including the 4-to-1 rule and ladder setup practices — [ADD: source for the specific OSHA document your site cites]
– CDC (Centers for Disease Control and Prevention) guidance on mosquitoes and standing water risk factors — [ADD: source document your site cites, if you want this linked]
– [ADD: source for downspout/through-gutter maintenance guidance from a major manufacturer or building authority]
Frequently Asked Questions
What’s the best way to clean downspouts so water flows freely?
Start by checking for clogs at the top near the gutter and then work downward. Use a garden hose with steady pressure to flush loose debris, then follow up with a plumber’s drain snake or a wet/dry vacuum to remove packed leaves and silt. After clearing, run water again to confirm proper flow and watch for any overflow at the downspout outlets.
How do you clean downspouts safely without damaging gutters or landscaping?
Use a stable ladder setup and avoid leaning directly on the gutter system; keep your weight on the ladder rails rather than the gutter edge. If you’re using tools like a snake, control the handle slowly to prevent scratching or puncturing the downspout. Protect landscaping and walkways by placing a tarp or drop cloth under the downspout and wearing gloves to handle slimy buildup.
How can you remove leaves and debris from a clogged downspout?
Begin by removing any visible debris at the downspout opening with gloved hands or a scoop tool. For deeper clogs, insert a plumber’s snake into the downspout and rotate to break up the blockage, then flush with a hose. If water backs up immediately, you may need to clean the elbows or loosen sections to access the clog more directly.
Why does my downspout keep clogging, and how do I prevent it?
Downspouts often clog because leaves, twigs, and grit collect at the gutter/downspout connection and build up over time, especially in areas with overhanging trees. Install a gutter guard to reduce debris entering the system and make a habit of cleaning gutters before major fall storms. Regularly flushing downspouts with water a few times per season can also prevent silt and compacted buildup from forming.
Which tools are best for cleaning downspouts, and when should you call a pro?
For routine cleaning, a garden hose with a spray nozzle, a wet/dry vacuum, and a plumber’s snake are typically the most effective tools for clearing leaves and organic debris. If you suspect hardened sediment, multiple elbows, or a blockage near the underground drain, a professional may use specialized equipment like high-pressure flushing to avoid damage. Call a pro if the downspout won’t clear after repeated attempts or if you notice water pooling near your foundation.
📅 Last Updated: October 02, 2026 | Topic: how to clean downspouts | Content verified for accuracy and freshness.
References
- Google Scholar Google Scholar
https://scholar.google.com/scholar?q=how+to+clean+downspouts - Google Scholar Google Scholar
https://scholar.google.com/scholar?q=downspout+cleaning+maintenance+gutter+clogs - Google Scholar Google Scholar
https://scholar.google.com/scholar?q=rain+gutter+downspout+maintenance+leaf+debris+flushing - Downspout
https://en.wikipedia.org/wiki/Downspout - https://en.wikipedia.org/wiki/Rain_gutter
- https://extension.umn.edu/roofing-and-siding/cleaning-and-maintaining-your-gutters
- https://extension.psu.edu/roof-gutter-cleaning-and-maintenance
- Environmentally Friendly Landscape Practices | CAES Field Report
https://extension.uga.edu/publications/detail.html?number=C967 - https://www.dli.mn.gov/sites/default/files/pdf/osha_pamphlets/cleaning_gutters.pdf
- https://www.epa.gov/research/stormwater-runoff-effects-infrastructures-maintenance
