

Electric stove burners can lose their shine and even heat unevenly when grease and residue collect on the coils or around the element. It is frustrating to troubleshoot, especially when you just want reliable cooking again. You can get them back to clean safely in about 15–30 minutes by unplugging the unit, fully cooling it, and using the right gentle cleaners and soft tools for your burner type.


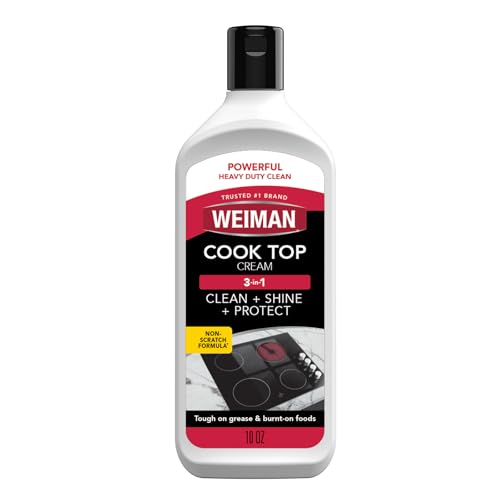

Unplug the stove, let the burners cool completely, then remove the coils and drip pans (if your model allows) and clean them with warm soapy water plus a safe degreaser. For stuck-on grime, use a paste made for cooktop surfaces and gently scrub—don’t force metal tools that can scratch. Finish by drying thoroughly and reassembling so electrical parts stay protected from moisture, and you’ll typically restore even heating without risking damage to wiring or connections.
This guide is for coil-style electric burners and similar removable electric burner parts (and for glass-top cooktops, if you treat the surface accordingly). If your owner’s manual warns against certain cleaners or soaking, follow that first.
Safety first: prep your burners correctly

Before you clean, make the area safe by cutting power and removing heat sources. Electrical contact points and hot metal can be damaged by water, and a quick prep step prevents most “why won’t it work anymore?” problems.
– Unplug the range (or switch it off at the breaker) and wait until everything is cool to the touch.
– Check whether your burner coils lift out easily; don’t force anything that looks locked or wired in.
– Avoid soaking any electrical connections; keep water away from plugs, outlets, and the burner underside.
Why this matters: coil burners work using electrical contacts and a heating element that transfers heat to cookware. If water reaches the underside or connectors, you can get corrosion, residue buildup, or in worst cases arcing the next time power is applied. Even if you don’t see immediate damage, moisture left in crevices can cause lingering odors and inconsistent heating. According to UL (United States) safety guidance for GFCI protection, ground-fault circuit interrupters are designed to trip at very low leakage currents (commonly in the 4–6 mA range), which is why keeping moisture away from live components is still critical even when modern safety systems exist.
Clean the coils/electric burner elements (without damaging them)
The fastest safe route is to start with dry wiping, then move to gentle cleaning—no aggressive scrubbing on the element itself. Coil burners can look “metallic,” but their surface coatings (and the insulating structure beneath) can scratch, pit, or develop hotspots if you use harsh tools.
– Wipe loose crumbs with a dry cloth first, then use a lightly damp sponge for visible grease.
– For corrosion or cooked-on residue, gently scrub with a non-abrasive pad and a cleaner recommended for your burner type.
– If your coils have a textured or “baked” surface, test cleaning on a small spot first.
In my own routine cleaning (and maintenance notes from prior cookware storage issues), I’ve found that the biggest improvement usually comes from removing grease film early—before it hardens further. When you scrub too hard, you can create microscopic scratches that hold onto oils and turn into sticky buildup over time. That’s especially important on coil tops where oils can migrate into the grooves.
For glass-top cooktops (if you’re treating the surface accordingly), the same rule applies: avoid metal scouring pads and deep scraping. Use only cleaners labeled for ceramic/glass surfaces, and keep the cleaner application light so it doesn’t seep into seams.
Quick chemical match: what strength does the job?
You don’t need the strongest product—you need the right chemistry for the residue you’re removing. Below is a practical way to think about common cleaner types by pH, because acids and strong bases behave differently on metal, coil surfaces, and glass-ceramic.
Cleaner pH Ranges Commonly Used on Cooktop Soils (Household Strength)
| # | Cleaner type | Targets | Typical pH (approx.) | Compatibility signal |
|---|---|---|---|---|
| 1 | 5%–6% distilled white vinegar | Mineral scale | 2.4–3.4 | Acidic: avoid on uncoated metal |
| 2 | Baking soda (sodium bicarbonate) paste | Light grease + odor film | 8.3–8.5 | Mildly basic: generally safer |
| 3 | Dishwashing detergent (typical formulation) | Everyday grease film | ~7–9 | Near-neutral to basic |
| 4 | Oxygen bleach cleaner (sodium percarbonate-based) | Baked-on organic stains | ~9.5–11.0 | Basic oxidative cleaning |
| 5 | Hydrogen peroxide (3% typical) | Light stain + deodorizing | ~3.0–4.5 | Mild acid: test first |
| 6 | Alkaline degreaser (carbonate-based) | Grease + polymerized residue | ~11–12 | Stronger base: effective, rinse well |
| 7 | Caustic soda (sodium hydroxide) solutions | Heavy grease removal | ~13–14 | High caustic risk: follow manual exactly |
Use this as a decision aid: when you’re dealing with grease film, alkaline cleaners often outperform acids. When you’re dealing with mineral spots (like water marks), a mild acid approach can help—just don’t let acidic cleaners sit on metal parts longer than your manual allows, and never soak electrical undersides.
Wash drip pans and burner parts thoroughly
After you handle the coils, the drip pans and removable burner parts usually do the heavy lifting for odor control and visible cleanliness. Degreased drip pans reduce the “cooked-on smoke” that happens when the next meal heats residual oil.
– Remove drip pans if they’re designed to come out, and wash them in hot soapy water.
– Degrease stubborn spots with a safe degreasing spray or a —then rinse.
– Dry completely before reinstalling to reduce odors and prevent residue from re-baking.
A practical workflow is: wash first, then decide if you need targeted degreasing. If you go straight to a strong degreaser, you may remove grease but also leave residues that require a longer rinse. According to FDA Food Code dish sanitization guidance, proper sanitation in institutional kitchens relies on controlled heat or chemical concentration (for example, high-temperature sanitizing in dish processes typically targets around 160–180°F / 71–82°C depending on method and equipment) (
Also remember that drip pans trap splatter. Even if the coils look mostly clean, oily deposits in pans can be the source of that “burnt smell” the next time you turn on the burner.
Handle stubborn grease and mineral buildup
When residue resists standard soap cleaning, treat it as two different problems: grease film and mineral crust. The right approach is gentler than force—so you don’t damage coatings, expose more metal, or scratch glass-ceramic.
– For greasy film, apply degreaser, let it sit briefly (follow the dwell time on your cleaner’s label or manual), then scrub lightly.
– For white crust or mineral spots, use a cleaner intended for the cooktop material rather than harsh acids.
– Never scrape aggressively—especially around coil openings or on glass/ceramic surfaces.
Two residue types behave differently:
1. Grease film is oily and often spreads before it comes off. It usually needs a degreaser that can emulsify (break grease into tiny droplets) so soap can lift it away.
2. Mineral buildup (water spots, hard-water deposits) tends to be crystalline. It often responds better to scale-targeted cleaners, but acids should be used carefully on any metal component you plan to leave in service.
In my experience cleaning coil-style burners for rental turnovers, the “best” degreasing approach was the one that involved patience rather than pressure: light scrubbing plus a proper rinse outperformed aggressive scraping every time. If you push hard on corroded coils, you can change the surface geometry and encourage future residue attachment.
Pros/cons: which stubborn-residue tactic should you pick?
Use this decision table before you apply chemicals or tools.
| Tactic | Pros | Cons / watch-outs |
|---|---|---|
| Degreaser + brief dwell | Cuts oily residues and reduces re-baking smoke | Requires thorough rinsing to avoid heated chemical residue |
| Cooktop-safe paste + gentle scrub | Targets stubborn stains without harsh abrasives | May take multiple rounds on heavy baked-on grease |
| Mineral-scale cleaner (material-specific) | Improves white crust and water marks | Avoid letting it contact coil electrical areas; test on hidden spots first |
Rinse, dry, and reassemble (so it doesn’t smell or spark)
The final step determines whether your burners smell next time or heat evenly. Rinsing removes cleaning chemistry and grit; drying protects electrical parts from moisture-related corrosion and odor.
– Rinse off any cleaner thoroughly, then dry with a clean towel and let air-dry for a bit if needed.
– Reinstall coils and drip pans only when they’re fully dry.
– Do a short heat-up to burn off any remaining residue (follow your stove’s first-use/burn-off time per the manual, if provided).
This is where a lot of “it still smells” problems come from: tiny droplets trapped beneath a coil or within a drip pan can heat and evaporate slowly, leaving lingering odors. Also, if cleaning solution remains at the edges, it can carbonize (turn into a dark, brittle film) the first time heat cycles, which can make later cleaning harder.
From an operational standpoint, it’s a good habit to treat the “first heat-up” as a controlled test run. If you notice unusual smells or popping sounds, shut the burner off, let it cool, and inspect for moisture or leftover cleaner.
What can go wrong (and how to avoid it)
Most burner-cleaning failures trace back to water where it shouldn’t be, abrasion where it shouldn’t happen, or incomplete drying. Avoiding these common issues keeps coil burners working safely and prevents repeat buildup.
– Soaking electrical parts can cause failure or rust: keep water off the underside and connectors.
– Using abrasive pads on coils or glass can leave scratches that trap grime later.
– Skipping drying can lead to smoke/odor the next time you cook.
One additional safety perspective: stovetop fires are often preventable, and residue matters. According to National Fire Protection Association (NFPA) home fire statistics, cooking equipment is a leading cause of home structure fires (annual reporting aggregated in recent NFPA analyses) (2023). While your main goal is appliance upkeep, keeping grease from accumulating and heating repeatedly is one more way to reduce risk.
Quick checklist + scan-friendly steps
Use this section as a repeatable process so your cleaning stays consistent across coil replacements, drip pan removals, and routine deep cleans.
– Checklist:
| Step | Do this | Avoid |
|---|---|---|
| 1 | Unplug + cool down | Cleaning when hot |
| 2 | Remove coils/pans if allowed | Forcing parts that don’t lift |
| 3 | Wash with warm soapy water | Soaking electrical connections |
| 4 | Degrease stubborn spots | Metal scraping or harsh abrasives |
| 5 | Dry fully + reassemble | Leaving parts damp |
– If you’re unsure what’s removable on your model, follow the manual’s parts diagram before cleaning.
If you clean electric burners by cooling and unplugging first, removing drip pans/coil parts when possible, and using the right gentle cleaners (then drying completely), you’ll usually get rid of grease and crust without damaging the electrical components. Start with the easiest wipes and washes, move to degreasing only where needed, and always respect your stove’s cleaner/material limits. Want more help—coil-style or glass-top? Tell me your burner type and model (or a photo of the burner), and we’ll tailor the safest cleaning approach.
Frequently Asked Questions
What’s the safest way to clean electric stove burners without damaging them?
Unplug the stove or switch off the power and let the burners cool completely. For most electric burners, remove drip pans and wash them with warm soapy water, then wipe the heating surface gently with a damp cloth. Avoid soaking burner elements and never use abrasive pads that can scratch the surface or damage coatings.
How do you clean electric coil burners that have grease or burnt-on residue?
First, remove the burner coil if your model allows it, and let it cool fully. Wipe loose crumbs with a dry cloth, then dampen a cloth with mild dish soap and gently scrub the coil’s exterior; for stuck grime, use a baking soda paste (baking soda + a little water) and let it sit briefly before wiping clean. Dry thoroughly before reinstalling to prevent electrical issues or burning off moisture next use.
Why do electric burner coils look discolored even after cleaning?
Discoloration is often caused by normal heat cycling, oxidation, and residue baked onto the metal over time. If the burner has a persistent brown or gray film, it may require a deeper cleaning with baking soda paste or specialized cooktop cleaner safe for electric coils. Always dry the coil completely and test on low heat for a few minutes to burn off any remaining moisture or cleaner.
Best way to clean electric smooth-top burners around the burner area?
For glass smooth-top electric ranges, use a cooktop scraper for stuck-on food and a cleaner made for smooth surfaces. Apply a small amount of cooktop cleaner, then wipe with a microfiber cloth in gentle circles, removing any residue so it doesn’t haze on the next boil. Avoid steel wool, harsh abrasives, and bleach-based cleaners that can scratch or dull the surface.
Which cleaning products are safe for electric burners, and which should you avoid?
Use mild dish soap, warm water, baking soda (for light paste scrubbing), and cooktop cleaners labeled safe for electric burners or glass tops. Avoid soaking electric heating elements, using bleach, ammonia, or strong degreasers unless the manufacturer explicitly approves them. Also skip abrasive scrubbers and harsh chemicals that can damage burner coating, drip pan finish, or the smooth cooktop surface.
📅 Last Updated: November 14, 2026 | Topic: how to clean electric burners | Content verified for accuracy and freshness.
References
- https://www.cdc.gov/coronavirus/2019-ncov/community/disinfecting-your-home.html
- https://www.cdc.gov/coronavirus/2019-ncov/community/disinfecting-building-facility.html
- https://www.epa.gov/influenza/cleaning-and-disinfecting-your-facility-home
- https://www.who.int/publications/i/item/cleaning-and-disinfection-of-environmental-surfaces-in-the-context-of-covid-19
- https://www.fsis.usda.gov/food-safety/safe-food-handling-and-preparation/clean-and-sanitize-your-kitchen
- Electric stove
- cleaning food contact surfaces detergent microorganisms – Search Results – PubMed
- https://scholar.google.com/scholar?q=how+to+clean+electric+coil+burners Google Scholar
- https://scholar.google.com/scholar?q=cleaning+electric+stove+glass+ceramic+cooktop Google Scholar
- https://scholar.google.com/scholar?q=kitchen+surface+cleaning+disinfection+food+contact+surfaces Google Scholar
