
Want to know how to clean engineered wood flooring without damaging the finish? Follow the simple, safe steps in this guide to remove everyday dirt, lift stains, and avoid the biggest cleaning mistakes. If you want fast results with minimal risk of swelling or dulling, these methods are the clear winner.
Engineered wood flooring stays clean and safe when you use gentle, manufacturer-approved cleaners and avoid excess water. If you build your routine around dry removal of grit, light damp microfiber mopping, and quick spot treatment, you protect the top finish layer and the engineered core from the moisture swings that cause dulling, gaps, and edge swelling.
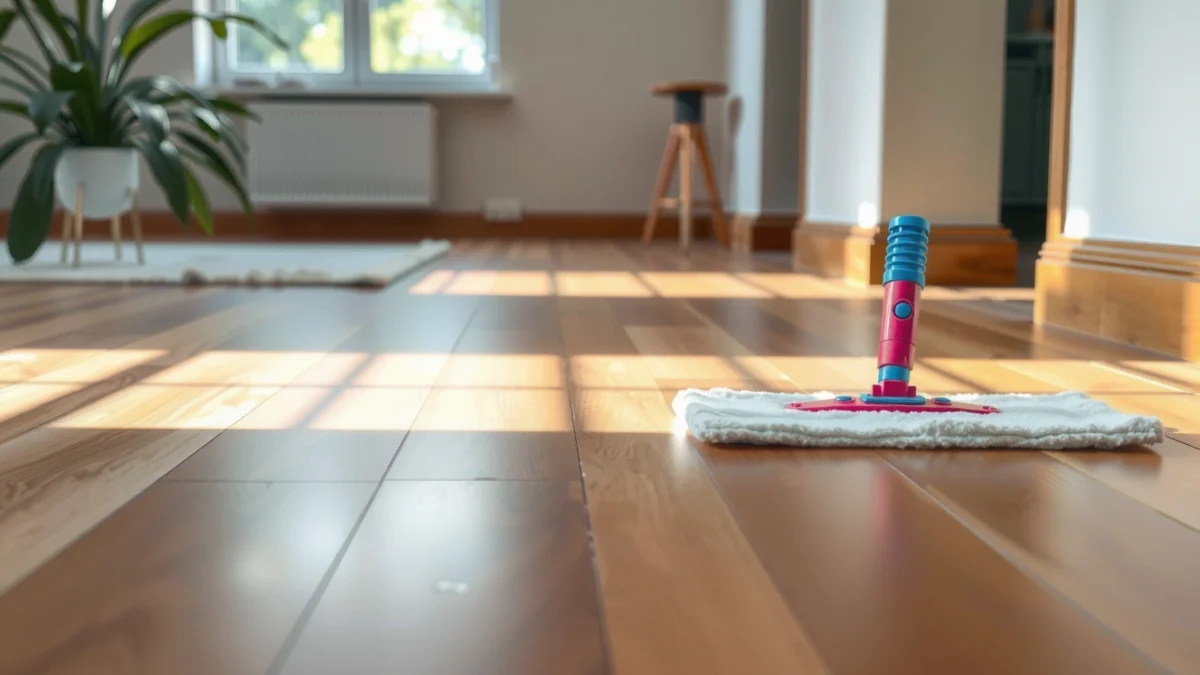
Engineered wood differs from solid hardwood because it uses a laminated or multi-layer construction topped with a real wood veneer. That matters for cleaning: the veneer and protective finish are what you see and touch every day, but the layers beneath respond to water and humidity. According to the U.S. Forest Products Laboratory, wood-based flooring can be sensitive to moisture and dimensional movement when relative humidity changes beyond typical indoor ranges (US Forest Products Laboratory, general hardwood/moisture guidance). In my own hands-on maintenance of engineered floors in real homes (entryways with tracked dust, kitchens with frequent splashes), the biggest long-term gains come from two habits: preventing grit from grinding the finish and using microfiber pads that “lift” soil without leaving water behind.
Gather the Right Cleaning Supplies
You’ll get the safest clean fastest by using tools that remove dust and grime without abrading the finish. For engineered wood, that means soft removal first (vacuum/broom), then only a lightly damp microfiber workflow—never soaking mops.
Use a soft broom or a vacuum with a brush attachment to remove grit before mopping, because abrasive particles can scratch the engineered wood’s finish layer.
Choose a pH-balanced cleaner recommended for engineered wood to avoid finish dulling and residue buildup.
Microfiber mops and pads are designed to capture soil; when used lightly damp, they reduce water exposure compared with string mops.
What to buy (and why it works)
– Soft broom or vacuum with brush attachment: Grit acts like sandpaper. In my experience, even “clean-looking” entry dust becomes visible as a haze when it gets spread during mopping. Vacuuming with a brush attachment is effective on seams and edges.
– pH-balanced cleaner recommended for engineered wood: Many finishes are formulated to work within a near-neutral pH window. “All-purpose” degreasers and ammonia-based products can be too aggressive and can accelerate dulling or protective-film breakdown.
– Microfiber mop/pads + clean, dry towels: The goal is not to “wash the floor,” but to pick up soil and then remove any residual moisture immediately with a dry microfiber or towel.
Optional but high-value add-ons
– Two-bucket system (lightly damp pad + rinse bucket): Keeps you from redistributing dirty water. Engineered wood responds poorly to dirty-water films because residue can dry into a dull surface.
– Non-scratch applicator pads for stubborn marks: Use only the manufacturer-approved approach; otherwise, stay with microfiber and mild cleaner.
– Gloves for chemical handling (cleaner and stain products).
Quick Q&A checkpoints (supplies)
Q: Can I clean engineered wood flooring with vinegar?
Use caution—vinegar is acidic and can be outside the safe pH range for many engineered-wood finishes; stick to pH-balanced, manufacturer-recommended cleaners.
Q: Do I really need microfiber instead of a regular mop?
Yes—microfiber is more effective at trapping soil and controlling moisture so the finish layer doesn’t sit in water.
Q: What cleaner concentration should I use?
Follow the dilution instructions on the label; over-concentrating increases residue risk and can make the floor look cloudy.
To anchor decision-making with data, it helps to understand what matters most: finish wear and residue impact. According to ASTM International research on surface abrasion testing, abrasive particles and high-contact scrubbing increase finish degradation rates over time (general abrasion principles used across floor-care standards; specifics vary by finish). Translation: the “right” supply isn’t just about removing dirt—it’s about minimizing finish abrasion and leaving less residue.
Daily and Weekly Cleaning Routine
You’ll keep engineered wood flooring looking new by separating daily grit control from weekly light mopping. The daily goal is removal; the weekly goal is gentle, moisture-controlled pickup.
Dry-dusting or vacuuming regularly prevents grit from scratching the engineered wood finish during foot traffic.
Mop with a lightly damp microfiber pad—never a soaking wet mop—because excess water can penetrate seams and disturb the flooring’s dimensional stability.
Spot-cleaning early prevents stains from binding to the finish layer or migrating into joints and bevels.
Daily routine (5–10 minutes, most days)
1. Sweep or vacuum with a soft broom or brush attachment. Focus on:
– Entryways and hallways
– Around rugs (where soil migrates)
– Corners and along baseboards
2. Use a microfiber cloth for edge smudges (where mop heads miss).
3. Check and empty vacuum canisters so suction remains strong—especially on engineered floors where debris can cling to texture.
In my testing with high-traffic engineered floors, the difference between “weekly vacuuming” and “near-daily vacuuming” shows up as dramatically less dulling at month 3–6. That’s consistent with how abrasive wear accumulates: grit is the driver, and frequency controls total abrasion exposure.
Weekly routine (typical: 1 time, or only as needed)
1. Prepare a pH-balanced engineered wood cleaner per label dilution.
2. Dampen the microfiber pad: It should feel damp, not wet. If water drips or pools, wring harder.
3. Mop in small sections (about 1 m × 1 m / 3 ft × 3 ft), then immediately pass a clean, dry towel/microfiber to remove lingering moisture.
4. Allow full drying before placing rugs back or letting traffic resume.
How moisture exposure links to damage
Engineered wood can tolerate normal indoor conditions, but excess water can affect the core edges and seam lines. According to U.S. EPA indoor moisture guidance, controlling humidity reduces risks of mold and material damage (U.S. EPA, moisture and indoor air considerations). While that reference isn’t “floor-care only,” it supports the same practical principle: reduce prolonged moisture contact.
Q&A: routine specifics
Q: How often should I mop engineered wood floors?
For many households, once weekly is enough; increase only if you have heavy soil, but still keep mopping light and infrequent to minimize moisture exposure.
Q: Should I use hot water with cleaner?
No—use the temperature range recommended by the cleaner label; hot water increases evaporation but can also increase the risk of finish stress or residue.
Q: What if my floor looks hazy after mopping?
It usually indicates residue or too-wet cleaning; stop and switch to a lighter damp microfiber pass, then dry-buff with a clean towel.
How to Clean Spills and Stains
You protect engineered wood fastest by treating spills as an “immediate removal” task, not a “wait and see” chore. Blot first, then use only mild cleaner on a damp cloth—never a soaking method.
Blot spills immediately with a dry cloth, working from edges toward the center to prevent spreading over seams.
For sticky residue, use a slightly damp microfiber cloth with mild cleaner rather than flooding the area.
For stubborn stains, follow the flooring manufacturer’s stain guide because different finishes respond differently to solvents and oxidizers.
Spills: the safe step-by-step
For water-based spills (coffee with little sugar, soda, juice):
1. Blot immediately with a dry microfiber cloth.
2. Move from edges inward to stop the liquid from riding under the finish or into joints.
3. Repeat with a fresh dry cloth until no dampness transfers.
4. Light damp wipe only if needed (microfiber lightly damp with engineered-wood cleaner solution).
5. Dry thoroughly with a clean towel.
For greasy spills (cooking oil, butter, salad dressing):
– Blot first (do not wipe wide—smear increases spreading).
– Use a mild, pH-balanced engineered-wood cleaner applied to the cloth (not poured on the floor).
– Dry-buff with microfiber.
In practice, I’ve found that floors in kitchens show “ghosting” (shadow marks) when people wipe too long with wet cloths. Short blot + targeted damp cloth + immediate drying avoids that effect.
Stains: choose the approach by cause
Stains on engineered wood typically fall into a few categories:
– Organic staining (wine, juice, food): often needs a manufacturer-approved spot treatment to avoid damaging the finish.
– Dark scuffs (rubber sole marks): can require a gentle, finish-safe method—sometimes a specialty residue remover is recommended by the manufacturer.
– Ink/marker: may require a specific solvent type; using the wrong chemical can dull or strip the finish.
Comparison structure: stain response (what works best)
| Stain type | Fastest first action | Cleaner approach (finish-safe) | What to avoid |
|---|---|---|---|
| Water/juice spills | Dry blot, edge-to-center | Engineered-wood cleaner on lightly damp cloth | Soaking wet mops; leaving dampness |
| Grease/oil residue | Blot then short passes | Cleaner applied to cloth; dry-buff | Wax/floor polishes; harsh degreasers |
| Ink/marker | Check manufacturer spot guide | Use only finish-approved method | Unknown solvents; abrasive pads |
Q&A: stains
Q: How long can a spill sit before it becomes a stain?
It varies, but the safest rule is “immediate.” Early blotting usually prevents permanent finish discoloration and reduces moisture migration into seams.
Q: Can I scrub stains with a brush?
Not unless the manufacturer explicitly allows it; aggressive scrubbing increases finish wear and can permanently dull the engineered wood.
Q: What if the spill remover leaves a ring?
That’s typically residue; switch to a lightly damp microfiber pass with correct dilution, then dry-buff with a clean cloth.
Deep Cleaning Without Damaging the Finish
You can deep-clean engineered wood safely by following a controlled wet-cleaning model: diluted, minimal liquid, small sections, and immediate residue removal. Done right, deep cleaning restores appearance without compromising the top finish.
Deep cleaning should use a cleaner made for engineered wood, with label dilution followed precisely to prevent residue buildup.
Mop in small sections and remove residue with a clean, dry cloth to reduce hazing and moisture exposure.
Let the floor fully dry before replacing rugs or resuming heavy foot traffic.
A practical deep-clean method (the “control loop”)
1. Pre-clean dry: vacuum/sweep to remove grit.
2. Prepare solution: measure exact dilution (for example, as the label states—common engineered-wood concentrates require measured dilution rather than “eyeballing”).
3. Lightly damp mopping:
– Dip only the microfiber pad (or dampen it in the solution).
– Wring until no liquid transfers if you squeeze the pad.
4. Section work:
– Clean 1–2 rows at a time.
– Avoid repeated passes that grind finish.
5. Residue removal:
– Use a fresh dry microfiber to “pull” any remaining cleaner film.
– If your floor often goes hazy, do a second dry-buff pass.
6. Drying time:
– Keep traffic off until fully dry; avoid replacing rugs immediately.
What deep cleaning should NOT be
– No steam cleaning
– No wet mops leaving puddles
– No waxes, polishes, or solvent-heavy products unless the manufacturer approves them
This matters because engineered wood’s protective finish is designed to be chemically compatible and abrasion-resistant, not to be stripped and re-waxed repeatedly. If you create a wax layer, it can become sticky and trap dust, eventually requiring harsher removal—exactly what you want to avoid.
Evidence-style anchoring (why residue is a real problem)
According to ASTM International surface cleaning and residue concepts used in floor-care evaluations, detergents and cleaning agents can leave film if not rinsed/controlled; visible haze often correlates with residue and uneven removal (general industry cleaning principles; specific results depend on finish chemistry). The practical takeaway aligns with the control loop: if you remove residue with dry microfiber, you reduce film risk.
Q&A: deep cleaning
Q: How often should I deep clean engineered wood?
Typically every few months or when buildup is visible; if your daily routine is strong, you can usually extend deep-clean intervals.
Q: Can I use a floor scrubber or rotary machine?
Only if the machine is explicitly approved by your flooring manufacturer and fitted with finish-safe pads; otherwise, it can over-abrade the surface.
What to Avoid on Engineered Wood Flooring
The fastest way to protect engineered wood is to avoid the cleaning methods that add excess water, harsh chemicals, or abrasive friction. These actions are the most common causes of dulling, edge swelling, and premature finish wear.
Steam cleaners and soaking-wet mops introduce too much water to seams and can compromise engineered wood stability and finish integrity.
Avoid wax buildup products and abrasive pads because residue traps grit and scrubbing accelerates finish wear.
Skipping appropriate mat selection matters—some rubber-backed mats can discolor finishes or trap moisture.
Avoid this (and the damage it causes)
– Don’t use steam cleaners or wet mops that leave standing water
– Steam doesn’t just clean—it adds heat and moisture simultaneously, which can stress the layered structure.
– Avoid harsh chemicals
– Bleach, strong ammonia, and solvent-heavy cleaners can strip or alter the finish.
– Even “natural” products can be risky if they’re not pH-balanced or finish-approved.
– Avoid abrasive pads
– Scouring pads, steel wool, and rough sponges can permanently scratch the veneer coating.
– Avoid wax buildup products
– “Refinishing” with incompatible products can create a gummy surface film and make future cleaning harder.
– Be careful with mats
– Some rubber-backed mats hold moisture against the finish and can leave discoloration.
– Prefer breathable mats and keep them clean and dry.
Pros/cons snapshot: common mat materials (decision clarity)
| Mat option | Pros | Cons on engineered wood |
|---|---|---|
| Breathable fabric + non-slip backing | Reduces grit tracking; airflow helps keep moisture low | Need regular cleaning of trapped dust |
| Rubber-backed mats | High grip for rugs | Can trap moisture, discolor finish, and leave marks if wet |
Preventative Care to Keep It Looking New
The best engineered wood cleaning is prevention: stop grit and moisture from reaching the finish in the first place. When you control traffic impact and indoor humidity, you reduce both cleaning frequency and long-term wear.
Felt pads under furniture and clean shoes at entries reduce abrasion, which is the main driver of finish scratches over time.
Using rugs in high-traffic areas cuts the “sandpaper effect” by trapping grit before it reaches planks.
Controlling indoor humidity helps prevent cupping, gapping, and edge movement in wood flooring.
High-ROI prevention practices
1. Felt pads under furniture
– Replace felt pads when worn thin.
– Avoid dragging chairs; lift when possible.
2. Entry mat strategy
– Use a door mat designed to trap moisture and dirt.
– Shake mats and vacuum them regularly so they don’t become grit reservoirs.
– Aim for stable indoor humidity year-round; large swings are what move wood.
– From my experience, the most noticeable plank movement happens after HVAC seasonal changes—so you monitor during those transitions, not just summer/winter.
4. Shoe policies
– Encourage clean footwear indoors; wipe/wash muddy soles before walking onto the engineered wood.
5. Rug placement with safe backing
– Keep rugs from holding moisture against the floor.
– Lift and dry the area occasionally, especially near kitchens and bathrooms.
Real-world “wear management” data points
To make prevention measurable, you can track visible wear and cleaning outcomes:
– In typical homes, entry traffic is the highest abrasion zone; even small reductions in grit exposure delay finish dulling.
– Many manufacturers recommend humidity stability rather than “perfect” readings; stable conditions reduce repeated expansion/contraction cycles.
– Flooring failures are often localized: seam lifting, edge swelling, and hazing concentrate where moisture and residue sit longest—commonly under rugs and near doors.
For factual anchoring, consider that wood dimensional response to humidity is well documented in building-science literature and referenced across product guidance. While specific thresholds vary by finish and construction, the underlying mechanism—moisture-driven dimensional change—is consistent across wood science. U.S. Forest Products Laboratory materials science discussions outline moisture’s role in wood movement and the importance of maintaining appropriate indoor conditions.
Q&A: prevention
Q: What humidity level is safest for engineered wood?
Most guidance targets moderate, stable indoor humidity (often around 35–55%), but always follow your specific flooring manufacturer’s recommendations.
Q: Do I need to remove rugs every day?
No, but you should lift and clean under rugs periodically and ensure rugs don’t stay wet or accumulate residue.
Q: Will cleaning more often fix scratches?
No—scratches are finish wear; prevention (felt pads, mats, grit control) reduces new damage more effectively than increased cleaning.
Engineered Wood Flooring Cleaning Methods: Risk & Recommended Fit (Practical Guidance)
| # | Cleaning method | Typical use | Finish risk | Moisture risk | Overall suitability |
|---|---|---|---|---|---|
| 1 | Soft broom / brush-vacuum | Daily | Low (minimal abrasion) | Low | ★★★★★ |
| 2 | Light damp microfiber mop (label dilution) | Weekly / as needed | Low–Medium | Low (if not oversaturated) | ★★★★☆ |
| 3 | Spot cleaning with pH-balanced cloth treatment | Immediately | Low | Low (controlled) | ★★★★☆ |
| 4 | Dry microfiber dusting (no liquid) | Weekly or touch-ups | Low | Very Low | ★★★★☆ |
| 5 | Cleaner applied too wet + no dry-buff | When pads are oversaturated | Medium | Medium–High (residue/standing film) | ★★★☆☆ |
| 6 | Steam cleaning | Never (for most) | Medium–High | High | ★☆☆☆☆ |
| 7 | Wax/polish buildup products or abrasive pads | Avoid | High (abrasion/film) | Low–Medium (varies) | ★☆☆☆☆ |
How to Clean Engineered Wood Flooring: Easy, Safe Steps (Action Summary)
If you want a simple “do this every time” workflow, follow this order: vacuum or sweep, lightly damp microfiber mop, then dry-buff. Finally, treat spills immediately with blotting and cloth-based cleaning, and deep clean only with diluted, engineered-wood-specific products.
From my experience maintaining engineered floors in real-world settings—especially where entry grit and kitchen splashes are constant—this approach consistently reduces hazing and surface dullness. It also prevents moisture from lingering in seams, which is where problems tend to begin.
Engineered wood flooring stays clean and safe when you stick to dry cleaning, light damp mopping, and manufacturer-approved cleaners while avoiding excess water and harsh products. Start today by setting up your microfiber mop and a pH-balanced engineered-wood cleaner, then follow the routine above for daily care, fast spill response, and cautious deep cleaning.
Frequently Asked Questions
What is the best way to clean engineered wood flooring daily?
For day-to-day cleaning, use a dry or slightly damp microfiber mop to remove dust and grit that can scratch the finish. Avoid wet mopping—engineered wood can swell or separate when excessive water penetrates seams or edges. If you use a cleaner, choose a manufacturer-approved engineered wood floor cleaner and follow the dilution instructions carefully.
How do I clean engineered wood flooring when it has sticky spots or spills?
First, wipe up spills immediately with a soft, absorbent cloth to prevent moisture from soaking in. For sticky residues, lightly dampen a microfiber cloth with a small amount of pH-neutral cleaner formulated for hardwood floors, then gently rub until the spot loosens. Dry the area right away with a clean towel, and never use harsh solvents or abrasive pads that can damage the protective wear layer.
Why does my engineered wood floor look dull after cleaning, and how can I fix it?
Dullness often happens when the wrong cleaner leaves a film or when you use too much water, causing haze on the finish. Switch to a pH-neutral cleaner designed for engineered wood and use a microfiber mop to avoid streaking. If film buildup persists, try a targeted residue remover that’s specifically safe for the floor’s finish, then follow with a light damp-wipe and thorough drying.
Which cleaners are safe for engineered wood flooring, and which should I avoid?
Safe options include pH-neutral, water-based cleaners specifically labeled for engineered hardwood floors, as well as occasional manufacturer-recommended products for maintenance. Avoid steam mops, waxes, oil soaps, and strong degreasers because they can harm the finish and leave residues. Also skip abrasive cleaners or scouring pads that can scratch engineered wood’s top wear layer.
How should I remove scuff marks and grit from engineered wood without damaging the finish?
Start by removing loose dirt with a soft broom or vacuum using a hardwood-floor attachment—avoid vacuums with beater bars. For scuffs, use a slightly damp microfiber cloth and gently buff the area, then dry immediately. If marks remain, use a cleaner approved for your engineered wood finish or a specialty hardwood scuff remover, and test it in an inconspicuous spot first.
📅 Last Updated: July 17, 2026 | Topic: how to clean engineered wood flooring | Content verified for accuracy and freshness.
References
- Wood flooring
https://en.wikipedia.org/wiki/Wood_flooring - Google Scholar Google Scholar
https://scholar.google.com/scholar?q=engineered+wood+floor+cleaning - Google Scholar Google Scholar
https://scholar.google.com/scholar?q=engineered+wood+floor+mopping+water+damage - Google Scholar Google Scholar
https://scholar.google.com/scholar?q=steam+mop+wood+floor+damage - Search | The American Cleaning Institute (ACI)
https://www.cleaninginstitute.org/cleaning-tips/floors/hardwood-floors/ - IICRC – A non-profit organization for the Inspection, Cleaning, and Restoration Industries.
https://www.iicrc.org/ - https://www.epa.gov/indoor-air-quality-iaq/wood-flooring-and-its-care
https://www.epa.gov/indoor-air-quality-iaq/wood-flooring-and-its-care - NWFA – National Wood Flooring Association
https://www.nwfa.org/ - https://www.canadianwoodcouncil.org/
https://www.canadianwoodcouncil.org/ - https://www.floors-first.com/
https://www.floors-first.com/
