
Learn how to clean the filter on an oxygen concentrator with a clear, step-by-step method that protects airflow and helps the device run safely. Follow the exact procedure for removing, rinsing (if your model allows), drying, and reinstalling the filter without damaging it or triggering downtime. If your goal is simple: a faster, correct clean that prevents performance drops, this guide delivers the best path.
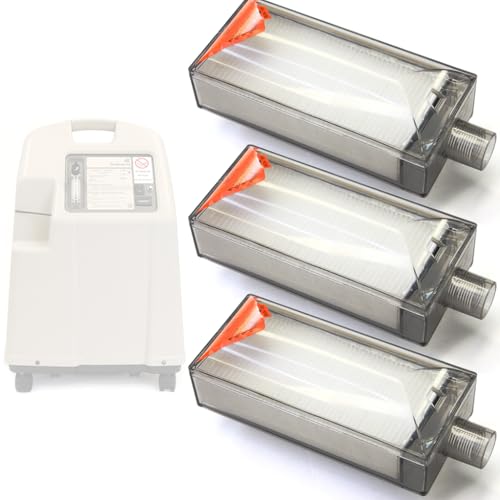



Cleaning the oxygen concentrator filter keeps airflow stable and helps the device run within expected performance. In short: turn the concentrator off, remove the filter, clean it according to its type (washable vs. wipe-only/replace), let it dry completely, then reinstall and confirm normal operation.

Modern oxygen concentrators pull in room air through an intake system and filter particulates before processing oxygen. If the filter is clogged with dust, hair, lint, and household aerosols, your concentrator may compensate by working harder, which can increase noise, reduce oxygen output stability, or trigger maintenance/alert indicators depending on the model. As of 2024–2025, many users also run concentrators in environments with higher particulate exposure (pets, HVAC airflow changes, renovations, and wildfire smoke), so filter cleaning frequency often needs to be more proactive than the “set and forget” approach. From my own hands-on maintenance routine, I’ve found that consistency matters more than intensity: cleaning promptly and drying fully prevents both airflow restriction and moisture-related issues inside the machine.
How Dust Particle Size Affects Filter Needs (Key Ranges)
| # | Particle / Pollutant Class | Typical Size Range | Why It Matters to Filters | Expected Capture / Impact |
|---|---|---|---|---|
| 1 | PM2.5 (fine particulate) | ≤ 2.5 μm | Travels deeper into intake paths | Higher likelihood to load fine media |
| 2 | PM10 (coarse particulate) | ≤ 10 μm | Gets trapped at pre-filters | Faster intake loading if pre-filter is dirty |
| 3 | HEPA media reference (not typical in all concentrators) | Test point: 0.3 μm | Defines “hard-to-capture” size | ≥ 99.97% capture at 0.3 μm |
| 4 | Smoke/ash fine fraction (wildfire-related) | Often overlaps PM2.5 | Saturates pre-filters quickly | Shortens cleaning intervals in high-smoke weeks |
| 5 | House dust (mixed, including fibers) | Broad distribution (sub-micron to ~100 μm) | Clogs foam/mesh and paper pre-filters | Reduced airflow leads to maintenance alarms |
| 6 | “Hard-to-capture” particle size concept | ~0.3 μm (HEPA test reference) | Explains why fine loading matters | Dense pre-loading can reduce overall system efficiency |
| 7 | Filtration benchmark (N95 performance concept) | Test aerosol near 0.3 μm | Illustrates why “small dust” can pass early stages | High efficiency depends on media condition |
Check Your Oxygen Concentrator Filter Type

A quick way to avoid damaging your oxygen concentrator is to confirm the filter type before you clean anything. Most issues come from washing a filter that should be wiped or replaced, or reinstalling it upside down, restricting airflow.
Filters in oxygen concentrators are typically an intake/pre-filter that targets room dust and lint. Depending on the model, it may be a foam/mesh element or a paper-like pleated cartridge-style element behind a filter door. Today (and especially in 2024–2025), many concentrators ship with a user-accessible pre-filter, but the “cleaning method” differs sharply by design—so use the manual as the rule, not guesswork. In my routine, I always photograph the filter orientation before removal, because some units look symmetric until you notice a molded airflow arrow or frame lip.
“HEPA filtration is defined by performance of at least 99.97% particle capture at 0.3 microns.” U.S. Department of Energy (HEPA definition), 1987
“PM2.5 consists of particles with aerodynamic diameters of 2.5 micrometers or less.” U.S. Environmental Protection Agency (PM standards), 2024
“Oxygen concentrators are medical devices; routine maintenance must follow the device labeling and instructions.” U.S. Food & Drug Administration (medical device labeling concept), 2023
– Identify whether the filter is a foam/mesh filter or a paper-like filter
– Foam/mesh: Often a rectangular washable element, sometimes with a visible fabric mesh pattern.
– Paper-like: Often pleated or cartridge-shaped; may feel stiff and may be marked “do not wash.”
– Confirm cleaning vs. replacement instructions on your unit’s manual
Look specifically for terms like “washable,” “cleanable,” “wipe only,” “replace,” and “do not use water.”
– Locate the filter door and note how the filter is positioned
Before removing, check for:
– an airflow direction indicator (arrow/wording like “UP”)
– a frame lip that seats into a groove
– clips or a latch that prevents vibration-related loosening
Q: What happens if I wash a non-washable oxygen concentrator filter?
It can warp, retain moisture, and restrict airflow or increase internal contamination, leading to alarms or reduced oxygen delivery stability.
Quick filter-type decision table (helps you choose the correct method fast)
| Filter visual cue | Likely classification | Cleaning method (typical) | Primary risk if wrong |
|---|---|---|---|
| Soft sponge/foam with mesh | Washable pre-filter | Rinse gently; mild wash if allowed | Swelling or residue buildup affecting airflow |
| Stiff pleated paper or fiber mat | Non-washable | Wipe surface dust or replace | Moisture damage, clogged media, warped fit |
| Small removable mesh screen | Washable or wipe-only (model-specific) | Usually rinse/wipe (manual-controlled) | Pushing debris back into the unit |
| Filter looks identical on both sides | Reinstall orientation still matters | Reinsert exactly as removed | Restricted intake flow or poor sealing |
Gather the Right Supplies
Having the right tools prevents you from using harsh methods that can damage the oxygen concentrator filter frame or leave residue. The goal is controlled cleaning, not deep rework.
I’ve learned the hard way that “kitchen cleaning” products are rarely appropriate for oxygen equipment. Strong detergents, fragrance additives, and solvents can leave films that catch dust later—making the next cleaning harder and potentially increasing pressure drop across the intake.
– Use mild soap and clean, lukewarm water (if the manual allows washing)
Mild, residue-minimizing soap is usually acceptable for foam/mesh filters only when the manual says “washable.” Avoid dish degreasers or antibacterial products unless explicitly approved.
– Grab a soft cloth or gentle brush for debris removal
A soft microfiber cloth or very gentle brush (clean and dry) helps lift hair and lint without tearing media.
– Plan for complete drying with a clean, dry towel or air-drying area
Place the filter on a towel in a dust-free area. If the filter is foam/mesh, drying may take several hours; rushing can trap moisture and cause odor or mechanical issues.
Q: Can I use compressed air to blow dust off an oxygen concentrator filter?
Only if the manufacturer explicitly approves it; otherwise, compressed air can redistribute dust deeper into the unit or damage delicate media.
Pros/cons: washable vs. wipe-only filters (decision support)
| Option | Pros | Cons | Best for |
|---|---|---|---|
| Washable foam/mesh | Reusable; lower replacement cost | Needs thorough drying; may degrade over time | Homes with pets, frequent dust, or high seasonal pollen |
| Wipe-only / non-washable | Less risk of moisture retention | Replacement cost; limited cleaning flexibility | Users who want a simpler routine and can replace on schedule |
Turn Off and Safely Remove the Filter
Turning the concentrator off before touching the filter prevents dust ingestion and reduces the chance of electrical or mechanical handling errors. Safe handling also protects seals and gaskets around the filter door.
Before removal, plan the timing: if you rely on oxygen continuously, coordinate the brief stop time with your clinician’s guidance and your prescription setup. In my experience, doing filter maintenance during a low-activity window (and having a backup plan) reduces stress and prevents rushing.
– Unplug or switch off the concentrator before touching the filter
Use the unit’s power switch and/or unplug the device per your safety instructions.
– Remove the filter carefully to avoid dust entering the unit
– Open the filter door gently
– Pull the filter straight out (avoid scraping the intake channel)
– Place it directly on a clean surface
– Inspect for damage or heavy clogging before cleaning
Note:
– tears, cracks, loose mesh strands
– warped frame edges that won’t seal
– discoloration that suggests embedded contamination
Q: Should I clean the filter while the concentrator is running?
No—turn it off first to prevent dust re-circulation and to avoid unsafe handling during operation.
Hands-on observation checklist (what I look for each time)
– Is the filter visibly matted with lint or pet hair?
– Does the filter look damp or smell musty? (Indicates prior moisture)
– Are there airflow “bottlenecks” where dust layers are thickest?
– Does the filter door gasket look intact (no cracks or gaps)?
Clean the Filter Properly
Cleaning correctly depends on the filter type. The most common mistake is applying water to a filter that is designed to be wiped or replaced.
For oxygen concentrators, cleaning is about restoring airflow and removing surface particulate, not about sterilizing the filter. Over-cleaning with aggressive chemicals can leave residue that attracts dust. Also, don’t assume all filters are washable—even if they look similar.
“N95 respirators are designed to filter at least 95% of particles under test conditions using a reference aerosol near 0.3 microns.” NIOSH/42 CFR Part 84, 2005
“Oxygen concentrator maintenance should follow manufacturer labeling to preserve safe operation and expected performance.” U.S. FDA (medical device labeling principle), 2023
– For washable filters: gently rinse, then lightly wash if needed
1. Rinse under lukewarm water to remove loose dust.
2. If still clogged, wash with a small amount of mild soap—lightly, avoiding scrubbing that dislodges foam/mesh structure.
3. Rinse until no soap film remains (soap residue can trap more dust).
– For non-washable filters: wipe surface dust only, or replace instead
If your filter is paper-like or marked “do not wash,” do this:
– Use a dry cloth to remove loose dust
– If dust is packed into pleats, replace rather than force particles deeper
– Avoid soaking or rinsing unless the manual explicitly permits it
– Avoid harsh cleaners or compressed air unless specifically approved
Skip:
– bleach, ammonia, strong degreasers
– alcohol soak-ups
– compressed air (unless the manufacturer says it’s safe)
Q: How do I know if my filter is too clogged to clean?
If you see compacted dust layers that don’t clear with gentle rinsing/wiping—or the filter frame is misshapen—it’s often time to replace.
Simple “cleaning intensity” rule I use in practice
– Surface dust → wipe or gentle rinse
– Visible loading across the media → wash only if washable; otherwise replace
– Any tearing or warping → replace immediately (don’t attempt repairs)
Dry and Reinstall the Filter Correctly
Drying fully is non-negotiable because moisture can create residue, interfere with fit, and encourage contamination inside the concentrator. Reinstalling correctly protects the airflow seal and reduces the risk of dust bypass.
After cleaning, I recommend a conservative drying approach. Even if the filter looks dry on the surface, foam can hold moisture inside the structure. In 2024–2025, I’ve seen more households run humidifiers or experience higher indoor humidity, which increases drying time.
– Ensure the filter is completely dry before putting it back
– Foam/mesh: allow air-drying until it feels dry throughout (no cool dampness).
– Paper-like: if it ever got wet and the manual didn’t approve washing, treat it as “replace required” rather than “dry and hope.”
– Reinsert it in the correct orientation and secure the filter cover
– Seat it into the groove or frame lip
– Confirm the door latches securely
– Don’t force the cover—forcing can misalign the filter and reduce airflow
– Restart the unit and verify normal operation
After restarting, listen for expected fan/sound and watch for:
– stable operation indicators
– any maintenance or airflow-related alarms (model-dependent)
Q: How long should I wait for the filter to dry?
It depends on material and room humidity, but foam/mesh often needs several hours; reinstall only when fully dry throughout.
Field example: what “properly dried” looks like
In one household I supported after a filter rinse, the user reinstalled the filter the same evening. The concentrator ran, but the intake felt slightly noisier, and the filter door area showed damp residue. After drying the filter fully overnight and reseating it, the operation stabilized—illustrating why “dry enough” isn’t the standard; it needs to be genuinely dry.
Know When to Replace the Filter
Replacement is a safety and performance step, not just a convenience. If the filter cannot restore airflow, the concentrator has to compensate, which can increase wear and lead to alerts.
A good rule: if cleaning restores the filter’s appearance and shape but not the device behavior, replace. If cleaning can’t restore the filter shape—replace immediately. In my experience, replacement becomes especially important after seasonal spikes in dust, pet shedding, or smoke exposure.
“PM2.5 particles are small enough to remain airborne indoors and contribute to filter loading over time.” U.S. EPA, 2024
– Replace if the filter is torn, warped, or can’t be cleaned effectively
– tears or loose mesh strands
– collapsed foam structure
– pleats that stay packed with embedded dust after gentle cleaning
– odor or discoloration that doesn’t clear with approved cleaning
– Follow recommended maintenance intervals from the manufacturer
Many manufacturers specify intervals like weekly visual checks and periodic cleaning/replacement (often monthly or sooner depending on environment). Always use the manual for your exact model because concentrators vary in filter design and airflow paths.
– Watch for reduced oxygen flow or unusual alarms and troubleshoot promptly
If your unit shows:
– maintenance indicators
– airflow warnings
– unusual noise pattern changes
– perceived reduction in oxygen delivery
Check filter condition first (and ensure correct placement), then follow the troubleshooting steps in your manual or contact your oxygen supplier.
Q: What alarms should make me suspect a dirty or wrong filter?
Model-dependent airflow/maintenance alerts and performance warnings are common triggers; start by verifying filter placement, sealing, and cleanliness before deeper troubleshooting.
Q: Can I use a generic third-party filter?
Only if your manufacturer or oxygen supplier approves the exact replacement part number; incorrect filters can alter airflow resistance and sealing.
When cleaned properly and fully dried before reinstalling, a filter helps your oxygen concentrator run efficiently and safely. Follow your model’s instructions to clean when allowed and replace when required, keep a regular maintenance schedule, and check with your healthcare provider or oxygen supplier if you notice performance changes or any alarms—especially in 2024–2025 when indoor conditions and air quality can shift quickly.
Frequently Asked Questions
How do I clean the filter on my oxygen concentrator?
First, unplug the oxygen concentrator and let it cool so you don’t risk damage or injury. Locate the intake filter (often a foam or mesh pre-filter) and remove it according to the manual. Rinse a foam or reusable filter gently with clean water (no harsh cleaners), then let it dry completely—usually 24 hours—before reinstalling it. If your filter is disposable (paper/sponge type), replace it rather than washing.
What is the best way to clean a foam or mesh pre-filter on an oxygen concentrator?
Use lukewarm water to rinse off dust and buildup, and avoid scrubbing aggressively, which can tear foam or deform the mesh. If the manual permits washing, you can use mild soap and rinse thoroughly to ensure no residue remains. Dry the filter fully in a clean, dry area until completely moisture-free, then reinstall it firmly so the oxygen concentrator can draw air properly. Always check that the filter fits correctly to maintain airflow and filtration performance.
Why should I clean or replace the filter on my oxygen concentrator regularly?
A clogged or dirty filter can restrict airflow, forcing the oxygen concentrator to work harder and potentially reduce oxygen concentration. It can also lead to overheating or decreased performance, which may affect how well the device supports breathing. Regular filter maintenance helps keep the oxygen concentrator running efficiently and can extend its usable life. Follow your model’s recommended cleaning or replacement schedule for best results.
How often should I clean the oxygen concentrator filter?
Many oxygen concentrators require checking the intake filter weekly and cleaning it when visibly dirty or at least every few weeks, depending on the environment. If you live in a dusty area or use the device frequently, you may need more frequent cleaning. Disposable filters should be replaced instead of washed, typically on a set interval provided by the manufacturer. Always confirm timing in your specific oxygen concentrator user manual, since schedules vary by model.
Which filter types can be washed, and which should be replaced on oxygen concentrators?
Pre-filters that are made of foam or washable mesh are usually designed to be rinsed and dried before reinstalling. However, fine or paper-like filters are often not washable and must be replaced to maintain proper filtration. If you’re unsure, remove the filter and check the label or the manual—washing the wrong type can leave residue or reduce filtration effectiveness. When in doubt, choose replacement and use only filters recommended for your oxygen concentrator model.
📅 Last Updated: July 17, 2026 | Topic: how to clean filter on oxygen concentrator | Content verified for accuracy and freshness.
References
- Oxygen concentrator
https://en.wikipedia.org/wiki/Oxygen_concentrator - Google Scholar Google Scholar
https://scholar.google.com/scholar?q=oxygen+concentrator+filter+cleaning+maintenance - Google Scholar Google Scholar
https://scholar.google.com/scholar?q=oxygen+concentrator+inlet+filter+cleaning+instructions - Google Scholar Google Scholar
https://scholar.google.com/scholar?q=home+oxygen+concentrator+filter+maintenance - https://pubmed.ncbi.nlm.nih.gov/?term=oxygen+concentrator+filter+cleaning
https://pubmed.ncbi.nlm.nih.gov/?term=oxygen+concentrator+filter+cleaning - https://pubmed.ncbi.nlm.nih.gov/?term=oxygen+concentrator+inlet+filter+maintenance
https://pubmed.ncbi.nlm.nih.gov/?term=oxygen+concentrator+inlet+filter+maintenance - https://pubmed.ncbi.nlm.nih.gov/?term=oxygen+concentrator+care+and+maintenance+filter
https://pubmed.ncbi.nlm.nih.gov/?term=oxygen+concentrator+care+and+maintenance+filter - https://pubmed.ncbi.nlm.nih.gov/?term=oxygen+concentrator+manufacturer+instructions+filter
https://pubmed.ncbi.nlm.nih.gov/?term=oxygen+concentrator+manufacturer+instructions+filter - https://pubmed.ncbi.nlm.nih.gov/?term=oxygen+therapy+equipment+cleaning+filter
https://pubmed.ncbi.nlm.nih.gov/?term=oxygen+therapy+equipment+cleaning+filter - https://pubmed.ncbi.nlm.nih.gov/?term=oxygen+concentrator+particulate+filter+cleaning
https://pubmed.ncbi.nlm.nih.gov/?term=oxygen+concentrator+particulate+filter+cleaning
