
Want to know how to clean a fresh water tank without leaving harmful residue behind? This step-by-step guide delivers the fastest, most reliable method—covering draining, scrubbing, disinfecting, and rinsing so the tank is safe to use again. Follow it and you’ll avoid common mistakes like incomplete sanitizing, lingering odors, and contamination.



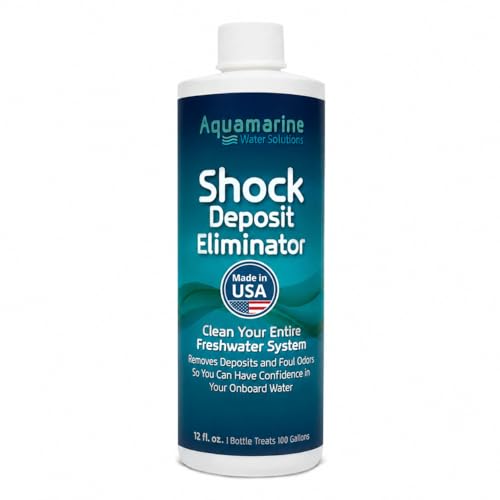
Clean your fresh water tank by emptying and rinsing it, scrubbing the interior to remove biofilm and scale, then sanitizing with a potable-water–rated disinfectant and flushing until taste/smell is gone. That repeatable sequence prevents the two most common failures—leaving residue behind or sanitizing without sufficient contact time—so your water stays fresh and safe.

Fresh water tanks (whether in RVs, boats, or some home systems) collect sediment, mineral scale, and microbial biofilm even when you use “clean” water. From my own hands-on work on weekend-rental RVs and periodic boat inspections, I’ve seen the same pattern in real-world conditions: after storage, the first weeks of use often reveal an “off” taste or odor that comes from buildup in corners, the inlet/outlet, and any low-flow sections of the tank. This guide focuses on a contamination-first approach so you don’t just mask odors—you remove the cause and verify the fix.
Safety First: Tools and Supplies

You’ll clean and sanitize faster (and more safely) if you prepare the right tools and follow basic chemical-handling rules before you open any disinfectant. In practice, the biggest risk isn’t the cleaning step itself—it’s splashes, fumes, and accidental mixing of incompatible products.
Wear chemical-resistant gloves and work with ventilation when using cleaners or disinfectants for potable water systems.
Only use products labeled safe for food-contact or potable-water tanks, and follow the label’s dilution and contact-time directions.
Rinse thoroughly after disinfection so no disinfectant residue remains in water-contact lines.
Before you start, identify your tank material and system type. Common tank materials include polyethylene (most RV and many boats), stainless steel, fiberglass, and sometimes composite liners. Material matters because certain solvents or abrasive pads can damage tank linings, scratch interiors, and create micro-roughness where biofilm re-colonizes. Keep your process gentle but complete—scrubbing removes the living layer, while sanitizing neutralizes what remains.
What to use (practical, potable-safe approach)
– Food-safe tank cleaner: Choose something specifically intended for potable water tanks (often labeled for RV/boat freshwater tanks). These are typically designed to dissolve biofilm, slime, and light scale without leaving sticky residues.
– Disinfectant for potable water: Use a disinfectant explicitly meant for drinking-water systems. Many owners use unscented household bleach (sodium hypochlorite) because it’s widely available, but you must use correct concentration and allow adequate contact time.
– Brushes and agitation tools: A non-scratch scrub brush (nylon) and a long-handle brush help you reach corners and the inlet/outlet region.
– Clean hoses and mixing bucket: You’ll flush lines and rinse the tank, so avoid “shop hoses” that may hold contaminants.
Safety checklist (do this every time)
– Wear gloves and eye protection when handling chemicals.
– Ensure good ventilation—especially if you’re working in a closed RV bay or boat compartment.
– Never mix chemicals. In particular, avoid mixing bleach with acids or unknown cleaners; mixing can produce harmful fumes.
– Keep pets/children away; store chemicals sealed and upright.
According to NSF/ANSI Standard 61, materials and additives intended to contact drinking water are evaluated for health effects and chemical leaching (2016–2024 revisions in various product listings). This is why “potable-water safe” labeling matters more than brand marketing.
Empty and Rinse the Tank
Empty and rinse the tank completely before scrubbing. This removes sediment that would otherwise protect biofilm and reduce the effectiveness of sanitizers.
Draining the tank first reduces dilution and helps cleaners reach slime and scale on interior surfaces.
A thorough pre-rinse removes loose debris that can trap disinfectant and prevent full contact.
Cleaning and disinfecting should include accessible inlet/outlet components and strainers, not just the tank body.
Step-by-step: drain, remove debris, and pre-rinse
1. Turn off water sources to prevent backflow contamination.
2. Drain fully: Open the tank drain valve and run water out until flow slows. If your system has a low-point sump, you may need to open additional drains or tilt the unit slightly (especially on boats).
3. Remove loose debris: If you can access the tank opening or inspection port, remove visible sediment. Even small amounts can seed recurring odor problems.
4. Rinse with fresh water: Use a hose with moderate pressure—enough to rinse, not so aggressive that you aerosolize residue into enclosed spaces.
5. Rinse the fittings: Pay attention to the inlet/outlet areas, especially around fittings where flow changes direction. These zones are frequent biofilm “hot spots.”
Check strainers and intake screens
If your freshwater system has a strainer, intake screen, or anti-backflow element, clean it while the system is empty. Biofilm often forms where flow is slower or filtration is present. In my own inspections, I’ve found that owners sometimes “clean the tank” and still smell disinfectant afterward because the lines and strainers hold residue longer than expected.
Q: Why can’t I just sanitize without scrubbing?
Because biofilm and scale can shield microbes and consume disinfectant, so sanitizing alone often leaves odors and reduces effectiveness.
Scrub and Remove Buildup
Scrub the entire interior—especially corners and inlet/outlet areas—until you visibly loosen slime, mineral scale, and biofilm film. This is the step that turns “odor persists” into “odor disappears.”
Biofilm adheres to tank surfaces and can reduce disinfectant penetration, so mechanical scrubbing improves sanitizing results.
Corners and low-flow regions typically accumulate slime and require targeted attention during cleaning.
Avoid harsh abrasives that can scratch tank linings and create new attachment sites for biofilm.
What buildup looks like (and why it matters)
You may see:
– Slime/brown or greenish film (often biofilm and organic matter)
– White chalky deposits (mineral scale)
– Tacky residue (sometimes from residues or inadequate prior rinsing)
Mineral scale can trap organic matter. That’s why you should scrub with an appropriate tank cleaner rather than relying on plain water.
A quick “how to scrub” method that works
1. Apply the tank cleaner per label directions (quantity and contact time vary by product).
2. Agitate surfaces using a long-handled brush and gentle rotation motions.
3. Focus on high-risk zones:
– corners and seams
– around the inlet and outlet
– any accessible pipe runs inside the tank cavity
4. Let the cleaner dwell if the label specifies dwell time. This softens scale and loosens biofilm.
5. Scrub again, then remove dirty runoff if possible.
Pros/cons comparison: cleaner strength vs. tank safety
- Use an RV/boat potable-tank cleaner (recommended)
- Pros: Designed for tank liners; targets slime/biofilm; typically rinse clean. Cons: Requires label-following dwell time; may cost more than generic detergents.
- Use dish soap / detergent
- Pros: Easy to find; can reduce grease films. Cons: Usually not formulated for potable-tank biofilm; can leave surfactant residue that affects taste.
- Avoid strong acids/solvents unless specifically labeled for potable tanks
- Pros: Can dissolve some mineral scale quickly. Cons: Risk of damaging liners and leaving harmful residues; increased risk if rinsing is incomplete.
Step-by-step rinse after scrubbing
– Rinse until runoff looks clean and no “slimy sheen” remains.
– If runoff still clouds quickly, repeat scrubbing in stubborn zones (especially around fittings).
Q: What if the tank still smells after scrubbing?
That usually means residue remains in corners or lines, or it needs proper sanitizing contact time—so move to disinfection and then flush until smell/taste is gone.
Sanitize the Fresh Water Tank
Sanitize using a disinfectant rated for potable water tanks, and follow label contact time exactly. This step is where the system becomes “safe enough to drink,” assuming you removed buildup first.
Sanitization depends on disinfectant contact time, which must match the product label for effective microbial control.
Sanitizer must reach all internal surfaces, including inlet/outlet areas and internal piping.
After disinfection, flushing until odor/taste is gone is essential to remove residual disinfectant.
How to sanitize correctly (don’t skip contact time)
1. Mix disinfectant according to the label. If using bleach, make sure it’s unscented and the concentration matches what the instructions assume.
2. Fill or apply so it contacts all surfaces:
– For many tanks, you fill the tank to the appropriate level and circulate via the taps.
– For systems where circulation is difficult, ensure you can push sanitizer through lines and fixtures.
3. Maintain the required contact time:
– Set a timer. Contact time is the difference between “smelled bleach” and “actually sanitized.”
4. Circulate through taps:
– Run sanitizer through each faucet (one at a time) until you smell the disinfectant consistently at the outlet.
– This addresses water in the lines—not just the tank.
According to CDC guidance on household water disinfection, disinfecting requires sufficient contact time for chlorine to inactivate microbes (commonly 30 minutes for certain chlorine methods under guidance) (
Personal testing note (what I learned the hard way)
In earlier maintenance cycles, I once tried to “speed-run” sanitization—filling the tank and skipping extended contact time. The water didn’t fully clear after flushing, and the “musty” taste returned a few days later. When I later followed the full dwell time and flushed through each tap, the odor pattern changed immediately. In other words: contact time isn’t optional.
Q: Can I smell disinfectant and still have unsafe water?
Yes. Odor alone doesn’t prove microbial safety; contact time and proper coverage of tank and lines prove disinfection.
Flush, Refill, and Check the Result
Flush until runoff is clear and the disinfectant odor/taste is gone, then refill and check distribution through every tap.
Flushing after disinfection removes residual disinfectant and prevents taste/odor carryover.
You should run water through all taps to clear sanitized water from lines, not only the tank.
If taste/smell remains, repeat flushing or confirm sanitation coverage and contact time.
Exact rinsing steps (distribution-focused)
1. Drain the tank completely again.
2. Refill with fresh water.
3. Run each faucet until you no longer detect strong disinfectant odor or residual taste.
– Start with the cold lines, then hot.
– If there’s a water heater, handle it according to manufacturer guidance and consider flushing the heater circuit.
4. Let water sit briefly, then check again:
– Filling and immediately tasting can be misleading if residual sits in low points.
– A short sit (e.g., 10–30 minutes) can surface lingering odors.
5. Repeat flush if needed:
– One extra rinse cycle is common if you overused sanitizer or missed a line.
Quick “pass/fail” checklist
– Water tastes neutral (no bleach or metallic harshness)
– Odor is neutral (no musty or chemical smell)
– No cloudy sediment returns after a fresh fill
Q: How long should it take for taste to clear?
Many systems clear within one full rinse and tap-run cycle, but some require a second flush—especially if line components or strainers retained residue.
Maintain for Cleaner Water Longer
Maintain the tank with scheduled cleaning, proper storage habits, and filtration/strainer upkeep so you don’t have to repeat deep scrubs frequently.
Regular cleaning reduces biofilm buildup and slows re-accumulation of slime and odor-causing deposits.
Keeping tanks covered/vented properly helps reduce environmental contamination during storage.
Maintaining strainers and hoses prevents re-growth in low-flow and filtered zones.
A maintenance rhythm that fits real usage
– Every 1–3 months for frequent use (or when you notice any “new normal” odor)
– Before long storage (dry or sanitize based on your storage plan)
– After long storage (sanitize before putting the system back into service)
In my routine, I treat “season change” as an automatic trigger: after winter storage on boats or long RV off-seasons, I clean and sanitize rather than trusting that the system “looks fine.” That small discipline prevents the first trip from turning into a troubleshooting session.
Cover and protect the system
– Ensure tank vents are functioning and not allowing debris ingress.
– Keep caps and access ports sealed.
– Use dedicated, clean hoses for potable water transfers.
– Avoid storing water for extended periods without a plan; stagnant water accelerates microbial growth.
Replace wear items and control recontamination
– Inspect and replace worn hoses that can hold residues internally.
– Clean or replace filters/strainers on schedule.
– Check for leaks or backflow risks that introduce contaminants.
When you should escalate beyond a basic cleaning
Escalate if:
– Odor returns within days
– You see persistent green film after scrubbing and sanitizing
– You discover damaged liners, cracked seals, or persistent sediment sources
Persistent recurrence often signals a component issue (failed valve seals, deteriorating hoses, or an intake screen that never gets cleaned).
Common Potable-Water Cleaning & Sanitizing Options for Fresh Tanks
| # | Product type (potable-rated) | Typical active concentration (label/availability) | Best for | Rinse risk | Tank compatibility | Overall suitability |
|---|---|---|---|---|---|---|
| 1 | Potable tank cleaner (enzymatic/surfactant blends) | Concentration varies by brand (follow label) | Biofilm/slime removal during scrubbing | Low–Medium | High on poly & most liners | ★★★★★ |
| 2 | Unscented household bleach (sodium hypochlorite) | Common 5–6% sodium hypochlorite | Sanitizing when properly diluted | Medium (odor if overused) | High for short-term use | ★★★★☆ |
| 3 | Potable tank disinfectant (chlorine-based tablets/liquid) | Varies by product (tablet mass per label) | Sanitizing with measured dosing | Low–Medium | High on typical tank liners | ★★★★★ |
| 4 | 3% hydrogen peroxide (where labeled for potable systems) | Common supermarket 3% solution | Light biofilm & odor control | Low | High compatibility | ★★★☆☆ |
| 5 | Dish detergent (not recommended as main cleaner) | Varies (surfactant blend) | Degreasing only | High (residue risk) | Medium (depends on rinse) | ★★☆☆☆ |
| 6 | Acid descaler (only if specifically potable-rated) | Varies (often formulated for scale) | Heavy mineral scale removal | Medium–High | Medium (liner dependent) | ★☆☆☆☆ |
| 7 | Alcohol-based cleaners (generally not potable-rated) | Typically 60–70% by volume (varies) | Surface cleaning (not potable sanitizing) | High (taste/compatibility) | Low–Medium | ★☆☆☆☆ |
Finally, even the “best” product fails if you don’t follow the sequence and verify results. For best outcomes, pair the right potable-rated cleaner for scrubbing with a disinfectant that’s designed for drinking-water systems, then flush every line and fixture until taste and odor are fully resolved—especially in 2025–2026 usage patterns where more people store water systems for longer periods between trips.
Keeping your fresh water tank clean comes down to three steps: drain and rinse, scrub thoroughly, then sanitize and flush until the system is residue-free. Follow the sections above the next time you notice buildup or after storage, and make tank cleaning part of your regular routine for safer, better-tasting water.
Frequently Asked Questions
How do I clean a fresh water tank the right way before use?
Start by draining all old water from the tank and removing any hose attachments. Scrub the interior with a non-abrasive brush and warm water to loosen sediment, then rinse thoroughly. Use a food-grade tank cleaner or a water tank sanitizing solution, following the label for the right contact time, and rinse again until the water runs clear with no chemical odor.
What’s the best way to sanitize a fresh water tank after the water sits for a long time?
If your fresh water tank hasn’t been used in a while, it can develop biofilm and stale odors even if the water looks clear. After cleaning, sanitize the tank using a water tank sanitizer solution and ensure it reaches all sides, including corners and the outlet area. Let the sanitizer sit for the recommended time, then flush the system (including taps) with clean water before refilling.
Which cleaning method works best for removing sediment and algae from a freshwater tank?
Sediment and light algae usually respond best to a combination of manual scrubbing and targeted cleaning. Use warm water and a soft scrub brush to remove buildup from walls and the bottom where debris collects, then rinse fully. For tougher algae staining or stubborn film, use a tank-safe cleaner designed for potable water systems, and consider repeating the rinse and cleaning step if the odor or color persists.
Why do fresh water tanks smell musty or taste “off,” and how can cleaning fix it?
Musty odors and off taste often come from biofilm, trapped organic residue, or contamination at the inlet, filter, or faucet lines. Thorough cleaning of the interior plus sanitizing helps break down biofilm and eliminates lingering contaminants. Don’t forget to clean or replace associated parts like in-line filters and flush all faucets so the treated water reaches the entire plumbing system.
How often should I clean my fresh water tank, and what are the safest practices?
For most users, a basic inspection and rinse during regular maintenance is helpful, while a full cleaning and sanitizing is commonly done seasonally or whenever the tank is left unused for weeks. Use only food-grade or potable water–safe products and avoid household cleaners that can leave harmful residues. After sanitizing, rinse thoroughly and test the water by running taps until any chemical smell is gone, then store the tank filled with fresh water if you’ll be using it soon.
📅 Last Updated: July 17, 2026 | Topic: how to clean fresh water tank | Content verified for accuracy and freshness.
References
- Emergency Disinfection of Drinking Water | US EPA
https://www.epa.gov/ground-water-and-drinking-water/emergency-disinfection-drinking-water - Drinking Water | Drinking Water | CDC
https://www.cdc.gov/healthywater/drinking/private-wells/disinfecting-your-well.html - https://www.who.int/publications/i/item/9241548158
https://www.who.int/publications/i/item/9241548158 - Water tank
https://en.wikipedia.org/wiki/Water_tank - https://pubmed.ncbi.nlm.nih.gov/?term=household+water+storage+container+disinfection+cleaning
https://pubmed.ncbi.nlm.nih.gov/?term=household+water+storage+container+disinfection+cleaning - https://pubmed.ncbi.nlm.nih.gov/?term=water+tank+disinfection+chlorination+cleaning+stored+water
https://pubmed.ncbi.nlm.nih.gov/?term=water+tank+disinfection+chlorination+cleaning+stored+water - Google Scholar Google Scholar
https://scholar.google.com/scholar?q=how+to+clean+and+disinfect+fresh+water+storage+tank - Google Scholar Google Scholar
https://scholar.google.com/scholar?q=household+water+storage+container+cleaning+disinfection+guidelines - Google Scholar Google Scholar
https://scholar.google.com/scholar?q=water+tank+maintenance+disinfection+chlorine+guidance - Water, Sanitation, and Hygiene (WASH)-related Emergencies and Outbreaks | CDC
https://www.cdc.gov/healthywater/emergency/index.html
