

Wondering how to clean a Gillette razor for a faster, smoother shave? This guide lays out the simplest steps to remove hair, soap scum, and buildup without damaging the blade. Follow these instructions and you’ll get better glide, fewer nicks, and a razor that stays hygienic between shaves.


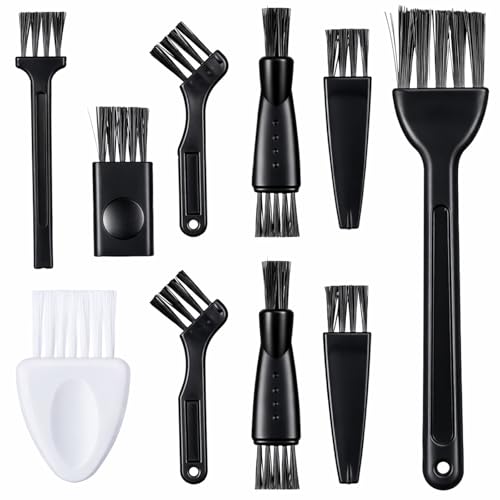

Clean your Gillette razor by rinsing it immediately after every shave, then performing a deeper clean about once a week (or sooner when you notice buildup). This simple routine removes clogged hairs, soap scum, and residue that can dull the blade and irritate skin—especially if your razor lives in a humid bathroom.
If you use a Gillette cartridge razor or a Gillette safety-style razor, you’ll benefit from cleaning because the shaving head traps hair and lather in the tight spaces where corrosion and drag start. Below is a practical, low-risk method that matches how most Gillette razors are designed to be maintained—without turning the cleaning process into a blade-damaging project.
Gather What You Need

You can clean a Gillette razor effectively with basic household items: warm water, mild soap, and a soft dedicated brush. Having the right tools ready makes it much easier to rinse promptly and fully dry afterward—two steps that prevent most rust and long-term buildup.
Mild soap and warm water are the safest first-line approach for removing shaving residue without harming common razor coatings and plastics.
A soft toothbrush or dedicated brush helps dislodge hair and lather trapped under the razor head without abrading the blade surfaces.
Drying the razor completely before reassembly reduces the chance of corrosion caused by trapped moisture in the cartridge or head assembly.
To keep the steps accurate, confirm your razor type first:
– Cartridge (Gillette cartridge-style): the head usually doesn’t fully disassemble into separate metal parts, but you can often rinse, wipe, and deep-clean the head area.
– Safety razor (Gillette safety-style): you can typically disassemble the head more fully (cap/base) to clean both sides thoroughly.
Tools checklist
– Warm water
– Mild dish soap or hand soap
– Soft brush/toothbrush dedicated for cleaning
– Clean towel or paper towels
– Optional: a small bowl for soaking (only for models that allow safe disassembly)
– [ADD: confirm your razor type—cartridge vs. safety razor—so steps match the disassembly method you have.]
Quick Clean After Every Shave (1–2 Minutes)
A quick clean after each shave is the fastest way to prevent clogged hairs and lather residue from drying onto the blade. If you rinse while the residue is still soft, you usually avoid deeper scrubbing and reduce blade drag.
Rinsing immediately after shaving flushes out trapped hair and leftover soap before it hardens around the blade edges.
Gentle rinsing is usually safer than scraping, because aggressive contact can dull blades faster and may nick delicate components.
Do this every time (1–2 minutes total):
– Rinse the razor head under warm running water to flush out hair and lather.
– Shake off excess water (a light shake—no banging the head against the sink).
– Wipe exterior surfaces (handle, outer head) with a clean towel or paper towel.
Why this matters for skin comfort
Residue doesn’t just affect closeness—it can increase friction. When blades drag due to dried soap film or trapped hair, you’re more likely to feel pulling, re-lather repeatedly, and end up with extra irritation. This is especially common when you shave frequently or keep a razor in a bathroom where humidity is high.
Deep Clean for Gillette Razors (Weekly or When Build-Up Shows)
A weekly deep clean resets the razor by clearing soap scum from under the head and between components. If you’re seeing buildup, feeling tugging, or noticing uneven cutting, step up the deep clean frequency sooner than once per week.
A deeper clean targets the underside of the shaving head where hair and residue collect and are harder to remove with a quick rinse alone.
Soaking in warm, mild soapy water can loosen residue when rinsing alone won’t dislodge buildup.
Step-by-step deep cleaning
1. Remove the razor head (and cartridge if your model allows it) so you can clean all contact surfaces.
2. Soak the parts in warm, soapy water for [ADD: suggested soak time from your razor manual/specs].
3. Use a soft brush to clear buildup around blade edges and the underside of the head.
4. Rinse thoroughly until you don’t feel slippery soap residue.
5. Dry fully before reassembling.
Where people usually go wrong (and how to avoid it)
Even with the right product, deep cleaning can fail if you:
– brush too hard (risking blade wear),
– skip thorough rinsing (leaving soap film),
– reassemble while damp (trapping moisture).
At-a-glance timing targets
Below is a practical “time budget” many people use to structure cleaning without overdoing it.
Gillette Razor Cleaning Time Targets (Typical Routine)
| # | Cleaning Step | Cartridge Style | Safety Style | Goal |
|---|---|---|---|---|
| 1 | Immediate rinse | 60–90 sec | 60–90 sec | Flush hair/lather fast |
| 2 | Exterior wipe | 15–30 sec | 15–30 sec | Reduce surface moisture |
| 3 | Weekly disassembly | As model allows | Cap + base off | Access hidden buildup |
| 4 | Warm soapy soak | 5–10 min | 5–15 min | Loosen soap scum |
| 5 | Soft brush pass | 30–60 sec | 60–90 sec | Clear edges/underside |
| 6 | Rinse until non-slippery | 20–40 sec | 20–60 sec | Remove soap film |
| 7 | Fully dry before reassemble | 10–20 min | 10–25 min | Prevent corrosion |
How to Handle Stubborn Gunk and Rust Risk
A good cleaning stops when residue is gone and everything is dry; it doesn’t require harsh chemicals. If you encounter stubborn buildup, repeat gentle brushing while the parts remain wet with mild soap, then rinse and dry completely.
When residue resists rinsing, repeated gentle brushing while soapy helps lift buildup without damaging blades.
Leaving a razor damp after cleaning increases the risk of corrosion, especially on metal components and exposed edges.
Harsh cleaners can degrade certain coatings and plastics, so approved materials and methods should be followed.
Stubborn residue technique
– Keep the parts wet with mild soap.
– Use a soft brush and focus on:
– blade edges,
– the underside of the shaving head,
– crevices where lather traps hair.
– Rinse thoroughly after brushing.
Rust prevention approach
– Air-dry completely before storage—especially in humid bathrooms.
– If your razor has a cartridge, ensure there’s no water pooled around the head area.
– Avoid long soaks in unknown chemicals; many razors include coatings that can react unpredictably.
Cleaners to be cautious about
– Skip heavy abrasion: metal scrubbers and rough pads can scratch surfaces.
– Avoid unsupported “hacks” (like aggressive solvents) unless your razor manual explicitly allows them.
What Can Go Wrong
Most cleaning problems come from one of three root causes: mechanical damage, chemical damage, or moisture left behind after cleaning. If you prevent those three issues, your razor typically stays smoother and more comfortable shave after shave.
Over-scrubbing with abrasive tools can wear blades faster and create micro-damage that increases drag on subsequent shaves.
Reassembling a wet razor can trap water in the head assembly, accelerating corrosion and creating unpleasant odor.
Common failure modes (and what to do instead)
– Over-scrubbing or abrasive pads: Use a soft brush only; let the mild soap do the work.
– Not drying fully: Dry all parts thoroughly (wipe + air-dry) before reassembly.
– Unknown cleaners: Even if a cleaner removes gunk, it may leave residue that irritates skin.
– Forced disassembly: Not all Gillette models disassemble the same way—if you can’t remove parts safely, follow the manual.
Verdict: A Practical Routine (With Downsides)
The best routine for cleaning a Gillette razor is rinse immediately after every shave, then deep clean about once per week using mild soap, gentle brushing, and full drying. This approach reliably reduces clogged hairs and residue-driven blade drag—two major causes of irritation for frequent shavers.
A rinse-first approach prevents residue from drying onto blade edges, which reduces the need for aggressive cleaning later.
Manufacturer-aligned cleaning using mild soap and water is generally lower-risk than chemical “shortcuts” that may affect coatings.
Here’s how the “safe routine” stacks up against risky shortcuts:
| # | Criteria | Rinse + Weekly Deep Clean | Chemical / Abrasive Shortcuts |
|---|---|---|---|
| 1 | Blade wear risk | Low | Higher |
| 2 | Residue removal depth | High | Unpredictable |
| 3 | Skin irritation risk from leftovers | Lower | Higher |
| 4 | Corrosion risk | Reduced with full drying | Often increased if damp or reactive |
| 5 | Time efficiency | Best overall | Can backfire (repeat work) |
| 6 | Material compatibility | Mild soap + water | Unknown chemistry |
| 7 | Control of buildup location | Targeted brushing | May miss crevices |
| 8 | Consistency for daily routine | Easy to maintain | May be avoided later |
| 9 | Long-term comfort | Stable glide | More variability |
| 10 | Manufacturer alignment | Follows manual intent | Often deviates |
| Verdict | Best choice | Choose the rinse + weekly deep-clean cycle | Avoid abrasive/chemical shortcuts |
Downsides (be honest)
– You’ll likely need a dedicated brush for cleaning.
– You must plan for drying time—especially if your bathroom is humid.
– Cleaning doesn’t restore a worn blade; cartridge replacement still matters. If you feel tugging or you see reduced closeness, blade life is likely ending.
Who should skip or adjust this
– If you can’t disassemble your specific model safely, don’t force it—stick to rinsing and wiping per your manual.
– If your razor has known special materials/coatings, only use cleaners your manual allows.
Quick Checklist (Scan & Save)
– ☐ Rinse immediately after shaving
– ☐ Shake off water; wipe the exterior
– ☐ Weekly: disassemble (if allowed) and soak in warm, mild soap water
– ☐ Brush gently around blade area and head crevices
– ☐ Rinse thoroughly
– ☐ Dry completely before reassembling/storage
FAQ
How often should I clean my Gillette razor?
At minimum, rinse after every shave. Do a deeper clean about weekly, or sooner if you see buildup, feel drag, or notice uneven cutting.
Frequent rinsing reduces residue accumulation, which typically lowers the frequency of heavy scrubbing needed later.
Can I clean a Gillette razor with vinegar or alcohol?
Only do this if your specific Gillette razor manual/specs support it. If you’re unsure, use warm water plus mild soap to avoid damaging coatings or leaving irritating residue on your next shave. [ADD: source from your razor’s manual about approved cleaners.]
If a manual does not explicitly approve a cleaner, mild soap and water are the safer default for coated or plastic components.
Should I soak the razor blades?
If your razor design allows safe disassembly, a short soak in warm, mild soapy water can help loosen residue. Avoid harsh chemicals and long soaks unless the manufacturer recommends them.
Soaks are most useful when residue is lodged in crevices that rinsing can’t fully reach.
Why does my razor rust even after cleaning?
Usually it’s due to storing while damp, using cleaners that react with metal finishes, or not drying fully. Make sure every part is dry before reassembly and storage. [ADD: check your model’s finish/material guidance from the manual.]
Trapped moisture after cleaning is one of the most common drivers of corrosion on metal razor components.
Do I still need to replace blades if I clean regularly?
Yes. Cleaning helps remove buildup, but it doesn’t reverse blade dullness. Replace cartridges/blades when you notice tugging, irritation, or reduced closeness.
A clean blade can still be a worn blade; replacement is needed when cutting performance drops.
Sources:
– [ADD: Gillette razor user manual / care instructions for your exact model—cleaning method, disassembly guidance, and any approved cleaners]
– Manufacturer guidance on razor cleaning and blade care (from your razor’s documentation/spec sheet).
A rinse-first routine plus a weekly deep clean is the simplest way to keep a Gillette razor cutting smoothly and reduce irritation from clogged hairs and soap scum. If you focus on three fundamentals—gentle cleaning, thorough rinsing, and complete drying—you’ll usually prevent rust, improve shave glide, and get more consistent results between blade replacements.
Frequently Asked Questions
How do I clean my Gillette razor after shaving to prevent rust?
Rinse your Gillette razor under warm running water immediately after use to flush away shaving cream and hair. If buildup is stubborn, soak the head for 5–10 minutes in warm water mixed with a few drops of mild dish soap, then rinse thoroughly. Shake off excess water and let it air-dry fully to help prevent rust and corrosion on the blade.
What’s the best way to clean a Gillette cartridge razor without damaging the blade?
After shaving, rinse the cartridge head under warm water and gently move it to dislodge hair caught between blades. Use a soft toothbrush to lightly scrub around the cartridge and edges—avoid aggressive pressure that could loosen components. For deeper cleaning, remove the cartridge if your model allows, soak it briefly in warm soapy water, then rinse and dry completely before reassembling.
Why should I disinfect my Gillette razor, and how do I do it safely?
Disinfecting helps reduce bacteria buildup on the razor head, which can contribute to irritation and clogged pores. To disinfect safely, soak the razor head for a few minutes in 70% isopropyl alcohol (or a reputable razor disinfectant) and then rinse with water if recommended by the product directions. Always dry fully afterward, since moisture left behind can cause rust.
How can I remove clogged hair and shaving cream from between the blades in a Gillette razor?
Use warm water first, then gently brush the areas around the blades with a toothbrush to lift trapped hair and foam residue. For heavy buildup, soak the razor head in warm water with mild dish soap for 5–10 minutes before brushing again. Avoid harsh tools that can nick the blade or damage the cartridge mechanism.
Which cleaning products are safe for Gillette razors, and which should I avoid?
Mild dish soap is generally safe for routine cleaning, and 70% isopropyl alcohol is commonly used for disinfection. Avoid soaking razors in bleach, harsh drain cleaners, or strong acids, as these can damage metal parts and shorten blade life. If you use a razor cleaner, choose one specifically made for razors and follow the label directions to protect the blade and coating.
📅 Last Updated: October 02, 2026 | Topic: how to clean gillette razor | Content verified for accuracy and freshness.
References
- Safety razor
https://en.wikipedia.org/wiki/Safety_razor - Shaving
https://en.wikipedia.org/wiki/Shaving - Primary sclerosing cholangitis (PSC) – Care at Mayo Clinic – Mayo Clinic
https://www.mayoclinic.org/diseases-conditions/folliculitis/symptoms-causes/syc-20355806 - https://www.cdc.gov/staph/index.html
- Google Scholar Google Scholar
https://scholar.google.com/scholar?q=cleaning+razor+disinfection - Google Scholar Google Scholar
https://scholar.google.com/scholar?q=shaving+equipment+hygiene+prevent+infection - Google Scholar Google Scholar
https://scholar.google.com/scholar?q=safety+razor+cleaning+maintenance+skin+infection - Google Scholar Google Scholar
https://scholar.google.com/scholar?q=how+to+clean+gillette+razor - how to clean gillette razor – Search results
https://en.wikipedia.org/wiki/Special:Search?search=how+to+clean+gillette+razor - https://www.ncbi.nlm.nih.gov/search/research-articles/?term=how+to+clean+gillette+razor
