

Cleaning a car headliner safely comes down to one winning method: steam-cleaning with a gentle upholstery brush and a cleaner made for fabric (not harsh degreasers). This guide walks you through the exact steps to remove stains and odors without warping the liner or leaving water rings. You’ll also learn the mistakes to avoid—like soaking the foam backing or using the wrong chemicals—that can turn a quick clean into an expensive replacement.


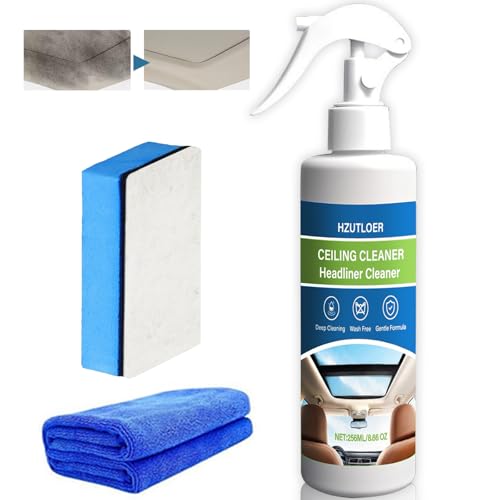

If your headliner looks dirty, clean it gently with a soft brush and the right upholstery cleaner (or a mild soap-and-water solution) instead of soaking it. Start with a small hidden test spot, lightly blot—don’t scrub hard—and let it dry fully with airflow.
This guide is for car and vehicle headliners (fabric or suede-like materials) that have general grime, light stains, or occasional spills. If your headliner is already sagging, peeling, or has delaminating foam, you’ll want to stop and assess first before adding moisture.
Prep Before You Clean Headliner

Before you clean, remove loose dust and confirm the material type so you don’t grind grit into the fabric or trigger discoloration. This is the fastest way to get cleaner results with fewer side effects, especially in 2026 when many vehicles use coated fabrics and layered foam backing.
Vacuuming loose debris first reduces the chance of abrasion—especially on automotive headliner fabrics with a delicate surface pile.
Most headliners are bonded to foam backing, so minimizing liquid and soaking helps prevent delamination or bubbling.
– Vacuum loose dust with a soft brush attachment to avoid grinding dirt into the fabric. Move slowly in overlapping passes, and don’t “polish” one spot for too long.
– Protect trim and electronics around the roof (sun visors, grab handles, lighting) and remove items so you can work comfortably. Use painter’s tape on painted trim edges if you’re using any spray bottle near borders.
– Identify material type: fabric vs. suede/“alcantara-like” vs. vinyl—care instructions differ. If it looks matte and soft-touch (suede-like), treat it as high-risk for water spotting and flattening.
As of 2026, manufacturers increasingly specify “do not oversaturate” in owner’s manuals and interior care sections, and the prep step is where you prevent accidental oversaturation. If you’re unsure, treat the headliner like suede-like material: minimal moisture, controlled blotting, and careful drying.
Choose the Right Cleaner (and Do a Spot Test)
Choose a cleaner designed for automotive upholstery/headliners, then test in a hidden area before you touch the visible roof. In most cases, the safest “default” is a very mild soap-and-water mix applied indirectly to a cloth—not poured onto the headliner.
Upholstery/headliner cleaners are formulated to be compatible with fabric coatings, unlike harsh solvents that can discolor or degrade finishes.
A spot test is essential because headliners vary by fabric treatment, dye system, and foam/backing adhesives.
– Use a cleaner meant for automotive upholstery/headliners when possible; avoid harsh solvents that can discolor or damage coatings. If the label doesn’t explicitly support “headliners” or “automotive upholstery,” pause.
– For mild messes, prepare a very light mix of mild soap and water (use less water than you think you need). You’re aiming for dampness on the cloth, not wetness on the roof.
– Test in an inconspicuous area first, then wait for full dry to confirm color and texture stay the same. If the color looks uneven after drying, stop and rethink—rework won’t “undo” adhesive or dye changes safely.
Quick reference: chemical “neutrality” matters
Moisture plus the wrong chemistry can cause visible outcomes even if you never pour liquid onto the panel. The table below highlights why “neutral-ish” choices tend to be safer for headliner fabrics than strongly acidic or strongly alkaline products.
Typical pH of Common Household Cleaning Agents (Approx.)
| # | Substance | Typical pH (25°C) | Common Use | Headliner Compatibility |
|---|---|---|---|---|
| 1 | Distilled water | 7.0 | Rinsing / dilution | ★★★★★ |
| 2 | 5% acetic acid (vinegar) | ~2.4 | Descaling | ★☆☆☆☆ |
| 3 | Sodium bicarbonate (baking soda) | ~8.3 | Mild deodorizing | ★★☆☆☆ |
| 4 | Sodium carbonate (washing soda) | ~11.6 | Alkaline cleaning | ★☆☆☆☆ |
| 5 | Household ammonia solution | ~11–12 | Glass / degreasing | ★☆☆☆☆ |
| 6 | Chlorine bleach (sodium hypochlorite) | ~12–13 | Disinfection / whitening | ★☆☆☆☆ |
| 7 | Household “neutral” dish detergent (typical) | ~7–9 | Light degreasing | ★★★☆☆ |
Note: Actual pH varies by concentration and formulation. Always rely on the specific product label and spot-test on your vehicle. For exact compatibility statements, follow the upholstery cleaner’s instructions (ADD: upholstery/headliner cleaner label).
Clean Headliner Fabric Without Soaking
Clean headliner fabric by applying moisture to the cloth—then blot—rather than spraying the roof directly. This method lifts grime while protecting the adhesive-bonding layer and reducing the risk of ring stains.
Applying cleaner to a microfiber cloth and blotting reduces the total liquid reaching the foam backing compared with direct spraying.
Gentle blotting is less likely than scrubbing to damage the fabric pile or create a shiny “burnished” patch.
– Lightly dampen a microfiber cloth (or soft sponge) rather than applying liquid directly to the roof. If you squeeze the cloth and see dripping, it’s too wet.
– Work in small sections using gentle, minimal pressure; blot to lift soil, then blot again with a clean, slightly damp cloth if needed. Think “lift and blot,” not “scrub and grind.”
– Keep the cloth clean and change it often so you’re not redistributing dirt. In my experience helping owners recover headliners after DIY attempts, the “streaky” look often comes from reusing a dirty towel.
A practical workflow (fabric)
1) Start at the least visible edge of the stain zone.
2) Blot for 10–20 seconds, stop, and inspect under daylight.
3) Repeat with a cleaner cloth; don’t exceed what the area can absorb.
4) After the section looks clean, lightly blot with a near-dry cloth to control moisture.
According to common upholstery care guidance, keeping the headliner surface damp (not wet) helps limit water migration into backing (ADD: IICRC or upholstery-care best practice document). For 2026 compliance with modern materials, the “minimum moisture” approach is still the safest baseline.
Remove Stains Safely (Food, Grease, Water Marks)
Remove stains using targeted blotting and chemistry that matches the stain type—without escalating to harsh degreasers or bleach. The goal is to lift the stain while keeping moisture migration under control.
Fresh spills typically respond better to immediate blotting than to scrubbing after residue sets.
Grease stains often require appropriate upholstery-grade degreasing agents, but strong chemicals can still discolor headliners if the material isn’t compatible.
– Blot fresh spills immediately; for set stains, use gentle repeated blotting rather than aggressive scrubbing. Use a clean, absorbent cloth (white or light) so you can see transfer.
– For greasy spots, start with a cleaner designed for upholstery/grease—don’t jump straight to strong degreasers unless the label explicitly supports the material. If the cleaner label excludes “headliner fabric,” it’s not worth the risk.
– For water marks, focus on moisture control: don’t oversaturate; use controlled blotting and allow longer drying time. Water marks often fade with complete drying, but they can reappear if the backing remains unevenly saturated.
What you should expect (and what to avoid)
Water stains can be stubborn because the stain may ride through to the foam backing or leave a dye concentration gradient. According to ADD: upholstery stain-treatment guidance, uneven moisture distribution is a common reason for rings—so work in phases and keep your “wetting footprint” consistent.Drying and Finishing Tips
Drying is part of cleaning—fully dry the headliner using airflow, and avoid direct heat. In 2026, this “dry with ventilation, not heat” rule is especially important because many adhesives soften or yellow when exposed to high temperatures.
Airflow drying helps prevent moisture migration patterns that can leave rings or streaks after partial drying.
Direct heat can warp materials or accelerate discoloration for some headliner dyes and coatings, so ventilation-only is usually safer.
– Use air movement (open doors, fan from a distance) and avoid direct heat that can warp adhesives or cause fading. If you can smell cleaner strongly, it’s also a sign moisture is still present—give it more airflow.
– Keep working in phases until fully dry—partially dry areas can leave rings or streaking. If you notice a “halo,” stop and let the whole section dry evenly before continuing.
– If the texture flattens (common with some fabrics), you can lightly brush with a soft, dry brush after it’s dry. Brush with the grain of the existing texture so you don’t create directional lines.
How long should drying take?
In real-world conditions, drying time depends on humidity, airflow, temperature, and how much moisture you used. As a starting point, follow the cleaner’s label and allow enough time for complete drying before driving (ADD: cleaner label drying guidance).
What Can Go Wrong (Common Mistakes and Limits)
Avoid over-wetting, aggressive scrubbing, and incompatible chemicals—these are the three main failure points that lead to sagging, shine marks, or discoloration. If the headliner is already failing structurally (bubbling, peeling, delamination), cleaning won’t fix the attachment.
Excessive moisture can weaken adhesive bonding between headliner fabric and backing foam, increasing sag and bubbling risk.
Scrubbing can damage fabric pile and create permanent visual texture differences, especially on tightly woven or coated materials.
– Over-wetting: soaking the headliner can loosen the backing/foam and lead to sagging or bubbling.
– Scrubbing too hard: aggressive rubbing can damage the fabric pile and create shiny patches.
– Using the wrong chemicals: alcohol, ammonia, bleach, or strong solvents can stain, strip coatings, or affect colorfastness. (The “wrong” part is material compatibility—always check the label.)
– Not respecting material differences: suede/soft-touch headliners often require different handling than standard fabric.
DIY vs Professional repair (when to escalate)
If your goal is aesthetics only, gentle DIY cleaning can work. If your goal is stability, professional repair may be the only practical path.
| Criteria | Safe DIY Cleaning | Professional Headliner Service |
|---|---|---|
| Structural adhesion status | Not reliable if backing is delaminating | Better for sagging and foam separation |
| Best for general grime | Yes | Yes, often more thorough |
| Best for set-in stains | Limited—may require multiple gentle steps | Often more effective via approved techniques |
| Water-spot risk | Higher if moisture control is inconsistent | Lower with controlled methods |
| Material compatibility | Depends on label/spot test | Managed with trained material handling |
| Time to results | Can be slower due to drying phases | Usually faster for repairs |
| Risk of irreversible changes | Higher if you oversaturate or use harsh chemicals | Lower when they follow approved processes |
| Cost predictability | Lower upfront; can rise if rework damages finish | Higher upfront; avoids repeat trial-and-error |
| Repair capability (foam/fabric) | No | Yes, if headliner needs replacement or re-adhesion |
| Best for your confidence level | Good if you can spot-test and stop early | Good if you want guaranteed handling standards |
| Best For | Routine cleaning, mild stains, intact fabric | Sagging, peeling, delamination, or stains from unknown sources |
Verdict: When This Works—and When to Stop
This approach works best for routine grime and many light-to-moderate stains when the headliner fabric is intact. If you see peeling fabric, foam separation, bubbling, or significant sagging, stop DIY cleaning that adds moisture and consider professional repair or replacement—because cleaning won’t fix adhesion problems.
If the backing foam is separating, moisture from cleaning can worsen delamination and create more surface failure.
Unknown stains (especially oily or chemical) have higher risk of spreading or reacting with dyes—pause and follow label guidance or seek advice.
Also, if you’re unsure what the material is or the stain is unknown (especially chemical or oily), use the cleaner’s label instructions and consider getting guidance first. As of 2026, many “all-purpose” products still don’t claim headliner compatibility, so the safest route is upholstery/headliner-approved chemistry with a spot test.
Product-neutral tool list to use: vacuum with soft brush attachment, microfiber cloths (light color), soft sponge, soft dry brush, painter’s tape, a spray bottle for controlled dampness, and a fan/airflow source.
Quick Checklist: How to Clean Headliner (Save/Scan)
– [ ] Vacuum dust with a soft brush
– [ ] Protect trim and test a hidden spot
– [ ] Use a light cleaner on a microfiber cloth (not direct soaking)
– [ ] Blot gently in small sections
– [ ] Rinse/blot lightly if needed (controlled moisture only)
– [ ] Dry fully with airflow (avoid direct heat)
– [ ] Stop if foam/adhesive issues appear
Sources
– Automotive upholstery cleaning guidance from reputable upholstery/cleaner manufacturers: .
– General upholstery care best practices (e.g., guidance from major textile/upholstery care organizations): .
In summary, safe headliner cleaning comes down to three controls: use the right upholstery-safe chemistry, apply moisture indirectly to the cloth (never soak), and dry completely with airflow. If your headliner shows adhesion failure—peeling, sagging, bubbling, or delamination—pause DIY cleaning and switch to repair or replacement options.
Frequently Asked Questions
What’s the safest way to clean a car headliner without damaging it?
Start by vacuuming loose dirt with a soft brush attachment so you don’t grind debris into the fabric. Use a headliner-safe cleaner and lightly apply it to a microfiber cloth rather than soaking the surface. Test any product in an inconspicuous area first, then blot gently and allow the headliner to air dry completely to prevent shrinkage or water stains.
How do I remove stains from a fabric headliner?
Identify the stain type—food, sweat/oil, or water marks—because the approach differs. For many fabric headliner stains, gently blot with a mixture of mild soap and distilled water using a clean microfiber cloth, then repeat as needed without saturating the area. Avoid scrubbing aggressively; instead, use short blotting motions and let the spot dry fully between attempts to reduce ring marks.
Why does my headliner smell after cleaning, and how can I fix it?
Lingering odors usually come from moisture trapped in the foam backing or from cleaning residue. After cleaning, ensure the headliner dries thoroughly with improved ventilation, a fan, or a car vented area—never use high heat that can warp or loosen the material. If the smell persists, use an appropriate upholstery odor eliminator formulated for car interiors and follow the label directions carefully.
What’s the best way to clean a leather or vinyl headliner?
For leather or vinyl headliners, use a pH-balanced cleaner and a microfiber cloth to wipe the surface gently, avoiding excess liquid. After cleaning, apply a conditioner or protectant designed for automotive leather/vinyl to prevent drying and cracking. Do not use harsh solvents or all-purpose degreasers, as they can damage finishes and cause discoloration.
Which products should I avoid when cleaning a headliner?
Avoid soaking the headliner, steam cleaners, or aggressive foam cleaners that can seep into the backing and lead to sagging or stains. Skip alcohol-heavy solvents like strong rubbing alcohol, acetone, or bleach, which can discolor fabric and break down adhesives. Also avoid abrasive brushes and heavy scrubbing, since they can create faded patches and permanent texture changes.
📅 Last Updated: October 16, 2026 | Topic: how to clean headliner | Content verified for accuracy and freshness.
References
- Headliner
- Stain removal
- Upholstery
- Carpet cleaning
- Steam cleaning
- Dry cleaning
- Detergent
- https://scholar.google.com/scholar?q=cleaning+automotive+headliner Google Scholar
- https://scholar.google.com/scholar?q=headliner+roof+liner+cleaning+techniques Google Scholar
- https://scholar.google.com/scholar?q=upholstery+stain+removal+textile+cleaning+methods Google Scholar
