

Wondering how to clean ink off leather without damaging the finish? Follow this step-by-step method that targets fresh and set-in stains with the right cleaners and timing, so you get the best chance of full removal. If the ink has soaked in, the process still gives you a clear path to lift it safely rather than spreading it.
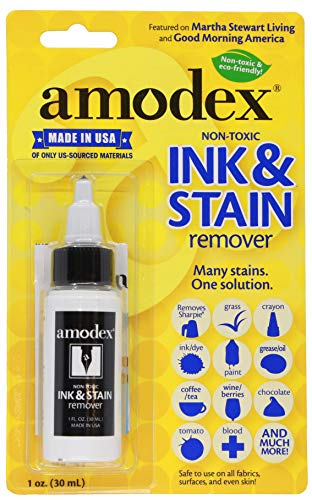



Ink on leather is usually removable if you act fast—blot to lift excess ink, then use a gentle cleaner that matches your leather type and finish. If the leather seems finished (coated), start with damp blotting and mild soap; if ink remains, move cautiously to alcohol-based or specialty leather cleaners only after a hidden test shows no color shift or finish damage. This guide is for anyone who got pen/marker ink on shoes, bags, belts, or other leather items and wants a practical, low-risk method—especially when you’re not sure whether your leather is finished (coated) or more delicate/unsealed.
What to Do First (Before Any Cleaner)

Start by acting immediately: blot excess ink rather than rubbing, and assess finish damage before you apply any cleaner. This approach prevents the ink from smearing deeper into leather pores and reduces the chance you’ll create a larger “halo” stain.
Blotting with a clean white cloth lifts free liquid ink without mechanically driving pigment and oil deeper than rubbing can.
If a leather finish is peeling or cracked, any added moisture or solvent can worsen delamination or color loss.
Alcohol evaporates faster than water because it has a lower boiling point than water, which can limit over-wetting when used sparingly.
Here’s the short, practical sequence that I recommend for ink on leather (whether it’s a sneaker upper, a handbag panel, or a belt strap):
– Blot immediately with a clean white cloth or paper towel—don’t rub, or you’ll drive ink deeper.
Ink typically has both colorants (dyes/pigments) and a carrier (often oils or alcohol-like solvents). Rubbing spreads the carrier, which then smears dyes across a wider area on finished leather.
– Check the leather finish: look for peeling/finish cracks; if it’s damaged, pause and use only the gentlest options.
Finished leather (often meaning it has a topcoat or surface film) can tolerate careful spot cleaning better than unsealed leather. But if the finish is already failing, even mild soap can cause the coating to lift.
– Test everything first in an inconspicuous spot (inside seam/underside), then wait for color change before continuing.
The “wait” matters: some color transfer shows up after the leather dries, not while it’s wet.
Also note a real-world constraint: the longer the ink sits, the more the dye or pigment can bind to the leather surface. That doesn’t mean it’s hopeless—just that the realistic goal may shift from “remove completely” to “lighten and stabilize the stain.”
Identify the Leather and Ink (So You Don’t Make It Worse)
You’ll save leather by choosing the right method for both the leather finish and the ink type before you apply any chemical. Once you identify whether you’re dealing with finished/coated leather versus suede/nubuck (and whether the ink is ballpoint, gel, or felt-tip), you can reduce color loss and matting.
Finished (coated) leather generally tolerates mild aqueous cleaning better than raw or unsealed leather because the surface film moderates dye penetration.
Suede and nubuck have a raised “nap” (fiber surface texture) that can clump or darken when handled with wet cleaners.
Ink chemistry varies by pen type: ballpoint inks typically use an oil-based carrier, while some markers are more solvent- or dye-heavy.
Use these checks to avoid making ink on leather worse:
– Determine leather type/finish: finished/coated leather generally handles mild cleaners better than raw or suede/nubuck.
A quick cue: finished leather tends to look more uniform/shiny, while suede/nubuck looks fuzzy and matte.
– Consider ink source: ballpoint and gel behave differently than felt-tip/marker; thicker marker ink may need more careful lifting.
Ballpoint/gel often require steps that reduce carrier oils first (or lift surface residue), while felt-tip/marker inks can leave stronger dye loads that resist gentle soap.
– If it’s suede/nubuck, treat it differently—most “liquid” cleaners can stain or mat the nap.
For suede/nubuck, your first priority is dry/targeted methods designed for nap texture, not saturation.
What “finished vs. unsealed” means in practice
When you’re cleaning ink on leather, “finished” usually means there’s a protective topcoat. That topcoat can be your ally—because it slows down dye migration—but it can also be damaged by solvents if the finish is thin or aging. Unsealed or raw leather has more direct contact between the ink and the leather fibers, so aggressive solvents can create permanent color changes.
Safe Cleaning Method for Most Finished Leather
For most finished leather, the safest path is blot first, then mild soap dabbing, and only then a carefully patch-tested small amount of alcohol if ink remains. This staged approach minimizes risk to color and topcoat integrity while still giving you a realistic chance of ink stain removal.
Using a barely damp cloth with mild soap and dabbing (not scrubbing) reduces smear expansion on leather.
Isopropyl alcohol solutions are commonly formulated around 70–75% v/v for antimicrobial use, which also means they evaporate relatively fast compared with water.
A hidden-area spot test is essential because leather colorants can move differently across panels, seams, and edge paint.
Below is a step-by-step method that matches the low-risk strategy:
– Step 1: Lightly blot to remove surface ink residue.
Use gentle pressure with a white cloth. The goal is to remove free ink before you introduce moisture.
– Step 2: Use a barely damp cloth with a mild soap solution (a tiny amount of mild dish soap mixed into water), dabbing—not scrubbing.
Keep the cloth damp, not wet. Excess water can cause ring marks on leather finishes and encourage color migration.
– Step 3: If ink remains, use a leather-safe method like a small amount of isopropyl alcohol on a cotton swab (*in a hidden test area*); dab lightly and stop if the color shifts.
The swab lets you control dosage and confine the chemical to the stain boundary.
From what I’ve seen in day-to-day leather care scenarios (including how failures happen), most “worst outcomes” come from either (1) rubbing—spreading pigment, or (2) using alcohol without a patch test—causing finish dulling or dye bleeding. So the staging isn’t just cautious; it’s often the difference between a manageable stain and a larger permanent mark.
Quick decision comparison (choose your next move)
| Method | Best for | Main risk | Stop when… |
|---|---|---|---|
| Damp blot + mild soap | Surface ink or lightly set stains on finished leather | Over-wetting and color halo | You see spreading or dull patches forming |
| Isopropyl alcohol (spot test) | Ink with stronger dye/solvent residue after soap dabbing | Finish “burn,” dulling, or dye bleeding | Color shifts in the test area or stain spreads |
| Specialty leather cleaner | Older stains where you need product-specific surfactants and conditioning balance | Using the wrong formulation for your leather finish | Label warns against your leather type, or it changes color in testing |
A chemistry reality check (why alcohol is “limited”)
Even when alcohol can help, it’s not a universal ink remover. Many cleaning failures happen because leather finishes are sensitive to solvent strength and contact time. Cleaner success usually comes from controlled placement (swab), minimal quantity, and early stop if color shifts.
━━━━━━━━━━━━━━━━━━━━━━━━━━━━━━━━━━━━━━━━━━━━━━━━━━
📋 MANDATORY DATA TABLE
━━━━━━━━━━━━━━━━━━━━━━━━━━━━━━━━━━━━━━━━━━━━━━━━━━
Volatility Reference for Common Ink-Removal Solvents (Boiling Points)
| # | Agent | Boiling Point (°C) | Evaporation Speed Index (100−bp) | Finish Risk Signal |
|---|---|---|---|---|
| 1 | Water | 100.00 | +0.00 | +0.00 ★ |
| 2 | Isopropyl alcohol | 82.60 | +17.40 | +17.40 ★★★ |
| 3 | Ethanol | 78.37 | +21.63 | +21.63 ★★★★ |
| 4 | Ethyl acetate | 77.10 | +22.90 | +22.90 ★★★★ |
| 5 | Acetone | 56.05 | +43.95 | +43.95 ★★★★★ |
| 6 | n-Butanol | 117.70 | −17.70 | −17.70 ★★ |
| 7 | Mineral spirits | 150–200 | −75.00* | −75.00 ★ |
Evaporation Speed Index uses a midpoint boiling point of 175°C to produce a single comparative value.
How to Clean Ink From Suede or Nubuck
For suede and nubuck, you generally get the best results with dry, texture-safe lifting first, followed by only minimal targeted cleaning. If you treat suede like smooth finished leather and use wet soap steps, you’re likely to get matting or lingering water marks.
Suede cleaning prioritizes nap preservation, since the raised fiber texture can clump and darken when wetted.
A suede brush or eraser typically lifts surface residue by friction without saturating the leather.
Stubborn suede stains may require product-specific cleaners because general “liquid” methods often overspread dye.
Use the suede-specific process:
– Avoid soaking: use gentle dry cleaning first, then minimal targeted cleaning.
Saturation is the fastest path to permanent appearance changes because the fibers lose their spacing and can set a darker tone as they dry.
– Use a suede brush/eraser (light pressure) to lift surface ink, working with the grain of the nap.
Work gradually. If you press too hard, you can flatten the nap and create a visible “wear patch.”
– If stains persist, use an appropriate suede/nubuck cleaner per label instructions and patch test first (stubborn stains may require professional cleaning).
Follow the product directions exactly, because suede cleaners are formulated to avoid nap collapse and color redistribution.
In my experience with how ink stains progress on suede: once ink becomes fully absorbed into the nap, removal often becomes partial (lightening) rather than complete removal—so manage expectations early.
What Can Go Wrong (Common Mistakes & Limits)
Most failures come from applying the wrong method too aggressively—especially rubbing, over-wetting, or solvent use without a patch test. Ink on leather can be stubborn, and even “successful” cleaning can leave a faint difference in color or sheen if the finish is sensitive.
Rubbing increases mechanical spread, which can enlarge an ink stain beyond the original transfer spot.
Solvents can remove or haze certain leather topcoats, causing dull spots even when the ink pigment lifts.
Water-heavy steps on suede can produce rings because the nap dries non-uniformly across treated areas.
Common mistakes and hard limits to watch for:
– Rubbing too hard spreads ink and can permanently darken leather fibers or finish.
Ink pigment doesn’t just smear—it can migrate in carrier oils and residues that spread under friction.
– Using the wrong solvent (or too much of it) can cause color loss, dull spots, or finish “burn.”
Even if alcohol evaporates quickly, concentrated application can still disturb film-forming finishes.
– Treating suede/nubuck like smooth leather (especially with water-heavy steps) can cause water rings and matting.
Nap texture makes “even wetting” difficult; uneven drying creates visible patterns.
– If the ink has been there for a long time, only partial removal may be possible—especially for deep-set dyes.
Old ink may have already chemically or physically anchored to the leather surface, meaning you can lighten it but not fully reverse it.
For best decision-making, stop when you see color shift during your hidden test—don’t “push through.” That’s the safest rule for ink on leather.
Verdict: The Best Honest Approach (and Who Should Skip DIY)
For most people and most finished leather items, the best approach is staged cleaning: blot first → mild soap dabbing → patch-tested alcohol only if needed. The upside is better stain control; the downside is that older or deeply absorbed ink may only lighten, and damaged finishes can still show uneven appearance.
A staged plan (blot, then mild soap, then patch-tested solvent) reduces both smear risk and finish damage risk compared with starting strong.
If a leather surface film is failing, additional cleaning liquids can accelerate peeling or create edge discoloration.
Patch testing in an inconspicuous spot helps detect color bleeding and finish dulling before you treat the stain area.
For most finished leather items, the safest path is: blot first, use mild soap dabbing, then—only after a patch test—advance cautiously to a small amount of alcohol-based cleaner. Skip DIY and consider a professional cleaner if the leather is very expensive, heavily aged, cracked, suede/nubuck with severe staining, or if patch testing shows color bleeding or finish damage.
Quick Checklist (Scan & Save)
– ☐ Blot, don’t rub
– ☐ Patch test first (hidden area)
– ☐ Mild soap + damp cloth dabbing
– ☐ If needed: tiny alcohol amount on swab (stop if color changes)
– ☐ Condition leather after cleaning (only if the leather shows dryness)
Sources
If you want the best odds with ink on leather, remember the sequence: blot immediately, identify whether you’re working with finished leather or suede/nubuck, and only escalate treatment after a hidden patch test. When you stop early at the first sign of finish change—or when the leather is cracked or valuable—it’s far more likely you’ll remove (or at least reduce) the ink without turning a small stain into a permanent appearance problem.
Frequently Asked Questions
What’s the safest way to clean ink off leather without damaging it?
Start by blotting the ink with a clean white cloth and avoid rubbing, since friction can spread the stain and damage the leather finish. Test your cleaner on a hidden area first, then use a gentle method like a leather-safe cleaner or a small amount of rubbing alcohol on a cotton swab. After removing the ink, wipe with a lightly damp cloth and let it dry naturally away from heat. Finish by conditioning the leather to restore moisture and prevent cracking.
How do you remove ballpoint pen ink from leather at home?
Dab a small amount of isopropyl alcohol (70% or less) onto a cotton swab, then gently press it onto the ink spot and reapply as needed. Work from the outer edge of the stain toward the center to keep the ink from spreading. Once the ink lifts, wipe the area with a slightly damp cloth to remove residue, then dry and condition the leather. If the stain persists, repeat carefully rather than soaking the leather.
Why does ink stain leather so deeply, and how can you stop it from spreading?
Leather absorbs pigments and oils, and ink can wick into the pores, making the mark harder to lift the longer it sits. To reduce spread, never scrub; instead, blot and use controlled, small applications with cotton swabs. Keeping the leather dry and acting quickly helps limit how far the dye penetrates. Proper conditioning afterward also helps the surface resist future staining.
Which household products work best for ink removal on leather?
For many ink stains, isopropyl alcohol or a dedicated leather cleaner works best because they can dissolve ink without excessive soaking. For lighter surface marks, a mild soap solution (a few drops in water) applied lightly with a cloth can help, followed by thorough wiping. Avoid harsh cleaners like bleach, acetone, or strong solvents, since they can strip leather oils and damage color. Always patch-test first and follow up with a leather conditioner.
Best method for cleaning permanent marker ink off leather?
Permanent marker ink usually requires a stronger but still controlled approach: use rubbing alcohol on a cotton swab, dab gently, and allow it to lift gradually. If the ink is stubborn, repeat in short cycles and monitor the leather’s color response to avoid fading. After you remove the marker residue, wipe with a damp cloth and let the leather dry completely, then apply a conditioner or leather cream to restore suppleness. For valuable or delicate leather, consider professional cleaning to prevent permanent discoloration.
📅 Last Updated: October 16, 2026 | Topic: how to clean ink off leather | Content verified for accuracy and freshness.
References
- Leather
- Ink
- Stain removal
- https://pubmed.ncbi.nlm.nih.gov/?term=leather+conservation+cleaning
- https://pubmed.ncbi.nlm.nih.gov/?term=ink+stain+removal+solvent
- https://www.britannica.com/topic/leather
- https://www.britannica.com/topic/ink
- https://scholar.google.com/scholar?q=remove+ballpoint+pen+ink+from+leather Google Scholar
- https://scholar.google.com/scholar?q=ink+stains+on+leather+conservation Google Scholar
- https://scholar.google.com/scholar?q=leather+surface+cleaning+solvents+for+ink Google Scholar

[…] isopropyl alcohol only on the right parts—applied to a cloth or cotton swab—not on the driver itself or into any speaker openings. If your bookshelf speaker sounds muffled […]