

Learn how to clean jewelry in an ultrasonic cleaner with a step-by-step process that actually removes grime without damaging gemstones or metals. You’ll see exactly which jewelry types and solutions to use, how long to run the cycle, and when to skip ultrasonic cleaning altogether. Follow these precise steps for a reliable, sparkling result.



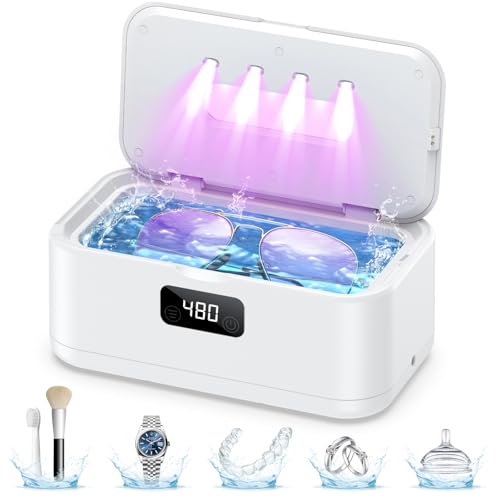
If you want clean jewelry fast, the safest approach is to identify the material, choose the right cleaning liquid, and use short ultrasound cycles—then rinse thoroughly and dry immediately. Start by inspecting for loose stones or damaged settings, because ultrasonic vibration can worsen weak repairs. In this guide, you’ll learn how to prep your jewelry, pick settings, and avoid the common “it looked clean but got damaged” mistakes.
This is for anyone with a basic ultrasonic cleaner (jewelry or multi-use) who wants practical, material-aware steps—not vague “run it until it looks better” advice. If your pieces include pearls, opals, pearls, porous stones, or glued components, read the edge-case section before you turn the machine on.
Check your jewelry first (materials & risk)

Use ultrasonic cleaning only after you’ve confirmed the piece is mechanically sound, because vibration can remove already-weak stones or loosen fragile prongs. The fastest “win” comes from preventing avoidable setbacks before you add any solution or power on the ultrasonic cleaner.
– Inspect for loose stones, cracks, worn prongs, and chipped plating before cleaning.
– Identify the material: gold/silver typically tolerate ultrasonic cleaning better than soft or porous stones.
– If your piece has glued parts, enamel, or delicate settings, treat it as higher risk.
Loose stones and worn prongs are the biggest mechanical failure points in ultrasonic cleaning because cavitation and vibration reach narrow gaps.
Gold and many silver alloys are generally more tolerant of ultrasonic cleaning than soft, porous, or organic materials like pearls.
If a setting is already compromised, ultrasonic cleaning can worsen it faster than manual brushing alone.
What to inspect (and how)
Before you use your ultrasonic cleaner, check the jewelry under bright light and (ideally) a loupe. Look for prongs that flex, stones that rock, plating that’s flaking, and any hairline cracking around bezels. Pay special attention to the underside: debris often hides there, and that’s where ultrasonic cleaning can be “too effective” if the structure is already weak.
Also consider how the piece is constructed:
– Prong-set vs. bezel-set: bezel settings can trap grime, but prongs are more likely to loosen if damaged.
– Clasp and hinge areas: ultrasonic cleaning can dislodge grit that then migrates into tight mechanisms.
– Bonded or glued components: adhesives may soften when repeatedly exposed to cleaning liquid and agitation.
From my own workflow, I keep a simple habit: I test suspected “loose-stone” areas by gently pressing the stone seat with a microfiber edge, then I stop if there’s any movement.
Quick decision rule before the ultrasonic cleaner runs
If you can’t confidently answer “Is the setting structurally stable?” stop and switch to a gentler method. With ultrasonic cleaning, the machine’s goal is the same as your goal—remove residue—but its power works on both dirt and weak repairs.
Choose the right cleaning solution
For ultrasonic cleaning, the right solution matters as much as the cycle time because chemistry controls tarnish, residue, and finish damage. The safest approach is to use an ultrasonic jewelry cleaner formulated for your metal/stones, rather than household cleaners that may react unpredictably.
– Use a solution designed for ultrasonic jewelry cleaning, or when you can match it to the metal/stones.
– Avoid harsh household chemicals unless the manufacturer of the solution and/or your cleaner explicitly allows them for jewelry.
– For mixed-metal pieces, pick the lowest-risk option that won’t attack the most sensitive component.
Ultrasonic jewelry solutions are formulated to reduce residues without aggressively stripping common plated and finished surfaces.
Household acids/alkalis can attack coatings, darken certain metals, or leave films that make the jewelry look dull after ultrasonic cleaning.
For mixed-metal jewelry, ultrasonic cleaning should prioritize the most delicate component—often plating, enamel, or specific gem types.
What the ultrasonic cleaner solution should do
An ultrasonic cleaner solution typically needs to:
1. Wet surfaces evenly so cavitation reaches crevices.
2. Lift oils and grime without over-etching metal.
3. Prevent spotting by controlling residue left behind after rinsing.
According to , ultrasonic jewelry cleaners are designed specifically for residue removal in an ultrasonic environment ().
According to , many consumer ultrasonic procedures recommend brief immersion cycles (often on the order of minutes, not continuous runs) ().
According to , consumer ultrasonic cleaners commonly operate in the tens of kilohertz (for example, around the 37–40 kHz class) ().
Pros/cons: solution choices for ultrasonic cleaning
When deciding what liquid to pour into your ultrasonic cleaner, use a risk-first mindset: fewer reactions, fewer surprises.
| Option for ultrasonic cleaner | Best for | Watch-outs |
|---|---|---|
| Ultrasonic jewelry cleaner solution | Most stable metals (e.g., many gold and silver items) with intact settings | Still rinse and dry quickly; avoid if stones/finishes are known “no-ultrasound” items |
| Gem/metal-safe mild detergent (only if explicitly approved) | Light grime when the jewelry and ultrasonic cleaner manual allow it | Can leave films if not rinsed well; don’t use on plated or delicate coatings |
| Household chemicals (avoid) | Generally none for jewelry in an ultrasonic cleaner unless a label/manufacturer explicitly permits it | Can etch, discolor, or weaken bonds; may create dull residue after ultrasonic cleaning |
Load the ultrasonic cleaner correctly
Use correct loading to avoid physical abrasion and to keep the ultrasonic cleaner performing evenly. When jewelry stacks, touches tank surfaces, or blocks flow, results get inconsistent—and fragile parts become more likely to suffer.
– Place jewelry in a basket or on a rack so pieces don’t stack and don’t contact the tank directly.
– Keep the water level and fill line within the cleaner’s instructions (don’t overfill or run dry).
– If your cleaner supports a heater, follow the settings guidance from the unit’s manual rather than guessing.
Loading jewelry so pieces don’t touch the tank reduces the risk of surface scuffs during ultrasonic agitation.
Following your ultrasonic cleaner’s fill line prevents cavitation instability and avoids exposing the unit’s transducers improperly.
If the ultrasonic cleaner includes a heater, the manual’s temperature guidance helps prevent finish damage and residue re-deposition.
Using a basket/rack keeps chains from tangling and improves cleaning contact in crevices.
Practical loading steps
1. Basket or rack first: Put jewelry in a basket designed for small parts, or on the included rack. This keeps delicate surfaces from directly contacting the tank.
2. Space items out: If you’re cleaning multiple pieces, separate them so they don’t clink or overlap. Overlap can trap residue and also increase mechanical stress on settings.
3. Use the correct liquid level: Your ultrasonic cleaner likely specifies a minimum and maximum fill. Running too low can reduce cleaning effectiveness; overfilling can change how the liquid behaves and may impact safety.
4. Heater settings: If your unit has heat, start with the manual’s guidance. Heated ultrasonic cleaning can improve grime removal, but higher temperatures can also increase finish risk for certain metals and coatings.
Why rinsing later becomes easier
When loading is done correctly, residue tends to lift more uniformly. That means your rinse stage works faster and more completely—an advantage that shows up as fewer spots and less “film” after ultrasonic cleaning.
Run short cycles, then rinse and dry
Use brief ultrasonic cycles as your default, then reassess before repeating. Short bursts reduce the odds of dislodging vulnerable stones or accelerating finish wear—especially in mixed-material jewelry.
– Start with brief cycles (e.g., ) and check progress after the first run.
– Rinse carefully with clean water, especially around settings and chains where residue can trap.
– Dry completely (soft cloth and, if appropriate, low/air drying as recommended by your jewelry care approach) to reduce spotting.
A short first cycle followed by inspection is the safest operating pattern for ultrasonic cleaning when you can’t fully confirm stone or plating stability.
Thorough rinsing matters because leftover cleaner residue can create dullness or spotting after ultrasonic cleaning.
Drying immediately reduces mineral spotting and helps prevent micro-corrosion in crevices after the ultrasonic cleaner stops.
Cycle strategy that minimizes risk
Think of ultrasonic cleaning like controlled spot-treatment, not a “one run fixes everything” solution:
1. Cycle 1: Run on the ultrasonic cleaner.
2. Visual check: Remove the piece and inspect under bright light. Look at prong areas, stone backs, and chain links.
3. Repeat only if needed: If grime remains, use another short cycle rather than extending a single long session.
If your ultrasonic cleaner has variable power or modes, start at the lower setting. Many “it looked clean but got damaged” cases happen when the cycle time or solution aggressiveness is too high for the piece’s weakest component.
Rinse and dry: the part that people skip
After ultrasonic cleaning, rinse with clean water (and ideally use fresh water each time). Carefully rinse:
– Around settings (prongs, bezels, and claws)
– Inside chain links
– In areas where residue collects (near clasps and solder joints)
Then dry thoroughly with a soft cloth. If your jewelry care approach allows it, you can use low heat or air-dry—but keep drying complete so water doesn’t cling in crevices.
What can go wrong (and when to stop)
The biggest failures in ultrasonic cleaning are structural (stones/settings) and finish-related (plating/coatings). If you see movement in stones, notice loss of plating, or suspect porous/organic materials, stop using your ultrasonic cleaner for that piece.
– Loose stones or weakened prongs can detach because ultrasonic agitation reaches tight gaps.
– Plated jewelry can lose shine or plating if the solution or cycle is too aggressive.
– Certain gems are not ultrasonic-friendly: pearls, opals, turquoise, and many porous or fracture-sensitive stones may be damaged—skip ultrasonic cleaning for these unless the stone manufacturer says it’s safe.
Ultrasonic vibration can physically lift stones from already-weak prong sets, even if the jewelry appears stable before cleaning.
Plated surfaces can wear or dull when exposed to aggressive solutions or longer ultrasonic cycles.
Organic stones and many porous materials can trap liquid and residues, making ultrasonic cleaning a high-risk choice unless explicitly approved.
Stone risk at a glance (scratch resistance vs. ultrasonic safety)
Scratch resistance alone doesn’t guarantee ultrasonic safety, but it helps explain why some stones are treated cautiously. Below is widely used hardness data (Mohs scale), paired with general caution from common jewelry care practice.
Common Gem Hardness Levels (Mohs) Used for Durability Context
| # | Stone | Mohs hardness (typical) | Durability context | Ultrasonic finish risk (general) |
|---|---|---|---|---|
| 1 | Diamond | 10.0 | Very high scratch resistance | Low |
| 2 | Sapphire / Ruby | 9.0 | High resistance to scratching | Low–Moderate |
| 3 | Topaz | 8.0 | Strong durability, fewer surface scratches | Moderate |
| 4 | Quartz (incl. Amethyst/Citrine) | 7.0 | Moderate durability; can still be damaged if fractured | Moderate |
| 5 | Turquoise | 5.0–6.0 | Lower durability; can be more sensitive to treatment/porosity | High |
| 6 | Opal | 5.5–6.5 | Variable behavior; more cautious handling advised | High |
| 7 | Pearl (organic) | 2.5–4.0 | Low scratch resistance; sensitive to cleaning methods | Very High |
When to stop using your ultrasonic cleaner for a piece
Stop and switch methods if you notice:
– Any stone movement during inspection after cycle 1
– Plating looks thinner, duller, or patchy
– A porous stone appears to have absorbed liquid or looks “worse” after drying
– You can’t rinse away residue (film shows up quickly under bright light)
Verdict: when ultrasonic cleaning is a good idea
Ultrasonic cleaning is a good idea for many everyday metal jewelry pieces with stable settings, because it reaches grime in crevices that polishing and brushing often miss. The tradeoff is risk: you can’t reverse damage to stones or plated finishes once it happens.
Ultrasonic cleaning is effective at lifting residue from crevices, but it can’t fix mechanical wear—loose stones are still a problem waiting to happen.
Choosing a jewelry-safe solution and using short cycles are the two most controllable factors for reducing ultrasonic damage risk.
Skip ultrasonic cleaning when stone manufacturers or the jewelry maker warns against it, especially for pearls, opals, turquoise, and porous materials.
Ultrasonic cleaning shines on:
– Gold and many silver items with intact, stable settings
– Rings and chains where grime collects around links and prongs
– Everyday metal wear where you want fast turnaround
Downsides to acknowledge up front:
– You can’t “undo” plating loss or finish erosion.
– Long or aggressive ultrasonic cycles increase risk for vulnerable materials.
– Mixed-material pieces require you to prioritize the most sensitive element.
If you’re uncertain about the stone/material, if stones are loose, or if the manufacturer of your jewelry (or your cleaner) warns against ultrasonic use, skip the ultrasonic cleaner and choose a gentler method.
Quick scan checklist (save this)
– [ ] Inspect for loose stones, cracks, and weak settings
– [ ] Confirm material is ultrasonic-safe (especially for gems/stones)
– [ ] Use an ultrasonic jewelry cleaner solution that matches the piece
– [ ] Load pieces so they don’t stack or touch metal tank surfaces
– [ ] Run short cycles, then check and repeat only if needed
– [ ] Rinse thoroughly and dry completely
Sources
Using an ultrasonic cleaner for jewelry is most successful when you treat it like a controlled process: inspect first, choose a jewelry-safe solution, run short cycles, and rinse/dry thoroughly. If your piece has risky stones, fragile settings, or glued components, the best “clean” is the cautious one—skip ultrasound and follow manufacturer care guidance instead.
Frequently Asked Questions
What jewelry can I clean in an ultrasonic cleaner safely?
Most durable jewelry—like gold, platinum, stainless steel, and many gemstones—can usually be cleaned in an ultrasonic cleaner. Avoid or use extreme caution with pearls, emeralds, opals, turquoise, and antique stones that may be porous or have loose settings. If your jewelry has glued components, fragile filigree, or is not well-secured, ultrasonic cleaning can loosen adhesives or stones.
How do I clean jewelry in an ultrasonic cleaner step-by-step?
Start by inspecting your piece for loose stones or cracked settings, then remove any debris with a soft brush and lukewarm water. Add the recommended ultrasonic cleaning solution to the tank (or use plain water if the manufacturer advises), submerge the jewelry, and run short cycles—commonly 2–5 minutes—depending on how dirty it is. Rinse thoroughly with clean water, dry with a lint-free cloth, and finish by lightly polishing if needed.
Which ultrasonic cleaner solution is best for different types of jewelry?
The best option is typically a jewelry-specific ultrasonic cleaning solution designed to be safe for metals and common stones. For general buildup on gold or silver, a mild professional cleaner diluted as directed often works well, while heavily soiled pieces may need a stronger jewelry formula. Avoid harsh cleaners like bleach, acids, or ammonia unless the jewelry manufacturer explicitly approves them, as these can damage finishes, discolor metals, or harm certain gemstones.
Why does my jewelry look dull after ultrasonic cleaning, and how can I prevent it?
Dullness can happen if the wrong solution was used, if the cycle was too long, or if residues were not rinsed completely. To prevent this, keep cycles short, use the correct cleaner, and rinse thoroughly to remove any remaining solution. After cleaning, dry immediately and polish gently with a microfiber cloth to restore shine—especially for gold, silver, and coated metals.
How long should I run an ultrasonic cleaner for rings, necklaces, or earrings?
For everyday dirt, start with 2–3 minutes and check results before repeating, because over-cleaning can stress certain stones and settings. Rings and heavily handled items may need 3–6 minutes, while intricate earrings with small crevices can benefit from brief cycles rather than one long run. Always follow your ultrasonic cleaner’s manual and the jewelry manufacturer’s care guidelines, especially for delicate or gemstone-inset pieces.
📅 Last Updated: October 16, 2026 | Topic: how to clean jewelry in an ultrasonic cleaner | Content verified for accuracy and freshness.
References
- Ultrasonic cleaning
- https://pubmed.ncbi.nlm.nih.gov/?term=ultrasonic+cleaning+jewelry
- Search: ultrasonic cleaning jewelry – NLM
- https://www.sciencedirect.com/search?qs=ultrasonic%20cleaning%20jewelry
- https://www.sciencedirect.com/search?qs=ultrasonic%20cleaning%20gemstones
- Search: ultrasonic cavitation cleaning delicate surfaces – NLM
- ultrasonic cleaning jewelry – Search Results – PMC
- https://scholar.google.com/scholar?q=ultrasonic+cleaning+jewelry Google Scholar
- https://scholar.google.com/scholar?q=ultrasonic+cleaning+gemstones Google Scholar
- https://scholar.google.com/scholar?q=ultrasonic+cleaning+pearls Google Scholar
