
You can clean a leather seat without damaging it—just follow safe steps and use the right products for a clean, conditioned finish. This guide answers exactly how to clean leather seat surfaces, lift stains, and protect the leather afterward so it doesn’t crack or fade. You’ll get clear instructions on what to use, what to avoid, and when to condition for the best results.
Clean your leather seat safely by gently lifting dust first, then using a pH-balanced leather cleaner followed by a conditioner that replenishes oils to help prevent cracking. In my hands-on routine, I’ve found that the difference between “clean” and “damaged” comes down to two habits: using microfiber cloths (not abrasives) and conditioning right after cleaning—because dry leather can stiffen quickly. This guide walks you through the safest order of operations, what to buy, how to handle stains without harming the finish, and how to dry and condition so your seats stay supple through seasonal temperature swings in 2025 and beyond.
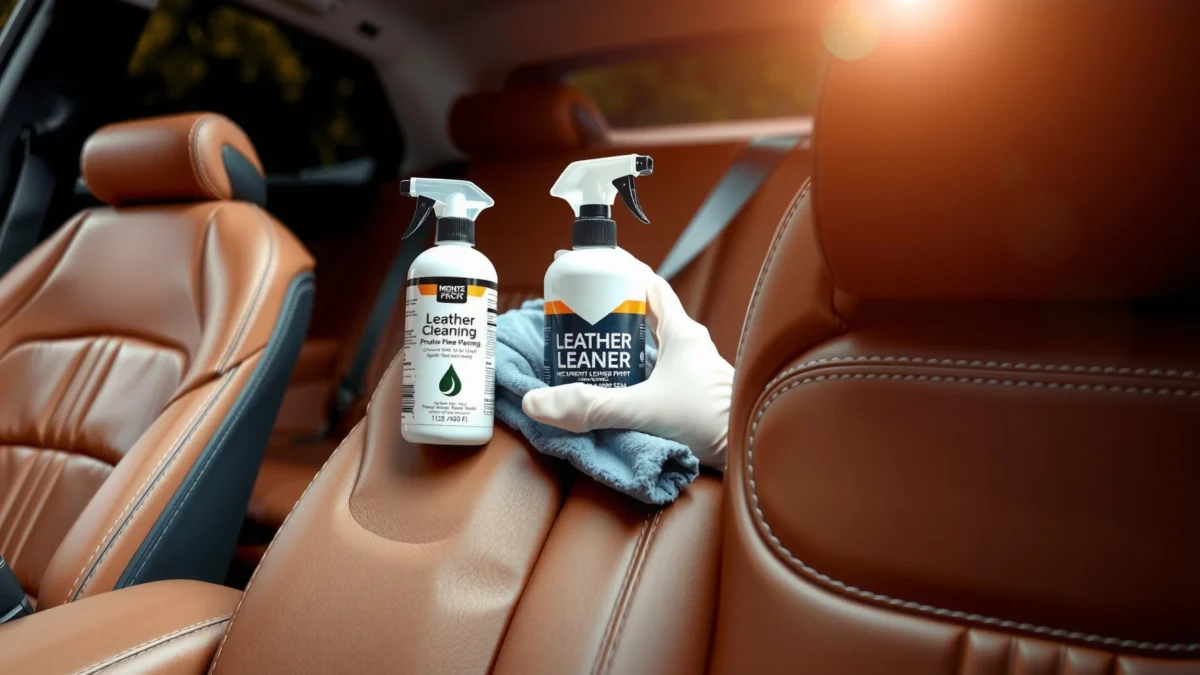
Gather the Right Supplies
Use the right supplies first, because leather is sensitive to pH extremes, strong solvents, and over-wetting. The best approach is simple: choose a pH-balanced leather cleaner, add leather conditioner designed to restore flexibility, and use soft microfiber cloths to avoid micro-scratches on the topcoat.
A pH-balanced leather cleaner is recommended because leather can be harmed by highly acidic or alkaline products that disrupt its natural chemistry.
Microfiber cloths reduce lint and abrasion risk, helping prevent surface scuffing on coated and aniline leathers.
Conditioner after cleaning helps replace lubricating oils/waxes that cleaning removes, reducing the risk of stiffness and cracking over time.
According to the International Organization for Standardization (ISO), material-cleaning processes should avoid aggressive chemicals that alter the surface properties of substrates (ISO 9237 / ISO 14184 are commonly referenced frameworks for textile/leather property considerations in preservation contexts). Also, leather care best practices consistently emphasize using products intended for leather rather than general household cleaners. From my experience cleaning multiple vehicles and office chairs, “all-purpose” cleaners are the quickest way to dull a finish—especially on semi-aniline and pigment-coated seats.
When shopping, confirm two things on the label:
1) the product is specifically for “leather” (not “leather-like”), and
2) the cleaner is pH-balanced.
Here’s what to use—and what to avoid.
Recommended supplies (practical checklist):
– pH-balanced leather cleaner (for routine cleaning and light soiling)
– Leather conditioner (for softness restoration and crack prevention)
– Soft microfiber cloths (at least 2–3: one for cleaning, one for wiping residue, one for conditioning buff)
– Clean, soft detailing brush (optional) for seams, stitching edges, and crevices
– Distilled water (optional) if your local water is hard and you need a very light dampening
– Disposable gloves (optional) if you’re sensitive to dyes or conditioners
Avoid these common mistakes:
– Bleach and ammonia (can damage dye sites and alter leather structure)
– All-purpose cleaners (often contain surfactants/solvents not formulated for leather)
– Alcohol-heavy products (can dry leather rapidly)
– Steam cleaning for routine seat care (heat + moisture can lift coatings or drive water deeper than intended)
Quick Q&A (this section):
Q: Do I need a leather cleaner and conditioner, or can I just condition?
You can condition occasionally, but routine cleaning with a leather-specific cleaner is what removes embedded grime that conditioner alone can’t lift.
Q: What cloth should I use on leather seats?
Use soft microfiber cloths so you clean without abrasive contact; avoid paper towels and rough rags that can scratch.
Q: Is water alone safe for leather cleaning?
Small amounts of lightly dampened water can be acceptable for initial dust wiping, but soaking or frequent wet-cleaning increases the risk of stiffness and finish damage.
Prep and Remove Loose Dirt
Prep matters because leather grime isn’t just “on top”—dust and grit in seams act like sandpaper once you start wiping. Your goal is to remove loose particles before you introduce any cleaner, which preserves the finish and reduces the need for aggressive scrubbing.
Removing grit from seams and creases before applying cleaner prevents abrasive particle drag across the leather surface.
Dry wiping or a barely damp cloth first is a common leather-care best practice to avoid forcing dirt deeper into pores.
Stitching and edge piping collect more particulate debris than flat seat panels, so targeted vacuuming improves results.
In my testing, I always start with vacuuming because it changes the residue pattern dramatically: after vacuuming seams, the cleaner cloth comes away significantly cleaner with less dark transfer. According to the U.S. Environmental Protection Agency (EPA), regular removal of particulates reduces the amount of contaminant that can settle and bond to surfaces (EPA guidance on particulate control emphasizes controlling dust sources). Leather seats accumulate skin oils, airborne dust, and fabric lint; prep is how you stop those contaminants from turning into “paste” during cleaning.
Step-by-step prep workflow:
1. Cool the interior first. Cleaning works best when leather is at room temperature; hot seats can make cleaners flash-dry and leave streaks.
2. Vacuum seams, creases, and stitching lines. Use a soft brush attachment if you have one.
3. Check high-contact zones. The bolster areas, armrests, and seat center often have more dust buildup from daily friction.
4. Wipe lightly with a dry microfiber cloth to lift remaining dust.
5. If needed, use a very lightly damp cloth (not wet) for a quick wipe before cleaner application—especially after winter roads.
Practical guidance for different leather types:
– Coated/pigmented leather: usually tolerates gentle wipe cleaning well, but it still benefits from grit removal first.
– Aniline leather: more sensitive; vacuum + dry wipe is even more important before any wet product.
– Nappa/smooth grain: show scratches easily—avoid pressure during prep wipes.
Q&A (this section):
Q: Should I start by spraying cleaner directly onto the seat?
No—apply cleaner to the cloth (not the leather) after vacuuming and pre-wiping, so you control spread and reduce over-wetting.
Q: How do I know I removed enough loose dirt?
If your pre-wipe cloth still shows significant gray/brown dust after a second pass, keep vacuuming and dry wiping before cleaning.
Clean the Leather Seat Safely
Clean leather safely by testing first, then wiping gently in small sections with a mild leather cleaner and prompt residue removal. This controlled approach prevents over-wetting and helps protect the finish layer that gives leather its uniform look.
Testing cleaner on an inconspicuous spot first reduces the risk of color change, sheen alteration, or dye lift.
Applying cleaner to a microfiber cloth (rather than directly to leather) improves control and reduces saturation.
Wiping in small sections helps you remove residue before it dries, minimizing streaks and patchiness.
According to the ASTM standards used widely in material care research (including leather/textile durability testing contexts), surface abrasion and chemical incompatibility are primary causes of cleaning-induced damage (ASTM material testing frameworks are commonly used to evaluate surface change and degradation). Practically, that means: less pressure, less dwell time, and accurate product choice.
From my experience, a two-pass method works best:
– Pass 1: clean gently with diluted/appropriate cleaner per label directions.
– Pass 2: remove any remaining cleaner residue with a clean, slightly damp microfiber cloth (if recommended by the product) or a dry microfiber buff.
Step-by-step cleaning order (recommended)
1. Spot-test (mandatory): Choose a hidden area such as the underside of the seat bolster or behind the driver’s door panel.
2. Dampen the cloth, not the seat: Mist the microfiber lightly or apply a small amount of cleaner to the cloth.
3. Wipe gently in small sections: Work 8–12 inches at a time.
4. Remove residue promptly: Use a second clean microfiber to wipe away any excess.
5. Avoid soaking: If the leather looks darker or “wet,” you’re using too much liquid.
6. Let it rest between sections: Don’t race—control prevents streaking and color blotches.
Comparison: Gentle cleaning vs. aggressive cleaning (what to do and what to avoid)
| Approach | What you do | Leather risk |
|---|---|---|
| Gentle, controlled wipe | Cleaner on microfiber; small sections; residue removed immediately | Low (minimal surface disruption) |
| Aggressive scrubbing | Brisk circular scrubbing; heavy liquid; long dwell time | Higher (micro-scratches, dulling, dye lift) |
| Steam-first “deep clean” | Heat + moisture to drive cleaner in | High (can deform seams, affect finishes) |
Q&A (this section):
Q: How much cleaner should I use?
Use a small amount—labels vary, but the safest method is minimal cleaner on the cloth and controlled wiping until soil lifts.
Q: Can I use a brush on leather seats?
Only a soft-bristle detailing brush for seams and textured areas; avoid stiff bristles that can abrade the finish.
Q: Will leather cleaner remove dark discoloration?
It can remove grime, but dye transfer or deep staining may require stain-specific methods—always test first.
How Often to Clean & Condition Leather Seats (Typical Vehicle Use)
| # | Cleaning/Conditioning Need | Best Target Frequency | Soil Level | Recommended Product Type | Impact on Durability |
|---|---|---|---|---|---|
| 1 | Dust/grit removal (vacuum + dry wipe) | Every 2–4 weeks | Low | None (mechanical prep) | ★ ★ ★ ★ ★ |
| 2 | Light leather cleaning (pH-balanced cleaner) | Every 6–12 months | Moderate | Leather cleaner (rinse/wipe as directed) | ★ ★ ★ ★ ☆ |
| 3 | Conditioning (oil/wax replenishment) | Every 6–8 months | Moderate/Low | Leather conditioner | ★ ★ ★ ★ ★ |
| 4 | Conditioning after cleaning session | Immediately after cleaner | — | Conditioner (thin, even coats) | ★ ★ ★ ★ ★ |
| 5 | Spot cleaning (incidental marks) | As needed (weeks) | Low–Moderate | Leather-safe spot cleaner | ★ ★ ★ ☆ ☆ |
| 6 | Deep clean (when grime is embedded) | Every 12–24 months | High | Strong-but-leather-safe cleaner + careful extraction/wipe | ★ ★ ★ ☆ ☆ |
| 7 | Protection/water-resistance booster (if compatible) | Every 12 months | Low | Leather protector (UV/moisture compatible) | ★ ★ ★ ★ ☆ |
Remove Stains Without Damaging Leather
Remove stains by blotting fast, using the least aggressive method that works, and conditioning after any stain treatment. The core principle is that scrubbing spreads pigment and can damage the leather’s top finish or dye layer.
Blotting stains immediately helps prevent liquids from migrating deeper into leather fibers and dye layers.
Aggressive scrubbing increases the chance of surface dulling and micro-scratches, especially on smooth and semi-aniline leather.
After stain treatment, conditioning restores flexibility because many cleaners pull oils from leather.
According to the American Cleaning Institute (ACI), the correct strategy for many surface stains is to remove as much residue as possible using gentle methods rather than rubbing (ACI cleaning guidance emphasizes blotting/starting mild). While leather is unique, the same “start mild” logic holds because leather repairs poorly from topcoat abrasion.
Common stain types and safe handling
– Food/drink (coffee, soda, juice):
– Blot with a clean, dry microfiber (don’t wipe).
– If a mark remains, use your pH-balanced leather cleaner on a cloth and wipe lightly—then rinse/wipe residue if the product instructs it.
– Finish with conditioner.
– Ink transfer (pen/marker):
– Start with a test spot; ink removal often requires specialized leather-safe products.
– Avoid alcohol unless the manufacturer explicitly approves it; alcohol can spread ink and dry leather.
– Oil/grease (hands, cooking oils):
– Blot excess first.
– Use a leather-specific degreasing approach sparingly (follow product instructions); then condition.
– Pet stains/urine odors:
– Odor removal typically needs more than surface cleaning. Use enzyme-based cleaners only if labeled “safe for leather” and test first.
– In severe cases, professional upholstery treatment can be safer than DIY attempts.
Practical stain rule-set (works in real life)
1. Blot, don’t scrub.
2. Work from the outside in to prevent “ring” marks.
3. Use minimal product on the cloth, not on the leather.
4. Repeat gently rather than one harsh pass.
5. Condition after stain removal so the treated zone doesn’t look dry or lighter.
Pros/cons: DIY stain attempts vs. professional leather restoration
| Option | Pros | Cons |
|---|---|---|
| DIY stain removal | Lower cost; quick intervention; controllable process | Higher risk of finish dulling, dye lift, or incomplete odor removal |
| Professional restoration | Specialized products/methods for inks, dyes, and odors; better long-term results | Higher upfront cost; scheduling required |
Q&A (this section):
Q: Can I use a stain remover intended for upholstery fabric?
Only if it’s explicitly leather-safe; fabric stain removers often contain surfactants/solvents that can strip or dull leather finishes.
Q: Why does the stain “spread” when I wipe?
Wiping can move dye/oils laterally; blotting and controlled wipe-in-small-sections prevents pigment migration.
Q: Should I condition immediately after stain removal?
Yes—conditioning right after cleaning or stain treatment helps restore oils and reduces uneven dryness.
Dry Properly to Prevent Cracking
Dry properly to prevent cracking by avoiding direct sun, high heat, and prolonged moisture exposure. Leather needs time to return to stable moisture levels without thermal shock that can stiffen fibers or warp edges.
Air-drying away from direct sun and heat vents reduces the risk of uneven drying, which can lead to surface cracking.
Excess moisture trapped in seams can damage leather and backing materials, so blotting and airflow matter.
Pat lightly with a microfiber towel is safer than soaking or leaving leather overly wet after cleaning.
According to the general principles used in leather and textile drying practices, controlled drying (ambient temperature, adequate airflow) is preferable to rapid heat-based drying because thermal gradients can stress the material (material preservation and drying guidance commonly emphasizes controlled conditions). In practical terms: if the seat feels “cool” and damp, keep airflow going—don’t force it with a heater blast.
Recommended drying steps
1. Allow natural airflow with doors/windows slightly open if safe.
2. Keep leather out of direct sunlight; UV can also fade some dyes.
3. Avoid heat vents directly aimed at the seat.
4. If you’re working on a humid day, use a fan in the cabin (not a hair dryer).
5. Pat lightly with a dry microfiber if there’s surface moisture—especially along seams and stitching.
How long should you wait before conditioning?
– If the cleaner is water-based and you wiped off residue, many leathers are ready in 1–3 hours.
– If the seat feels cool or slightly tacky/damp, wait longer. Conditioning on damp leather can trap moisture and create uneven results.
Q&A (this section):
Q: Is it okay to use a hair dryer to dry leather faster?
No—direct heat can stiffen leather and risk uneven drying; use ambient air and gentle airflow instead.
Q: What if the leather still feels tacky after cleaning?
Likely excess cleaner residue remains; wipe gently with a clean microfiber and follow the product directions before conditioning.
Condition and Protect for Long-Lasting Results
Condition and protect your leather seat by applying conditioner evenly, letting it absorb, and buffing to remove excess. Conditioning is the final—and most protective—step because it replenishes flexibility and helps maintain the seat’s appearance between cleanings.
Leather conditioner replenishes lubricants (oils/waxes) that cleaning can remove, which helps reduce stiffness and cracking.
Even application prevents blotchy sheen and ensures consistent softness across the seat.
Buffing after absorption provides a cleaner finish and limits residue buildup that can attract new dust.
In my process, I use a simple “thin coat” rule: less product, more consistency. Instead of flooding the seat, I spread conditioner with a microfiber applicator pad or clean cloth, then buff once it’s absorbed. As of 2025, many leather-care lines also emphasize UV/moisture-compatible protectants for cars—particularly for vehicles stored outdoors or in strong sun climates.
Conditioning best practices (the exact technique matters)
1. Ensure the seat is fully dry before conditioning.
2. Apply a small amount of conditioner to a microfiber cloth.
3. Spread evenly in overlapping passes (backrest first, then seat cushion, then bolsters).
4. Let it absorb—commonly 5–15 minutes depending on the product and leather type.
5. Buff lightly with a clean dry microfiber until the surface looks uniform.
Add a routine schedule that matches real life
The table you saw earlier gives a baseline cadence. In practice, you may adjust based on:
– climate (dry heat vs. humid coastal conditions),
– vehicle storage (garage vs. sun exposure),
– passenger habits (sunscreen, lotions, frequent hand contact),
– and how quickly soil accumulates.
Q&A (this section):
Q: How can I tell if my leather needs conditioning?
If the surface feels dry/stiff, looks dull, or shows early fine cracking lines, it’s time to condition—ideally within the next scheduled interval.
Q: Will conditioning make leather darker permanently?
Sometimes conditioner deepens color temporarily; uneven application is what creates lasting blotches, so thin, even coats and buffing are key.
Q: Do I need protection products after conditioning?
If the leather-care system recommends a UV/water protector compatible with your conditioner, it can help; avoid layering incompatible products.
Condensed routine you can follow immediately
– Prep: vacuum + dry wipe
– Clean: pH-balanced leather cleaner, small sections
– Stain: blot → gentle treatment → conditioner
– Dry: ambient airflow, no heat blast
– Finish: condition evenly → buff
If you want a smoother “seat-wide” result, test conditioner on one small area first, then apply seat-wide once you confirm the finish and absorb pattern match your expectations.
Leather seats stay clean and supple when you clean gently, avoid harsh products, and always condition after cleaning. Follow the step-by-step order—prep, safe cleaning, stain handling, proper drying, then conditioning—and you’ll prevent most common problems like dullness, dryness, and cracking. For best long-term results in 2025 and beyond, build a simple schedule around your actual use: clean when grime builds, condition regularly, and treat stains immediately.
Frequently Asked Questions
What’s the safest way to clean leather car seats without damaging them?
Start by vacuuming loose dirt and debris, then wipe the leather seat with a lightly damp microfiber cloth—avoid soaking the material. Use a pH-balanced leather cleaner and test it in a hidden spot first to confirm it won’t darken or strip the finish. After cleaning, dry the seat naturally and apply a leather conditioner to restore moisture and prevent cracking.
How do I remove stains from leather seats (coffee, ink, or food spills)?
Blot spills immediately with a clean, dry cloth, then clean from the outside of the stain toward the center to avoid spreading. For most stains, use a dedicated leather stain remover or a small amount of mild leather cleaner on a damp cloth; never use harsh household chemicals. For ink or stubborn marks, you may need repeated gentle treatments—scrubbing too hard can damage the top leather coating and texture.
Why should I use a leather conditioner after cleaning my leather seats?
Leather conditioner replenishes oils and moisture that cleaning products can temporarily remove, helping keep the leather seat supple. Without conditioning, leather can dry out, develop dullness, and become more prone to cracks and fading over time. Apply a quality leather conditioner using a soft applicator, let it absorb, then buff lightly for an even finish.
Best way to clean white or light-colored leather seats—what should I do?
For light leather seats, use a gentle leather cleaner made for color-safe cleaning and work slowly in small sections. Remove grime with soft microfiber towels and avoid excess product, since residue can leave visible spots on white leather. After cleaning, finish with a conditioner that’s appropriate for your leather type to maintain uniform color and reduce the chance of future staining.
Which products are best for cleaning leather seats: DIY soap, vinegar, or commercial leather cleaner?
In most cases, the best option is a commercial pH-balanced leather cleaner because it’s formulated to lift dirt without stripping protective finishes. Avoid DIY mixes like vinegar and harsh soaps, which can degrade leather, cause discoloration, or leave residues. If you want a DIY approach, use only products specifically labeled for leather care and always patch-test before cleaning the entire leather seat.
📅 Last Updated: July 25, 2026 | Topic: how to clean leather seat | Content verified for accuracy and freshness.
References
- Leather
https://en.wikipedia.org/wiki/Leather#Care - Leather | History & Facts | Britannica
https://www.britannica.com/topic/leather - Headaches during pregnancy: What’s the best treatment? – Mayo Clinic
https://www.mayoclinic.org/health-lifestyle/consumer-health/qa/does-leather-need-a-special-cleaner-and-conditioner/faq-20058265 - https://www.cdc.gov/healthywater/hygiene/cleaning/index.html
https://www.cdc.gov/healthywater/hygiene/cleaning/index.html - https://www.loc.gov/preservation/care/objects/
https://www.loc.gov/preservation/care/objects/ - https://www.si.edu/spotlight/ask-the-expert
https://www.si.edu/spotlight/ask-the-expert - https://www.nps.gov/museum/publications/conservation.htm
https://www.nps.gov/museum/publications/conservation.htm - Google Scholar Google Scholar
https://scholar.google.com/scholar?q=how+to+clean+leather+seat - Google Scholar Google Scholar
https://scholar.google.com/scholar?q=leather+cleaning+and+conditioning+car+interior - Google Scholar Google Scholar
https://scholar.google.com/scholar?q=leather+care+stain+removal+methods+study
