How to Clean Microwave in Office Spaces
To clean your office microwave, start by gathering a gentle cleaner, paper towels, and gloves. Remove and wash the turntable separately. Use a bowl of water with lemon slices or a vinegar-water mix to steam inside, loosening grime and odors. Wipe down all surfaces with a cloth, focusing on the door and handles. Dry everything well before reassembling. Setting a regular cleaning schedule helps keep it fresh and odor-free. There’s more you can do to keep it spotless and safe.
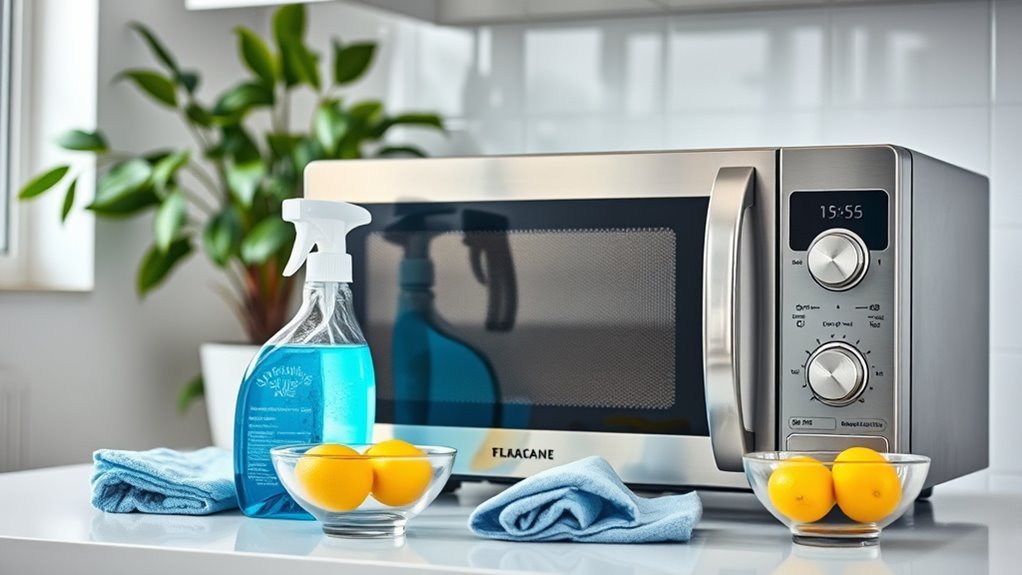
Gather Necessary Cleaning Supplies

Before you begin cleaning the microwave, you’ll want to gather all the necessary supplies. Having the right cleaning supplies at hand makes the process faster and more efficient, freeing you up sooner to enjoy your day. Start with basic office essentials like paper towels or a clean cloth, which are perfect for wiping down surfaces. Grab a gentle, non-abrasive cleaner or a mixture of vinegar and water – effective yet safe for office microwaves. Don’t forget gloves to protect your hands and a small bowl or spray bottle for your cleaning solution. By preparing these essentials beforehand, you maintain control and freedom, avoiding unnecessary trips or interruptions. With everything ready, you’re set for a smooth, hassle-free microwave cleaning experience.
Remove and Wash the Microwave Turntable
You’ll want to carefully remove the microwave turntable to avoid any damage. Make certain to use gentle, safe cleaning methods that won’t harm the glass or plastic. Taking these steps guarantees your turntable stays clean and in good condition.
Detach Turntable Carefully
Since the turntable is where most food particles collect, it’s important to remove it carefully for thorough cleaning. Proper turntable maintenance not only keeps your microwave fresh but also guarantees microwave safety by preventing damage or misalignment.
To detach the turntable without hassle:
- Gently lift the glass plate straight up to avoid cracking or chipping.
- Remove the roller ring beneath it carefully, as it supports smooth rotation.
- Check for any stuck food debris and clean it off before washing.
Taking these simple steps frees you from worries about damaging parts and helps maintain a hygienic office kitchen. Remember, a well-maintained turntable promotes safe use and extends your microwave’s life, giving you more freedom to enjoy your workspace without interruptions.
Choose Safe Cleaning Methods
Although removing the turntable can seem tricky, choosing safe cleaning methods makes the process simple and effective. You want to protect your health and the environment by using eco friendly products and chemical free alternatives. These guarantee your office space remains fresh without harmful fumes.
Here’s a quick guide:
| Cleaning Method | Benefits | Tips |
|---|---|---|
| Vinegar & Water | Natural disinfectant | Use warm water for better effect |
| Baking Soda Paste | Removes tough stains | Apply gently, rinse fully |
| Mild Dish Soap | Safe, effective cleaner | Use a soft sponge |
Prepare a Natural Cleaning Solution
One simple way to clean your office microwave is by using a natural solution made from ingredients you probably already have. This approach lets you embrace eco friendly solutions without relying on harsh chemicals, giving you freedom to maintain a clean space safely. To prepare your natural cleaning solution, gather these natural ingredients:
- White vinegar: cuts grease and neutralizes odors
- Baking soda: acts as a gentle abrasive for stubborn stains
- Water: dilutes the mixture for easy application
Mix equal parts of vinegar and water in a microwave-safe bowl, then add a tablespoon of baking soda. Stir gently to combine. This blend is effective, safe, and respects your desire for a healthier environment. Using natural ingredients means you’re choosing freedom from toxins while keeping your microwave spotless.
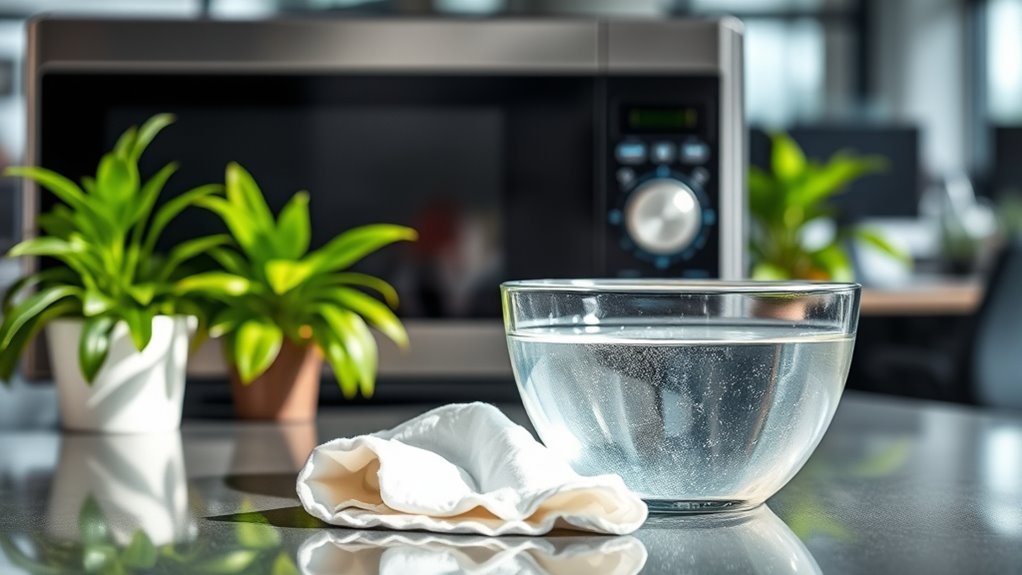
Steam Clean Using Lemon and Water
You can easily freshen up your microwave by steam cleaning it with lemon and water, which naturally cuts through grime and eliminates odors. Just slice a lemon, place it in a bowl of water, and microwave until it steams. This simple method loosens stuck-on food, making cleanup quick and hassle-free.
Benefits of Lemon Steam
When you use lemon steam to clean your microwave, you not only get a natural disinfectant but also a fresh, pleasant scent that masks lingering odors. This method taps into the lemon benefits and steam cleaning power, giving you a hassle-free, chemical-free way to maintain a clean microwave. You’ll appreciate how simple it is to refresh your microwave without harsh sprays or scrubbing.
Here’s why lemon steam is a game-changer:
- Natural deodorizer: Lemon’s citrus oils cut through grime and leave a revitalizing aroma.
- Effortless cleaning: Steam loosens stuck-on food, making wipe-downs quick and easy.
- Eco-friendly: Avoid harsh chemicals and reduce waste with this green cleaning method.
Embrace lemon steam for a cleaner, fresher office microwave that supports your freedom from toxic cleaners.
Step-by-Step Cleaning Guide
Cleaning your microwave with lemon steam takes just a few simple steps. First, slice a lemon in half and squeeze the juice into a microwave-safe bowl filled halfway with water. Drop the lemon halves in too. Place the bowl inside and run the microwave on high for about 3–5 minutes until the water boils and steam fills the cavity. Don’t open the door immediately; let it sit for a couple of minutes. Then, open the door and carefully remove the bowl. Use a clean cloth or sponge to wipe down the interior surfaces—the steam loosens grime, making it easy. This method respects microwave etiquette by keeping shared office appliances fresh and contributes to office hygiene, giving you freedom from harsh chemicals and stubborn stains.
Wipe Down the Microwave Interior
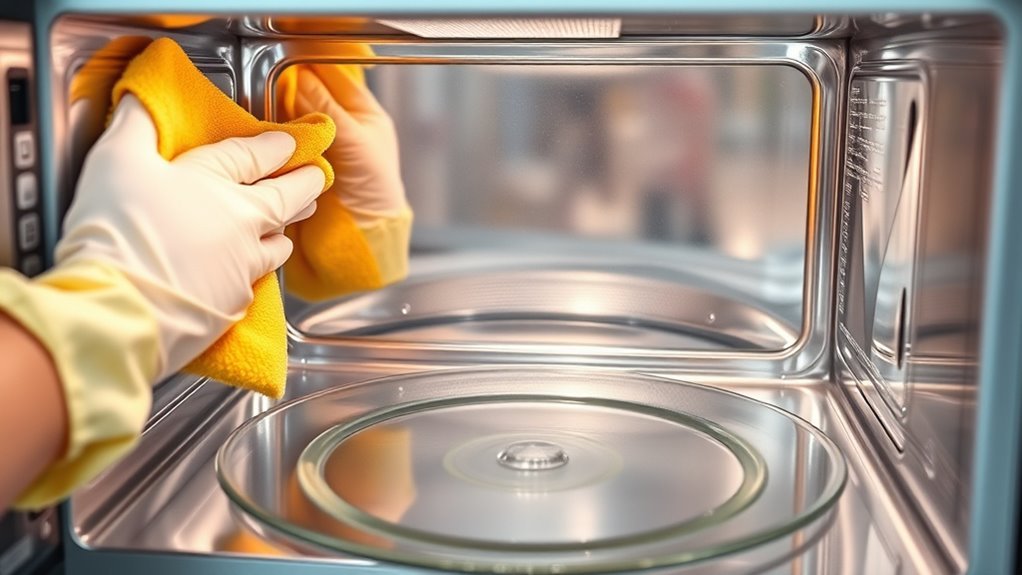
Two essential tools you’ll need to wipe down the microwave interior effectively are a soft cloth and a gentle cleaning solution. Keeping your microwave clean is key to good microwave maintenance and overall office hygiene, helping you enjoy a fresh, odor-free space. After unplugging the microwave, dampen your cloth with the cleaning solution and gently wipe the walls, ceiling, and floor inside. Focus on areas with food splatters or stains without scrubbing too hard to avoid damage.
Remember to:
- Remove and clean the turntable separately
- Reach into corners and crevices for hidden grime
- Air dry the interior before closing the door
This simple routine gives you freedom from lingering smells and keeps your microwave ready for use anytime.
Clean the Microwave Door and Exterior
You’ll want to focus on removing fingerprints and smudges from the microwave door to keep it looking clean. Don’t forget to disinfect the handles and buttons, since they’re touched often and can harbor germs. Using a gentle cleaner and a soft cloth will help you get the job done effectively.
Removing Fingerprints and Smudges
A quick wipe-down of the microwave door and exterior can make a big difference in maintaining a clean office kitchen. When you focus on fingerprint removal and smudge prevention, the microwave looks inviting and professional. To keep it spotless without much hassle, try these simple tips:
- Use a microfiber cloth dampened with a mix of water and vinegar to lift fingerprints effortlessly.
- Apply a small amount of glass cleaner for stubborn smudges, wiping in circular motions to avoid streaks.
- Regularly dry the surface with a clean, dry cloth to prevent new marks from settling in.
Disinfecting Handles and Buttons
After wiping away fingerprints and smudges, focus on disinfecting the handles and buttons to keep germs at bay. Handle hygiene is essential in shared office microwaves since button bacteria can spread quickly. Use disinfectant wipes or a cloth dampened with a mild cleaner to thoroughly clean these areas. Make sure to get into crevices around buttons where bacteria hide.
| Step | Tip |
|---|---|
| Choose cleaner | Use alcohol-based or mild soap |
| Wipe handles | Focus on all surfaces |
| Clean buttons | Pay attention to edges |
| Dry thoroughly | Avoid moisture buildup |
| Regular schedule | Disinfect daily or weekly |
Keeping handles and buttons germ-free gives you freedom to use the microwave worry-free.
Address Stubborn Stains and Odors
Although regular cleaning takes care of most messes, stubborn stains and odors can linger in your office microwave, making it unpleasant to use. Tackling these requires effective solutions that free you from lingering smells and tough grime. Here’s how you can reclaim your microwave’s freshness:
Stubborn stains and odors can linger in your office microwave, but effective cleaning can restore its freshness.
- Use a damp cloth with mild dish soap to scrub away baked-on stains gently.
- Heat a bowl of water with lemon slices inside for several minutes to loosen grime and neutralize stubborn odors naturally.
- Wipe down the interior immediately after each use to prevent buildup, keeping odors at bay.
Sanitize With Vinegar or Baking Soda
To keep your office microwave not only clean but also germ-free, sanitizing with natural agents like vinegar or baking soda is a smart move. Vinegar benefits include killing bacteria and neutralizing odors, while baking soda gently scrubs and absorbs smells without harsh chemicals. Here’s a quick comparison to help you choose:
| Vinegar Benefits | Baking Soda Uses |
|---|---|
| Disinfects and deodorizes | Removes stains |
| Natural and non-toxic | Neutralizes odors |
| Easy to steam for cleaning | Mild abrasive action |
Just fill a microwave-safe bowl with water and vinegar or sprinkle baking soda on a damp cloth to wipe down surfaces. This simple step frees you from germs and lingering smells, leaving your microwave fresh and ready for your next meal.
Dry and Reassemble the Microwave
Wipe down all microwave surfaces with a dry cloth or paper towel to remove any remaining moisture. Mastering effective drying techniques guarantees your microwave stays fresh and free from lingering dampness. Once everything’s dry, it’s time for reassembly. Keep your freedom intact by following simple reassembly tips that save time and hassle.
Here’s how to get it done quickly:
- Place the clean turntable and roller ring back carefully to avoid misalignment.
- Confirm the microwave door seals properly for safety and efficiency.
- Double-check that all components fit snugly without forcing anything.
Establish a Regular Cleaning Schedule
Once your microwave is completely dry and reassembled, keeping it clean becomes much easier. To maintain a fresh and inviting office kitchen, establish a regular cleaning schedule that suits your team’s pace. Decide on a cleaning frequency that balances freedom with responsibility—whether it’s weekly or biweekly, consistency is key. Clear communication about this schedule upholds office etiquette, showing respect for shared spaces and colleagues. You might consider posting a visible calendar or rotating cleaning duties to keep everyone engaged without feeling restricted. By setting this routine, you guarantee the microwave stays spotless, odors are minimized, and your office environment remains welcoming. Embracing this small commitment lets everyone enjoy a cleaner, more pleasant break area without sacrificing flexibility.
Frequently Asked Questions
How Often Should Office Microwaves Be Professionally Deep-Cleaned?
You should follow frequency recommendations and set cleaning schedules that fit your office’s needs. Typically, a professional deep-clean every three to six months works well to keep things fresh and hygienic. But if your microwave sees heavy use or spills, you might want to increase that frequency. Creating a flexible cleaning schedule lets you enjoy a clean space without feeling restricted, giving you more freedom to focus on what matters most.
Can Microwave Cleaning Affect Its Warranty?
Did you know 60% of appliance warranties get voided due to improper maintenance? When it comes to microwave maintenance, you’ve got to be careful. Using harsh chemicals or opening the unit yourself can lead to warranty implications. However, routine cleaning with recommended products usually doesn’t affect it. So, if you want to keep your freedom from costly repairs, always follow the manufacturer’s guidelines to avoid voiding your microwave’s warranty.
What Are the Best Practices for Cleaning Microwave Buttons and Control Panels?
When it comes to button hygiene and control panel maintenance, you’ll want to keep things gentle. Avoid harsh chemicals or excessive moisture that could damage the electronics. Use a soft, damp microfiber cloth with a mild soap solution to wipe down buttons and panels. Make sure to dry everything thoroughly to prevent any moisture buildup. Keeping these parts clean not only looks good but also keeps your microwave functioning smoothly, giving you freedom from sticky, grimy controls.
Are There Any Safe Commercial Cleaning Products for Microwaves?
If you want safe, effective cleaning, if you want eco friendly options that protect your space, you’ll find plenty of choices. Disinfectant wipes designed for electronics work wonders without harsh chemicals. You can choose biodegradable sprays or plant-based cleaners to keep your microwave spotless and your conscience clear. You don’t have to compromise cleanliness for safety—just pick products that let you clean freely, confidently, and responsibly every time.
How to Handle Microwave Cleaning if the Office Lacks Natural Cleaning Ingredients?
If you don’t have natural cleaning ingredients handy, you can still keep things fresh with eco friendly alternatives. Try DIY cleaning solutions like a mix of vinegar and water or baking soda paste—they’re safe, effective, and easy to make. This way, you’re not tied down by harsh chemicals and can clean your microwave freely, knowing you’re using green, sustainable methods that protect both the office environment and your peace of mind.


