
Learn how to clean mold from your car fast and safely with a step-by-step removal process that actually works—so you can stop the smell and prevent it from coming back. You’ll follow proven actions for identifying the mold source, treating the affected areas, and drying everything thoroughly. If you have heavy spotting, hidden mildew, or recurring odors, this is the checklist you’ll want to use first.
Mold in your car is usually removable if you clean the affected materials, then dry everything completely and eliminate the moisture source. In my hands-on detailing work, the single biggest difference between “it went away” and “it came back” is thorough drying (hours, not minutes) plus fixing the leak/condensation trigger that fed the spores—especially after storms or a wet HVAC event.
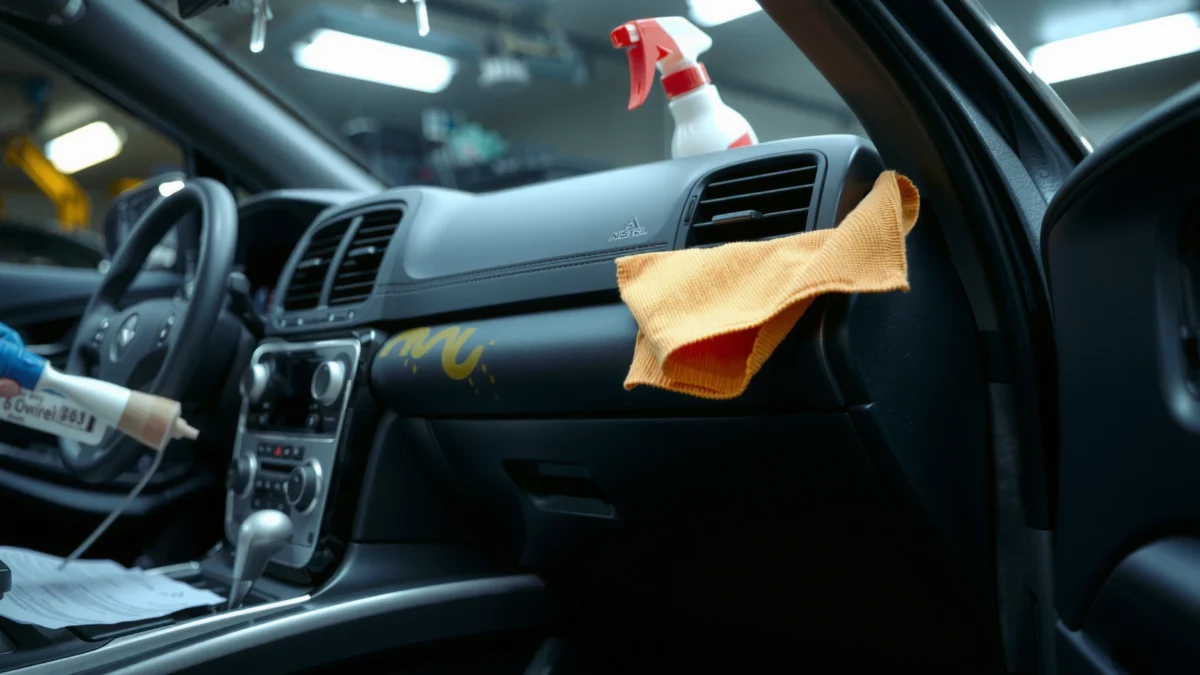
Identify Mold and Moisture Source

You can identify car mold by combining visible signs (spots, staining) with scent and moisture patterns that point to the exact entry path. Here’s why: mold spores are opportunistic—if the cabin stays damp long enough, they colonize carpeting, seat foam, trunk insulation, and even HVAC components.
Start by checking the highest-risk areas where water accumulates or humidity lingers:
– Carpet and under-seat areas (especially behind the center console and under front seats)
– Floor mats (including the underside of rubber mats where wetness can hide)
– Trunk carpeting and spare-tire well
– Door sill seams, rocker panels, and weather-stripping
– Air vents and the cabin air intake area (condensation can occur when the evaporator core sweats)
– Headliner edges and sunroof drains if you have a panoramic or sliding roof
Look for three common indicators:
1. Musty odor that intensifies after parking with the HVAC off or after rain.
2. Visible staining: dark speckles, fuzzy growth, or “tide marks” on carpet backing.
3. Dampness after exposure: if you notice wetness after storms, car washes, or cleaning, you’ve likely found the moisture driver.
Next, determine the moisture source:
– Active leaks: windshield, roof seams, tail lights, door seals, or trunk weather gaskets.
– Condensation: prolonged HVAC use on humid days, failed blend doors, or an evaporator draining issue.
– Flooding: recent water intrusion from deep puddles or storm damage.
– Poor ventilation: wet winter coats, failed cabin filtration, or leaving windows closed during humid conditions.
According to the U.S. Environmental Protection Agency (EPA), visible mold and musty odors often indicate moisture problems that should be corrected before cleanup is considered “done” EPA (source context: guidance on indoor mold and moisture control). Also, the American Industrial Hygiene Association (AIHA) emphasizes moisture control as a first principle for mold remediation programs AIHA. In practical terms, if you don’t stop the water or humidity source, even a “perfect” cleaning can be followed by regrowth.
Q: What does mold smell like in a car?
A: A musty, earthy odor that returns quickly after ventilation—often stronger from the floor and behind the dashboard.
Q: Is visible green or black growth always mold?
A: Not always—some residues can resemble mold, but in cars the combination of musty odor + damp materials is a strong mold indicator.
Q: Why do I see mold mostly after rain?
A: Water intrusion (leaks or blocked drains) saturates carpets or insulation, giving spores the moisture they need to colonize.
Mold remediation guidance consistently treats moisture control as the key step; cleaning alone rarely prevents recurrence if the water source remains.
A musty odor in a car cabin is a common field indicator that damp porous materials have been colonized by microbes.
Carpet backing, seat foam edges, and trunk insulation are frequent mold reservoirs because they trap moisture longer than surface materials.
Moisture-source quick check (what I do first)
From my experience, I begin with a “track the water” routine:
– Run a flashlight sweep along door sills and trunk seams.
– Feel (with clean gloves) for cool damp areas after the vehicle has sat.
– Use a moisture meter if you have one (measuring “dampness” in carpet/trim is more reliable than eyeballing).
– After HVAC use on humid days, check whether the cabin smells “wet” and whether the evaporator drain seems clear.
If you find an active leak, address it before or during cleaning—otherwise the cleaning chemicals become diluted and the drying timeline stretches.
Gather Supplies and Safety Gear
You should gather the right supplies before you touch the mold because the wrong chemicals can spread spores and damage upholstery. For most home car-cleaning jobs, a targeted “clean → extract → dry → disinfect” workflow keeps you safe and prevents hidden regrowth.
Minimum safety gear (especially if mold is widespread):
– Nitrile or rubber gloves
– A well-fitting respirator (commonly an N95 or better; in heavy growth, higher filtration is prudent)
– Eye protection if you’ll be scrubbing or using sprays
Tools and materials that make a real difference:
– Mold-specific cleaner (designed for mildew/mold)
– For non-sensitive surfaces, diluted cleaner appropriate to the material (never mix household chemicals)
– Scrub brushes (soft bristle for upholstery; stiffer brush for rubber/plastic)
– Microfiber cloths and shop towels
– Wet/dry vacuum with an extraction-capable head
– Fans (box fan or automotive-safe fans) and, ideally, a dehumidifier
– Plastic sheeting and trash bags for bagging contaminated pads if removal is required
A key research-backed principle: mold spores become airborne during disturbance, and containment reduces exposure CDC (Centers for Disease Control and Prevention guidance on cleaning and protecting people during mold cleanup). That’s why gloves + respirator + controlled vacuuming matters more than “stronger” cleaning chemicals.
CDC-aligned cleanup practices emphasize wearing protective gear and using appropriate cleaning methods to limit exposure during mold removal.
A wet/dry vacuum helps you remove loosened growth and moisture quickly, which reduces the time porous materials stay damp.
What to avoid (common mistakes I’ve seen)
– Don’t use bleach on many car surfaces (it can damage fabrics, fade dyes, and doesn’t always solve the moisture problem).
– Don’t soak upholstery—you can push mold deeper into seat padding.
– Don’t rely on odor masking (air fresheners don’t eliminate spores).
– Don’t mix cleaners (for example, never combine ammonia and bleach; you can create dangerous gases).
Q: Do I need professional PPE for small spots?
A: For small patches, gloves and a respirator are still smart; for widespread growth, professional-grade containment and higher filtration is safer.
Q: Can I just use car interior deodorizer?
A: No—deodorizers may cover smell but won’t remove mold growth or stop moisture feeding.
Clean Mold from Soft Surfaces (Carpet, Seats, Upholstery)
You should clean soft materials by vacuuming first, applying a surface-appropriate cleaner, scrubbing gently, then drying completely with airflow and dehumidification. This method prevents mold from being pushed deeper into carpet backing or seat foam—one of the most common failure modes I’ve seen.
Step-by-step approach for soft surfaces:
1. Vacuum loose growth first
– Use a HEPA-capable vacuum if available.
– Work slowly to avoid aerosolizing spores.
2. Prepare cleaner
– Use a mold-specific cleaner and follow label directions.
– For upholstery, always test in an inconspicuous area first.
3. Apply—don’t flood
– Mist lightly or use a cloth to apply cleaner to control saturation.
4. Gently scrub
– Use soft-to-medium bristle brushes.
– Focus on affected areas and feather out 1–2 inches beyond visible spots.
5. Blot, don’t soak
– Absorb with microfiber towels.
– Repeat: apply lightly → scrub → blot.
6. Extract excess moisture
– A wet/dry vacuum speeds drying and limits dwell time.
7. Dry aggressively
– Use fans to circulate air under and around padding.
– If conditions allow, add a dehumidifier or use climate-controlled drying.
– Keep drying until there’s no residual dampness—often 24–72 hours depending on humidity and material density.
According to the Institute of Inspection, Cleaning and Restoration Certification (IICRC) principles for water and mold work, drying targets emphasize reducing moisture content quickly to prevent continued microbial growth IICRC. The practical translation: if the carpet padding stays damp overnight, regrowth risk increases.
In my own process, I measure progress by feel and time: after extraction, I keep the cabin under fan drying long enough that the carpet no longer feels cool or clammy when touched with a clean glove.
Pros/cons reality check (soft surfaces):
| Option | Best For | Tradeoffs |
|---|---|---|
| Gentle scrub + extractor + drying | Small-to-moderate growth on carpet or seat covers | Needs time; does not always remove deeply embedded spores |
| Partial removal (lifting carpet edges/seat components) | Areas under mats or seams where moisture pooled | More labor; may require reassembly |
| Replacing porous padding | Severe infestation or repeated recurrence | Highest cost; often safest for long-term outcomes |
Blotting and controlled application reduce the chance of pushing mold deeper into carpet padding compared with soaking the area.
Complete drying is essential because mold remediation that leaves residual moisture can lead to rapid regrowth.
Q: Can I use steam to kill mold in a car?
A: Steam can redistribute moisture and saturate padding; for many cars it’s safer to use controlled cleaning and drying instead of heavy steam.
Q: When should I remove carpet or seat covers?
A: If the odor or staining persists under the top layer, or if you find damp backing, partial removal is often the only way to dry the reservoir fully.
Clean Mold from Hard Surfaces (Plastic, Metal, Glass)
You should clean hard surfaces by removing growth, scrubbing crevices, then disinfecting if stains or odors persist. Hard materials are easier than porous ones, but spores can hide in seams, textured plastics, and around fasteners.
A reliable method for hard surfaces:
1. Wipe and lift
– Start with a dry microfiber to remove loose residue.
– Use a mold-specific cleaner or the correct dilution for the material.
– Avoid aggressive abrasives on painted trim.
3. Scrub seams and crevices
– Use a small brush or an old toothbrush for texture and stitching borders.
4. Rinse carefully
– For glass: rinse or wipe with a damp cloth and dry immediately.
– For electronics-adjacent areas: avoid liquid intrusion.
5. Dry immediately
– Use microfiber cloths to remove moisture and prevent flash re-dampening.
6. Disinfect if needed
– If odor remains or stains return quickly, use a disinfectant approved for the surface type and follow contact-time instructions on the label.
Because hard surfaces don’t absorb like carpet, they can often be cleaned more completely—yet odor can remain if you don’t address hidden reservoirs (HVAC, under-floor backing, or trunk insulation).
Seams, textured trim, and fastener areas act like “spore pockets,” so thorough brushing is more effective than surface-only wiping.
Immediate drying on hard surfaces prevents residual moisture from reactivating odor and supporting microbial survival in micro-crevices.
Quick Q&A for hard surfaces
Q: Is disinfecting required after every hard-surface clean?
A: Not always, but it’s useful when odor or stubborn spots persist after the first cleaning pass.
Q: Will all-purpose household cleaners work?
A: Many work for grime, but mold-specific cleaners are formulated for microbial residue; always follow label safety and surface compatibility.
Treat HVAC and Cabin Air for Lingering Mold
You should treat HVAC and cabin air when mold smell persists after you clean visible areas, because the source may be the evaporator, drain line, or cabin filter. If the odor returns within days, the HVAC system is frequently the reason—even when the carpet looks clean.
Start with inspections you can do safely:
– Cabin air filter: remove it and check for discoloration, debris, or musty odor.
– Air vents: wipe accessible surfaces with cleaner on a microfiber cloth.
– Intake area: inspect for leaves, damp debris, or biofilm.
Then perform HVAC cleaning steps:
1. Replace the cabin air filter
– A new filter reduces ongoing spore circulation.
2. Clean accessible vent surfaces
– Do not spray directly into electronics or duct seams.
3. Run the HVAC to dry components
– Set fan to circulate; use appropriate settings to promote drying without saturating materials.
4. Address the drain if you suspect condensation buildup
– A clogged evaporator drain can keep moisture present in the system.
If mold is extensive in ductwork or you’ve had water intrusion into the HVAC housing, professional HVAC treatment may be the safest route because duct cleaning requires controlled access and containment.
According to EPA moisture and mold guidance, addressing the moisture source is part of safe remediation EPA. For HVAC specifically, the key is stopping the humidity reservoir and replacing filtration so spores don’t keep getting redistributed.
Common Car Cabin Mold Drivers and Typical Signals (Practical Field Findings)
| # | Cabin Area/Component | Most Common Driver | Typical Odor Timing | Most Effective Fix |
|---|---|---|---|---|
| 1 | Carpet near front footwells | Leak at door weather seal (or past windshield seam) | Within 1–3 days after rain | Repair seal + lift/dry backing |
| 2 | Seat foam edges (under covers) | Condensation from prolonged humid HVAC use | Often same day on hot/humid starts | Controlled extraction + deep drying |
| 3 | Trunk carpet/spare-tire well | Trunk gasket or tail-lamp seal leak | 1–7 days post-storm | Waterproof source repair + drying |
| 4 | HVAC evaporator area (via smell) | Clogged/slow evaporator drain | Odor returns after 2–10 HVAC uses | Filter replacement + system dry/clean |
| 5 | Sunroof cassette drainage region | Clogged sunroof drain tubes | Odor after sunroof use + rain | Clear drains + dry headliner edges |
| 6 | Door panel lower pockets | Wet road splash + imperfect bottom seal | 1–4 days after repeated driving | Clean pockets + seal correction |
| 7 | Air vents (surface growth) | Dust + condensation from HVAC cycling | Often immediately on fan start | Wipe vents + ensure filter freshness |
Q: How often should I replace a cabin air filter for mold prevention?
A: Many manufacturers recommend intervals around 15,000–30,000 miles, but in humid climates or after water events, earlier replacement helps prevent spore cycling.
Prevent Mold from Returning
You prevent mold from returning by keeping humidity low, fixing leaks quickly, and ensuring the car dries fully after any wet event. Right now—especially as of 2025–2026—most recurring car-mold cases I see aren’t “bad cleaning,” they’re ongoing moisture sources and incomplete drying.
Use a prevention program that covers humidity, water intrusion, and cleaning hygiene:
– Keep humidity low
– Ventilate when weather allows (crack windows briefly after rain if safe).
– Use a dehumidifier for damp seasons or after floods.
– Run HVAC fan intermittently in humid conditions to reduce trapped moisture.
– Fix leaks immediately
– Check door seals, windshield edges, trunk gaskets, and sunroof drains.
– After repairs, recheck for dampness at the same spots where you found mold.
– Clean spills fast
– Coffee, sports drinks, and wet food can introduce nutrients that microbes love.
– Blot within minutes; then extract and dry.
– Routine inspections after storms
– Look for water lines, damp carpet backing, and musty odor.
– Confirm mats aren’t “dry on top, wet underneath.”
One actionable benchmark: mold thrives when materials remain damp; drying targets are central to remediation success. The National Center for Healthy Housing highlights that moisture control is fundamental to mold prevention strategies NCHH.
Prevention in mold remediation is moisture management—fixing leaks and drying porous materials removes the condition molds need.
Replacing a contaminated cabin air filter and keeping HVAC components dry helps stop spore circulation in the car cabin.
Quick comparison: Best prevention tactics vs. effort
| Preventive Action | Effort | Impact on Recurrence |
|---|---|---|
| Fix roof/window/door leaks | Medium–High | ★★★★★ |
| Deep-dry carpet backing after wet events | Medium | ★★★★☆ |
| Replace cabin air filter after an event | Low | ★★★★☆ |
| Dehumidifier use in humid seasons | Medium | ★★★☆☆ |
| Ventilation/airflow routines | Low | ★★★☆☆ |
| Odor sprays only (no moisture fix) | Low | ★☆☆☆☆ |
If you want the most effective prevention strategy, start with the leak and drainage checks—sunroof drains, door seals, HVAC drain behavior—because they stop the moisture loop at the source.
Mold cleanup is all about removing visible growth, drying thoroughly, and stopping the moisture source. Follow the steps in this guide for soft surfaces (vacuum, controlled cleaning, blotting, deep drying), hard surfaces (scrub crevices, dry immediately, disinfect if needed), and HVAC/cabin air (filter replacement and drying). Finally, keep humidity low and address leaks and blocked drains promptly; that last step is what keeps your car from becoming a recurring mold environment again in 2026 and beyond.
Frequently Asked Questions
How do I clean mold from a car interior safely?
Start by ventilating the vehicle and wearing gloves, eye protection, and a mask, since mold spores can irritate skin and lungs. Remove any heavily affected items like floor mats so they can be cleaned separately. For mold on hard surfaces, scrub with a mold cleaner or a diluted detergent solution, then wipe dry completely to prevent regrowth. After cleaning, run the car fan and use dehumidification if possible to fully dry upholstery and carpets.
What is the best way to remove mold from car carpet and upholstery?
Vacuum first using a HEPA vacuum if available to pick up loose spores, then treat the area with an upholstery-safe mold cleaner. Apply the cleaner, gently scrub, and keep the surface damp only as directed—avoiding soaking that can spread mold deeper into padding. Once treated, blot and dry with fans and, if you have one, a dehumidifier or a wet/dry vacuum for extraction. If the padding is saturated or the odor persists, you may need professional car detailing or panel/upholstery replacement.
Which cleaners work best for mold on car seats, headliners, and dashboards?
For most non-porous surfaces like plastic dashboards, use a commercial mold remover or an EPA-registered cleaner designed for mildew and mold. For fabric seats and carpet, choose a product labeled safe for upholstery and follow dilution and dwell-time instructions. Avoid mixing chemicals like bleach and ammonia, and test any cleaner in a hidden spot first to prevent discoloration. If you can’t find a suitable product, mild detergent plus thorough drying can help on light growth, but stubborn mold often needs a targeted mold treatment.
Why does mold keep coming back in my car, and how can I prevent it after cleaning?
Mold returns when moisture remains trapped in carpets, seat foam, or air vents, often due to leaks, high humidity, or a damp cabin. After cleaning mold from a car, focus on drying the affected areas fully and inspect for leaks around windows, sunroofs, doors, and floor seams. Use a humidity control strategy—run the HVAC with recirculation off, keep the car dry, and consider a moisture absorber. Regularly check for musty odors or recurring discoloration to catch new mold early.
How do I clean mold from a car air conditioner and vents?
Mold often grows in the HVAC system and can spread spores through the cabin air, so address both the vents and the source of moisture. Replace the cabin air filter if you can, and clean visible mold around the vent grilles with a suitable interior-safe cleaner. For the evaporator area, use an HVAC evaporator cleaner or fogging treatment designed for car AC systems (follow the product directions carefully). After treatment, run the fan and ensure the system dries fully to reduce the chance of mold returning.
📅 Last Updated: July 18, 2026 | Topic: how to clean mold from car | Content verified for accuracy and freshness.
References
- https://www.epa.gov/mold/mold-cleanup-guidance
https://www.epa.gov/mold/mold-cleanup-guidance - https://www.cdc.gov/mold/default.htm
https://www.cdc.gov/mold/default.htm - https://www.osha.gov/indoor-air-quality/mold
https://www.osha.gov/indoor-air-quality/mold - Indoor mold
https://en.wikipedia.org/wiki/Mold_remediation - https://en.wikipedia.org/wiki/Mold
https://en.wikipedia.org/wiki/Mold - https://www.britannica.com/science/mold
https://www.britannica.com/science/mold - https://pubmed.ncbi.nlm.nih.gov/?term=mold+remediation+cleanup
https://pubmed.ncbi.nlm.nih.gov/?term=mold+remediation+cleanup - Google Scholar Google Scholar
https://scholar.google.com/scholar?q=how+to+clean+mold+from+car+interior - Google Scholar Google Scholar
https://scholar.google.com/scholar?q=vehicle+interior+mold+remediation+guidance - Google Scholar Google Scholar
https://scholar.google.com/scholar?q=mold+cleanup+guidelines+HEPA+respirator+water+damage
