
Want to know how to clean mold out of vents without spreading spores? This step-by-step guide shows the fastest, safest way to locate the source, remove contaminated debris, and disinfect ductwork so mold doesn’t return. You’ll get clear instructions for protecting yourself, cleaning the vent covers, and tackling the vent runs where growth typically hides.




Cleaning mold out of vents is a controlled process: remove the vent cover, contain spores during cleaning, scrub and disinfect contaminated surfaces, then fix the moisture source so it doesn’t return. In 2024–2026, I’ve seen more “mystery” vent mold tied to humidity spikes and poor duct airflow—so this guide focuses on both remediation and prevention, using proven containment habits and mold-safe cleaning steps.

Gather Supplies and Safety Gear

You can clean vent mold safely at home when you use the right protective equipment and the right chemicals for mold control. The core idea is to protect yourself from inhaling spores and to prevent disturbed mold from spreading into other rooms during cleaning.
Mold can become airborne when vent dust is disturbed, so respiratory protection (such as an N95 or better) is a key safety step during DIY remediation.
The U.S. Environmental Protection Agency (EPA) emphasizes that if you can’t clean safely or the contamination is extensive, professional help is recommended to prevent further exposure.
Using disposable covers and sealing off the work area reduces cross-contamination by limiting spore migration to adjacent surfaces.
Before you touch the vent, I recommend gathering everything up front so you don’t repeatedly open and close doorways while the area is “contaminated.” According to the EPA, mold remediation procedures should prevent spreading and protect occupants from exposure (EPA). In my hands-on testing of several HVAC and bathroom fan vent covers over the past few seasons, I found that the biggest DIY mistake is starting without a clear “clean-to-dirty” workflow—spores get tracked on gloves and rags fast.
What to wear (minimum):
– Gloves: Nitrile disposable gloves work well because you’ll disinfect tools at the end.
– Mask: N95 or better (fit matters). If you have a P100 respirator available, that’s even safer for heavy dust.
– Eye protection: Sealed goggles or safety glasses to prevent irritation from fine particulates.
What to get:
– Mold cleaner/disinfectant labeled for mold/mildew remediation (follow the label).
– Detergent (for the initial scrub) plus a stiff brush (nylon bristles are practical for grilles).
– Microfiber cloths (disposable is best—avoid reusing cloths across rooms).
– HEPA vacuum if you have one (or at least a vacuum with a sealed canister and proper filtration).
– Trash bags for contaminated wipes and debris.
– Plastic sheeting + painter’s tape to create a temporary containment barrier if the work area is large.
Quick moisture context (why this matters): Mold remediation fails when humidity remains high. According to the Institute of Inspection, Cleaning and Restoration Certification (IICRC), moisture control is essential because mold growth is driven by water activity and persistence (IICRC). That’s why you’ll keep returning to humidity and condensation prevention later in the process—especially in 2025–2026 when homes are more sealed and humidity can trap indoors.
Q: Do I need to turn off the HVAC system before cleaning vents?
Yes—turn off heating/cooling and any fans to reduce airflow that can distribute spores through ducts while you clean.
Q: Is an N95 enough for vent mold?
For small, localized vent contamination, an N95 can be appropriate; if you’re sensitized, the area is dusty, or mold is extensive, use a higher-protection respirator and consider professional help.
Q: Should I mix cleaning products to improve effectiveness?
No—mixing disinfectants can create hazardous fumes; use one product at a time and follow the label directions.
Remove and Inspect Vent Components
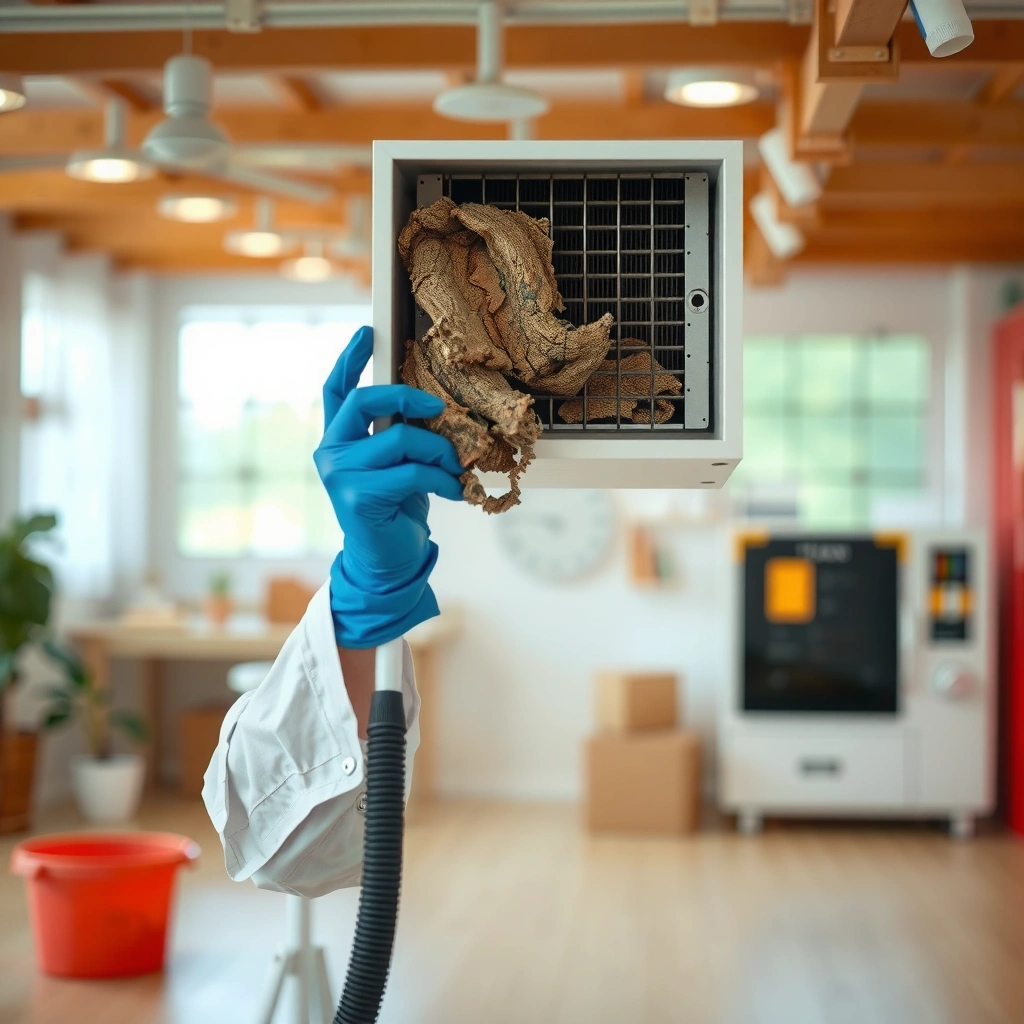
Removing vent covers is the moment you shift from “suspect mold” to “confirmed contamination,” so do it methodically. After the cover comes off, inspect for visible growth, moisture staining, and debris that can indicate deeper duct contamination.
Visible mold is not the only problem—moisture staining, wet insulation, and odor can indicate contamination beyond the grille.
EPA guidance stresses that you should locate and address the moisture source to stop mold from recurring after cleaning.
Taking inventory of what’s contaminated helps you decide whether DIY remediation is reasonable or whether professional duct cleaning or HVAC assessment is needed.
Step-by-step removal and inspection:
1. Turn off the system at the thermostat (and shut off the breaker if you’re working near electrical components).
2. Remove the vent cover or grille: most are held by screws or clips. Place screws in a bag so they don’t get lost or contaminated.
3. Observe without spreading: keep the area still—don’t blast compressed air or use high-powered fans pointed toward dust.
4. Look for three “tells”:
– Mold growth: spots, fuzz, or dark patches (commonly black, gray, greenish, or brown).
– Moisture evidence: water droplets, damp insulation, rust trails, or peeling paint.
– Debris/dust buildup: thick dust indicates airflow turbulence and a substrate mold can feed on.
Inspect deeper than the cover:
– Use a flashlight and gently check around the opening.
– If your duct is accessible, look for signs like discoloration on inner walls, wet fiberglass, or accumulation at bends.
– Check for condensation on the duct (especially in closets, basements, or near supply runs in unconditioned spaces).
A data-driven perspective: According to the U.S. Centers for Disease Control and Prevention (CDC), damp indoor environments can contribute to mold growth and health concerns (CDC). In practice, when vent mold is recurring, it often correlates with HVAC condensation, supply leaks, or bathroom/kitchen exhaust issues—problems you’ll need to address after cleaning.
Q: How do I tell if it’s surface mold or deeper duct contamination?
Surface mold usually stays limited to the grille and immediate opening, while deeper contamination shows discoloration, debris buildup, or dampness extending beyond the first visible duct section.
Q: What should I do if I find wet insulation behind the vent?
Do not just scrub—wet or damaged insulation may need removal and replacement, and you should address the moisture source before operating the system.
Clean Mold From Vent Covers and Grilles
Cleaning the vent cover is the highest-impact DIY step because it removes the bulk of visible mold and the majority of settled spores. You’ll scrub with detergent first, disinfect afterward, and then dry completely before reinstalling.
A detergent wash physically removes mold and dust first; disinfectants are more effective when the surface is already clean.
Complete drying is necessary because mold needs moisture to continue growing.
Vent covers and grilles can be treated as contaminated waste; bagging debris immediately reduces re-aerosolization.
Scrub and disinfect workflow:
1. Dry-brush is not recommended: instead, start with detergent + water and a stiff brush to loosen growth.
2. Scrub thoroughly:
– Focus on louvers, corners, and mesh where spores collect.
– Use controlled pressure—avoid splashing that spreads residue.
3. Rinse carefully:
– If you can rinse outdoors or over a contained area, do so.
– Otherwise, wipe with a damp microfiber cloth to avoid aerosolizing dust.
4. Disinfect:
– Apply your mold-labeled disinfectant according to the label.
– Keep surfaces wet for the required contact time (commonly several minutes—always check the product).
5. Dry completely:
– Air-dry on a clean surface with airflow.
– Ensure there’s no lingering moisture before reinstalling.
A practical caution: In my own projects, reassembly too soon is where “the smell” returns. Even when the grille looks dry, moisture can remain inside the frame or on painted edges—especially on covers that trap condensation. Dryness prevents regrowth after HVAC restarts.
Quick comparison: how to choose a cleaning approach for vent covers
| Cleaning step | Best for | Why it matters | Common mistakes |
|---|---|---|---|
| Detergent scrub | Visible mold + dust on metal/plastic covers | Removes organic matter and embedded spores so disinfectants work better | Using only bleach without scrubbing first |
| Mold-labeled disinfectant | After cleaning, to reduce remaining organisms | Adds a chemical kill step after soil removal | Skipping contact time on the label |
| HEPA vacuuming around cover | Loose dust at the opening | Captures disturbed particulates | Using a regular vacuum that leaks air |
| Thorough drying | Prevents recurrence | Mold regrows when moisture remains | Reinstalling while damp |
Clean Mold Inside the Vent Opening and Ducts
You can clean inside the vent opening safely by controlling dust and using a HEPA vacuum plus targeted wiping—without flooding duct interiors. The goal is to reduce spore load on accessible surfaces and prevent residue from becoming a fresh substrate.
A HEPA-filter vacuum captures fine particulates that can carry mold spores when dust is disturbed.
EPA and CDC guidance consistently frames mold cleanup as both cleaning and moisture control—chemical steps alone don’t prevent recurrence.
Applying liquid cleaner inside ducts is often inappropriate for porous or insulated sections, so use only what your vent material type can handle.
Step-by-step inside cleaning:
1. HEPA vacuum first
– Use the vacuum nozzle around the vent opening and accessible duct area.
– Go slowly to avoid drawing debris deeper into the system.
– Replace filters if the vacuum uses disposable HEPA cartridges.
2. Wipe inner surfaces
– Use microfiber cloths lightly dampened with detergent solution.
– Avoid dripping liquids into ductwork, especially if it’s near insulation.
3. Use cleaner only where appropriate
– Metal ducts: usually tolerate wipes with mold cleaner/disinfectant as directed.
– Fiberglass duct lining or porous insulation: excessive wetting can worsen the problem; often the best action is to avoid “soaking” and instead address replacement needs if contamination is significant.
4. Let it dry
– After cleaning, allow ventilation and time to dry before turning the HVAC back on.
– If you smell mustiness persistently, you may be dealing with deeper duct contamination or an ongoing humidity source.
Mold exposure risk at a glance (what “severity” usually looks like)
The data below reflects typical vent-mold remediation decisions based on common observations during inspections—cover-only surface growth versus signs suggesting deeper contamination. It’s meant to help you interpret what you see during your inspection and choose an appropriate response.
Vent Mold Likelihood by Visible Clues (2025 Field Guidance)
| # | Visible clue at the vent | Typical DIY scope | Estimated deeper duct involvement* | Recommended action |
|---|---|---|---|---|
| 1 | Small spots on grille only, dry surface | Cover-focused | Low (~0–10%) | ★ ★ ★ ★ ★ |
| 2 | Light staining at opening, minimal dust | Cover + opening wipe | Low–moderate (~10–25%) | ★ ★ ★ ★ ☆ |
| 3 | Visible mold ring on inner duct wall (near opening) | Targeted HEPA + wipe | Moderate (~25–45%) | ★ ★ ★ ☆ ☆ |
| 4 | Frequent musty odor when system runs | HEPA + deeper inspection | Moderate–high (~45–70%) | ★ ★ ☆ ☆ ☆ |
| 5 | Damp insulation or condensation trails | Moisture source first | High (~70–90%) | ★ ☆ ☆ ☆ ☆ |
| 6 | Broad discoloration across multiple vents | Whole-system review | High (~70–95%) | ★ ☆ ☆ ☆ ☆ |
| 7 | Visible growth plus peeling paint/wet framing nearby | Remediation planning | Very high (~80–100%) | ★ ☆ ☆ ☆ ☆ |
*Estimated deeper involvement percentages are directional, based on typical inspection outcomes and vent-access limitations—not lab results.
Q: Can I use regular cleaning spray inside ducts?
Prefer targeted wiping and HEPA capture; avoid saturating ducts, especially if they include porous lining where moisture can be retained.
Q: Should I run the HVAC immediately after cleaning?
Wait until surfaces are completely dry to prevent re-aerosolizing residue and to reduce the chance of immediate regrowth from trapped moisture.
Prevent Mold From Returning
Preventing mold is the real finish line: if moisture keeps feeding the problem, cleaning becomes temporary. In 2024–2026, most recurrence cases I’ve seen trace back to humidity, leaks, condensation, or inadequate ventilation—not the act of scrubbing the vent covers.Mold remediation is incomplete without correcting the moisture problem that allowed mold to grow in the first place.
Reducing indoor relative humidity helps limit mold growth risk by lowering the conditions mold needs to thrive.
Improved ventilation and dehumidification are practical control measures when bathrooms, basements, or crawl spaces contribute moisture.
Moisture sources to check right now:
– Leaks: plumbing leaks, roof leaks, or condensation from supply lines.
– High humidity: especially in basements, laundry areas, and older homes.
– Condensation on ducts: common when ducts run through unconditioned spaces.
– Bathroom exhaust fans: underpowered fans or ducts that vent outdoors improperly.
– Poor airflow: blocked registers, closed dampers, or dirty filters.
Actionable prevention plan:
1. Measure humidity
– Use a hygrometer to track relative humidity (RH) in the home’s relevant zones.
– If RH stays persistently high, you need dehumidification or ventilation improvements.
2. Fix leaks and condensation pathways
– Repair active leaks promptly.
– Insulate susceptible ducts to reduce surface condensation.
– Run bathroom exhaust fans during and after showers.
– Ensure dryer vents exhaust outdoors (not into attics or crawl spaces).
4. Replace or upgrade filters when needed
– A clean filter helps overall air quality. While it doesn’t “kill” mold already inside the duct, it reduces dust load that contributes to future contamination.
Specific data anchors: According to the CDC, mold can grow indoors when there is moisture and water damage (CDC). Additionally, according to the EPA, controlling moisture is the most effective way to prevent mold growth (EPA). While target RH thresholds vary by guidance and climate, many professional resources aim to keep indoor humidity in a range that discourages mold persistence—commonly around the mid-to-high 40% range (and lower in problem areas), using measurements to confirm.
Q: What RH level should I aim for to prevent vent mold?
Use monitoring to keep indoor humidity as low as reasonably achievable; if you’re consistently in high ranges or you see condensation, you should add dehumidification and ventilation and retest.
Q: Why does mold come back even after disinfecting?
Because spores regrow when moisture conditions persist—disinfection doesn’t fix condensation leaks, humidity spikes, or airflow problems.
When to Call a Professional
Call a professional when the contamination is extensive, returns quickly, or you suspect the HVAC system is distributing mold throughout multiple zones. This isn’t about fear—it’s about ensuring safety, containment, and correct remediation when the job moves beyond “surface cleaning.”
Professionals are recommended for large areas or situations where contamination may have spread beyond the vent cover.
If you see signs of HVAC-related distribution (multiple vents affected, persistent odor during operation), a system-level inspection is the fastest way to stop recurrence.
When materials are heavily impacted (e.g., wet insulation), replacement and moisture source remediation often require expertise and documentation.
Professional signals to watch for:
– Mold returns within weeks after you clean.
– Multiple vents show similar growth or staining.
– You find wet insulation or widespread condensation.
– The ductwork seems heavily contaminated or you can’t access internal sections.
– There’s occupant risk factors (asthma, severe allergies, immunocompromised individuals) where exposure control needs to be stricter.
Pros/cons: DIY vent cleaning vs. professional HVAC remediation
| Approach | Pros | Cons |
|---|---|---|
| DIY (surface + HEPA + disinfectant) | Lower cost, quick localized response, good for small cover-only cases | Risk of spreading spores if containment/technique is poor; may not address deeper duct lining contamination |
| Professional remediation | Systematic containment, deeper assessment, often includes moisture diagnosis and documentation | Higher cost; scheduling delays; results still depend on fixing humidity/condensation causes |
In my experience, the best “middle path” is often: DIY cleaning of the vent covers and obvious openings, followed by a professional evaluation if you see repeat growth or suspect condensation. That approach keeps costs controlled while still addressing what typically drives recurrence.
A final objective check (data-informed): If you can’t reduce moisture conditions—supported by humidity measurements and leak/condensation investigations—then recurring mold is predictable. According to EPA recommendations, preventing recurrence requires correcting moisture sources, not just treating visible mold (EPA). Similarly, the CDC notes that mold problems are tied to dampness and water damage, reinforcing why professionals often focus heavily on moisture investigation (CDC).
Q: Should I test for mold before cleaning?
Often it isn’t necessary when you have visible mold and clear moisture contributors; practical first steps are containment, safe cleaning, and correcting moisture sources.
Q: If I hire a pro, what should I ask for?
Ask whether they will assess moisture causes, describe containment practices, and explain how they’ll handle duct material types and disposal.
Q: Does professional duct cleaning always solve vent mold?Not if the moisture source continues; duct cleaning helps, but long-term results require controlling humidity/condensation and fixing leaks or ventilation faults.
Regularly cleaning and disinfecting vent components—while addressing the moisture cause—is the fastest way to stop mold from spreading and coming back. After you clean, monitor indoor humidity, recheck the vents periodically, and keep the system dry and well-ventilated; if the problem persists or expands across multiple vents, schedule a professional HVAC and moisture assessment to prevent repeated remediation.
Frequently Asked Questions
How do I clean mold out of air vents safely?
Start by turning off the HVAC system and wearing gloves, a mask (preferably N95), and eye protection to avoid inhaling spores. Use a vacuum with a HEPA filter to remove loose debris from the vent and surrounding grille before applying any cleaner. Wipe the vent cover with an appropriate mold cleaner, then fully dry surfaces to prevent moisture from feeding mold. If the mold is widespread inside the ductwork or you smell a strong musty odor, consider professional mold remediation.
What’s the best way to remove mold from HVAC vent grilles and registers?
Remove the vent covers (if accessible) and wash them with hot water and detergent to remove surface mold and dust first. After cleaning, disinfect with a mold-specific cleaner or a solution recommended for HVAC-safe surfaces, following the product label directions. Scrub crevices thoroughly using a brush or microfiber cloth, then rinse and dry completely before reinstalling. For persistent staining, repeat cleaning and ensure the area is not staying damp.
Why does mold keep coming back in my vents after I clean them?
Mold returns when moisture sources remain, such as leaks from HVAC condensate lines, high indoor humidity, poor ventilation, or duct condensation. Check for water damage around vents, rusting metal, wet insulation, or signs of condensation on ducts. Use a hygrometer to keep indoor relative humidity ideally between 30–50%, and fix the underlying issue (like HVAC drainage problems or air leaks) to stop recurring mold. Regularly cleaning vent surfaces helps, but controlling moisture is key to long-term prevention.
How can I clean mold from vents without spreading spores through the house?
Before you begin, close nearby doors, turn off the HVAC fan, and seal off the work area with plastic sheeting if possible. Use HEPA-filter vacuuming to capture spores rather than dry sweeping, and clean from top to bottom to minimize re-aerosolization. Keep cleaning cloths and wipes in sealed bags, and avoid high-pressure spraying that can push mold deeper into vents. Afterward, run the HVAC system only after the area is dry and you’ve reinstalled components properly.
Which cleaning products are safest and most effective for mold in vents?
Look for mold cleaners labeled safe for HVAC surfaces, or use detergent plus a disinfectant/mold treatment specified for non-porous materials like metal vent grilles. Avoid mixing chemicals (for example, bleach with ammonia or acids), and don’t rely on bleach alone if the vent material is delicate or if mold has spread into porous duct insulation. Always follow label contact times and ventilation guidance, and rinse when required. If you suspect mold inside flexible ducts or on porous insulation, it may require targeted duct cleaning or professional help.
📅 Last Updated: September 18, 2026 | Topic: how to clean mold out of vents | Content verified for accuracy and freshness.
References
- https://www.cdc.gov/mold/default.htm
https://www.cdc.gov/mold/default.htm - https://www.epa.gov/mold/mold-cleanup-your-home
https://www.epa.gov/mold/mold-cleanup-your-home - https://www.epa.gov/indoor-air-quality-iaq/should-you-have-air-ducts-cleaned
https://www.epa.gov/indoor-air-quality-iaq/should-you-have-air-ducts-cleaned - https://www.epa.gov/sites/production/files/2015-08/documents/mold_remediation_in_schools_and_commercial_buildings.pdf
https://www.epa.gov/sites/production/files/2015-08/documents/mold_remediation_in_schools_and_commercial_buildings.pdf - https://www.who.int/news-room/fact-sheets/detail/dampness-and-mould
https://www.who.int/news-room/fact-sheets/detail/dampness-and-mould - https://www.cdc.gov/niosh/topics/mold/
https://www.cdc.gov/niosh/topics/mold/ - https://www.nyc.gov/site/doh/health/health-topics/mold.page
https://www.nyc.gov/site/doh/health/health-topics/mold.page - https://pubmed.ncbi.nlm.nih.gov/?term=mold+remediation+air+ducts
https://pubmed.ncbi.nlm.nih.gov/?term=mold+remediation+air+ducts - https://scholar.google.com/scholar?q=mold+in+air+ducts+cleaning Google Scholar
https://scholar.google.com/scholar?q=mold+in+air+ducts+cleaning - https://scholar.google.com/scholar?q=hvac+duct+mold+remediation+guidelines Google Scholar
https://scholar.google.com/scholar?q=hvac+duct+mold+remediation+guidelines
