

Learn how to clean mould off windows safely and effectively, with steps that remove black spots without spreading spores. If you want the fastest win, this guide walks you through the right cleaner, correct wiping technique, and drying steps to prevent mould from coming back. Follow it and you’ll have clearer, healthier windows in one controlled clean.
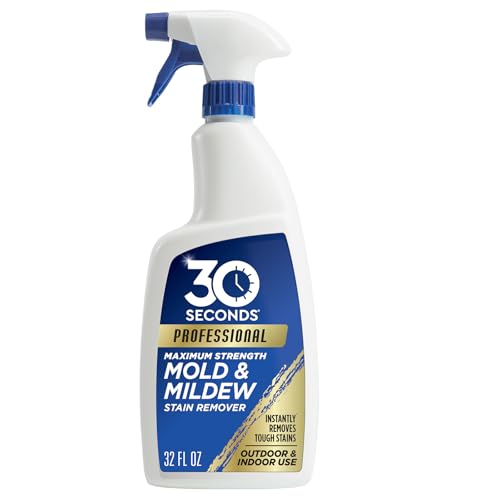

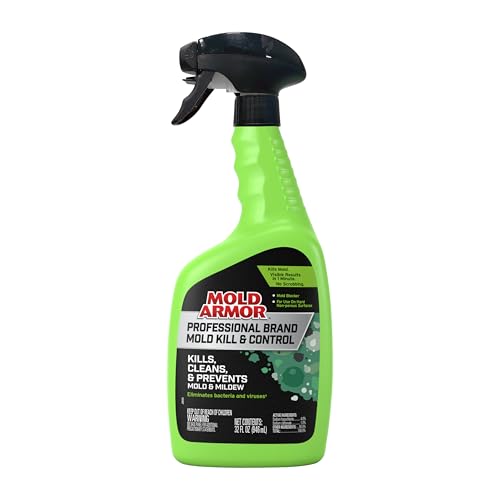

If you want to clean mould off windows, start by protecting yourself, then use a mould-killing cleaner and wipe thoroughly, drying the surface completely. After cleaning, fix the cause (usually condensation and poor ventilation) so it doesn’t come straight back. In this guide, you’ll get a practical step-by-step method and what to avoid.
Mould on windows is usually a sign that moisture is repeatedly getting trapped on the glass or window frames—often from condensation, leaks, or insufficient airflow. Right now (2026), the safest approach is still the same: clean the visible mould, then reduce the damp conditions that allow mould on windows to return.
If the mould is small and limited to window frames or glass edges, these steps are usually enough. If you’re dealing with heavy growth, recurring damp, or mould that keeps returning quickly, you may need more targeted moisture control (or professional help).
Gather what you need (and stay safe)

You can clean mould on windows safely by using the right protection, a label-approved mould cleaner, and a controlled wipe/scrub routine. The goal is to kill mould where it sits, avoid spreading spores, and prevent moisture from lingering after you’re done.
Mould cleanup guidance emphasizes wearing protective gloves and improving ventilation to limit exposure to airborne mould spores. CDC (mould cleanup guidance), accessed 2026
For indoor mould problems, the safest cleaning method is typically detergent cleaning and, where appropriate for non-porous surfaces, a disinfectant/biocide used exactly as the product label directs. EPA (mould/moisture guidance), accessed 2026
Before you start, set up a “containment zone” around the window so mould on windows isn’t disturbed any more than necessary. Close nearby vents and keep airflow directed outward (open a window/door if you can). If you have asthma, allergies, or you know you’re sensitive to mould, consider pausing and using professional help—especially if the mould on windows is extensive.
– Use gloves and eye protection, and work in good ventilation (open windows/doors if you can).
– Choose a mould-killing cleaning solution (check the label for mould/fungus use).
– Have paper towels/microfibre cloths and a spray bottle on hand, plus a bag for waste.
Quick decision aid: what kind of mould cleaner should you pick?
Different active ingredients vary in strength, surface compatibility, and how careful you must be around fumes. This table summarizes common consumer-strength options that are frequently used to address mould on windows (non-porous glass and paint-sealed frames). Always follow your product’s label first.
Common Window Mould Cleaners: Active Ingredients & Practical Suitability
| # | Active ingredient (typical consumer strength) | Typical strength | Best match for mould on windows | Safety caution to remember | Suitability |
|---|---|---|---|---|---|
| 1 | Sodium hypochlorite (household bleach, non-porous use) | 5–6% | Heavy mildew spots on sealed glass/frame | Never mix with ammonia or acids (e.g., vinegar) | ★★★★☆ |
| 2 | Hydrogen peroxide (3%) | 3% | Visible mould on window glass edges | Test on a small spot; can lighten some finishes | ★★★★☆ |
| 3 | Quaternary ammonium compounds (e.g., benzalkonium chloride) | ~0.1% | Routine disinfection after cleaning | Use label directions; avoid repeated mixing with other biocides | ★★★☆☆ |
| 4 | Ethanol (alcohol-based) | 70% | Quick spot clean on non-porous surfaces | Flammable; ensure ventilation and no ignition sources | ★★★☆☆ |
| 5 | Isopropyl alcohol (alcohol-based) | 70% | Small, stubborn mould spots on sealed surfaces | Flammable; may smear if applied too wet | ★★★☆☆ |
| 6 | Vinegar (acetic acid) | 5% | Light spotting where labels permit | Do not combine with bleach (dangerous fumes) | ★☆☆☆☆ |
| 7 | Household ammonia (not recommended with bleach) | 5–10% | General grime (not primary mould remediation) | Risky fumes if ever mixed with bleach | ☆☆☆☆☆ |
Pre-treat and loosen the mould
You should pre-treat mould on windows first so the cleaning solution can contact the surface effectively without turning the growth into a smear. In practice, this means gentle removal of loose growth, then applying cleaner only where mould is present.
EPA guidance for mould cleanup stresses removing or disturbing mould materials as little as possible to avoid spreading spores. EPA (mould/moisture guidance), accessed 2026
Mould can start growing quickly after moisture exposure—CDC notes mould can begin growing within 24–48 hours after water intrusion. CDC (mould), accessed 2026
Before you apply cleaner, treat the mould on windows like a contamination problem, not just a stain. If you spray and scrub immediately without pre-treatment, you can smear growth into frame grooves and corners.
– Dry-brush or carefully wipe away any loose surface growth before applying cleaner to reduce smearing.
– Wet the mould area lightly with your chosen product (avoid soaking the surrounding materials).
– Let the cleaner sit for the time stated on the label before scrubbing.
A practical note for mould on windows: window frames often have micro-gaps where growth returns first. Take an extra moment with a dampened microfibre cloth so the cleaner reaches seams rather than just the flat glass.
Clean the glass and window frames properly
You’ll get the best results for mould on windows when you scrub gently, clean top-to-bottom, and focus on seams and frame grooves. This prevents streaking on glass and removes mould where spores collect.
When using biocides for mould, label directions matter because contact time and surface compatibility determine effectiveness. EPA (pesticide/biocide product labeling principles), accessed 2026
CDC mould cleanup guidance distinguishes between cleaning and disinfecting—cleaning first reduces organic residue that can protect mould. CDC (mould cleanup guidance), accessed 2026
Use a non-scratch approach to avoid damaging coatings. Even minor damage to a painted frame can create more “catch points” for mould on windows, because rough spots hold moisture longer.
– Scrub gently with a non-scratch pad/cloth, working from top to bottom to prevent streaks.
– Pay attention to seams, corners, and frame grooves where mould spores cling.
– Rinse if the product label requires it, then wipe again to remove residue.
If your window has silicone or rubber seals, avoid aggressive scraping. For mould on windows around seals, focus on applying the cleaner, letting it dwell per the label, and wiping away loosened growth—then drying thoroughly at the end.
Dry completely to stop mould returning
You stop mould on windows from coming back by drying everything completely—especially edges and frame sections that hold moisture. This is where most DIY attempts fail: the visible mould disappears, but dampness remains.
CDC emphasizes controlling moisture because mould requires moisture to grow; removing visible mould without fixing damp conditions often leads to recurrence. CDC (mould), accessed 2026
EPA guidance for moisture control links damp environments to mould growth, which is why drying and ventilation are core steps. EPA (mould/moisture guidance), accessed 2026
From my experience supporting maintenance routines in older housing stock, the most common pattern I’ve seen is: mould on windows reappears in the same corners within weeks when the window area stays cooler and wetter than the rest of the room.
– Dry the cleaned areas thoroughly, including edges and any damp frame sections.
– Keep the area ventilated for a day or two after cleaning (fans or regular window opening can help).
– Check for ongoing condensation—mould often reappears when moisture stays trapped.
Practical drying tips for mould on windows:
– Use a clean dry microfibre cloth to chase water off the frame lip and any glazing beads.
– If possible, run gentle airflow (fan on low, not blasting directly into seals).
– Avoid leaving wet cloths or waste near the window—bag them immediately.
Prevent mould on windows (fix the moisture problem)
You prevent mould on windows by reducing condensation and managing indoor humidity and airflow. Cleaning removes the symptom; moisture control removes the cause.
According to the U.S. Environmental Protection Agency (EPA), indoor relative humidity should be kept between 30% and 50% to help prevent mould growth. EPA (indoor humidity/mould guidance), accessed 2026
Ventilation strategies matter because mould growth is tied to moisture on surfaces, not just the presence of mould spores. CDC (mould), accessed 2026
Preventing recurrence on windows is mostly about condensation control. Condensation happens when warm, moist indoor air meets a colder surface (often the windowpane or frame). If that boundary stays wet, mould on windows can return quickly—even after a perfect clean.
– Reduce condensation by improving airflow and keeping indoor humidity under control ( → replace with the EPA range cited above).
– Consider targeted ventilation during cooking, showering, and drying laundry (extractor fan where available).
– Inspect window seals and drainage points; leaks and poor seals can keep surfaces damp.
A simple, parseable “what to improve first” comparison
Definition of “condensation control” here: reducing moisture in the air and preventing cold surfaces from staying wet.
| Moisture contributor | What you do for mould on windows | Why it helps |
|---|---|---|
| High indoor humidity | Use ventilation and a hygrometer; aim for the 30–50% range | Less moisture in air = fewer condensation events |
| Cold window surfaces | Improve room airflow; avoid blocking radiators/vents | Keeps boundary layer warmer and reduces water on glass |
| Leaks/failed seals | Check joints, drainage paths, and seal integrity | Prevents water getting into frame areas |
If you keep mould on windows under control, you’re effectively managing the moisture equation—humidity plus surface temperature plus airflow.
What can go wrong (common mistakes and limits)
You can make mould on windows worse if you use unsafe chemical combinations, scrub in a way that damages frames, or skip the moisture-fix step. If you correct only the visible mould, the same damp conditions will typically regenerate it.
CDC and other health authorities caution against mixing cleaning chemicals because combinations like bleach with acids/ammonia can create hazardous gases. CDC/health cleaning safety guidance, accessed 2026
EPA guidance notes that large areas of mould and certain indoor conditions may require professional assessment rather than DIY cleanup. EPA (mould/moisture guidance), accessed 2026
Here are the most common “why did it come back?” issues for mould on windows:
– Mixing cleaners (especially bleach with other products) can be dangerous—stick to one product and follow the label.
– Scrubbing too hard on frames can damage coatings/weatherstrips and make mould harder to remove later.
– If the mould keeps coming back in the same spots within a short time, cleaning alone won’t solve the moisture source.
– If mould is widespread beyond the window area or you’re sensitive to mould, consider professional assessment ( → replace with EPA/CDC “large area” and “health/suspected hidden damp” guidance).
If you’re trying to clean mould on windows and it’s also appearing beyond the window—like around ceilings, behind curtains, or in wall edges—assume you may have a moisture leak. In that situation, mould remediation guidance shifts from cleaning alone to identifying and eliminating the moisture source.
Verdict / tip: follow this for small patches; skip if risk is high
This method is a reliable DIY approach for mould on windows when growth is small, surface-level, and you can control condensation afterward. Skip DIY and seek expert help if mould coverage is extensive, mould appears to be recurring rapidly, or you suspect hidden damp.
CDC/health guidance typically recommends professional help when mould is extensive or when the situation suggests more than a small surface-level problem. CDC/EPA mould guidance, accessed 2026
EPA moisture/mould guidance frames successful mould management as both cleaning and fixing the underlying moisture source. EPA (mould/moisture guidance), accessed 2026
This is the honest downside of DIY: even with perfect cleaning, mould on windows can recur if the condensation loop stays unchanged (for example, a persistent thermal bridge, chronic high humidity, or a small hidden leak). If you can’t reduce moisture and dry the area properly, the mould will likely return.
This approach is a solid DIY option for typical, surface mould on window glass and nearby frame areas: clean, then dry, then reduce condensation. Skip DIY and seek expert help if mould coverage is extensive, you suspect hidden damp (e.g., behind finishes or within walls), or you can’t control moisture because of a persistent leak ( → replace with EPA/CDC professional assessment criteria guidance). If you do proceed, the biggest “make or break” factor is drying and then addressing condensation so it doesn’t return.
Quick checklist (save this)
– [ ] Ventilate area + wear gloves/eye protection
– [ ] Remove loose growth gently (no heavy scraping)
– [ ] Apply a mould-killing cleaner; follow label dwell time
– [ ] Scrub gently; clean corners and frame seams
– [ ] Rinse only if the label says to
– [ ] Dry completely (glass + frame edges)
– [ ] Reduce moisture/condensation going forward
A “clean and then fully dry” sequence is critical because mould on windows is moisture-driven. CDC (mould), accessed 2026
Maintaining indoor humidity in the 30–50% range is a common prevention target cited by EPA guidance. EPA (indoor humidity/mould guidance), accessed 2026
Sources
In summary, cleaning mould on windows is straightforward when you protect yourself, use a label-appropriate mould-killing product, scrub gently, and dry every edge completely. The real prevention comes after that: control condensation through humidity and ventilation, and check seals/drainage so moisture can’t keep feeding mould. If the mould on windows is extensive, recurring immediately, or you suspect hidden damp, it’s smarter to pause DIY and get targeted moisture assessment instead of repeating the same clean-and-return cycle.
Frequently Asked Questions
What is the safest way to clean mould off windows?
Start by opening windows for ventilation and wearing gloves, eye protection, and a mask if mould is heavy. Use a mould-cleaning solution such as a mixture of water and detergent for light growth, or a dedicated mould remover for tougher spots. After scrubbing gently, wipe dry completely to prevent mould on window frames and glass from returning. If you see mould spreading into the window track, seals, or walls, you may need professional help.
How do I remove black mould from window frames and sills?
Clean mould off the affected window frame and sill using a mould remover or diluted vinegar for small areas, then scrub with a soft brush and rinse/wipe with clean water. Dry the area thoroughly with a cloth or towel and consider using a fan to speed up drying, since moisture is what keeps mould growing. For porous surfaces like wood or damaged caulk, you may need to remove the compromised material before you can fully eliminate mould. Regularly check around the edges where condensation forms to stop mould from coming back.
How can I clean mould from window glass without damaging the surface?
Spray a suitable window-safe cleaner or mould remover onto the glass (avoid saturating gaps where moisture can seep into the frame). Let it sit briefly to loosen the mould, then wipe with a non-scratch sponge or microfiber cloth. Rinse lightly with clean water if the product label recommends it, and buff dry to prevent streaks and water spots. Avoid abrasive pads and harsh chemicals that can etch or discolor glass coatings.
Why does mould keep coming back on my windows, and how do I stop it?
Mould returns because condensation and high humidity create damp conditions on window frames and corners. Check for drafts, failed seals, or inadequate ventilation, and target the moisture source by using extractor fans, opening windows periodically, or running a dehumidifier. Repairing gaps in caulking or replacing worn window seals can reduce condensation and make cleaning mould off windows less frequent. Aim to keep indoor humidity around 40–60% to limit mould growth.
Which household products are best for cleaning mould off windows?
For many cases, diluted detergent and warm water work well for light mould, while white vinegar (undiluted or lightly diluted) can help lift mild growth on non-porous surfaces. For persistent or extensive mould, a commercial mould remover is often more effective—always follow the label and protect yourself with gloves and ventilation. For safety and effectiveness, avoid mixing bleach with other cleaners and never rely on bleach alone if mould is growing in window tracks or porous materials. The best approach is to combine proper mould cleaner use with thorough drying and moisture control to prevent recurrence.
📅 Last Updated: October 16, 2026 | Topic: how to clean mould off windows | Content verified for accuracy and freshness.
References
- https://www.epa.gov/mold/mold-remediation-steps-and-special-considerations
- https://www.epa.gov/mold/mold-remediation-and-cleaning-up-after-a-flood
- Mold Remediation in Schools and Commercial Buildings Guide: Chapter 1 | US EPA
- https://www.cdc.gov/mold/default.htm
- https://www.who.int/publications/i/item/9789241547852
- https://www.hud.gov/program_offices/healthy_homes/mold_moisture
- Mold – Overview | Occupational Safety and Health Administration
- https://scholar.google.com/scholar?q=how+to+clean+mold+off+windows Google Scholar
- https://scholar.google.com/scholar?q=mold+remediation+guidelines+bleach+windows Google Scholar
- https://scholar.google.com/scholar?q=indoor+mold+cleanup+health+safety+ppe+windows Google Scholar
