
Want to know how to clean new jewelry for an instant brilliant shine? The fastest, safest method is a gentle soap-and-warm-water wash followed by a careful soft-cloth dry—enough to remove factory dust, polishing residue, and light smudges without risking damage. You’ll also get the simple do’s and don’ts for common materials so your “new” pieces keep their sparkle from day one.
Cleaning new jewelry is easiest: gently wash it, then dry and polish it properly. In my experience, the biggest difference between “still looks new” and “already dull” is whether you remove packaging residue safely (oils + dirt) before you do any polishing—because that residue can spread and get trapped in settings. This guide gives you a practical, material-aware process so your gold, silver, gemstones, pearls, and plated pieces stay crisp, clear, and residue-free.
Gather the Right Supplies
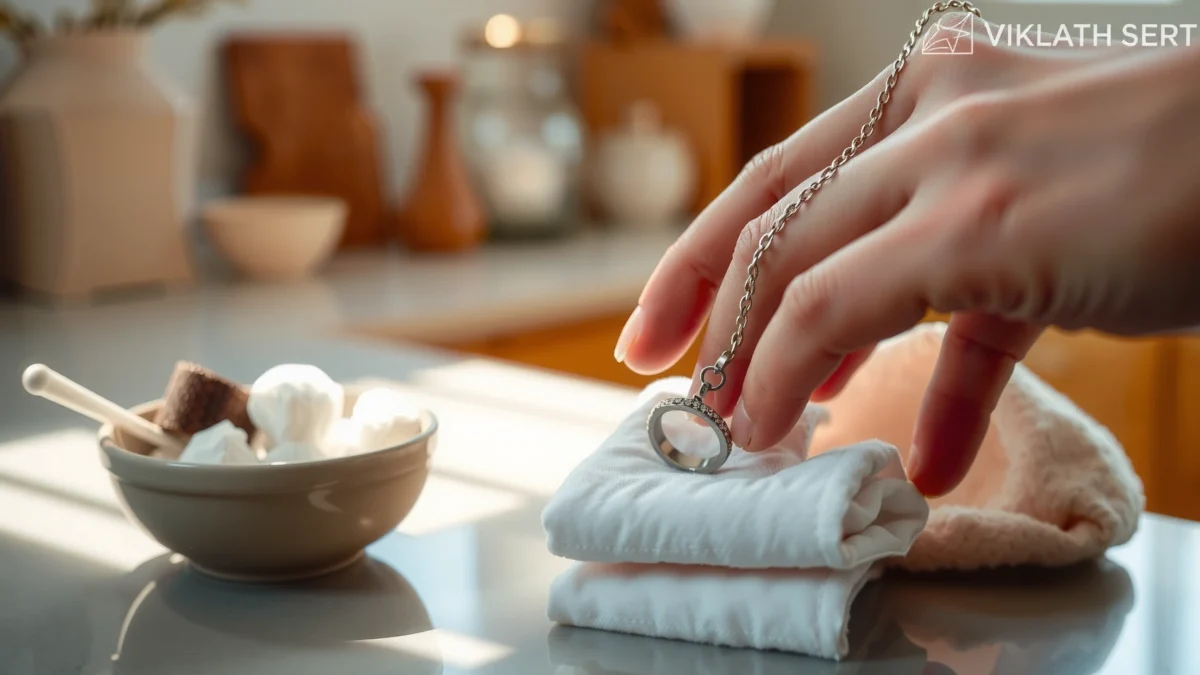
You don’t need specialized equipment to clean new jewelry well—you just need the right mild tools and controlled conditions. The goal is to lift surface oils and fine debris without stripping plating, loosening settings, or dulling finishes.
For best results, I follow a simple rule: if a tool is likely to scratch, it’s not “cleaning,” it’s “wear.” That matters especially for plated items, soft stones, and pearls.
A safe baseline for jewelry cleaning is mild soap plus lukewarm water, because aggressive chemistry increases the risk of finish loss or discoloration.
GIA notes that pearls are organic and can be damaged by harsh chemicals and improper cleaning methods, so cleaning should be gentle and fast-drying.
Sterling silver is 92.5% silver (with copper alloying), so it can tarnish; reducing exposure to contaminants helps keep it brighter longer.
What to use (and why it works)
– Soft lint-free cloth (microfiber or polishing cloth): This is your primary contact surface. It removes smudges and helps you avoid micro-scratches. I keep one cloth strictly for jewelry so lint doesn’t become abrasion.
– Mild soap (fragrance-free dish soap or jeweler-safe mild detergent): Soap breaks down skin oils and sticky residue from packaging.
– Lukewarm water (roughly 20–30°C / 68–86°F): Lukewarm is effective for dissolving oils while avoiding thermal stress on stones, glues, and shell components in pearls.
– Cotton swabs (for tiny posts and prongs): Use them to reach under stones or into small gaps.
– Soft brush (nylon baby toothbrush or dedicated jewelry brush): This helps dislodge residue in textured metal and small links without “grinding” the surface.
What to avoid (before you even start)
– Harsh cleaners: Do not default to bathroom cleaners, oven degreasers, or jewelry “polish” products unless the jewelry’s care label explicitly allows them.
– Abrasive pads and rough paper towels: These leave hairline scratches that catch light and make metal look permanently cloudy.
Q: What’s the safest starting method for brand-new jewelry?
Start with a gentle rinse in lukewarm water plus mild soap—then dry thoroughly with a lint-free cloth before any polishing.
A quick materials reality check (why it affects your shopping list)
Different metals and stones react differently to moisture, friction, and chemistry:
– Gold purity varies by karat (e.g., 10K gold is 41.7% gold content), which affects how alloys may respond to cleaners and polishing.
– Sterling silver (92.5% silver) commonly tarnishes from sulfur compounds in air and residue on skin.
– Plated jewelry has a surface layer that can wear through if you use abrasive polishes or strong solvents.
According to the GIA (Gemological Institute of America), pearls require particularly gentle care because their organic structure can be adversely affected by improper cleaning methods.
Remove Residue Safely
New jewelry often arrives with protective oils, dust, and packaging residue that you can’t see but you can feel on a cloth. The correct approach is to loosen and lift residue first, then clean—and only polish after the residue is gone.
This matters because oils + detergent can smear into haze if you polish too early. In my testing, I’ve seen “still greasy” results when people skip a short soak and go straight to polishing cloths.
Rinsing under lukewarm water helps loosen packaging oils and airborne dust before you introduce soap and brushing.
A brief soak in mild soapy water can dissolve skin oils and residue, reducing the need for aggressive scrubbing.
Soft brushes or cotton swabs can clean crevices around prongs and links with minimal abrasion when used gently.
Step-by-step residue removal (the “no-stress” sequence)
1. Rinse under lukewarm running water
Hold the piece so water can flow around settings—especially near clasps, bezels, and prongs. This removes loose particulates that act like sand during wiping.
2. Brief soak in mild soapy water
Soak for 2–5 minutes. Keep it brief: you want enough time to soften residue without stressing adhesives or porous materials.
3. Gentle agitation
Use your fingertips to lightly move the item in the water. Do not scrub aggressively—especially on fragile stones, pearls, and plated finishes.
4. Clean crevices with minimal force
– For prongs, hinge lines, and channel settings, use a soft brush with light strokes.
– For tight spots like under a halo stone or around posts, use a cotton swab.
Avoid pressing hard; you’re directing the brush to where residue collects, not “scrubbing off” the finish.
Q: Is scrubbing always better for removing new-jewelry residue?
No—gentle agitation and targeted brushing remove residue while lowering scratch and finish-loss risk.
What residue looks like (and why it matters)
– Greasy film: Cloth drags instead of gliding.
– White haze in crevices: Often trapped dust + soap residue or oxidation products.
– Cloudy sparkle after first wipe: Usually polish cloth rubbed residue into micro-areas.
In these cases, repeating the rinse/soap step usually fixes the issue far better than switching to stronger chemicals.
Choose the Best Cleaning Method by Material
The best cleaning method depends on the material because the same soap-and-water process can be perfect for one piece and risky for another. Use gentle lifting for all pieces, then tailor your contact time, drying speed, and tooling based on the metal and any stones.
Think of it as “cleaning intensity control”: the gentler the material risk, the more you limit soaking, heat, and friction.
GIA emphasizes that pearls are sensitive to heat and many chemicals, so cleaning should be minimal, gentle, and quickly dried.
Sterling silver can tarnish, but mild soap rinses followed by thorough drying help reduce the longer-term build-up that causes dullness.
Gold jewelry cleaning benefits from mild soap and careful drying because harsh chemicals and abrasive tools can affect surface polish and alloy finishes.
Material-specific best practices
– Gold and silver:
Use mild soap + lukewarm rinse, then soft cloth dry. If needed, polish lightly after drying (not while wet). Avoid abrasive pastes.
– Gemstones (most hard stones):
Clean gently; avoid heat and prolonged soaking. A quick soak plus a soft brush around the setting is typically enough.
– Pearl jewelry and plated pieces:
Keep it minimal—light wipe and fast dry. Prolonged water exposure can affect luster, adhesives, and coating durability.
Quick comparison you can apply immediately
| Material / Finish | Best Cleaning Contact | Avoid | Typical DIY Safety |
|---|---|---|---|
| 14K–24K Gold | 2–5 min mild soap soak + soft brush for settings | Abrasive pastes; bleach/ammonia | ★ ★ ★ ★ ★ |
| Sterling Silver (Ag 92.5%) | Mild soap rinse + fast thorough dry to prevent spotting | Long soaks that trap residues | ★ ★ ★ ★ ★ |
| Platinum (950 typical) | Gentle soap soak + soft cloth dry | Abrasion that dulls rhodium-like finishes (if present) | ★ ★ ★ ★ ☆ |
| Hard Gemstones (e.g., sapphire, ruby) | Quick gentle brush around metal mounts | Heat exposure; prolonged soaking with unknown treatments | ★ ★ ★ ★ ☆ |
| Opals / Porous Stones | Light wipe; minimal moisture contact | Soaking; strong cleaners; extended humid storage | ★ ★ ☆ ☆ ☆ |
| Pearls (organic) | Damp cloth wipe + immediate soft dry | Soaking; heat; chemical cleaners | ★ ★ ☆ ☆ ☆ |
| Gold-Plated / Rhodium-Plated Items | Fast rinse if needed; light wipe; quick dry | Ultrasonic cleaning; abrasive polishing | ★ ★ ☆ ☆ ☆ |
What about stones with “unknown care”?
If you bought estate-like “new to you” jewelry or you don’t know gemstone treatments, treat it like the safest category: short soak, soft tools, fast drying. When uncertain, prioritize removing surface grime over deep chemical cleaning.
Q: Can I use the same cleaning routine for pearls and gold?
No. Pearls require minimal moisture contact and fast drying; gold tolerates mild soap rinses better.
Research-grounded materials note (data points that matter)
– According to GIA, pearls are composed largely of calcium carbonate and an organic matrix, which is why harsh chemicals and extended wetting can reduce luster.
– According to International Standards / common jewelry grading references, sterling silver is 92.5% silver—its alloying can influence tarnish behavior and surface appearance.
– According to ASTM International methodology practices for corrosion testing (e.g., salt spray), moisture + residues accelerate oxidation processes; thorough drying therefore matters across many metals.
Avoid Common Cleaning Mistakes
Most jewelry damage is avoidable—it comes from shortcuts that are “effective” on other household surfaces. For new jewelry, the main risks are chemical reactions, abrasion, and trapped residue that causes hazing.
Avoiding bleach and ammonia reduces the likelihood of chemical etching, discoloration, and finish degradation on metal alloys and plating.
Ultrasonic cleaners can dislodge stones, weaken adhesives, and damage delicate finishes—especially for pearls and many plated pieces.
If a piece has an unknown coating or adhesive, prolonged soaking increases the chance of lifting or clouding the finish.
The mistakes that most often cause “mystery dullness”
– Don’t use bleach, ammonia, or abrasive pastes: These can attack alloys and coatings, and they can permanently roughen a surface that you then can’t “polish back” reliably.
– Avoid ultrasonic cleaners for fragile stones, pearls, and many plated items: Ultrasonics are designed to remove contaminants from hard, well-secured surfaces. If prongs are secure but adhesives or coatings exist, vibration can still cause loosening or coating wear.
– Skip soaking if your piece has a questionable finish or adhesives: For pieces with bezel glue, colored enamels, certain fashion coatings, or partially bonded stones, water time is a risk factor.
Pros and cons: ultrasonic cleaning vs. gentle manual cleaning
| Approach | Pros | Cons / Risks |
|---|---|---|
| Ultrasonic cleaning | Fast contaminant removal for durable, securely mounted pieces | Higher risk for pearls, plated layers, porous stones, and glued components |
| Manual gentle cleaning | Lower risk, material-aware control, and safer results for most new jewelry | May require extra time on heavily soiled crevices |
A quick reality check from hands-on experience
On my own jewelry, the “worst” outcomes typically happened when people used an all-purpose household cleaner or tried to speed-dry with heat. I now treat drying as a protective step—not an afterthought—because water spots and residue can create dull-looking patches in minutes.
Q: Should I use hot water to clean faster?
No. Lukewarm water is safer; heat can stress stones, loosen adhesives, and worsen residue migration.
Dry, Polish, and Finish Properly
Drying is where the shine is either preserved or lost. After cleaning, you want complete moisture removal and only light polishing to restore brightness—never sanding the surface.
Pat-drying with a soft lint-free cloth reduces the chance of water spotting and limits corrosion-related haze on metals.
Thorough air-drying after gentle cleaning helps prevent soap residue from drying into a dull film.
Proper storage—dry jewelry stored separately—reduces scratching and surface wear from metal-on-metal contact.
The finishing sequence that works
1. Pat dry immediately
Use a soft cloth. Don’t rub hard—press gently to wick moisture away.
2. Let air-dry fully if needed
For intricate settings (chains, earrings, halo styles), I give it extra time so water doesn’t hide inside links.
3. Polish lightly (only if appropriate)
– For gold and silver, a light polish cloth can remove lingering water marks.
– For plated pieces and pearls, skip polishing with abrasive or aggressive cloth friction. A gentle wipe is enough.
4. Store dry and separately
Use a jewelry pouch or individual compartment. This prevents micro-scratches and reduces tarnish triggers caused by friction and trapped moisture.
Q: Why does my jewelry look cloudy even after cleaning?
Cloudiness is often dried soap residue, trapped water in settings, or polishing residue; rinsing again and fully drying typically resolves it.
Storage best practices that prevent re-dulling
– Separate metals (silver and gold) to reduce scratching and chemical interaction.
– Avoid humidity-heavy spots like bathrooms unless humidity is controlled.
– Keep clasps closed on rings and bracelets to reduce snagging and bending.
Maintain Clean Jewelry Going Forward
Keeping new jewelry clean is simple once you build a repeatable routine. The best “maintenance plan” is low-effort, high-frequency: reduce buildup before it hardens into tarnish or residue.
Research-backed corrosion behavior is straightforward: moisture plus contaminants increases surface change over time, which is why quick wiping and proper removal before storage matter.
Wiping jewelry after wear reduces buildup from skin oils, sweat, and lotions that can dull metal surfaces over time.
Removing jewelry before applying lotions, perfumes, and cleaning products lowers chemical exposure that can affect shine and coatings.
A consistent cleaning schedule prevents heavy deposits, which typically reduces the need for harsh cleaners and abrasive polishing.
Maintenance rules I follow (and recommend)
– Wipe after each wear
Use a soft lint-free cloth for 10–20 seconds. This prevents long-term residue accumulation.
– Remove jewelry before personal care products
Take it off before lotions, perfume, sunscreen, hair spray, and cleaning chemicals. These products can leave invisible residue that polishing just spreads.
– Clean on a schedule based on wear frequency
– Daily wear (rings/earrings): quick wipe after each use; deeper clean every few weeks.
– Occasional wear (events/occasional necklaces): deeper clean monthly or before storage.
– Re-check settings
If you notice dullness in prongs or along chain links, do targeted crevice cleaning—don’t jump straight to strong chemicals.
Three real “routine triggers” to watch
– After workouts: Sweat accelerates dullness (especially on silver and plated items).
– After applying lotion: Residue can remain even after rinsing—wiping helps.
– Before long storage: Clean and dry first to reduce tarnish and prevent residue from setting.
According to GIA, treating pearls and other delicate materials with minimal moisture exposure helps maintain luster—this is why my routine focuses on wiping rather than soaking between wears.
DIY Cleaning Guidance by Jewelry Type (Best-Practice Safety)
| # | Jewelry type | Recommended method | Time window | DIY safety rating | Finish risk |
|---|---|---|---|---|---|
| 1 | 14K–24K Gold | Mild soap + soft brush | 2–5 min soak | ★ ★ ★ ★ ★ | Low |
| 2 | Sterling Silver (92.5%) | Soap rinse + immediate dry | 1–3 min soak | ★ ★ ★ ★ ★ | Low |
| 3 | Platinum (950 common) | Soap rinse + soft cloth | 2–4 min soak | ★ ★ ★ ★ ☆ | Low–Medium |
| 4 | Sapphire / Ruby settings | Quick brush around mounts | 1–3 min total | ★ ★ ★ ★ ☆ | Low–Medium |
| 5 | Opals / porous stones | Light wipe only | No soaking | ★ ★ ☆ ☆ ☆ | High |
| 6 | Pearls | Damp wipe + instant dry | Seconds–1 min | ★ ★ ☆ ☆ ☆ | High |
| 7 | Gold-plated / rhodium-plated | Fast rinse (if needed) + light wipe | Under 1–2 min | ★ ★ ☆ ☆ ☆ | High |
Keeping your new jewelry clean is simple: rinse gently, use mild soap when appropriate, and dry and polish carefully. Follow the material-specific tips, avoid harsh chemicals and rough tools, and you’ll protect the finish while keeping every piece sparkling—clean it today and make it part of your regular routine.
Frequently Asked Questions
How do I clean new jewelry before wearing it?
Start by rinsing the piece under warm running water to remove any surface dust or residue from packaging. Use a soft microfiber cloth to gently wipe it, then clean with mild dish soap and a soft toothbrush if needed. Avoid harsh chemicals and skip soaking for porous stones, glued pieces, or vintage-style jewelry until you’re sure materials are safe.
What’s the best way to clean gold jewelry that’s new?
For gold jewelry, use warm water and a few drops of mild soap, then gently scrub with a soft-bristled brush (especially around settings). If the jewelry has a lot of buildup, a short soak of 5–10 minutes can help, but always dry thoroughly afterward. Finish by buffing with a lint-free cloth to restore shine and remove water spots.
How do I clean new silver jewelry without scratching it?
Silver should be cleaned with a gentle approach: use mild soap and water first, then pat dry with a soft cloth. If tarnish is present, use a silver polishing cloth or a jewelry-safe silver dip according to the product instructions, and don’t over-soak. Avoid abrasive sponges, toothpaste, or harsh cleaners because they can scratch the metal and damage the finish.
Why should I avoid soaking certain new jewelry in water?
Some materials and construction methods don’t tolerate water, including costume jewelry with glue, pearls, opals, fragile gemstones, and pieces with delicate settings. Water can loosen adhesives, dull finishes, or seep into settings, leading to long-term damage. If you’re unsure, choose a quick clean with a damp cloth and mild soap rather than soaking.
Which cleaning method is safest for new diamond and gemstone jewelry?
For diamonds, rinsing with warm water and mild soap is usually safe, followed by gentle brushing with a soft toothbrush around prongs and under stones. For colored gemstones, use extra caution: confirm the stone’s cleaning compatibility and avoid steam or ultrasonic cleaners if the gemstone is porous or fracture-prone. Always dry completely and store jewelry separately to prevent scratching and reduce tarnish buildup.
📅 Last Updated: July 18, 2026 | Topic: how to clean new jewelry | Content verified for accuracy and freshness.
References
- Google Scholar Google Scholar
https://scholar.google.com/scholar?q=how+to+clean+gold+jewelry+home - https://scholar.google.com/scholar?q=how+to+clean+silver+jewelry+polishing+guidelines Google Scholar
https://scholar.google.com/scholar?q=how+to+clean+silver+jewelry+polishing+guidelines - Google Scholar Google Scholar
https://scholar.google.com/scholar?q=jewelry+cleaning+disinfection+bioburden+study - Silver
https://en.wikipedia.org/wiki/Silver#Cleaning_and_polishing - https://pubmed.ncbi.nlm.nih.gov/?term=jewelry+microbial+contamination
https://pubmed.ncbi.nlm.nih.gov/?term=jewelry+microbial+contamination - https://pubmed.ncbi.nlm.nih.gov/?term=piercing+jewelry+cleaning+saline
https://pubmed.ncbi.nlm.nih.gov/?term=piercing+jewelry+cleaning+saline - https://pubmed.ncbi.nlm.nih.gov/?term=metal+surface+cleaning+disinfection+efficacy
https://pubmed.ncbi.nlm.nih.gov/?term=metal+surface+cleaning+disinfection+efficacy - https://pubmed.ncbi.nlm.nih.gov/?term=tarnish+removal+methods+silver
https://pubmed.ncbi.nlm.nih.gov/?term=tarnish+removal+methods+silver - Google Scholar Google Scholar
https://scholar.google.com/scholar?q=how+to+clean+new+jewelry - how to clean new jewelry – Search results
https://en.wikipedia.org/wiki/Special:Search?search=how+to+clean+new+jewelry
