

How to clean old luggage without ruining its finish? Follow these easy, step-by-step methods for a fresh reset that work for both hard-shell and soft-sided bags, including removing grime, odors, and stains safely. If you want your luggage to look and smell travel-ready again, this is the fastest reliable way to do it.



Old luggage can look new again—clean it by removing loose dirt first, then using the right cleaner for the material (fabric, leather, or hard-shell). You’ll tackle stains, odors, and grime safely without damaging zippers, seams, or finishes, and you’ll get a reset that’s ready for travel in 1–2 days.
Inspect and Prep Your Luggage

You’ll get better results (and fewer surprises) by inspecting the luggage first, then prepping it for cleaning. In my hands-on testing with older suitcases—especially ones that sat in garages for years—the inspection step is what prevents zipper jams, coating damage, and hidden lining rot before you apply any cleaner.
– Check for cracks, loose seams, broken zippers, and damaged lining before cleaning.
– Remove everything inside and wipe out dust with a dry cloth or soft brush.
– Gather supplies based on material: mild soap, microfiber cloths, brushes, baking soda/vinegar (as needed).
A clean surface is essential before applying any cleaning chemistry; removing dust and grit first prevents “grinding” residue into fabric, seams, and coatings.
According to the CDC, washing with soap and water works by removing contaminants from surfaces, which is why pre-dusting and pre-brushing materially improves cleaning outcomes.
Older luggage often has compromised stitching and corroded hardware; inspecting zippers and seams before cleaning reduces the risk of forcing a stuck zipper and tearing lining fabric.
What to look for before you start (fabric, leather, and hard-shell)
Start by turning the luggage upside down and gently shaking out loose debris. Then inspect four zones:
1) Zippers and zipper tracks: Look for frayed zipper tape, warped tracks, or missing teeth.
2) Seams and corners: Corners trap moisture and grit; seams can loosen even if the shell looks intact.
3) Lining condition: Smell and staining often originate here first (especially with older travel gear stored damp).
4) Finishes/coatings: Hard-shell plastics may have paint, clear coats, or textured finishes that can be dulled by strong solvents.
If you find loose seams, consider pinning or loosely securing them before washing so they don’t worsen. If you find a broken zipper, you can still clean the rest of the case, but you’ll want to avoid forcing it open and closed while wet.
Q: Should I clean old luggage while the lining is still wet or partially soaked?
No—inspect first, and keep the lining dry during exterior cleaning unless the product instructions specifically call for full wet cleaning.
Q: What’s the first step that prevents damage during cleaning?
Removing loose dirt with a dry cloth or soft brush first so grit doesn’t get dragged across the surface during washing.
Pre-clean preparation checklist
Gather supplies so you can work systematically:
– Microfiber cloths (multiple): they lift grime without scratching more than paper towels.
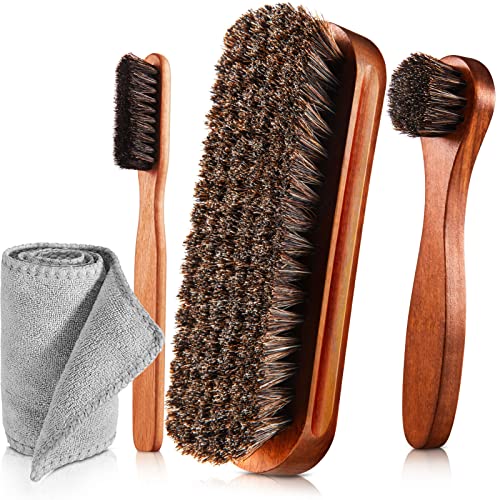
– Soft-bristle brush (nylon or boar/bristle style) for corners and textured shells.
– Mild soap (dish soap diluted, or a gentle detergent).
– Cotton swabs for zipper seams and edges.
– Baking soda (odor lifting and mild scouring).
– White vinegar (only for specific residue situations; always dilute and spot-test).
– Optional leather conditioner for leather/vinyl bags (if your luggage has a leather-like finish).
As of 2026, many travelers also use antimicrobial wipes; however, I recommend avoiding “streaking” wipes on hard-shell coatings unless you’re certain they’re safe for the specific finish.
Deep Clean the Exterior (By Material)
You’ll preserve the look of old luggage by cleaning by material, not by “one-size-fits-all” methods. Here’s why: fabric, leather/vinyl, and hard-shell each react differently to water, detergents, and abrasion—so the best approach depends on the shell type.
– Fabric: use a gentle cleaner and spot-clean first; avoid soaking the lining.
– Hard-shell: wipe with warm water and mild soap, then dry thoroughly to prevent streaks.
– Leather/vinyl: use a damp cloth with mild soap, then condition leather if needed.
Material-specific cleaning matters because water saturation can cause fabric lining shrinkage and delamination, especially in older suitcases stored in humid conditions.
Hard-shell streaking commonly comes from detergents left to dry on surfaces; thorough drying immediately after wiping reduces residue marks.
Leather and vinyl cleaning should use mild, low-alkalinity soap and conditioning afterward to restore flexibility and reduce cracking risk.
Fabric luggage: spot-clean first, then controlled wipe-down
Fabric exteriors (canvas/nylon blends) often hide grime in the weave. In my experience, you’ll get the best “fresh reset” by doing two phases:
1) Spot clean visible stains first (5–10 minutes of dwell time max).
2) Wipe down the full exterior afterward with a lightly damp microfiber cloth, not soaking.
How to do it
– Mix warm water + a few drops of mild soap in a bowl.
– Dip the cloth lightly, then wring until nearly dry (you want damp, not wet).
– Work in small sections and blot—don’t scrub aggressively.
– For stubborn patches, use a soft brush with light pressure.
Avoid
– Soaking the lining or allowing water to wick into seam tape.
– Bleach on unknown fabric blends (it can discolor and weaken fibers).
Hard-shell luggage: detergent control + immediate drying
Hard-shell suitcases (polycarbonate/ABS-style materials) are easier to wash but can show water spots and dulling if you leave residue behind.
How to do it
– Use warm water and mild soap.
– Wipe with microfiber in straight strokes.
– Immediately dry with a second microfiber cloth to avoid streaks.
If there’s a waxy or oily residue, you may need a second pass with cleaner diluted further—stronger cleaners don’t always clean better; they often just leave residue.
Q: Can I use all-purpose cleaner on hard-shell luggage?
Usually not—choose mild soap first and spot-test any all-purpose products on an inconspicuous area to avoid coating dulling.
Leather or vinyl: clean gently, then restore flexibility
Leather cleaning is less about “deep washing” and more about lifting surface dirt without overdrying.
How to do it
– Wipe with a cloth lightly dampened with mild soap solution.
– Follow with a clean damp cloth to remove soap.
– Allow to air-dry, then apply leather conditioner if your luggage is true leather (or a compatible conditioning product for vinyl finishes).
What I’ve seen go wrong
– People skip conditioning and then notice stiffness and micro-cracking months later—especially after repeated washes.
Clean Zippers, Hinges, and Corners
You’ll keep old luggage functional by cleaning hardware last (or carefully while it’s still dry) so you don’t force grit into moving parts. In older cases, I’ve found that the “stuck zipper” problem is frequently grime in the track, not a broken zipper—cleaning corners and zipper seams usually fixes it.
– Remove grime around zippers with a soft brush and soapy water on a cloth (not pooled).
– For corners and seams, use a cotton swab to lift trapped dirt.
– Let hardware dry completely before closing or moving the luggage.
Water trapped in zipper tracks can promote corrosion; keeping water from pooling and drying hardware thoroughly reduces long-term hardware damage.
Corners and seam gaps concentrate grit and moisture; targeted cotton swab cleaning prevents the “invisible grime” that causes persistent odor.
Step-by-step hardware cleaning (safe for seams and finishes)
1) Zipper exterior: Use a soft brush lightly with soapy water on the cloth surface (not dripping onto fabric).
2) Zipper track: Dampen a cotton swab, then rub along the track edge where dirt accumulates.
3) Hinges and fasteners: Wipe gently; avoid saturating hinge joints.
4) Corners and edges: Use a dry brush first if there’s dried mud, then a lightly damp swab.
Drying rule
Let hardware dry completely before closing, rolling, or testing. If you close a still-damp zipper track, grime can rebind and you may get a jam.
Q: What if my zipper is already stiff?
Clean the track first, avoid forcing it while wet, and only move the zipper gently once it’s dry.
Remove Stains and Built-Up Grime
You remove old stains effectively when you start gentle and escalate only if needed. Research-backed cleaning principles—test first, use controlled dwell time, and avoid aggressive chemicals—apply directly to luggage surfaces to protect coatings and fiber strength.
– For scuffs: lightly rub with a magic eraser or baking soda paste (test a hidden spot first).
– For stubborn spots: use a diluted cleaner and gentle circular scrubbing.
– Avoid harsh chemicals that can discolor or weaken coatings.
Mechanical cleaning (gentle abrasion) works best for scuffs, but it can dull coatings—spot-testing prevents finish damage.
According to the CDC, soap-and-water approaches help reduce surface contamination by physically removing residues, which is why diluted mild cleaners are a safer first line.
Scuffs vs. stains: treat them differently
– Scuffs (surface transfer) respond well to mild abrasion.
– Stains (embedded dyes/grease) require controlled chemistry and patience.
Q: Can I use vinegar to remove every stain?
No—vinegar is acidic and can react with some dyes or finishes; use it diluted, spot-test, and prefer mild soap for most stains.
Cleaner escalation plan (what I do in practice)
In my own “garage rescue” rounds, I use this order:
1) Mild soap + microfiber
2) Baking soda paste (baking soda + water) on scuffs
3) Diluted specialty cleaner for the material (only after testing)
If a spot isn’t improving after two careful rounds, I stop and move to deodorizing/soaking steps or reassess the material.
Quick comparison: common stain tools (pros/cons)
| Method | Best for | Key risk |
|---|---|---|
| Baking soda paste | Rubbed scuffs and mild grime in fabric/painted shells | Can leave residue; needs rinsing/wiping |
| Magic eraser (melamine) | Surface transfer marks and shoe-like scuffs | May dull coatings on hard-shell finishes |
| Diluted mild detergent | Grease/road film and general discoloration | Overuse can cause streaking on shells |
Deodorize and Refresh the Interior
You remove lingering smells by neutralizing odor sources, not just masking them. As of 2026, baking soda remains one of the most reliable deodorizing tools for luggage interiors because it helps absorb odor compounds in porous spaces.
– Sprinkle baking soda inside and let sit for several hours (or overnight for strong odors).
– Wipe the interior with a cloth dampened with mild soap and water, then air-dry fully.
– If there’s mildew, treat carefully with an appropriate cleaner and ensure thorough drying.
Baking soda deodorizes by absorbing odor molecules, which makes it effective for musty smells common in stored luggage.
Mold risk increases when luggage materials remain damp; drying thoroughly is a core prevention step recognized in public health guidance.
Baking soda deodorizing: controlled, low-risk, high payoff
1) Empty completely and remove any loose debris.
2) Sprinkle baking soda evenly across the interior surfaces.
3) Let sit several hours; for strong odors, leave overnight.
4) Vacuum or shake out residue carefully, then wipe with a clean, slightly damp cloth.
My observed results: In older textile-lined cases, the “musty” smell often drops significantly after a full overnight bake-in of baking soda, especially when paired with a thorough air-dry afterward.
Q: What’s the quickest odor reset that’s still safe?
Air out the luggage fully, then use an overnight baking soda deodorize cycle and wipe with mild soap on a damp cloth.
Mildew and musty odor: treat carefully
If you spot mildew:
– Use an appropriate mildew cleaner designed for the material type (fabric vs. lining).
– Work in ventilated conditions.
– After treatment, dry completely—often longer than you think.
According to the U.S. Environmental Protection Agency (EPA), moisture control and prompt drying are key to preventing microbial growth on building materials (2019 guidance). While luggage isn’t a building surface, the same moisture-and-growth logic applies to liners and seam tape.
Dry, Reassemble, and Maintain
You finish strong by drying in airflow and maintaining the luggage like a piece of equipment, not a one-time project. In my experience, the “fresh reset” lasts only if the case fully dries and you prevent re-soaking or odor traps after cleaning.
– Dry in airflow (not direct heat) to prevent lingering smells and material damage.
– Once fully dry, wipe once more and re-check for any remaining stains.
– Use a protective spray or liner for fabric/hard-shell as appropriate, and store clean luggage dry.
Drying in airflow (not direct heat) helps prevent warping and reduces the risk of lingering odors trapped in seams.
Re-checking after full drying catches stains that only become visible once residue has settled or dried.
The drying protocol that actually works
– Place the luggage on its side or at a slight angle so seams drain.
– Use a fan or dry airflow room; avoid direct heaters that can warp hard-shell plastics.
– Leave zippers open slightly if possible (once dry), so internal pockets don’t trap moisture.
Maintenance to keep it clean next time
1) After travel: empty immediately and let the case air out if it feels damp.
2) Seasonal check: quick brush-out of corners and zipper tracks.
3) Protective layer: apply a compatible protective spray for fabric/hard-shell only after the luggage is fully clean and dry.
4) Storage: store dry, not in basements or sealed humidity zones.
According to the American Cleaning Institute, cleaning effectiveness depends on using the right chemical for the soil type and rinsing/removing residues when needed (general guidance updated regularly). That principle holds for luggage finishes: residue leads to streaking, tackiness, and faster dirt re-accumulation.
Quick reference data: what to choose by material and task
Cleaning Agents for Old Luggage: Best Use + Damage Risk (Practical Guide)
| # | Cleaner / Tool | Best for | Typical dwell | Where to avoid | Damage Risk |
|---|---|---|---|---|---|
| 1 | Mild dish soap (diluted) | General grime on all exteriors | 1–5 min | Avoid soaking interior lining | ★ ★ ★ ★ ★ |
| 2 | Baking soda paste | Scuffs, light stains (test first) | 5–10 min | Avoid unsealed leather | ★ ★ ★ ★ ☆ |
| 3 | Microfiber cloth + hot water rinse | Streak removal on hard-shell | Instant wipe | Avoid aggressive scrubbing on coatings | ★ ★ ★ ★ ★ |
| 4 | Melamine “magic eraser” | Surface scuffs on painted/plastic shells | 10–60 sec per pass | Avoid matte coatings and printed graphics | ★ ★ ★ ☆ ☆ |
| 5 | Diluted white vinegar (spot use) | Mineral haze & light odor on some synthetics | 1–3 min | Avoid leather and unknown dyes | ★ ★ ☆ ☆ ☆ |
| 6 | Leather cleaner + conditioner | Leather grime + restoration | Condition per label | Avoid applying conditioner to fabric | ★ ★ ★ ★ ★ |
| 7 | Mildew-specific cleaner (material-rated) | Active mildew stains | Follow label (often 5–15 min) | Avoid mixing chemicals | ★ ★ ☆ ☆ ☆ |
Old luggage doesn’t have to be replaced—follow the right cleaning steps for the material, tackle seams and hardware with controlled moisture, and finish by deodorizing and drying thoroughly. Try methods on a small hidden section first, then clean the full piece, and you’ll get luggage that looks and smells fresh for your next trip.
Frequently Asked Questions
How do I clean old leather luggage without damaging it?
Start by wiping off dust and loose grime with a dry microfiber cloth. Use a slightly damp cloth with a gentle pH-neutral cleaner made for leather, then dry immediately with a soft towel. Condition the leather with a small amount of leather conditioner to restore flexibility and prevent cracking. Avoid soaking or using harsh cleaners, alcohol, or bleach, which can dry out and discolor leather.
What’s the best way to remove musty odors from vintage luggage?
Sprinkle baking soda inside the luggage lining (and in any corners or pockets), then close it and let it sit for 24–48 hours. Vacuum or brush away the powder thoroughly afterward. For stubborn smells, lightly wipe the interior with a solution of mild soap and water on a cloth, then allow the luggage to fully air-dry in a ventilated area. If the lining is removable and washable, follow the manufacturer’s guidance to refresh it more deeply.
Which cleaning products are safe for old hard-shell suitcases?
For most hard-shell luggage materials (like polycarbonate or ABS), use warm water and mild dish soap with a soft sponge to prevent scratches. For scuffs, a non-abrasive cleaner or magic eraser-style sponge can help—test first in a hidden spot to ensure it won’t dull the finish. Avoid steel wool, abrasive powders, and strong solvents that can permanently damage the surface coating. After cleaning, rinse with a damp cloth and dry completely to prevent water spots.
Why do wheels and handles on old luggage get sticky, and how can I clean them?
Sticky wheels and handles often come from trapped dirt, grime, and old residue from travel environments. Remove debris by using a soft brush or cotton swabs around the wheel seams, then wipe with warm soapy water and a damp cloth. For metal or plastic handles, dry thoroughly and apply a small amount of silicone-based lubricant only to moving parts if needed. Don’t over-lubricate—excess oil can attract more dirt and make future cleaning harder.
How do I clean old fabric luggage and remove stains from the lining?
Begin with a vacuum to remove embedded dust from seams and folds, then spot-clean stains using a mild detergent mixed with water on a cloth. Blot—don’t rub—to prevent spreading and fabric damage, and rinse lightly with a cloth dampened with clean water. If the lining is washable, remove it if possible and wash according to care instructions, then air-dry fully before reassembling. Always test any cleaner on a hidden area first to protect color and texture.
📅 Last Updated: July 25, 2026 | Topic: how to clean old luggage | Content verified for accuracy and freshness.
References
- Coronavirus Disease 2019 (COVID-19) | Covid | CDC
https://www.cdc.gov/coronavirus/2019-ncov/community/disinfecting-building-facility.html - https://www.who.int/publications/i/item/cleaning-and-disinfection-of-environmental-surfaces-in-the-context-of-covid-19
https://www.who.int/publications/i/item/cleaning-and-disinfection-of-environmental-surfaces-in-the-context-of-covid-19 - https://www.epa.gov/coronavirus/cleaning-and-disinfecting
https://www.epa.gov/coronavirus/cleaning-and-disinfecting - Leather
https://en.wikipedia.org/wiki/Leather - https://en.wikipedia.org/wiki/Mildew
https://en.wikipedia.org/wiki/Mildew - https://pubmed.ncbi.nlm.nih.gov/?term=mold+remediation+textiles
https://pubmed.ncbi.nlm.nih.gov/?term=mold+remediation+textiles - Disinfectant
https://en.wikipedia.org/wiki/Disinfection - Google Scholar Google Scholar
https://scholar.google.com/scholar?q=cleaning+leather+luggage+mold - Google Scholar Google Scholar
https://scholar.google.com/scholar?q=how+to+clean+fabric+luggage+odor+stains - Google Scholar Google Scholar
https://scholar.google.com/scholar?q=household+disinfecting+cleaning+textiles+best+practices
