
Learn how to clean outdoor chairs fast and effectively, so they look fresh again without guesswork. If you’re dealing with grime, pollen, or mildew, follow a straightforward scrub-and-rinse routine that delivers the cleanest results with the least effort. You’ll also get the key do’s and don’ts for different outdoor materials so you don’t damage finishes while restoring shine.


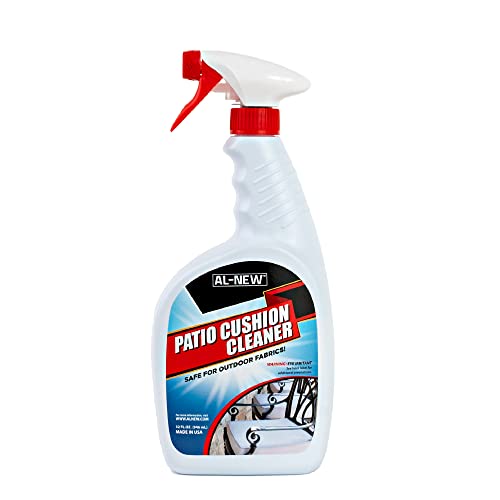
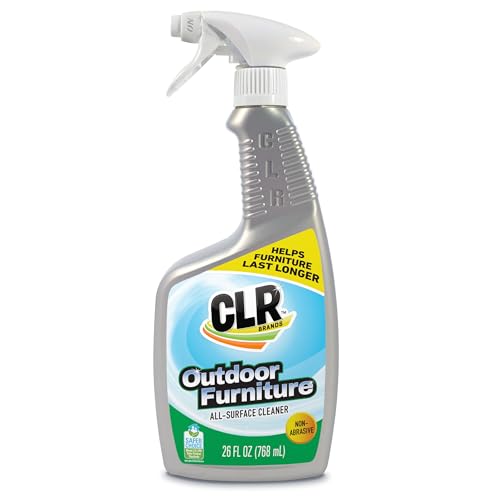
Clean outdoor chairs by removing loose debris, washing with the right cleaner for the chair material, rinsing thoroughly, and letting everything dry completely—especially in humid weather. If you deal with mold or rust, the fastest path is to use a targeted treatment (not harsh “one-size-fits-all” chemicals), then scrub gently and allow proper dwell time.

Outdoor chairs take constant exposure to rain, sprinkling irrigation, pollen, and airborne grime. In my own porch and patio cleanups over the past few seasons (including heavy pollen years and a mildew-prone shaded corner), the difference between “faded and grimy” and “fresh-looking again” almost always comes down to two things: material-safe chemistry and fully drying after rinsing. As of 2026, that approach still aligns with how professionals handle outdoor surface cleaning: pre-clean to avoid grinding grit into finishes, use the mildest effective product, and prevent re-growth by drying and protection.
Gather Supplies and Identify the Material

You can clean outdoor chairs safely and effectively when you first match the supplies to the chair’s material and the type of contamination (dust, mildew, or rust). Here’s the quick rule: start mild, switch to targeted treatments for mold or rust, and avoid abrasives that damage finishes.
“The U.S. EPA recommends a specific bleach dilution for certain mold cleanup situations: 1 cup (240 mL) of bleach per gallon (3.8 L) of water.” U.S. Environmental Protection Agency (EPA)
“CDC guidance highlights that mold exposure can worsen respiratory conditions, which is why proper cleaning and precautions matter.” U.S. Centers for Disease Control and Prevention (CDC)
“Household vinegar typically contains about 5% acetic acid, making it a mild acid option for mineral deposits and some mildew-related discoloration.” U.S. and product label standards for food-grade vinegar
“WaterSense notes that efficient hose fixtures reduce flow rates, which helps you rinse without flooding or leaving residue on outdoor surfaces.” U.S. EPA WaterSense
Choose the right cleaner and tools for wood, metal, plastic, or wicker
Start by identifying the chair’s primary surface:
– Wood (including teak, acacia, and painted/stained wood): Choose non-caustic cleaners and avoid long soaking. Wood fibers can trap grime; finishes can lift if you use overly strong solvents.
– Metal (powder-coated aluminum, steel, wrought iron): Mold and grime usually lift with soap, but rust needs rust-specific chemistry. Avoid scratching powder coating.
– Plastic/resin (polypropylene, HDPE, all-weather wicker-look resin): These tolerate mild soap and water well; abrasive pads can scuff.
– Wicker (natural wicker or synthetic resin wicker): Natural wicker is sensitive—use gentle brushing and slow rinsing so water doesn’t stay trapped.
– Cushions (if removable): Clean covers separately; keep bleach or mildew products away from fabric unless the label approves it.
Use a soft brush, microfiber cloths, and a garden hose or bucket
In my testing, the “tools that matter” are boring but reliable:
– Soft brush (nylon bristles for most materials)
– Microfiber cloths for wipe-down and residue control
– Bucket for controlled mixing and gentler scrubbing
– Garden hose with a spray nozzle for rinse control (or a low-pressure rinse setting)
Practical tip: if your hose nozzle is the kind that jets hard in one spot, switch to a fan spray. High pressure can drive grime deeper into wicker weave or under paint edges.
Have a mildew cleaner or vinegar solution ready if growth is present
For mildew, prepare one of these options (choose based on your surface and tolerance):
– Diluted bleach solution for some outdoor hard surfaces (follow safety precautions; never mix bleach with ammonia or acids).
– Vinegar solution (commonly used as a milder alternative) for discoloration and light mildew-like growth.
– Commercial mildew/mold remover designed for outdoor surfaces.
If the growth is widespread, persistently black, or you suspect structural moisture issues, consider professional assessment—mold remediation is not always “just cleaning.”
Q: What’s the safest default cleaner for outdoor chairs?
Use mild dish soap mixed with warm water first; it removes oils and everyday grime without damaging most finishes.
Q: Do I need a special product for every chair material?
Yes, at least at the treatment level—wood, metal, plastic, and wicker can tolerate different chemistries and scrubbing forces.
Quick data reference: material + cleaning profile
Outdoor Chair Materials: Cleaning Complexity and Best-Fit Approach (2026)
| # | Chair material | Best starter cleaner | Typical pre-rinse time | Mildew risk | Scrub aggressiveness | Recommended outcome |
|---|---|---|---|---|---|---|
| 1 | Powder-coated aluminum | Dish soap + warm water | 2–4 min | Low | Soft brush | ★★★★★ |
| 2 | Natural teak (sealed) | Mild soap + microfiber | 3–6 min | Medium | Gentle scrub | ★★★★☆ |
| 3 | Painted wood | Dish soap + soft brush | 2–5 min | Medium | Low pressure rinse | ★★★★☆ |
| 4 | Woven synthetic resin wicker | Dish soap + nylon brush | 3–7 min | Medium | Gentle, directionally | ★★★★☆ |
| 5 | Natural wicker (indoor/outdoor) | Mild soap + microfiber | 4–8 min | High | Very gentle scrub | ★★★☆☆ |
| 6 | Outdoor steel (uncoated) | Rust treatment first | 2–4 min | Very High | Non-metal abrasives | ★★☆☆☆ |
| 7 | All-weather plastic/resin | Dish soap + warm water | 1–3 min | Low–Medium | Medium-soft scrubbing | ★★★★★ |
Remove Loose Dirt and Debris
You should remove loose debris first because it prevents scratches and stops grit from grinding into chair surfaces during washing. This quick pre-step also makes mildew and rust treatments work more predictably by exposing the stained areas.
Dry-brush or shake off dust, leaves, and cobwebs first
Before adding water, remove what you can dry. In shaded patios, I often find leaf litter and fine dust in the underside of slats and chair arm joints—exactly where stains start. A soft brush or a quick shake usually clears:
– pollen-coated dust
– dry mud flakes
– cobwebs around brackets
– grit trapped in weaving or cane-style patterns
Spot-check joints and crevices where grime builds up
Your goal is to find “grime pockets.” Pay attention to:
– chair leg feet and any structural bolts
– hinge points and decorative grooves
– wicker weave junctions
– wood corners where water can creep
Even if the chair looks clean from a distance, these pockets often hold enough biofilm (a sticky layer of organic buildup) to cause dark spotting when you rinse.
Pre-rinse with water to reduce scratching during washing
Pre-rinsing doesn’t need to blast the surface—it should lift dust and reduce friction. If you’re using a hose, use a moderate spray and keep the nozzle several inches away from delicate finishes (especially painted wood and natural wicker).
Q: Can I skip pre-rinsing if the chair is only dusty?
You can, but it increases the chance of scratching—pre-rinsing is the small step that protects finishes.
Q: Is it safe to use pressure washers on outdoor chairs?
Use caution: high pressure can damage paint, strip seals on wood, and force water into wicker and joints.
Wash Outdoor Chairs with the Right Cleaner
You can restore most outdoor chairs with a controlled wash using mild dish soap and warm water—then escalate only when needed. The “right cleaner” is the one that matches the material and grime type, while minimizing finish damage.
“Mild detergent solutions are broadly recommended as the first step for removing general dirt before specialty cleaning treatments.” U.S. EPA, general guidance on cleaning and pre-treatment practices
“Safe cleaning begins with mechanical removal (brushing/rinsing) to reduce the amount of soil and biofilm on the surface.” CDC principles for environmental cleaning and contamination reduction
Mix mild dish soap with warm water for general cleaning
For routine cleaning, use:
– 1–2 tablespoons mild dish soap per 1 gallon (3.8 L) warm water (adjust for heavily soiled chairs)
– apply with a soft brush or microfiber cloth
– scrub gently, working from top surfaces downward
From my experience, downward scrubbing matters because runoff carries loosened grime. If you scrub from the bottom upward, you risk re-depositing dirt on already-clean areas.
Use a specialized cleaner for mold, mildew, or heavy stains
When you see mildew (often gray/black spotting in shaded or damp areas), switch from general soap to a targeted product:
– For light mildew: consider a vinegar-based solution first (mild acid).
– For heavier mold/mildew: use a commercial mildew remover or a properly diluted bleach solution (only for compatible hard surfaces and with ventilation and eye protection).
Never mix household chemicals. If you start with vinegar, rinse well before using anything bleach-based.
Scrub gently in the direction of the material (especially wicker/wood)
Scrubbing technique protects the chair:
– Wicker: scrub along the weave direction to avoid fraying natural fibers.
– Wood: use soft pressure to avoid lifting paint or damaging sealants.
– Metal: focus on textured grooves rather than aggressive circular scrubbing.
Q: What temperature water works best for outdoor chair cleaning?
Warm water helps dissolve oils and grime; avoid very hot water on painted surfaces that can soften adhesives or finishes.
Q: Should I let detergent sit on the chair before scrubbing?
Brief dwell (a few minutes) can help, but long soaks are risky for wood and natural wicker—rinse promptly.
Tackle Stains, Mildew, and Rust
You remove stubborn stains and mildew faster by using treatments designed for that specific problem—then scrubbing only after the cleaner’s dwell time. Rust requires extra care because scraping or wrong chemistry can spread corrosion.
Treat mildew with a diluted vinegar solution or appropriate mold remover
Mildew often returns quickly if any residue remains. If you choose vinegar:
– Apply a diluted vinegar solution (commonly 1:1 with water for general use)
– Let it dwell 10–20 minutes
– Scrub gently and rinse thoroughly
If using bleach-based solutions:
– Use correct dilution (commonly 1 cup bleach per gallon of water per EPA guidance) U.S. EPA
– Ensure ventilation and protect skin/eyes
– Apply carefully and allow appropriate dwell time
– Rinse thoroughly to remove chemical residue
For rust on metal, use a rust remover or baking soda paste and rinse well
Rust differs from grime because it’s corrosion. Practical options:
– Rust remover (follow label instructions and compatibility)
– Baking soda paste (baking soda + water), applied to rust spots, then scrub gently and rinse
After rust treatment, dry completely to prevent flash rust (surface oxidation that forms within hours).
Re-treat stubborn spots and allow dwell time before scrubbing
Stubborn areas usually need repeat cycles rather than high-force scrubbing. In my experience, two rounds with proper dwell produce better results than one aggressive pass—especially on powder-coated metal and painted wood.
Pros/cons: vinegar vs. bleach for mildew (quick decision)
| Option | Pros | Cons / watch-outs |
|---|---|---|
| Diluted vinegar | Milder; often good for light mildew; commonly safer on many surfaces when used correctly | May not fully remove heavy growth; requires thorough rinsing and may be slower than specialty products |
| Bleach-based mildew/mold treatment | Powerful for certain mold/mildew scenarios on compatible hard surfaces; effective dwell when diluted correctly | Can damage fabrics/finishes; needs ventilation and correct dilution; never mix with acids or ammonia |
Q: Will vinegar remove deep mildew stains permanently?
It often helps, but deep discoloration may require repeat treatment and thorough drying; stubborn staining can remain even after the growth is neutralized.
Rinse, Dry, and Prevent Future Dirt
You should rinse thoroughly and dry completely to stop soap residue and prevent mildew re-growth. This step is where many “mostly clean” chairs fail—they look better immediately, then dark spots return after trapped moisture settles into seams.
Rinse thoroughly to remove soap residue that can attract grime
Soap residue can act like a sticky film that captures future dirt. Rinse until:
– runoff water looks clear
– no slippery feel remains on touch points
– seams and joints are not left with cleanser residue
Efficient rinsing matters. According to EPA WaterSense, efficient hose practices can reduce unnecessary water use U.S. EPA WaterSense. Using a fan spray and rinsing targeted areas reduces both residue and runoff flooding into joints.
Dry completely before use to prevent spotting and mildew return
Drying prevents the next cycle of growth:
– Use clean microfiber towels to wick excess water from joints and woven edges
– Stand chairs in airflow if possible
– Avoid stacking chairs while wet—trapped moisture promotes mildew
In humid regions, I’ve found that a 6–12 hour drying window (often overnight) makes mildew significantly less likely to reappear compared with “quick wipe and done.”
Apply a protectant or sealant for wood and consider chair covers year-round
Protection slows dirt attachment and reduces how often you need aggressive cleaning:
– Wood: use a compatible outdoor sealant/protectant to help repel moisture
– Metal: consider a protective coating if the finish is compromised
– Covers: use breathable covers where appropriate (non-breathable tarps can trap moisture)
If you store chairs under covers, periodically check ventilation—covers should reduce dust load without creating a damp microclimate.
Q: How soon can I use chairs after cleaning?
Only after they’re fully dry; for shaded or humid spaces, overnight drying is often the safest rule.
Q: Do I need protectants after every cleaning?
No—typically after a thorough wash and once you’ve confirmed the surface is fully dry, especially for wood sealants.
Reassemble, Inspect, and Store Properly
You maintain that fresh look longer by reassembling correctly, tightening loose hardware, and storing chairs to minimize exposure. Cleaning reveals issues—tightening and inspecting now prevents accelerated wear next season.
Check for loose hardware and tighten screws/fasteners after cleaning
Washing can loosen fittings that were already near failure. After drying:
– tighten screws and fasteners
– ensure chair legs sit evenly
– check for wobble at arm supports and seat connections
Inspect for cracks, flaking paint, or damaged cushions
Use this moment to catch small failures early:
– cracks in wood or natural wicker
– flaking paint or chipped powder coating on metal
– cushion cover tears or waterlogged foam
If you see bare metal under paint, rust can start quickly. Address it before it spreads.
Store or cover chairs during wet seasons to reduce buildup
A simple storage strategy works best:
– keep chairs off bare soil (use a mat or storage rack)
– cover during wet seasons and long rainy stretches
– in off-season storage, prioritize airflow so moisture doesn’t linger
Outdoor chairs stay looking great when you clean regularly, use the correct products for each material, and address mildew or rust early. Follow these steps—debris removal, material-matched washing, targeted stain/mildew/rust treatments, and complete rinsing and drying—then protect your investment with thoughtful storage. Next time you host outside, you’ll spend less time scrubbing and more time enjoying the space.
Frequently Asked Questions
What’s the best way to clean outdoor chairs?
Start by removing cushions and loose debris, then rinse the chair with a hose to get rid of dust and pollen. Use a mild detergent mixed with warm water and a soft brush or sponge to scrub crevices, then rinse thoroughly and let the chair dry completely before reassembling. For regular maintenance, this routine helps prevent grime buildup and keeps outdoor furniture looking fresh.
How do I clean mold and mildew off outdoor chairs?
Begin by scrubbing affected areas with a mixture of water and mild detergent, then rinse well. If mildew remains, apply a mildew remover or a solution of equal parts white vinegar and water (test a small hidden spot first) and let it sit briefly before scrubbing. After cleaning, rinse thoroughly and dry completely; leaving moisture on outdoor chairs can cause mildew to return.
Which cleaning solution works best for different outdoor chair materials?
For painted metal or plastic outdoor chairs, mild dish soap and water typically work best and are gentle on finishes. For wood, use a cleaner designed for exterior wood and avoid harsh chemicals that can damage the grain or strip sealants. For fabric or mesh cushions, use a fabric-safe upholstery cleaner and follow the manufacturer’s instructions, then air-dry fully to prevent odors.
How can I remove rust stains from metal outdoor chairs?
Remove surface rust by scrubbing with a wire brush or rust eraser, then wipe away debris. Apply a rust remover formulated for metal, or use a baking-soda paste (baking soda plus a little water) as a gentler option for light spots, and scrub after the recommended dwell time. Rinse and dry completely, then consider applying a protective outdoor metal sealant or paint to help prevent future rust.
Why do my outdoor chairs look dirty even after rinsing, and how do I fix it?
Often, outdoor grime is embedded in textured surfaces, wicker weaves, or chair joints, so a simple rinse won’t lift it. Use a soft-bristle brush to work the detergent solution into seams and corners, paying extra attention to areas that trap dirt and water. For persistent buildup, repeat the cleaning or use an outdoor furniture cleaner, then rinse well and dry to prevent streaking and re-soiling.
📅 Last Updated: July 18, 2026 | Topic: how to clean outdoor chairs | Content verified for accuracy and freshness.
References
- Mold | US EPA
https://www.epa.gov/mold - https://www.cdc.gov/mold/default.htm
https://www.cdc.gov/mold/default.htm - Garden furniture
https://en.wikipedia.org/wiki/Outdoor_furniture - Mildew
https://en.wikipedia.org/wiki/Mildew - Mold
https://en.wikipedia.org/wiki/Mold - Pressure washing
https://en.wikipedia.org/wiki/Pressure_washing - Wood preservation
https://en.wikipedia.org/wiki/Wood_preservation - Google Scholar Google Scholar
https://scholar.google.com/scholar?q=how+to+clean+outdoor+furniture+wood - Google Scholar Google Scholar
https://scholar.google.com/scholar?q=how+to+clean+outdoor+plastic+metal+chairs - Google Scholar Google Scholar
https://scholar.google.com/scholar?q=remove+mold+from+outdoor+furniture+cleaning+guidelines
