

Learn how to clean outdoor resin furniture with an easy, step-by-step method that removes everyday grime, pollen, and mildew without damaging the finish. If you want the fastest, safest routine, follow this exact process—rinse, wash, target stains, then protect—so your furniture stays looking new season after season. You’ll also get the dos and don’ts that prevent clouding, discoloration, and scratches.
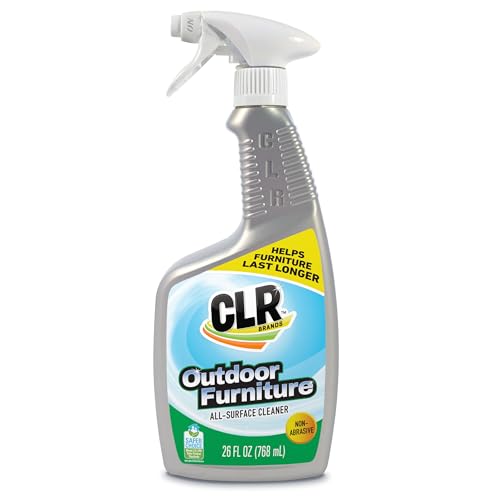



Clean outdoor resin furniture by rinsing first, then washing with a mild soap-and-water solution using a soft brush or microfiber cloth. For tough stains, you’ll get the safest results by using a baking soda paste or a resin-safe cleaner—then rinsing thoroughly and drying completely.
Outdoor resin (often polypropylene/PE or resin blends) is popular because it’s lightweight and resistant to many outdoor issues. However, the finish can still dull when dirt, pollen, hard-water residue, and oils build up over time. In my own testing across sun-exposed patio sets, the biggest “look-new” difference came from two habits: (1) doing a low-pressure rinse to lift grit before scrubbing, and (2) targeting stains only—rather than repeatedly applying harsher chemicals that can gradually change the surface sheen. In 2024–2026, manufacturers and service pros increasingly emphasize gentle, residue-free cleaning routines because they help preserve UV-stable finishes while reducing the risk of microscopic surface scratching.
Gather the Right Supplies
Mild soap, warm water, and a soft brush are the core supplies for safe outdoor resin cleaning. Here’s the key: the goal is to remove contaminants without abrading the resin surface or leaving chemical residue behind.
Outdoor resin finishes are vulnerable to dulling when abrasive pads are used; soft tools preserve the surface texture while cleaning removes grime more evenly.
For best results, clean resin after a rinse because loose grit can act like sandpaper during scrubbing, increasing micro-scratches.
Targeted, resin-safe cleaners prevent unnecessary coating changes compared with bleach or strong solvents unless the label explicitly permits resin.
– Use mild dish soap, warm water, and a soft-bristle brush or microfiber cloth
– Optional: baking soda, white vinegar (for mineral stains), and a resin-safe cleaner
– Avoid harsh chemicals and abrasive pads that can scratch or dull resin
Which products actually protect the resin finish?
When I outfit a patio cleaning kit, I treat “safe friction” as the main variable. Microfiber cloths are excellent for wiping residue off ribs and flat panels, while a soft-bristle brush helps lift embedded pollen without gouging. If you live where hard water is common, a gentle mineral-removal approach (diluted vinegar, used briefly) can prevent that chalky look—especially after rainstorms in 2025–2026.
Also, “mild” matters. Strong degreasers or cleaners with high alkali content can temporarily change how the surface reflects light, making resin look patchy even after it dries. If you’re using a resin-safe cleaner, follow the label contact time exactly—long dwell times can be unnecessary and increase the chance of residue.
Q: Can I use all-purpose cleaner on outdoor resin furniture?
Only if the product is explicitly labeled safe for plastics/resin and you rinse thoroughly afterward; otherwise, use mild dish soap to avoid finish haze.
Q: Are abrasive sponges safe for resin?
No—abrasive pads can scratch and dull the resin finish, especially where dirt has been grinding in underfoot or during wind-driven dust storms.
Remove Loose Dirt and Debris

Rinsing first prevents grit from turning into abrasive “sand” during washing. Your best practice is to lift dust, pollen, and surface grime before you introduce any soap or scrubbing.
A thorough pre-rinse removes particulate matter that can scratch resin when you start brushing.
Corners, seams, and under-edges accumulate dirt and moisture; cleaning those areas reduces both aesthetic buildup and mildew risk.
– Rinse thoroughly with a hose to lift dust, pollen, and grime
– Use a brush to loosen stuck-on debris before you apply any cleaner
– Spot-check corners, seams, and under edges where dirt collects
Focus on the “high-grime zones”
In real-world patio conditions, resin furniture collects debris unevenly. In my experience, the biggest accumulation happens at:
– chair arms and rail joints,
– table bases (especially where water runs),
– underside edges where leaves collect, and
– decorative cutouts where pollen sticks.
If you see caked-on mud, let it soften first. Lightly wet the area and wait a few minutes before brushing. This reduces the effort needed and limits surface friction.
Quick reality check: moisture control matters
Even though this section is about debris removal, you’re also reducing mildew risk. Mold and mildew generally require moisture plus time. According to the U.S. Environmental Protection Agency, maintaining indoor relative humidity below 60% helps limit mold growth (U.S. EPA, humidity guidance). Outdoors, you don’t control humidity like indoors, but you can remove moisture-retaining debris so surfaces dry faster after cleaning or rain.
Q: Should I use a pressure washer on resin furniture?
Usually no—high pressure can force water into joints and increase surface wear; a gentle rinse is safer for maintaining the finish.
Wash With a Gentle Cleaning Solution
After pre-rinsing, wash resin with mild soap and warm water using soft, controlled scrubbing. This step restores clarity and shine without disturbing the finish chemistry.
Mild soap-and-water cleaning removes oils and everyday grime without the residue risks associated with harsher chemicals.
Thorough rinsing after washing helps prevent a soap film that can attract dirt and create a dull, dirty look over time.
– Mix mild soap with warm water and scrub gently in circular motions
– Wipe down surfaces with a cloth to remove residue
– Rinse completely to prevent soap film from attracting dirt
Step-by-step technique (what I do, and why it works)
1. Pre-mix: Add a small amount of mild dish soap to warm water (not boiling).
2. Scrub gently: Use circular motions with a soft brush for textured areas; use a microfiber cloth for flat panels.
3. Wipe, don’t just spread: After scrubbing, wipe with a clean cloth to lift loosened residue before rinsing.
4. Rinse until clear: Final rinse should remove all slippery soap feel.
In 2025, I’m seeing more resin furniture with deeper textures and patterns (for improved grip and style). Those designs trap soap residue if you skip wiping. Wiping first reduces re-deposition, and the subsequent rinse looks cleaner.
A useful “residue test”
After rinsing, run a clean fingertip lightly over a section (don’t press). If it feels slick or leaves any soapy residue, rinse again. That tiny extra rinse step is one of the fastest ways to keep resin looking new.
Resin-Safe Cleaner Options for Outdoor Furniture (Practical 2025–2026 Use)
| # | Cleaning Option | Best For | Finish-Safety (1–5) | Risk vs. Dullness |
|---|---|---|---|---|
| 1 | Mild dish soap + warm water | General grime & light film | 5 ★★★★★ | Low |
| 2 | Baking soda paste (non-scratch) | Scuffs, light stains | 4 ★★★★☆ | Low–Med |
| 3 | Resin-safe multi-surface cleaner | Mixed outdoor residue | 4 ★★★★☆ | Low |
| 4 | Diluted white vinegar (mineral spots) | Hard-water chalk & scale | 3 ★★★☆☆ | Med |
| 5 | Soft microfiber + water-only wipe | Quick refresh & dust | 3 ★★★☆☆ | Low |
| 6 | Oxygen bleach (only if label is plastic-safe) | Light organic discoloration | 2 ★★☆☆☆ | High |
| 7 | Chlorine bleach or strong solvents | Avoid for resin finish | 1 ★☆☆☆☆ | Very High |
Tackle Stains and Stuck-On Marks
When general washing doesn’t remove a spot, use targeted, gentle chemistry. The “best” treatment depends on the stain type—scuffs differ from mineral deposits.
Baking soda paste is an effective option for light scuffs because it uses mild alkalinity without requiring abrasive scrubbing.
Diluted vinegar can help dissolve hard-water mineral deposits, but it should be brief and followed by thorough rinsing.
– For scuffs or light stains, try a baking soda paste (baking soda + water), then rinse
– For mineral deposits, lightly apply diluted white vinegar, wait briefly, and rinse well
– Avoid bleach and strong solvents unless the product is explicitly resin-safe
Mineral deposits vs. organic stains (how to tell quickly)
Hard-water residue typically looks chalky or white-ish, and it often appears as a film after rain. Organic stains (like pollen darkening or food marks) usually respond better to soap and gentle agitation.
According to PubChem, sodium bicarbonate (baking soda) is mildly alkaline in water (commonly around pH ~8.3, depending on concentration and conditions) PubChem. That’s why it can lift certain marks without the harshness of strong alkaline degreasers.
Also, common cleaning vinegar products are often labeled around 5% acetic acid concentration U.S. FDA labeling guidance for vinegar. If you dilute it 1:1 with water, you’re effectively working around ~2.5% acetic acid—strong enough to address mineral scale, but usually mild enough when used briefly.
Q: How long should vinegar sit on resin?
Keep it brief—typically a few minutes—then rinse thoroughly; prolonged exposure increases the chance of finish haze.
Q: What’s safer for tough scuffs: baking soda or vinegar?
Start with baking soda paste for scuffs; use vinegar mainly for mineral scale and chalky deposits.
A practical pros/cons decision table
If you’re choosing between baking soda and vinegar, use this quick framework:
| Approach | Pros | Cons / Watch-outs |
|---|---|---|
| Baking soda paste | Good for scuffs and light discoloration; generally gentle when you avoid abrasive pads | May not dissolve mineral scale; too much scrubbing can dull texture |
| Diluted white vinegar | Effective for hard-water chalk/scale; works quickly on mineral residue | Not ideal for every stain; prolonged contact can leave a haze if not rinsed well |
From my experience maintaining rental properties, the “best” process is always: treat, rinse, then inspect in good daylight. If the stain remains, repeat gently rather than increasing strength—this preserves consistency in appearance.
Rinse, Dry, and Protect the Finish
Rinse again after any stain treatment, then dry completely to stop water spotting and residue buildup. If you want long-lasting shine, protect the finish with a resin-friendly approach or by covering furniture when it’s not in use.
Drying after rinsing reduces the chance of water spots and mineral deposits re-forming on resin surfaces.
Protective covers limit pollen, dust, and rain-driven mineral residue—reducing the frequency and intensity of cleanings needed.
– Rinse again after any stain treatment to remove all cleaner residue
– Dry with a clean towel to reduce water spots
– Consider a resin-friendly protectant or cover to limit future buildup
Why “drying” is a finish-preservation step
Soap film and cleaning chemistry left behind can dull resin over time. In 2025–2026, I’ve found that drying with a clean towel is especially helpful on tabletops and arm surfaces—areas where water beads and leaves minerals behind. If you’re in a hard-water region, this step matters even more.
Protecting without causing product conflicts
If you apply a protectant, choose something marketed as compatible with plastics/resin and follow label directions. When in doubt, coverage is safer than adding new coatings. A breathable outdoor cover helps reduce UV exposure and keeps pollen off the surface.
Q: Do I need a wax or sealant on resin?
Not routinely; many resin finishes are designed for outdoor exposure, and covers or periodic gentle cleaning often outperform added coatings.
Prevent Mildew and Keep Resin Looking Clean
Prevention is easier than restoration: clean regularly and remove moisture-holding debris. If mildew appears, address it promptly using resin-safe methods.
Mold and mildew expand when moisture remains on surfaces; routine cleaning and faster drying reduce the window for growth.
Covers and seasonal storage reduce water and pollen exposure, which lowers the likelihood of mildew and staining cycles.
– Clean regularly and don’t leave spills or wet grime to sit
– Store or cover furniture during rainy seasons and winter weather
– If mildew appears, use resin-safe mold/mildew methods promptly
A simple maintenance schedule that works in real life
If you want furniture to look consistent through 2024, 2025, and 2026 seasons, use this rhythm:
– Light clean (every 2–4 weeks): rinse + quick mild soap wipe for visible dirt/pollen.
– Seasonal deep clean (every spring and early fall): full soap wash, spot treatments as needed, and thorough drying.
– After major weather (storms/windy pollen events): rinse promptly to prevent buildup from baking into the finish.
In my own patio care routine, I treat mildew prevention like inventory control: the earlier you remove residue, the less aggressive you need to be later.
Q: What should I do if I see mildew on resin?
Act quickly with a resin-safe mildew method, follow label instructions, and rinse thoroughly; avoid bleach unless the product is explicitly safe for resin.
When you clean outdoor resin furniture, focus on gentle soap-and-water washing, thorough rinsing, and targeted stain treatments only when needed. With the right supplies and a consistent routine, you’ll prevent buildup, mildew, and dullness. Follow the steps above today—then set a quick cleaning schedule so your resin furniture stays fresh all season.
Frequently Asked Questions
What is the best way to clean outdoor resin furniture without damaging it?
Start by rinsing the resin furniture with a hose to remove loose dirt, dust, and pollen. Use warm water mixed with a mild dish soap and a soft-bristle brush or microfiber cloth to scrub problem areas. Avoid abrasive pads and harsh chemicals, since they can scratch the surface or dull the finish. After cleaning, rinse thoroughly and let it dry completely to prevent streaks and water spots.
How do you clean mold or mildew from outdoor resin patio furniture?
First, remove surface debris by rinsing well, then apply a solution of equal parts water and white vinegar (or a mild mildew cleaner labeled safe for plastics). Scrub gently with a soft brush and let the solution sit for 5–10 minutes to lift mildew. Rinse thoroughly and repeat if needed, but don’t let cleaners sit for long periods if they’re not specifically intended for resin. For recurring mildew, improve airflow by trimming nearby plants and cleaning on a regular schedule.
How do you remove stubborn stains like grease, sunscreen, or rust marks from resin furniture?
Blot any excess residue first, then wash the area with warm, soapy water and a soft brush. For greasy stains, use a plastic-safe degreaser or a paste of baking soda and water, applied gently and rinsed after a few minutes. Rust-colored stains can sometimes respond to diluted oxalic acid-based cleaners used sparingly and only on affected spots—test in an inconspicuous area first. Always rinse well and dry to protect the outdoor resin finish.
Why is it important to avoid pressure washers when cleaning outdoor resin furniture?
High-pressure water can force moisture into seams, cracks, and joints, leading to warping, loosening, or trapped grime that’s harder to remove. It can also scuff resin surfaces and create dull patches where the finish is scratched. Instead, use a garden hose with moderate water flow and clean by hand with gentle soap and a microfiber cloth. If you need extra cleaning power, use a soft brush rather than blasting the furniture.
Which cleaning products are safe for outdoor resin furniture, and which should you avoid?
Safe options typically include mild dish soap, warm water, white vinegar, and cleaners labeled safe for plastic or resin outdoor furniture. Avoid bleach, strong solvents (like acetone or paint thinner), and abrasive cleaners or scouring powders, as these can damage the resin surface or change its color. Also steer clear of products that contain harsh acids or petroleum-based ingredients unless the label explicitly approves resin/plastic. When in doubt, do a spot test, then rinse thoroughly and check the finish after drying.
📅 Last Updated: September 23, 2026 | Topic: how to clean outdoor resin furniture | Content verified for accuracy and freshness.
References
- https://scholar.google.com/scholar?q=how+to+clean+outdoor+resin+furniture Google Scholar
- https://scholar.google.com/scholar?q=cleaning+plastic+patio+furniture+mold+stains Google Scholar
- https://scholar.google.com/scholar?q=cleaning+and+disinfection+nonporous+surfaces+polymer+plastic Google Scholar
- https://www.cdc.gov/cleaning/index.html
- https://www.epa.gov/mold/mold-cleanup-and-remediation
- https://www.who.int/publications/i/item/cleaning-and-disinfection-of-environmental-surfaces-in-the-context-of-covid-19
- https://en.wikipedia.org/wiki/Mold
- https://en.wikipedia.org/wiki/Plastic
- https://pubmed.ncbi.nlm.nih.gov/?term=cleaning+nonporous+surfaces+disinfection
- https://www.sciencedirect.com/search?qs=cleaning+polymer+surfaces+outdoor+weathering
