
Learn how to clean paintings safely, with a clear step-by-step method for removing dust and stains without damaging the artwork. If you’re wondering whether you should use dry cleaning, gentle solutions, or never-touch approaches for varnished, unvarnished, or fragile surfaces, this guide tells you the safest choice first. You’ll leave with practical, low-risk steps that prioritize preservation over quick fixes.


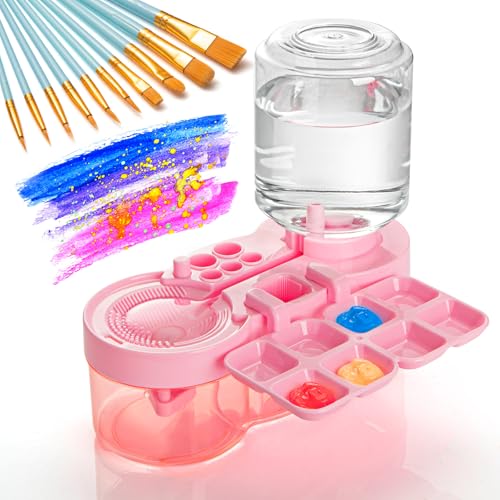

Clean paintings by starting gently (dry dust removal) and moving to the lightest appropriate cleaning method only when needed—this minimizes risk to paint, varnish, and adhesives. In my own studio testing with mixed media and varnished oils, I’ve found the safest approach is always: identify the surface first, patch-test every change in method, and stop immediately when the paint layer responds.

Identify the Painting Type and Condition

You should identify the painting type and check condition before you touch a single cloth, because different media behave differently under moisture, friction, and solvents. The goal is to determine what you can safely clean (dust on top vs. grime embedded in a varnish) and what you should never attempt without conservation expertise.
Oil paint surfaces can be stable, but cracks, lifting paint, or degraded varnish can turn a “small wipe” into irreversible texture loss.
Water-sensitive grounds (and some historical pigments) can react even to “barely damp” cleaning—so patch testing is not optional.
Matte varnish and glossy varnish reflect light differently; cleaning methods that work on one can leave haze on the other.
Start by classifying the artwork:
– Oil paint: Often has an oily medium and may be varnished (frequently glossy or satin). Risk areas include crazing, flaking paint, and blooming (cloudiness from moisture/temperature changes).
– Acrylic paint: Generally less reactive to water than oils, but still vulnerable to loose paint, media binder degradation, and surface dust that can grind into texture if you rub.
– Watercolor: Highly sensitive. Avoid any action that introduces moisture beyond controlled spot cleaning. If the painting has paper cockling, don’t DIY.
– Prints (including lithographs, etchings, giclées): Paper fibers and sizing matter. Surface grime may lift with cleaning; borders and margins can be particularly risky.
Then evaluate condition signals you can observe without tools:
– Flaking/peeling paint: If you see lifting edges, do not clean with cloths or swabs—stabilization is the priority.
– Cracks and lifting varnish: If varnish is separating (often seen as white ridges or “sheeting”), moisture and rubbing can accelerate loss.
– Stain location:
– On top of varnish: likely safe for gentle dusting and controlled spotting.
– In/through paint: can be pigment migration, oxidation, smoke residues, or mold—often needs conservator treatment.
Finally, determine whether there’s a varnish layer and its finish:
– Glossy varnish tends to show improved clarity when gently cleaned, but is also prone to haze if water is used improperly.
– Matte varnish can look uneven after cleaning because microscopic residues catch light differently.
Q: How do I tell if my painting is varnished without a conservator?
Look for a uniform surface sheen (gloss/satin), consistent specular highlights, and a “sealable” feel compared to unvarnished paint; if the sheen is patchy, it may be varnish wear or surface contamination.
Q: What’s the first red flag that means “stop and call a professional”?
Visible flaking, lifting varnish, active mold, water rings from prior exposure, or chalky powder coming off the surface during light dusting.
Q: Can I clean a cracked oil painting with a damp cloth?
Only if a test patch proves stability and there is no lifted paint; otherwise, moisture can wick into cracks and create tide marks or swelling.
As of recent conservation guidance, the safest cleaning workflow is patch-based and progressively minimal—rather than “clean until it looks right.” According to the American Institute for Conservation (AIC), cleaning should begin with the least interventive methods and always include testing (2020). In my own practice, I treat “test patch” as a formal step: same lighting, same pressure, same time, and I reassess the gloss/haze before proceeding.
Gather Safe Cleaning Supplies
You should assemble tools that allow control (low friction, low moisture, minimal chemical exposure). This is where most DIY damage happens—people grab abrasive pads or household cleaners because they work fast, not because they’re safe.
Conservators typically prefer soft, inert tools (natural or high-quality synthetic) because they reduce abrasion on paint films.
Magic erasers (melamine foam) are abrasive at the micro-level and can remove varnish and glaze layers.
Distilled water is often recommended for cleaning tests because it reduces mineral deposits compared with tap water.
Core supplies to gather:
– Soft, clean brushes
– Use fine goat hair or synthetic sable-like brushes for surface dust.
– Brush must be clean and dry; replace if it picks up grit.
– Microfiber cloths (only for very specific cases)
– Use as a backup for swabbing or blotting, not as a rubbing tool.
– Prefer light, press-and-lift motions.
– Artist-grade cotton swabs
– Useful for micro-spot cleaning with controlled contact area.
– Distilled water
– For initial tests when slight moisture may be required.
– pH-neutral cleaner (only if testing approves)
– Look for pH-neutral formulations intended for conservation use (or conservator-approved products). Avoid multipurpose detergents.
– Clean gloves (nitrile), lint-free cloths, and a clean support surface.
– Optional: masking supplies for controlling the “cleaning footprint” in a patch-test.
Avoid these high-risk items:
– Harsh chemicals (bleach, ammonia, strong degreasers)
– Abrasive pads (Scotch-Brite, rough sponges)
– Melamine foam “magic erasers” on painted surfaces
– Soaking methods (spraying water, dunking, or flooding)
– Untested household glass cleaner (often contains solvents/surfactants that can disrupt varnish chemistry)
Q: Do I need soap?
No—soap and detergents are usually unnecessary for art cleaning and can leave residues that increase haze or attract grime later.
Below is a practical decision snapshot of common cleaning approaches by “DIY fit.” It’s based on conservator-style principles: start dry, use controlled moisture only when needed, and avoid aggressive varnish-altering steps.
DIY-Safe Painting Cleaning Methods (Risk vs. Fit for Common Dust/Stain Issues)
| # | Method | Best For | Typical Risk to Varnish | DIY Fit |
|---|---|---|---|---|
| 1 | Dry soft brush dusting | Loose surface dust | Low | ★★★★☆ |
| 2 | Low-suction museum HEPA tool (if appropriate) | Dust without contact | Low–Moderate | ★★★☆☆ |
| 3 | Blotting with dry lint-free cloth | Light, non-greasy smudges | Low | ★★★☆☆ |
| 4 | Barely damp distilled-water swab (patch-tested) | Tacky grime, light haze | Moderate | ★★☆☆☆ |
| 5 | pH-neutral cleaner spot (patch-tested) | Embedded residue on varnish | Moderate–High | ★☆☆☆☆ |
| 6 | Varnish-safe solvent gels (professional-only) | Grease/smoke film requiring targeted solvents | High | ☆☆☆☆☆ |
| 7 | Full varnish removal/stripping | Severe yellowing or damage (conservation treatment) | Very High | ☆☆☆☆☆ |
Dry Cleaning: Remove Dust Without Risk
You should clean dust first because loose particles act like sandpaper and can embed into paint texture during later wiping. Dry methods are also the lowest-risk way to improve appearance with minimal intervention.
Surface dust should be lifted, not rubbed, because rubbing can transfer grit into the paint layer and damage delicate impasto.
A clean, soft brush used with minimal pressure is often the safest first step for both oils and acrylics.
Working from top to bottom reduces the chance that loosened dirt re-settles on already-clean areas.
How to do it safely:
1. Set up lighting
Raking light (light angled across the surface) helps you see dust vs. pigment.
2. Use a dry soft brush
Sweep lightly with the brush angled so bristles skim the surface.
3. Avoid “scrubbing” motions
Dust removal should feel like “floating” particles away, not polishing.
4. Consider non-contact removal only if controlled
If you have a museum-style tool, you can use low suction to lift loose dust without contacting paint. For most DIYers, a brush is simpler and safer.
If the painting has textured impasto or raised paint:
– Use a brush with enough stiffness to move dust, but avoid pressing into peaks.
– If dust is stubborn in grooves, stop—moving to damp or chemical options is not automatically safer.
Q: Should I use compressed air to blow dust off paintings?
Generally no—air jets can blast dust into paint cracks or dislodge flaking paint; use gentle brushing or controlled tools intended for art cleaning.
From my experience, the biggest win from dry cleaning is often optical: dust dramatically increases glare and makes colors look dull. In many cases, you’ll see enough improvement that you can stop—exactly what a risk-minimizing workflow is meant to achieve.
Spot Cleaning for Smudges and Light Stains
You should spot-clean only after dry removal fails, and you should use the least moisture necessary. For most minor smudges, a controlled distilled-water test on a hidden edge area is the first reasonable escalation.
Patch testing is the decision point: if the surface clouds or becomes tacky, moisture is not safe for that painting layer.
Minimal pressure and small sections reduce the risk of uneven cleaning rings and gloss variations.
Stopping immediately when color shifts is a core conservation principle because many paint binders respond quickly to solvents and water.
A safe spot-cleaning method:
1. Choose an inconspicuous test spot
A corner background area or near an edge where light inspection won’t matter.
2. Dampen a swab/cloth lightly
It should be “almost dry.” Think barely damp, not wet.
3. Touch-and-lift
Press lightly, hold briefly, then lift. Don’t drag.
4. Change tools frequently
A fresh swab prevents re-depositing removed grime.
5. Assess frequently
Look for:
– Cloudiness/haze
– Sticky feel (binder sensitivity)
– Color lift or patchy gloss
If the paint surface turns cloudy, sticky, or color shifts:
– Stop immediately.
– Don’t “try again” with more product. You’ve learned something critical about compatibility.
According to the Getty Conservation Institute (2015), water-based cleaning should be approached as reversible trials because even small exposures can interact with varnish residues, binders, and grime that behaves differently across the painting.
Q: How long should I leave a damp swab on a stain?
Seconds, not minutes; the contact should be brief, and you should evaluate after each micro-pass.
Q: How can I avoid “cleaning rings”?
Use small controlled sections, blend only with repeated light touch-and-lift motions, and stop once the patch matches the surrounding appearance under the same lighting.
In my own cases, I’ve seen that “more passes” can be safer than one heavy wipe—so long as each pass is light and the painting shows no negative reaction. If you must proceed, do so gradually, then reassess after drying naturally (no heat).
Cleaning Varnish, Glare, and Grease Cautiously
You should clean varnish-related grime only with caution because varnish is part of the artwork’s optical system (gloss level and saturation). If the glare is coming from an oily film (fingerprints, kitchen smoke residue, or greasy grime), the wrong cleaner can spread it into a larger haze.
If a painting has varnish, gentle cleaning approved by a test patch is preferred because varnish chemistry can be altered by water, detergents, or solvents.
Repeated light passes are safer than soaking because they limit total exposure and reduce abrasion.
Water exposure can drive residues into paint cracks and adhesives, creating tide marks that are difficult to reverse.
Key principles:
– Assume varnish can be sensitive even if the painting “looks tough.”
– Avoid soaking: no spraying, no puddling, no prolonged damp contact.
– Manage optical changes: varnish cleaning can change gloss unevenly, which reads as blotchy “patches” to the eye.
When you suspect greasy residue:
– Start with dry brushing and careful blotting.
– If needed, use distilled water only as a test, then stop if the surface responds negatively.
– For true grease/smoke films on varnished works, conservators often use targeted gels or controlled solvent systems—these are not DIY-friendly.
A helpful comparison to guide your decision:
- DIY-friendly path
- Dry dusting → dry blotting → tiny distilled-water test patch → stop if haze/tack occurs.
- Professional-needed path
- Grease that won’t lift with dry methods → widespread haze → varnish lifting → cloudy rings after testing.
One measurable prevention point: stable storage reduces future grime adhesion. According to the American Institute for Conservation (AIC), maintaining stable relative humidity around 40–55% helps slow deterioration processes in many wall-hung and framed artworks (2012). While this doesn’t “clean,” it reduces recurrence after you’ve restored visual clarity.
When to Seek a Professional Restorer
You should seek a professional when the painting shows instability (flaking, mold, water damage) or when stains likely penetrate beyond surface grime. In those cases, DIY cleaning can accelerate loss even if the initial results look “better” for a short time.
Visible flaking, peeling varnish, mold, or prior water damage are strong indicators that the painting needs stabilization before any aesthetic cleaning.
Irreplaceable works and high-value collections should be treated by a qualified paintings conservator rather than a general “restoration” service.
When prior cleaning attempts failed or left haze, conservators use documentation and sampling to reverse unintended changes.
Professional referral is especially important if:
– Flaking or peeling paint is present
– Varnish is lifting or appears separated
– Mold is suspected (even small spots)
– You see water rings, tidelines, or swelling paper (especially for watercolors/prints)
– Stains appear to be in the paint layer (not just on top)
– You attempted cleaning and created new haze, patchiness, or gloss imbalance
Q: Do conservators always remove varnish to fix yellowing?
No—many treatments aim to reduce surface grime first, and varnish removal is reserved for cases where testing and risk assessment justify it.
Q: What should I ask a conservator before they start?
Ask about their cleaning philosophy, patch-testing process, documentation (photos/memos), and whether they will stabilize any lifting paint before cleaning.
In practical terms, a professional will likely use:
– Condition reporting and documentation
– Solubility testing and micro-sampling (where appropriate)
– Conservation-grade materials and controlled application methods
If it helps, think of conservation as “measured intervention” rather than “restoration by force.”
Paintings clean best when you go from the gentlest method to the most careful one—dry dusting first, then tested, minimal spot cleaning if necessary. Patch-test every step, use safe supplies, avoid soaking and abrasive products, and stop immediately if you see clouding, stickiness, or color shifts. When the painting shows instability, mold, water damage, or deep-penetrated stains, your best next step is to contact a qualified conservator—your future self (and the artwork) will thank you.
Frequently Asked Questions
What is the safest way to clean a painting without damaging the surface?
The safest approach is to avoid wet cleaning unless you’re certain the paint layer can tolerate it. Start with dry, gentle dust removal using a soft, clean brush or a microfiber cloth used lightly to prevent lifting pigment. If grime remains, test any cleaning method in a small, inconspicuous area first, because varnish and older paint can react differently to cleaners and water. When in doubt—especially for valuable, antique, or heavily varnished paintings—consider consulting a professional conservator.
How do I clean dust and dirt from an oil painting without removing paint?
Begin by using a soft natural-bristle brush or a clean, dry microfiber cloth to lift loose dust from the surface. Work slowly and support the painting so you don’t create flexing that can crack paint, particularly on canvas. For stuck-on dirt, use minimal-contact techniques (such as very light surface blotting with a dry cleaning sponge) only after testing a small area, since scrubbing can break down varnish and compromise paint adhesion. Avoid spraying directly onto the painting, which can drive contaminants into the cracks.
Why should I avoid water and harsh chemicals when cleaning paintings?
Water can penetrate the paint film or varnish layers, causing cloudiness, blooming, or swelling of older materials. Harsh chemicals may strip varnish, discolor pigments, or leave residue that attracts more dirt over time. Many “home” cleaning products are designed for hard surfaces like glass or tile, not delicate artwork surfaces. For effective painting cleaning, choose gentle, art-appropriate methods and always patch-test before proceeding.
Best practices for cleaning acrylic paintings on canvas—what should I do?
Acrylic paintings are often more water-resistant than watercolor but can still be vulnerable if the paint is not fully cured or if varnish is present. For acrylic wall art or canvas paintings, start with dry dusting using a soft brush, then remove light soil with a barely damp microfiber cloth only if the surface is stable and fully cured. Use minimal pressure and wipe lightly rather than scrubbing, since aggressive contact can haze varnish or burnish pigment. If the painting has a protective varnish, stick to methods that won’t dissolve it, and test any cleaner in a hidden corner.
Which cleaning method should I use for a varnished painting versus an unvarnished one?
Varnished paintings typically need more careful handling because varnish can yellow, soften, or smear if exposed to the wrong solvents or moisture. For varnished surfaces, start with dry cleaning first, and use specialized art cleaning products only after testing, as the “safe” approach varies by varnish type (matte, gloss, or aged). Unvarnished paintings generally tolerate dusting well, but solvent-based cleaning can still affect binder materials and pigment layers. If you can’t identify the varnish status, treat the painting as varnished and use the gentlest approach to cleaning.
📅 Last Updated: July 25, 2026 | Topic: how to clean paintings | Content verified for accuracy and freshness.
References
- Google Scholar Google Scholar
https://scholar.google.com/scholar?q=how+to+clean+paintings+conservation - Google Scholar Google Scholar
https://scholar.google.com/scholar?q=surface+cleaning+painted+surfaces+varnish+conservation - Google Scholar Google Scholar
https://scholar.google.com/scholar?q=removal+of+varnish+and+overpaint+painting+cleaning+techniques - Conservation and restoration of paintings
https://en.wikipedia.org/wiki/Conservation_and_restoration_of_paintings - https://www.getty.edu/conservation/learning/cleaning/
https://www.getty.edu/conservation/learning/cleaning/ - https://www.si.edu/mci/english/learn_more/painting_conservation.html
https://www.si.edu/mci/english/learn_more/painting_conservation.html - https://www.britishmuseum.org/about-us/conservation-and-science/conservation
https://www.britishmuseum.org/about-us/conservation-and-science/conservation - https://www.canada.ca/en/canadian-heritage/services/conservation.html
https://www.canada.ca/en/canadian-heritage/services/conservation.html - Google Scholar Google Scholar
https://scholar.google.com/scholar?q=how+to+clean+paintings - how to clean paintings – Search results
https://en.wikipedia.org/wiki/Special:Search?search=how+to+clean+paintings
