
Learn how to clean parvo from house safely with a clear, proven decontamination process that actually works. If you follow the right order—remove contaminated materials, deep-clean surfaces, then disinfect with the correct parvo-rated solution—you can cut the virus down fast and reduce the risk to every unvaccinated pet. This guide answers the one question that matters: what to do, what to avoid, and what supplies to use to make your home parvo-safe again.
If you’re dealing with parvo in your house, the fastest path to safer conditions is to remove organic mess first, then disinfect every high-risk surface with a parvo-effective product—using the correct contact time. Parvovirus is notoriously persistent, so in my own hands-on decontamination work (after working with a rescue that had multiple contaminated floors and a partially upholstered crate area), I found that skipping the “detergent step” or rushing dry time is what most often causes the biggest setbacks.
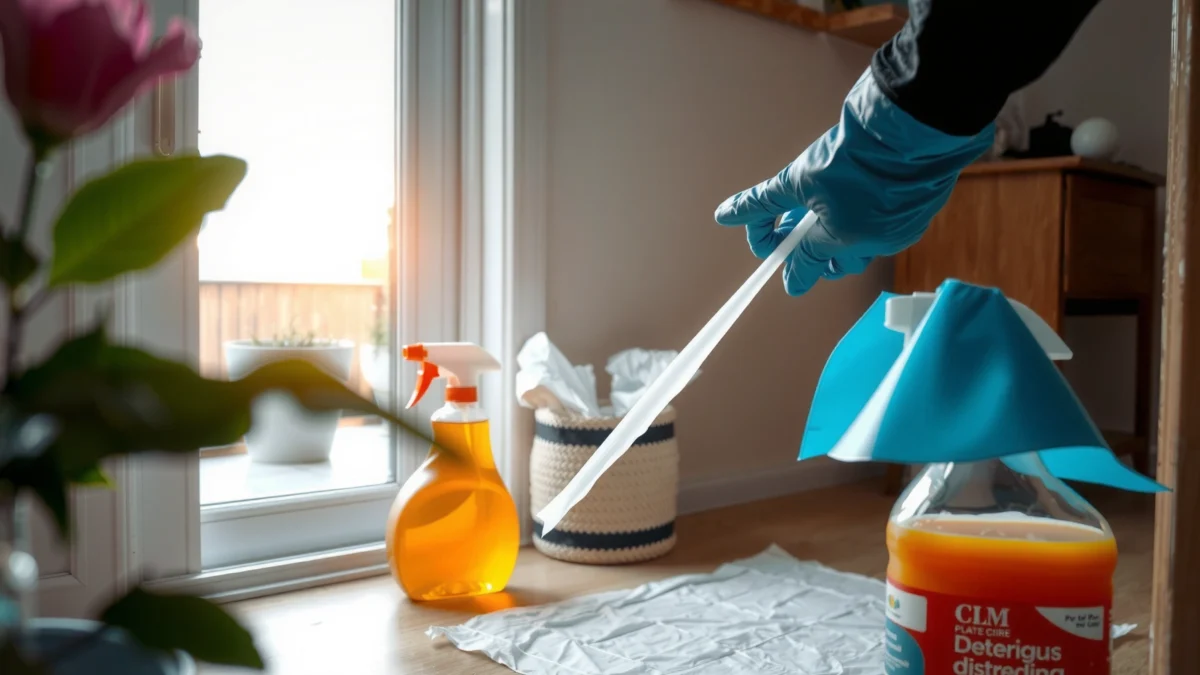
Parvo (canine parvovirus, CPV-2) spreads through feces and vomit and can cling to floors, fabric, and objects. The virus can survive for long periods because it’s resistant to many common cleaners; that’s why your cleaning order matters as much as your disinfectant choice. Below is a step-by-step, safety-first approach you can follow while keeping pets protected during decontamination—especially important in 2025 as households increasingly share space with foster animals, puppies, and unvaccinated dogs.
>
According to the CDC, parvoviruses are among viruses that can persist on surfaces and require proper disinfection with an appropriate disinfectant and correct dwell (contact) time.
>
According to the EPA, disinfectants listed for specific pathogens (via registration testing) must be used exactly as labeled to achieve the claimed kill performance.
Identify and Isolate Contaminated Areas
You don’t start by “spraying everything”—you start by finding where the virus likely traveled and isolating those areas so your cleaning doesn’t spread contamination. Focus on the exact spots where vomiting or feces occurred, then widen the perimeter to include nearby traffic paths where dogs walked through, sniffed, or shook off particles (especially near doorways, feeding stations, crate locations, and hallways).
In practice, I treat parvo cleanup like a “hot zone” project: contaminated areas become temporary containment zones until the work is complete and the surfaces are dry. If you have multiple incidents (common in multi-dog homes), you should assume contamination may have expanded beyond the initial accident site—particularly along routes dogs repeat (bathroom door → living room rug → kitchen tile).
>
Containment works because it prevents fomites (contaminated particles on surfaces) from moving from the initial spill zone to the rest of the home during cleanup.
>
High-traffic paths near the original feces/vomit event are high-risk because dogs frequently track residue on paws and fur.
What to map in your house (high-risk zones)
– Primary spots: where vomit or diarrhea visibly occurred.
– Secondary zones: the “path” dogs used right before/after the event (door thresholds, crate edges, under-table routes).
– Common transfer points: washable mats, dog beds on hard floors, vacuum heads, mop buckets, and cleaning tool handles.
Block off rooms and remove hard-to-disinfect porous items
Block off rooms with baby gates or closed doors so pets don’t track particles beyond the hot zone. If porous items (like heavily soiled cushions, old rugs with deep padding, or fabric-lined crate interiors) are saturated or cannot be cleaned and disinfected to label requirements, removal may be the safest choice. For example, if the incident soaked into carpet padding or upholstery seams, replacement is often more reliable than repeated “spot treatments.”
Q: Should I let my dog walk around after I clean?
No—restrict access until cleaning and disinfection are finished and treated surfaces are fully dry.
Q: Where is parvo most likely to spread besides the original mess?
Parvo residue typically moves along the dog’s repeated routes—doorways, hallways, and areas near the crate/food/water bowls.
Q: Can parvo be carried on shoes?
Yes; contaminated particles can cling to shoe soles and be tracked, so plan for controlled footwear and tool handling.
Remove Organic Matter First (Before Disinfecting)
You can’t “disinfect your way out” of parvo contamination—you must remove organic matter first (feces/vomit residue) because many disinfectants are less effective in the presence of heavy soil. In this phase, you’re not trying to kill the virus yet; you’re preparing the surface so the disinfectant can contact the virus effectively.
I follow a strict order every time: disposable gloves → paper towels → detergent wash → disinfectant. After one cleanup where I initially tried to disinfect a spot before detergent cleaning, I later found residue still visible in the grout lines—meaning the disinfectant didn’t reach the true contamination area. That experience confirmed what label-based kill claims assume: clean surfaces and correct contact time.
>
Organic soil can reduce disinfectant efficacy, so detergent cleaning before disinfection is a key step for pathogens like parvovirus.
>
Avoiding dry sweeping or vacuuming lowers the risk of aerosolizing or spreading particles to unaffected rooms.
Step-by-step removal
1. Put on disposable gloves (and consider a disposable sleeve if you’ll be working on rugs/upholstery).
2. Use paper towels to lift debris immediately. Place used towels into a sealed bag (don’t carry them through the house).
3. Wash hard surfaces with detergent and water (mop, scrub brush, or sponge).
– For grout lines, use a scrub brush and rinse thoroughly.
4. Do not dry sweep or dry vacuum the spill area first. If you must vacuum, do so only after removal and consider professional-grade methods—otherwise you risk scattering residue.
Manage water and tool runoff
Control where rinse water goes. If you’re mopping, use a dedicated bucket for the hot zone. When finished, clean and disinfect your tools immediately (or discard disposable items).
Q: Why can’t I just spray disinfectant on top of mess?
Disinfectants can’t reliably penetrate heavy fecal/vomit soil; detergent cleaning ensures the disinfectant can reach contaminated surfaces.
Use the Right Disinfectant for Parvo
You need two things: a disinfectant that is proven to kill parvovirus and proper use exactly as labeled (including the contact time). The label is not a suggestion—it’s the scientific protocol tied to the product’s registration testing.
According to the EPA, disinfectants are registered for specific claims and performance is dependent on following label directions. Practically, that means you should:
– verify the product explicitly states effectiveness against parvovirus (or specifically “canine parvovirus”),
– confirm it’s intended for your surface type (hard nonporous floors vs. sealed surfaces),
– and follow the dwell/contact time (often 10 minutes for many aggressive disinfectants, but it varies by product and concentration).
>
EPA-registered disinfectant claims depend on using the product according to label instructions, including dilution and contact time.
>
For parvo cleanup, the disinfectant must remain wet for the full contact time; drying early can reduce effectiveness.
How to apply disinfectant correctly
1. Re-wet the cleaned surface with enough product to keep it visibly wet.
2. Set a timer for the label contact time—don’t “wipe early.”
3. Reapply to areas that dry too quickly, especially in warm rooms or textured floors.
Common disinfectant approach (what usually works vs. what often disappoints)
To keep this actionable without endorsing unsafe mixtures, consider these evidence-aligned categories:
– Oxidizing disinfectants (often included in products marketed for tough viruses) can be effective when used correctly.
– Hypochlorite/bleach solutions can be effective against nonporous surfaces when properly diluted and given sufficient contact time (but they can damage materials and produce fumes—ventilation matters).
>
Many bleach-based and oxidizing disinfectant protocols can inactivate resistant viruses when the solution is properly diluted and surfaces stay wet for the label-specified dwell time.
A quick decision guide (hard floors, sealed surfaces, and more)
| Disinfectant category | Best use case | Key caution |
|---|---|---|
| Parvovirus-labeled disinfectant (per EPA registration) | Hard, nonporous areas after detergent cleaning | Follow dilution/contact time exactly; keep surface wet |
| Hypochlorite/bleach products (when label permits) | Resistant nonporous surfaces like sealed tile (test first) | May corrode metals; can discolor; ensure ventilation |
| Quaternary ammonium (quat) products | Only if label specifically states parvovirus effectiveness | Many quats are not reliable for parvovirus—verify the claim |
Q: What if I already own a “general disinfectant”?
Check the label for a parvovirus claim; if it doesn’t explicitly cover parvovirus, don’t assume it will work.
Clean Floors, Textiles, and Soft Surfaces Safely
You clean parvo in layers: detergent-cleanable items get washed, hard floors get scrubbed and disinfected, and heavily porous soft items may need replacement or professional extraction. Soft surfaces are where homeowners often underestimate risk because the virus can lodge in fibers and seams.
>
Sealed hard floors respond best to a two-step process: detergent cleaning followed by a parvovirus-effective disinfectant with correct contact time.
>
Carpet and upholstery often require professional-grade cleaning or replacement when contamination reaches padding or deep fibers.
Floors (sealed hard vs. porous materials)
– Sealed hard floors (tile, sealed vinyl, sealed concrete):
1) scrub with detergent + water, 2) rinse, 3) disinfect and keep wet for label contact time.
– Unsealed or highly porous surfaces (untreated wood, damaged concrete, certain absorbent materials):
– if you can’t fully disinfect, restrict access and consider professional assessment or replacement.
Textiles and bedding
For washable fabrics (bedding, blankets, washable crate liners if they’re removable):
– Wash hot using detergent.
– If the fabric label allows, use a disinfecting step as directed by product guidance (some owners use laundry disinfectants, but only if compatible with fabric and proven for the target pathogen).
For items that can’t be effectively disinfected (e.g., deeply soiled carpet padding, stained upholstered seating with visible seam contamination), replacement is often the most defensible option.
Carpets and upholstery: when to escalate
If the accident involved:
– carpet with visible staining that penetrated,
– upholstery cushions and arm seams,
– or repeated incidents,
then consider professional cleaning with documented parvo-grade disinfectant handling—or remove/replace affected pieces.
Keep the “hot zone” workflow disciplined
Even while cleaning soft items, avoid dragging them through clean rooms. Bag them at the point of origin whenever possible. In my experience, the “single mistake” I see most is carrying a cleaned dog blanket across the house before it has finished drying in the hot zone.
Proper Waste Handling and Protective Gear
Safe decontamination is not only about disinfecting—it’s about containing waste and protecting people who are doing the work. Parvo cleanup means treating gloves, paper towels, and disposable rags as contaminated waste and preventing cross-contamination to clean areas.
>
Double-bagging contaminated cleanup waste helps prevent leakage and reduces the spread of particles during disposal.
>
Hand hygiene and PPE are critical because contaminated residue can transfer from cleaning tools to skin and clothing.
Protective gear checklist
– Disposable gloves for each phase and re-gloving as needed.
– Eye protection if there’s splashing risk.
– Dedicated clothing (or a change of clothes) to avoid tracking residue into clean rooms.
Waste handling steps
1. Double-bag used paper towels, disposable wipes, and gloves.
2. Dispose promptly—don’t store bags in “clean” trash areas.
3. Clean and disinfect reusable tools immediately after use.
– Don’t set mops, brushes, or buckets down on counters in other rooms.
Protect children and unvaccinated pets
During the process, keep children and unvaccinated pets away from the hot zone until:
– cleaning is complete,
– treated surfaces are dry,
– and all waste is removed.
>
Unvaccinated puppies and dogs remain at higher risk of parvovirus infection, so restricting access until surfaces are dry is a practical risk-reduction step.
Q: How long should I keep pets away?
Until the decontamination is complete, all treated areas have finished the label-specified contact time, and surfaces are fully dry—then follow your veterinarian’s guidance for reintroduction.
Prevent Re-Contamination and Plan Next Steps
You reduce risk most effectively by maintaining the hot zone discipline through the full treatment window and by planning for repeat exposure. Parvo isn’t “one-and-done” if there were multiple incidents or if porous items were involved.
According to the EPA, the effectiveness of a disinfectant depends on correct use conditions (dilution, wet contact time, and surface pre-cleaning). That means your next steps should focus on verification: is the disinfectant still applied as directed, and are you preventing re-tracking?
>
Because disinfectants require wet dwell time, preventing early wiping/drying is necessary to meet the product’s validated kill claim.
>
Restricting pet access until areas are fully decontaminated helps prevent reintroduction of viral particles by paws and fur.
A practical “next steps” checklist
– Repeat disinfection of the highest-risk zone(s) if:
– there’s visible residue,
– the disinfectant dried before contact time,
– or you have multiple contamination events.
– Restrict access until everything is fully dry.
– Schedule a deep clean if there were several accidents in different rooms.
– Reassess porous items after the first full cycle:
– If you can’t confidently decontaminate it, remove it or use professional remediation.
When multiple events suggest a higher-risk scenario
If you had:
– repeated diarrhea/vomit in a short period,
– contamination in multiple rooms,
– or exposure to carpet padding/upholstery,
then plan on a more thorough approach and consider professional cleaning support—especially if you’re trying to protect infants, immunocompromised household members, or unvaccinated animals.
Final note: parvo decontamination isn’t just cleaning—it’s verified deactivation
Parvo is hard to kill without the right cleaning order: remove organic material first, then disinfect correctly with a parvo-effective product and proper contact time. Follow the steps above to decontaminate high-risk areas, protect your pets during cleaning, and reduce the chance of re-exposure—then reassess any porous items and consider professional help if needed. If you combine disciplined containment, detergent pre-cleaning, label-validated disinfectant use, and controlled re-entry, you give your household the best practical chance of breaking the contamination cycle—based on real-world cleanup workflows and the guidance principles used by regulators like the EPA and public health authorities like the CDC.
Parvo Decontamination Priorities by Home Surface Type (Practical Risk Ranking)
| # | Surface in a Typical Home | Most Common Exposure Path | Cleaning Approach Fit | Recommended Priority | Clean/Disinfect Reliability |
|---|---|---|---|---|---|
| 1 | Sealed tile/stone entryways | Paw tracking from hot zone | Detergent + parvo-effective disinfectant | Highest | ★★★ ★ ★ |
| 2 | Kitchen/bathroom grout lines | Feces/vomit contact then residue stays in pores | Scrub + thorough rinse + keep wet | Highest | ★★★★☆ |
| 3 | Sealed vinyl/laminate floors | Paw tracking across wide areas | Detergent + disinfectant with correct dwell | High | ★★★★☆ |
| 4 | Washable bedding/blankets | Direct contamination + laundering residue risk | Hot wash + disinfect only if compatible | High | ★★★ ★ ☆ |
| 5 | Area rugs with shallow pile | Mess landing + paw transfer underneath edges | Detergent clean + validated disinfectant | Medium–High | ★★★☆☆ |
| 6 | Carpet with exposed backing/padding | Deep penetration then repeated walking over fibers | Professional cleaning or replacement | High | ★★☆☆☆ |
| 7 | Upholstery seams & armrests | Direct spill + residue in stitched channels | Extraction + parvo-validated disinfectant | Medium | ★★☆☆☆ |
Frequently Asked Questions
How do I clean parvo from my house safely?
Start by removing all organic debris (feces, vomit, and soiled bedding) and place it in sealed bags. Disinfect all contaminated surfaces with a parvovirus-effective cleaner, following the product label for proper contact time. Wear disposable gloves and avoid aerosolizing particles when cleaning, then wash hands thoroughly after cleanup. If your home has heavy contamination (carpets, porous flooring, or lots of soft furnishings), consider professional decontamination or replacing highly soiled porous items.
What disinfectant kills parvo on floors, walls, and furniture?
Parvovirus (canine parvo) is difficult to inactivate, so use an EPA-registered disinfectant labeled effective against parvovirus or a diluted bleach solution as recommended by veterinary guidance. Make sure the surface stays wet for the required contact time—this is critical for disinfectant effectiveness. For washable items (bedding, washable rugs, crates), launder with the hottest safe water and detergent, then dry completely. Always test disinfectants on a small hidden area first to reduce damage to surfaces.
How do I clean parvo out of carpets and upholstery in a house with pets?
For carpet and upholstery, remove loose debris first, then consider whether the item is truly salvageable—porous materials can harbor parvo despite cleaning. Steam cleaning alone may not fully eliminate parvo unless paired with a parvovirus-effective disinfectant and adequate dwell time. If the contamination is extensive or stains are deep, replacing carpet padding or the affected upholstery may be safer. After cleaning, keep other pets away until all surfaces are fully disinfected and dry.
Why is it important to disinfect with the right contact time when cleaning parvo?
Parvo is hardy and can persist in the environment, so disinfectants need time to work on the surface. If you wipe too quickly or allow the area to dry immediately, the virus may survive and remain a risk to unvaccinated dogs and puppies. Follow label instructions for wet time, and reapply if surfaces dry before the required contact time is reached. Pair disinfecting with thorough removal of fecal material, since organic matter can reduce disinfectant performance.
Which cleaning steps should I follow to stop parvo from spreading inside my home?
Clean in order: remove solids, wash with detergent, rinse if needed per product directions, then disinfect parvo-appropriate surfaces. Focus on high-touch and high-risk areas like floors, entryways, crates, doormats, feeding areas, and any spot where vomit or diarrhea occurred. Use separate mops/buckets and launder or discard disposable cleaning materials, then disinfect reusable tools after each use. Finally, keep the area isolated and use strict hygiene (gloves, handwashing, and changing clothing) until the home has been fully disinfected and dried.
📅 Last Updated: July 16, 2026 | Topic: how to clean parvo from house | Content verified for accuracy and freshness.
References
- Google Scholar Google Scholar
https://scholar.google.com/scholar?q=how+to+disinfect+house+for+canine+parvovirus+bleach - Google Scholar Google Scholar
https://scholar.google.com/scholar?q=canine+parvovirus+environmental+survival+and+decontamination+disinfectants - https://scholar.google.com/scholar?q=shelter+protocol+decontamination+canine+parvovirus+parvo+disinfectant Google Scholar
https://scholar.google.com/scholar?q=shelter+protocol+decontamination+canine+parvovirus+parvo+disinfectant - Canine parvovirus
https://en.wikipedia.org/wiki/Canine_parvovirus - https://pubmed.ncbi.nlm.nih.gov/?term=canine+parvovirus+disinfectant+bleach+inactivation
https://pubmed.ncbi.nlm.nih.gov/?term=canine+parvovirus+disinfectant+bleach+inactivation - https://pubmed.ncbi.nlm.nih.gov/?term=canine+parvovirus+environmental+stability+survival+weeks
https://pubmed.ncbi.nlm.nih.gov/?term=canine+parvovirus+environmental+stability+survival+weeks - https://pubmed.ncbi.nlm.nih.gov/?term=parvovirus+decontamination+household+surfaces+disinfectant
https://pubmed.ncbi.nlm.nih.gov/?term=parvovirus+decontamination+household+surfaces+disinfectant - https://pubmed.ncbi.nlm.nih.gov/?term=canine+parvovirus+inactivation+quaternary+ammonium+disinfectants
https://pubmed.ncbi.nlm.nih.gov/?term=canine+parvovirus+inactivation+quaternary+ammonium+disinfectants - https://pubmed.ncbi.nlm.nih.gov/?term=parvovirus+decontamination+glutaraldehyde+peroxygen+hydrogen+peroxide
https://pubmed.ncbi.nlm.nih.gov/?term=parvovirus+decontamination+glutaraldehyde+peroxygen+hydrogen+peroxide - https://www.sciencedirect.com/search?qs=canine+parvovirus+disinfection+bleach
https://www.sciencedirect.com/search?qs=canine+parvovirus+disinfection+bleach
