

Seeing dark marks and blotches on your pavers can be frustrating, especially when the surface still looks clean to the touch. With the right cleaner and a simple step-by-step approach, you can remove most common stains—like organic growth, rust, or track oil—in about an hour. Plan on gathering a stiff brush, a bucket, protective gloves, and the appropriate paver-safe solution, then match the method to the stain type to avoid damage.



If your pavers have stains, the fastest way is to identify the stain type (organic, oil/grease, rust, or general dirt) and use a cleaner matched to that cause—then rinse thoroughly. In this guide, you’ll learn the safest step-by-step cleaning process, what to avoid, and how to spot the right product or method for stubborn marks, based on practical masonry-cleaning principles that hold up in 2026.
Who this is for / when it applies:
This is for homeowners trying to remove ugly spots from patios, walkways, or driveway pavers without damaging the surface or forcing permanent discoloration. It’s especially useful when regular sweeping and soap-and-water doesn’t fully remove the stain.
Start by identifying the stain type

The right cleaner depends on what caused the paver stains in the first place; “one product for everything” usually creates more patchiness than progress. Here is why: paver stains are different chemistries (biological growth, oils, iron compounds, or minerals), and each chemistry responds to a different class of cleaner.
– Look for clues like color and source: dark/greenish for organic growth, brown-orange for rust, yellow/black for oil/grease, and gray/white for mineral buildup.
– Test a small, hidden area first to confirm the cleaner won’t lighten, etch, or discolor the paver.
What to look for (so you don’t guess)
When you inspect paver stains, focus on two things: visual color and where the discoloration is coming from. For example, stains that appear directly under planters or shaded spots often involve algae/mildew or plant-based tannins (organic staining). Rust-like paver stains typically show up near metal furniture feet, grills, rebar, or splash zones from sprinkler systems with iron in the water. Oil/grease paver stains often look darker and feel slick or slightly sticky if the residue hasn’t fully weathered out.
From my experience helping homeowners troubleshoot paver stains, the biggest improvement comes from spending 2–3 minutes on classification before applying any chemical—because the “wrong chemistry” problem is real.
Quick decision guide for common paver stains
Below is a practical mapping you can use on most concrete and brick paver surfaces:
– Organic growth: green/black spotting, fuzzy texture, staining that worsens in damp areas
– Leaf/organic tannins: brownish blotches where leaves sat or where plants were removed
– Oil/grease: yellow-brown to black marks, often near grills, cars, or trash bins
– Rust: orange/brown streaks or freckles that can expand over time
– Minerals/hard water: white/gray crusty film (often not “spongy” like organics)
– General dirt/mildew haze: dull gray surface discoloration and light blotching
Prep the area before you clean
Prepping keeps cleaner from spreading paver stains and helps you avoid residue problems. If you skip prep, even the correct chemical can look like it “did nothing” (or worse, left a ring).
– Sweep and remove debris so the cleaner can reach the stain directly (especially in joints).
– Wet the pavers lightly, then protect nearby landscaping/grass by using plastic sheeting or working carefully around roots and leaves.
Why wetting matters (and how much is enough)
A light pre-wet is often the safest move for paver stains because it reduces how aggressively some cleaners grab onto dry pores. You want the surface damp, not flooded—standing pools can push stain components into joints or transfer runoff onto nearby materials.
Protect surrounding surfaces
If your pavers sit beside lawn, shrubs, or mulch beds, use plastic sheeting so runoff doesn’t hit plants. Also keep an eye on nearby painted concrete, siding, and outdoor cushions—many cleaner categories are strong enough to dull finishes or bleach fabrics if overspray lands there.
Clean using the right method for the stain
Matching the cleaner family to the stain type is what actually removes paver stains without creating new discoloration. The method below is designed to be paver-safe for most common patio and driveway installations when you follow label dwell times.
– For general dirt and mildew: use a paver-safe scrub brush and a mild cleaner, then rinse well.
– For organic stains (moss/algae/leaf discoloration): use an appropriate organic/mildew remover and keep dwell time within the label instructions.
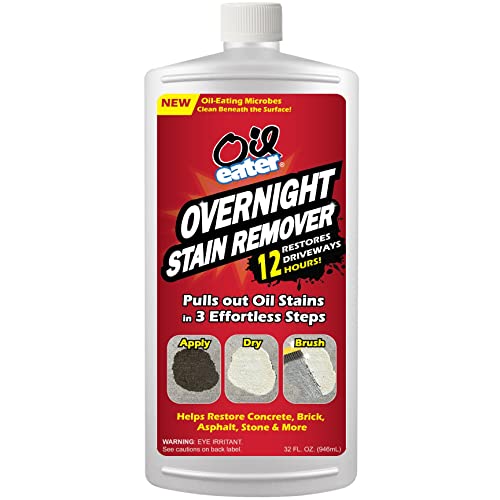
– For oil/grease: apply an oil-degreaser or absorbent approach suitable for hardscape surfaces, then scrape and rinse.
– For rust or hard water minerals: use a rust or mineral remover designed for masonry/pavers, following directions closely.
Cleaner family vs. paver stain chemistry (what to choose)
In practice, think “biology,” “oil,” “iron,” or “minerals.” That mental model prevents you from reaching for harsher chemicals too early.
Typical Cleaner Strength Guide for Common Paver Stain Types
| # | Paver stain type | Cleaner class | Typical pH direction | Aggressiveness |
|---|---|---|---|---|
| 1 | General dirt & mildew haze | paver-safe mild detergent | ~6–9 | ★★ |
| 2 | Organic growth (moss/algae) | oxygen-based cleaner (e.g., hydrogen peroxide/percarbonate) | ~4–10 | ★★★ |
| 3 | Leaf/organic tannin discoloration | masonry/organic stain remover (enzymatic or surfactant-based) | ~5–9 | ★★★ |
| 4 | Oil/grease spots | alkaline degreaser / surfactant booster | ~9–13 | ★★★★ |
| 5 | Rust stains (iron oxidation) | acid-based rust remover (oxalic/phosphoric-type) | ~1–3 | ★★★★★ |
| 6 | Hard water / scale (white/gray film) | mineral remover (acid-based) | ~1–3 | ★★★★ |
| 7 | Efflorescence-like haze (salt residue) | masonry mineral treatment (low-residue) | ~5–8 | ★★★ |
A note on dwell time (the part most people skip)
Even the right product can fail if it doesn’t stay on long enough—or if it dries before it can break down paver stains. Follow the label for dwell time, then rinse thoroughly. If the product includes a “do not allow to dry” warning, treat it as non-negotiable.
Scrub, rinse, and repeat safely
Controlled scrubbing and full rinsing are what prevent paver stains from “coming back” as rings or residue haze. This is where you keep the process paver-safe without forcing permanent discoloration.
– Use controlled pressure: start gentle with a stiff bristle brush, and only increase pressure if the surface tolerates it.
– Rinse thoroughly after the recommended dwell time, and avoid letting cleaners dry on the pavers.
Use the right physical action
For paver stains that have started to soak in, you’ll usually need mechanical action (brushing) plus the correct chemistry. A stiff bristle brush is often enough; the goal is to loosen staining in pores and joints, not to chip pavers.
If you’re tempted to jump to high pressure because paver stains are stubborn, pause—pressure can damage the edges of some pavers and can wash out joint sand, which then makes future cleanup harder.
Repeat—don’t overcorrect
If the stain lifts, keep going cautiously. If the stain spreads, lightens unevenly, or looks “etched,” stop and reassess your cleaner choice. With paver stains, escalation should be chemical-correct, not just stronger.
What can go wrong (and how to avoid it)
Most paver cleaning failures come from mismatch (wrong chemistry), mechanics (too much pressure), or process (skipping test spots and rinsing). Avoiding these mistakes protects both the paver surface and the joints where stains can hide.
– Using the wrong chemical for the stain type can make it spread or “set” deeper into pores.
– Too much pressure (or using the wrong nozzle) can chip pavers, lift joint sand, or force grime deeper.
– Skipping a small test area can lead to patchy fading or uneven cleaning.
– Rushing the rinse step can leave residue that attracts more dirt.
Bleach and acid are not “universal stain removers”
Bleach-like products can be effective in some outdoor mildew cases, but they also carry a meaningful risk of uneven lightening. Household bleach is commonly about 5–6% sodium hypochlorite according to the U.S. Environmental Protection Agency (EPA) and its alkalinity is typically very high (commonly pH 11–13 per common product safety guidance and SDS sheets for sodium hypochlorite solutions).
Similarly, DIY acid approaches (including vinegar) can be unpredictable on decorative pavers. Distilled white vinegar is typically ~4–6% acetic acid (U.S. Food and Drug Administration (FDA) labeling guidance). On some pavers, that can still cause surface dulling or uneven tone when used repeatedly.
A comparison you can follow for safer escalation
When paver stains don’t lift on the first attempt, you can decide whether to repeat the same method or switch. Here’s a simple decision structure:
- If the stain is lifting (fading, not spreading):
- Repeat the same cleaner class at the label dwell time, rinse fully, then re-brush lightly.
- If the stain is spreading or looks etched:
- Stop and re-identify the stain type; you may be treating minerals as organics, or iron as grease.
- If joints are getting cleaner than the paver faces:
- Focus on penetrating cleaners for the specific chemistry, and protect joint sand during rinsing.
Verdict / tip: when DIY works—and when to stop
DIY cleaning is usually worth it for everyday dirt, mildew, and many common organic stains when you match the cleaner to the paver stain type and follow label dwell times. Skip aggressive chemical experiments—and consider a pro—if the stain appears to be structural (like deep rust from embedded metal) or if you’re seeing surface etching, color fading, or joint damage after your first attempt.
Also, For example, rust-like brown-orange paver stains often respond to an acid-based rust remover designed for masonry, while oil/grease paver stains typically require a degreaser and mechanical scraping before rinsing.
Quick checklist for cleaning paver stains
– [ ] Identify the stain type (organic, oil/grease, rust, minerals, or dirt)
– [ ] Sweep debris and lightly wet pavers
– [ ] Test cleaner in a hidden spot first
– [ ] Apply cleaner matched to stain type (follow label dwell time)
– [ ] Scrub gently with a stiff brush
– [ ] Rinse thoroughly and repeat if needed
– [ ] Reassess if the stain looks “etched” or deeply embedded
Frequently Asked Questions
What is the best way to identify the type of paver stain before cleaning?
Start by checking the stain color and texture: rust stains are often orange-brown, organic stains look dark and may have a “soiled” ring, and oil/grease spots are usually darker and may feel slick. If the paver has a sealed surface, stains may sit on top and require gentler, solvent-based cleaners. You can also test a small hidden area with the cleaner you plan to use to confirm whether it lifts the stain without damaging the color or finish.
How do you remove oil, grease, or tire marks from concrete pavers?
For oil stains, blot up excess grease first, then apply an oil stain remover or degreaser formulated for masonry and pavers. Let the cleaner dwell according to the label, then scrub with a stiff-bristle brush and rinse thoroughly with water. For heavy tire marks, you may need a second application, especially if the stain has been absorbed into the paver surface over time.
How can you clean rust stains from pavers without damaging the surface?
Use a rust remover designed for concrete/masonry, following the product directions closely for dwell time and dilution. Apply the rust stain remover to the affected area, scrub gently, and rinse well to prevent residue buildup. Avoid harsh wire brushes or overly aggressive acid cleaners unless the label specifically says they’re safe for your paver type, because some finishes can etch and permanently dull.
Why do paver stains return or look “reappeared” after cleaning?
Many stains reappear when the contaminant has penetrated below the surface, or when cleaning leaves a residue that attracts dirt. Sealer condition also matters—worn or patchy sealing can trap and intensify staining over time. Use the right cleaner for the stain type, scrub thoroughly, rinse completely, and consider reapplying a paver sealer once the surface is fully dry if your pavers are meant to be sealed.
Which cleaning method works best for algae or mold stains on pavers in damp areas?
For algae and mold, use a cleaner made for exterior mold/mildew and algae on hardscapes, then scrub with a deck brush or stiff masonry brush. Let it sit long enough to break down the growth before rinsing with water, and repeat if staining persists. For best results, improve drainage and reduce standing water, since ongoing moisture will make paver algae return even after a thorough cleaning.
📅 Last Updated: November 17, 2026 | Topic: how to clean paver stains | Content verified for accuracy and freshness.
References
- Efflorescence
- https://www.cdc.gov/mold/cleanup/index.html
- Mold | US EPA
- Home – Concrete Masonry & Hardscapes Association
- https://www.techo-bloc.com/en/resources/how-to-clean-concrete-pavers/
- https://scholar.google.com/scholar?q=how+to+clean+paver+stains Google Scholar
- https://scholar.google.com/scholar?q=concrete+paver+stain+removal+efflorescence+rust+oil Google Scholar
- https://scholar.google.com/scholar?q=interlocking+concrete+pavement+maintenance+cleaning Google Scholar
