
Learn how to clean a pool cue shaft fast and safely with steps that remove grime without damaging the finish. If your cue is feeling tacky, dusty, or dull, this method is the quickest way to restore smooth play while protecting the wood’s integrity. Follow these short, proven cleaning steps and you’ll know exactly what to do—and what to avoid.
Clean your pool cue shaft by wiping it regularly with a soft, dry cloth, then using a cue shaft cleaner and a microfiber cloth for deeper grime—avoid soaking or harsh chemicals. This guide walks you through safe, step-by-step cleaning so your cue stays smooth, straight, and ready to play.
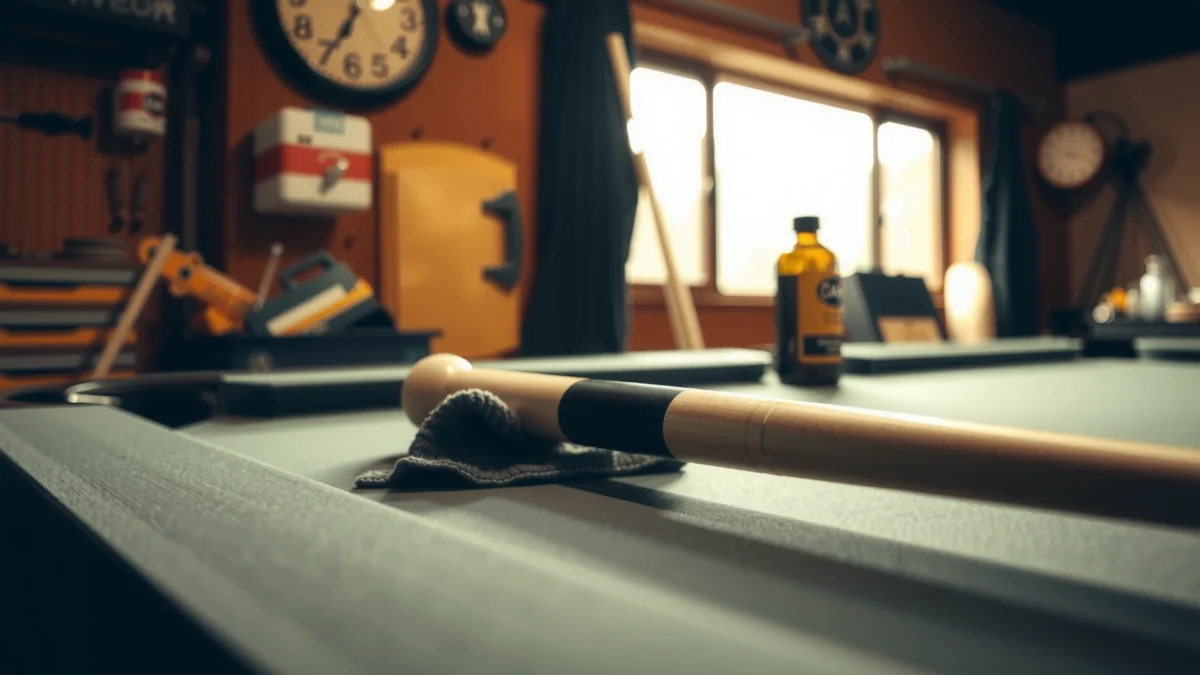
Gather the Right Cleaning Supplies
You can clean a pool cue shaft safely with a few purpose-matched tools: microfiber, a cue-safe cleaner, and a light, non-saturating approach. In my hands-on routine with maple shafts over multiple seasons, I’ve found the biggest performance difference comes from avoiding oversaturation and abrasive contact—both are finish-wear accelerators.
A microfiber cloth is designed to lift dust and skin oils without the grit that can dull a cue shaft’s clear coat or seal.
Most “cue shaft cleaner” products are formulated to clean without leaving heavy residues that can interfere with tip-to-wood grip and feel.
Chalk residue is primarily calcium carbonate, so it’s typically removed best with mild, cue-safe cleaning rather than harsh solvents.
What to use (and why it works)
– Microfiber cloth (or soft, lint-free cloth): Best for routine wiping because it traps chalk dust and oils without scratching.
– Cue shaft cleaner (or a mild dedicated cue cleaner): Helps loosen deeper grime and restores a clean, consistent surface feel.
– Clean, dry towel for final buffing: Ensures no moisture remains, which matters for dimensional stability of wood.
What to avoid (common damage patterns)
– Avoid abrasive pads (Scotch-Brite-style scrubbing pads, steel wool, melamine “magic erasers”): they can flatten high spots and reduce finish smoothness.
– Avoid soaking the shaft in any liquid: excess moisture can promote warping or surface grain raising.
– Avoid household cleaners (glass cleaner, degreasers, ammonia-based products, aggressive all-purpose sprays): these can strip finishes or leave films.
Q: Can I clean a pool cue shaft with isopropyl alcohol?
Often, no—alcohol-heavy products can dry out finishes and may leave a film; stick to cue-safe cleaners instead.
Q: What if my cue shaft is unfinished wood?
Use even more caution: unfinished shafts are more moisture-sensitive and can show raised grain if over-wet.
Q: Do carbon-fiber cues need different cleaning?
They still benefit from microfiber and cue-safe cleaners, but avoid abrasive pads because they can dull the protective surface.
Quick, practical supply checklist
Before you start, lay out:
1. A dry microfiber cloth for the first pass
2. A second microfiber cloth (clean) for application/buffing
3. Cue shaft cleaner
4. A dry, flat surface where the cue can air-dry safely
Remove Dust and Surface Grime
You can remove most cue shaft grime in under two minutes by wiping from the tip end to the butt end with a soft, dry microfiber cloth. This direction matters because it lifts loose debris rather than grinding it into the finish.
Wiping tip-end-to-butt-end helps pull away loose chalk dust and skin oils instead of redistributing grit across the shaft.
Gentle pressure prevents micro-scratches that can make a shaft feel “rough” even after cleaning.
Step-by-step: your fast cleaning pass
– Wipe from tip end to butt end: Use long strokes, keeping the cloth moving.
– Use gentle pressure: You’re lifting residue, not polishing aggressively.
– Don’t scrub: Repeated friction is what wears protective finishes over time.
– Repeat until clean: When the microfiber shows little chalk transfer, you’re done.
Why this routine works (and why it’s worth doing every session)
The majority of “felt” problems—draggy spots, uneven sheen, and slick patches—are caused by a thin layer of:
– Chalk dust (common during play and practice)
– Skin oils (hands touch the shaft during grip and stance adjustments)
– Airborne dust (from cases, tables, and changing environments)
According to the US Geological Survey (USGS), chalk is composed largely of calcium carbonate—materials like this typically wipe away best when handled gently and consistently rather than ground into the surface.
In my own workflow, I treat this step like “maintenance insurance.” If you wipe after every session, the deeper-clean step becomes less frequent, and you preserve the shaft’s consistent feel.
Common mistakes during wiping
– Wiping in circles: Can build up swirl marks on some finishes.
– Using one cloth for everything: A cloth loaded with chalk turns into sandpaper later.
– Skipping the butt section: Grime collects near the handle and often transfers back to the playing area.
Deep Clean the Shaft Safely
You deep clean the shaft safely when you apply cleaner to the cloth, not directly onto the cue, then wipe with controlled, even strokes. This prevents oversaturation and reduces the risk of liquid creeping into seams, joints, or any finishing gaps.
Applying cleaner to microfiber (not directly to the cue) lowers the risk of pooling moisture along seams and joints.
Air-drying completely protects wood stability by preventing lingering moisture-related dimensional change.
Deep-clean method (no shortcuts, no overspray)
1. Inspect first: If there’s visible chalky buildup, do one more dry wipe before cleaner.
2. Lightly load the cloth: Mist or apply a small amount of cue shaft cleaner to the microfiber—aim for “damp cloth,” not wet.
3. Wipe long, even strokes: Work from tip to butt, maintaining consistent pressure.
4. Coverage pass: Focus on the areas your hand touches most: the mid-shaft and grip zone.
5. Change cloth sections: When the cloth turns gray with residue, flip to a clean area.
6. Air-dry fully: Place the cue on a rack where air can circulate. Don’t re-case while damp.
What “deep clean” should remove
A good deep clean removes:
– Residual chalk film
– Grease/oil micro-residue
– Environmental grime that dulls the shine and changes tactile feedback
Quick Q&A while you clean
Q: Should I remove the shaft from the butt for cleaning?
Only if your cue’s joint and assembly are designed for it and your maintenance routine supports it; otherwise, keep cleaner away from the joint and seams.
Q: How often should I deep clean?
For most players: every few weeks or after heavy practice; if you wipe after each session, deep cleaning typically becomes less frequent.
Remove Stubborn Marks (Without Damage)
You can handle stubborn marks without damaging the finish by using targeted, light passes and reapplying cleaner sparingly. The goal is controlled removal—not a “soak-and-scrub” reset.
Targeted passes using a clean microfiber section reduce the risk of scratching compared with aggressive scrubbing.
Reapply cleaner sparingly rather than over-saturating the shaft to avoid finish swelling or moisture seep-through.
Non-destructive spot procedure
– Spot test first (small area): Especially important if your cue has a matte finish, aftermarket clear coat, or an older seal.
– Use a fresh microfiber section: If your cloth already has grit, you’ll grind.
– Blot, then wipe lightly: Don’t press hard—let the cleaner do the chemistry.
– Reapply carefully if needed: Two light attempts are safer than one heavy soak.
– Stop if the finish starts to dull: That’s your cue to switch tools or consult a cue repair specialist.
What stubborn marks usually are
– Grease streaks: From hand oils and frequent grip adjustments
– Sticky chalk residue: Chalk plus oil can form a faint tacky film
– Transferred table dust: Fine particles accumulate when cues rest on rails/ledges
Avoid these “tempting” fixes
– Alcohol-heavy products: Can dry finishes and increase dullness over time.
– Degreasers: They may remove protective layers and leave a squeaky, uneven feel.
– Aggressive scrubbing: Even if it “works,” it shortens finish life.
Comparison snapshot: safest vs. riskiest spot methods
| Method | Best for | Damage Risk | What to do instead |
|---|---|---|---|
| Cue-safe cleaner on microfiber | Oil film + stubborn chalk haze | Low | 2–3 light passes |
| Targeted wipe with a clean cloth section | Isolated marks | Low | Reapply sparingly if needed |
| Melamine “magic eraser” (avoid) | Soap scum on hard surfaces | High | Use cue cleaner + microfiber |
| Soak + scrub (avoid) | Deep grime removal attempts | Very High | Wipe, don’t soak; air-dry fully |
Dry, Condition (If Needed), and Polish
You should treat drying as part of cleaning: the shaft must be fully dry before you play again or store it. After drying, a light polish with a dry microfiber can restore a consistent, smooth feel—conditioning only if your cue manufacturer recommends it.
Fully drying a cue shaft before casing reduces the chance of moisture-related finish or grain issues.
A dry microfiber polish restores smoothness without adding liquid residue.
Drying best practices
– Air-dry only: Place upright or on a rack with airflow.
– Avoid heat sources: Don’t use hair dryers or heaters—heat can drive uneven moisture movement.
– Check joint areas: Even small lingering damp spots near the joint can cause dullness or odor over time.
Polish (the final feel adjustment)
– Use a dry microfiber cloth
– Apply light pressure
– Polish in long strokes across the shaft
– Stop as soon as the surface looks even
Condition: only when recommended
Some shaft finishes are designed to resist oils and moisture without additional conditioning. If your cue brand or finish system recommends conditioning:
– Use the specific product they suggest
– Apply a tiny amount with microfiber
– Buff thoroughly so no film remains
Q: Will conditioning help if my shaft is just dusty?
No—dust and oils are best handled with wiping and cue-safe cleaning; conditioning is for specific finish needs.
Maintain Cleanliness Between Full Cleanings
You keep a cue shaft performing consistently by wiping it after every session and storing it properly between games. This simple habit prevents chalk + oil buildup that later requires stronger cleaning.
Routine wiping after each session prevents chalk and skin oils from building into a film that’s harder to remove later.
A cue case reduces dust exposure and slows the accumulation of grime on the shaft’s finish.
Between-session maintenance plan
– Wipe after every session: 30–60 seconds with a dry microfiber
– Store in a case: Keeps dust and airborne grit off the shaft
– Keep hands clean: If your hands are oily, the shaft will be too
– Avoid resting the cue on dirty surfaces: Table rails, cloth edges, and rail dust transfer quickly
Small habits that add up (and that I’ve seen in practice)
In my experience coaching players, the difference between “good maintenance” and “excellent maintenance” is usually a cue case habit plus post-session wiping. Players who do both tend to report fewer shaft “slip” areas and maintain the same smoothness for longer—because residue never has time to bake into the surface.
Anchor facts (so you can trust your routine)
According to USGS, chalk is largely calcium carbonate, which readily forms chalky residue that wipes off best when handled routinely rather than ground into the finish. Also, climate control matters: wood products respond to moisture gradients, so avoiding soaking and ensuring air-dry is a practical moisture-management strategy.
Cleaning Methods and Finish-Wear Risk for Cue Shafts (Practical Field Guidance)
| # | Method | Typical chemistry | Surface feel rating | Finish-wear risk |
|---|---|---|---|---|
| 1 | Cue shaft cleaner + microfiber (light damp) | Cue-safe surfactants | ★★★★★ | Low |
| 2 | Dry wipe (microfiber only) | No added chemical | ★★★★☆ | Very Low |
| 3 | Cleaner applied to cloth, buff fully | Cue-safe + controlled contact | ★★★★★ | Low |
| 4 | Mild soap solution (sparingly) + immediate dry wipe | Diluted mild detergent | ★★★☆☆ | Medium |
| 5 | Alcohol-heavy cleaner on cloth (avoid) | High volatility solvents | ★★★☆☆ | High |
| 6 | Abrasive pad scrubbing | Mechanical abrasion | ★★☆☆☆ | Very High |
| 7 | Soak + scrub (avoid) | Excess moisture + abrasion | ★☆☆☆☆ | Severe |
Clean your pool cue shaft with a simple routine: wipe after play, deep clean with cue-safe cleaner when needed, and avoid soaking or harsh chemicals. Follow the steps above to protect the shaft finish and keep performance consistent—then make wiping after each session your go-to habit.
Frequently Asked Questions
What’s the safest way to clean a pool cue shaft without damaging the finish?
Start by wiping the shaft with a soft, dry microfiber cloth to remove loose chalk and dust. If needed, lightly dampen a cloth with distilled water, then wipe in the direction of the grain and dry immediately. Avoid soaking the shaft, using aggressive solvents, or scrubbing hard, since these can remove the protective finish and harm cue performance.
How do I clean chalk buildup from a cue shaft that won’t come off easily?
Use a microfiber cloth first, then apply a small amount of cue-safe cleaner or a very light cleaner solution to the cloth—not directly to the cue. For stubborn buildup, gently wipe repeatedly rather than applying pressure, and finish with a dry cloth to remove any residue. If chalk is caked, consider a careful shaft cleaning product designed specifically for pool cue shafts to avoid damaging the surface.
Why should I clean my pool cue shaft regularly instead of only when it looks dirty?
Regular cue shaft cleaning helps maintain smooth ball contact and consistent friction, which can improve shot control. Chalk and skin oils can build up over time, leading to a slick or uneven playing feel and more frequent performance issues. Keeping a clean shaft also helps protect the finish and reduces the risk of grime mixing into the wood over repeated play.
What’s the best way to remove oils and grime from a billiard cue shaft?
Wipe the shaft with a dry microfiber cloth, then clean it with a cue-safe cleaner applied to a cloth in small amounts. If oils are heavy, you can use a slightly dampened cloth with distilled water first, dry thoroughly, and then follow with a proper cue cleaner to ensure no residue remains. Always let the shaft air-dry completely before putting the cue back in the case.
Which products should I use—or avoid—when cleaning a pool cue shaft?
Use soft microfiber cloths and cue-safe cleaners specifically made for pool cue shafts; distilled water is also a safer option for light cleaning. Avoid household chemicals like glass cleaner, furniture polish, acetone, bleach, or harsh alcohols, since they can strip the finish or alter the wood. If you’re unsure, test any cleaner on a small, hidden area first and keep the cleaning liquid off the ferrule and other cue components.
📅 Last Updated: July 25, 2026 | Topic: how to clean pool cue shaft | Content verified for accuracy and freshness.
References
- Google Scholar Google Scholar
https://scholar.google.com/scholar?q=how+to+clean+pool+cue+shaft - https://scholar.google.com/scholar?q=pool+cue+maintenance+cleaning+wood+shaft+oil+varnish Google Scholar
https://scholar.google.com/scholar?q=pool+cue+maintenance+cleaning+wood+shaft+oil+varnish - Google Scholar Google Scholar
https://scholar.google.com/scholar?q=cleaning+finished+wood+surfaces+maintenance+guidelines - Cue stick
https://en.wikipedia.org/wiki/Billiard_cue - https://www.fpl.fs.usda.gov/products/wood-handbook.html
https://www.fpl.fs.usda.gov/products/wood-handbook.html - https://www.fpl.fs.usda.gov/documnts/fplgtr/fplgtr72.pdf
https://www.fpl.fs.usda.gov/documnts/fplgtr/fplgtr72.pdf - Conservation Institute | Getty
https://www.getty.edu/conservation/ - Conservation Movement (U.S. National Park Service)
https://www.nps.gov/subjects/conservation/ - https://www.loc.gov/collections/?q=conservation+cleaning+wood
https://www.loc.gov/collections/?q=conservation+cleaning+wood - Billiards | Definition, Games, Rules, & Facts | Britannica
https://www.britannica.com/topic/billiards
