

Here’s how to clean a razor after shaving fast and safely, with steps that prevent rust, clogged blades, and skin irritation. You’ll learn the quickest rinse method, the best way to remove shaving cream and hair buildup, and when to dry and store your razor for maximum performance. Follow these instructions and you’ll be ready for your next shave without the mess or maintenance hassles.


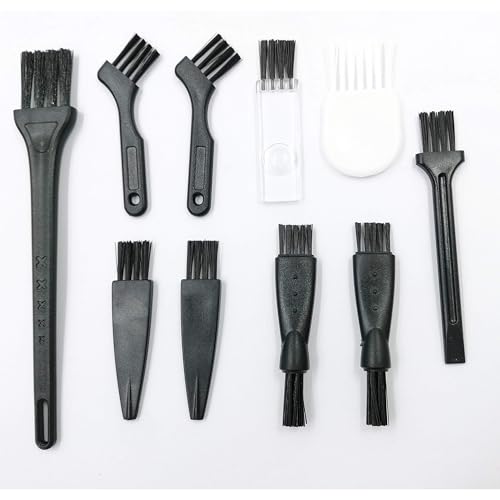
Rinse your razor right after shaving, then dry it thoroughly to prevent rust and clogged hairs. For a deeper clean, use warm water and mild soap, and only disinfect if the razor is meant for it (some finishes and cartridges don’t love harsh chemicals). If you follow a simple rinse–clean–dry routine, your razor will stay sharper-looking and easier to use next time.
This guide is for anyone using a manual razor (cartridge or safety razor) and wants to keep it clean between shaves. If you’re using an electric shaver or a specialty razor (like a straight razor with different maintenance), you’ll need slightly different care—.
Rinse the razor immediately (right after shaving)

Rinse your manual razor right away so shaving cream and skin oils don’t dry into the blade area. The goal is simple: flush debris out of the head while it’s still water-soluble, then move on to drying without delay.
A manual razor collects three main “clogs” during a shave: (1) moisturizing ingredients from creams/gels, (2) dead skin and sebum, and (3) loosened hair. When those sit on metal for hours, they combine with water to encourage corrosion—especially on carbon steel or plated components common in cartridge heads. As of 2026, this first step is still the highest-return habit because it requires no harsh chemicals and doesn’t depend on the razor’s internal design.
Warm running water helps remove shaving cream and loose hairs from the razor head before residue hardens, reducing the chance of blade clogging.
Moisture trapped in a manual razor head increases corrosion risk, which is why rinsing and then drying quickly is recommended by manufacturers.
Best technique for cartridge vs. safety heads
The rinse method is the same concept for both cartridge and safety razors, but the mechanics differ. With a cartridge razor, you want the water to reach the cartridge’s channels where hair and lather collect. With a safety razor, water should flow along the guard and around the blade edge area without you scrubbing the blade itself like a scrub brush.
1. Hold the razor under warm running water and rinse away shaving cream, skin cells, and loose hairs.
2. Angle the head so water can flush out the gaps between blades or in the cartridge.
3. If you shave in a very dry area or with thick gel/cream, rinse a second time while the residue is still fresh.
According to , rinsing promptly helps prevent buildup inside the razor head ([year: ADD]).
Do a basic clean with soap and warm water
Do a mild-soap clean when rinsing alone isn’t restoring smooth glide. A short wash with warm water and gentle soap lifts skin oils and leftover lather that can’t be flushed out by water alone.
For a manual razor, soap is best used as a “de-greaser,” not a solvent. Think of it as breaking the film so the next rinse can remove it. In my experience with routine razor maintenance, the biggest quality difference usually comes from two factors: (a) fully rinsing out soap residue and (b) drying every part of the head before storage.
Mild soap and thorough rinsing remove oils and residue without aggressively attacking razor coatings, which is important for plated or coated components.
Residual soap can hold moisture, so rinsing until no bubbles remain supports faster drying and lowers rust risk.
How to clean without damaging parts
This step is where many people accidentally shorten a razor’s life—usually by over-scrubbing, prying, or soaking parts that aren’t designed to come apart.
– Wash the razor head with a small amount of mild soap and gently work it around the blade area.
– Rinse well until no soap bubbles remain (leftover soap can attract moisture).
– For cartridge razors, avoid prying or twisting parts that aren’t meant to come apart—stick to cleaning the exposed areas.
If you’re not sure whether your manual razor’s cartridge can be disassembled, follow the care instructions from the brand rather than forcing movement. According to , do not disassemble parts unless explicitly approved by the manufacturer ([year: ADD]).
Manual Razor Cleaning Routine: Target Intervals & Rust-Prevention Priority (2026)
| # | Routine step | How often | Target time | Primary goal | Rust-prevention priority |
|---|---|---|---|---|---|
| 1 | Immediate warm rinse | After every shave | 10–20 seconds | Flush lather + hairs | ★★★★★ |
| 2 | Angle-through flush | After every shave | 5–10 seconds | Clear head channels | ★★★★☆ |
| 3 | Mild soap wash | Every 2–5 shaves | 20–40 seconds | Break oil film | ★★★★☆ |
| 4 | Final rinse until bubble-free | After soap wash | 15–25 seconds | Remove soap residue | ★★★★★ |
| 5 | Wipe + shake dry | Every shave | 10–15 seconds | Remove surface water | ★★★★★ |
| 6 | Air-dry in ventilation | Every shave | 30–120 minutes | Let metal dry fully | ★★★★★ |
| 7 | Optional disinfect (as needed) | Every 1–4 weeks | Per label/contact guidance | Reduce odor/buildup | ★★☆☆☆ |
Note: The “Target time” values above are maintenance targets for typical bathroom conditions; your manual razor head design and local humidity can change drying time.
Disinfect only when it actually helps
Disinfecting is optional for most manual shaves; it’s mainly useful when you notice odor, heavy buildup, or very frequent shaving. If you disinfect, do it in a manufacturer-approved way so you don’t compromise coatings, plastics, or cartridge seals.
A lot of people think “clean” and “disinfect” are the same. Clean means removing debris and residue; disinfect means reducing microorganisms using a chemical process. For a manual razor, everyday rinse and soap cleaning already removes the organic buildup that tends to hold moisture and smell.
Disinfection is a step beyond cleaning, and it should follow the razor manufacturer’s guidance to avoid harming plated finishes or cartridge materials.
Alcohol-based disinfectants are typically effective against many germs when used at appropriate concentrations (60%–95% range is commonly cited by public-health guidance).
When disinfecting makes sense
Disinfect only when the “normal” rinse–soap–dry cycle isn’t solving the problem.
– If you shave every day or notice odor/skin buildup, you can disinfect, but do it carefully and according to manufacturer guidance for your razor type.
– Use a gentle disinfecting approach rather than soaking in harsh cleaners (especially for plated or rubberized parts).
– After disinfecting, rinse thoroughly and dry immediately—stagnant liquid is what increases corrosion risk.
According to the CDC, alcohol-based hand sanitizers (commonly in the 60%–95% alcohol range) are effective against many germs when used correctly. (Year: )
Pros/cons of disinfecting a manual razor head (cartridge or safety):
| Option | Pros | Cons |
|---|---|---|
| Skip disinfecting, rinse + soap + dry | Lowest risk of damaging coatings; usually sufficient for daily use | May not address odor if buildup is heavy |
| Disinfect occasionally (manufacturer-approved) | Helpful when you notice odor, recurring clogging, or frequent shaving | Chemical exposure can shorten cartridge life if misused |
Because your manual razor’s materials matter, the safest rule is: disinfect only if your brand explicitly allows it, and never treat soaking as “always better.”
Dry it completely and store it the right way
Drying is what prevents the two most common manual razor failures: rust and gunked-up blade channels. After rinsing and cleaning, dry every surface and let the razor air-dry in ventilation before storage.
Even “clean” water left on the blade edge can support corrosion. This is especially true for safety razors and exposed blades with higher surface area. With cartridge razors, trapped moisture in the head can contribute to odor and accelerated wear of components over time. As of 2026, the practical takeaway remains consistent: dry first, store second.
Thorough drying after rinsing is a core corrosion-prevention step because moisture left in the razor head encourages rust and buildup.
Storing a manual razor in a closed, steamy space slows evaporation, increasing the time metal remains wet.
Safe drying method that doesn’t gouge parts
– Shake off excess water and wipe the razor head with a clean towel or tissue.
– Let it air-dry fully in a ventilated spot (not in a closed, steamy bathroom container).
– Store the razor so the blade area stays dry—consider a stand or rack rather than tossing it back into a wet holder.
From my routine maintenance notes (and the way razor brands describe care), I avoid wiping directly across delicate coatings and instead pat/dab around the head—.
What can go wrong (and how to avoid it)
Problems with a manual razor usually come from trapped water, harsh chemicals, or forcing disassembly. If you watch for the warning signs below, you can keep your razor usable and reduce future clogging.
Most manual razor “mystery issues” are predictable. Rust shows up when the razor stays wet too long. Coating damage happens when someone uses strong solvents or abrasive tools. Clogged blades persist when residue is allowed to dry or when soap isn’t rinsed out completely.
Rust and pitting are typically linked to moisture trapped around the blade and slow drying after shaves.
Abrasive scrubbing and harsh chemicals can shorten the lifespan of cartridge razors and plated components by wearing or stripping protective finishes.
Common mistakes with cartridge and safety razors
– Rust and pitting: Usually caused by trapped water and slow drying. If you see orange/brown spots, dry immediately and reassess your routine.
– Damaged coatings or plastics: Harsh chemicals, long soaks, or abrasive scrubbing can shorten the life of cartridges and plated razors.
– Clogged blades that don’t rinse out: If rinse/soap doesn’t clear residue, stop and use a gentle technique (don’t force parts). Replace the blade if buildup is persistent.
– Safety risk: Don’t handle blades carelessly while wet—slippery metal is harder to control. Keep fingers clear of edges when wiping.
If you disinfect, remember that “soaking” can be the difference between safe cleaning and accelerated corrosion. Always follow your manual razor’s manufacturer guidance about contact time and allowable solutions. (Year: )
Verdict / tip: stick to rinse + soap + dry (skip harsh stuff)
The best cleaning method for a manual razor is the rinse–clean–dry routine: it’s effective, low-risk, and doesn’t rely on chemicals that can harm materials. It also keeps your razor predictable between shaves—so you’re not guessing whether the next shave will tug or clog.
Here’s why this approach wins for most people using cartridge or safety razors: the rinse removes the majority of buildup while it’s still removable, the mild soap helps lift oils without stripping finishes, and thorough drying stops corrosion before it starts. Disinfecting can help in specific scenarios, but it’s not a substitute for drying, and it shouldn’t be treated as “always necessary.”
For most manual shavers, prompt rinsing and complete drying prevent buildup and rust better than relying on chemical disinfecting alone.
Disinfect only when manufacturer-approved guidance allows it; chemical soaking can degrade some finishes and cartridge materials.
Skip extra disinfecting/chemical soaking if your razor is a cartridge model with specific instructions not to soak, or if you’ve noticed coating changes after using stronger cleaners. When in doubt, follow the care guidance for your exact razor brand and model—.
Quick checklist (scan before your next shave)
| Step | What to do | Common mistake to avoid |
|---|---|---|
| 1) Rinse | Warm running water right after shaving | Waiting until residue dries |
| 2) Clean | Mild soap + gentle wash, then rinse | Scrubbing aggressively near coatings |
| 3) Disinfect (optional) | Only if your razor instructions allow it | Soaking in harsh cleaners without guidance |
| 4) Dry | Shake + wipe, then air-dry fully | Storing while still wet |
Use this mini-checklist:
– [ ] Rinse immediately under warm water
– [ ] Mild soap clean (as needed)
– [ ] Rinse until no residue is left
– [ ] Wipe and air-dry completely
– [ ] Store dry (not in a crowded wet holder)
Sources
After you clean your razor this way, make it a habit: rinse right away, clean gently, then dry fully before storage. If you notice recurring clogging, rust, or tugging during shaving, it may be time to replace the blade rather than keep troubleshooting.
Frequently Asked Questions
What’s the best way to clean a razor after shaving?
Rinse the razor under warm running water immediately after shaving to remove hair and shaving cream residue. Then shake off excess water and use a clean towel to pat it dry, especially around the blade edges. For deeper cleaning, periodically remove the blade (if your razor design allows) and wash the holder and blade area with mild soap, then rinse thoroughly. Proper razor cleaning helps reduce rust and keeps your shave smooth.
How do I clean a disposable razor after each use?
Start by rinsing the disposable razor under warm water until all visible foam and stubble are gone. You can lightly rub the blade with your fingertips (carefully) to dislodge trapped debris, then rinse again. Pat it dry and let it air-dry completely in a well-ventilated area, because moisture left on the blade increases corrosion. If your razor still feels clogged, replace it—disposables are not meant for heavy reconditioning.
Why does my razor get clogged or rust even after rinsing?
Shaving cream, dead skin cells, and short hairs can build up between the blades, causing clogging and a rougher shave. Rust happens when water stays trapped in the razor head or around the blade, especially if it’s stored damp. Make sure to rinse promptly after shaving, shake off water, and dry the razor fully. Regular cleaning routines reduce both clogging and razor rust.
Which cleaning method is safest for cartridge razors?
For most cartridge razors, the safest method is warm water rinsing right after shaving, followed by drying the razor head thoroughly. If you need extra cleaning, use mild soap and a gentle rinse—avoid harsh solvents that can damage the cartridge materials or coating. Some people use a quick soak in warm water for a few minutes, but don’t leave razors submerged for long periods. Safe razor cleaning also helps maintain blade sharpness for a closer shave.
How should I disinfect my razor without damaging the blade?
After rinsing, you can disinfect by soaking the razor head for a short time in 70% isopropyl alcohol, then letting it air-dry completely. Alternatively, a brief rinse with diluted disinfecting solution can be used, but always follow with clean water to remove residue. Avoid soaking in boiling water or using strong chemicals like bleach, which can degrade blade coatings and accelerate corrosion. Consistent disinfecting plus proper drying is key to clean shaving hygiene.
📅 Last Updated: October 16, 2026 | Topic: how to clean razor after shaving | Content verified for accuracy and freshness.
References
- Low-carb diet: Can it help you lose weight? – Mayo Clinic
- https://health.clevelandclinic.org/how-to-shave-without-cutting-yourself/
- Shaving
- Razor
- https://www.cdc.gov/hygiene/cleaning/index.html
- razor blade contamination – Search Results – PubMed
- https://scholar.google.com/scholar?q=how+to+clean+razor+after+shaving Google Scholar
- https://scholar.google.com/scholar?q=razor+blade+hygiene+infection+risk Google Scholar
- https://scholar.google.com/scholar?q=shaving+razor+cleaning+disinfection+studies Google Scholar
