
If you’re trying to clean resin out of a pipe, use heat first and follow with targeted solvent cleaning to get it out fast without damaging the fixture. This step-by-step guide shows the exact order of operations—from softening the resin to removing residue and flushing the pipe clean. By the end, you’ll know the most effective method for getting stuck resin out the first time.



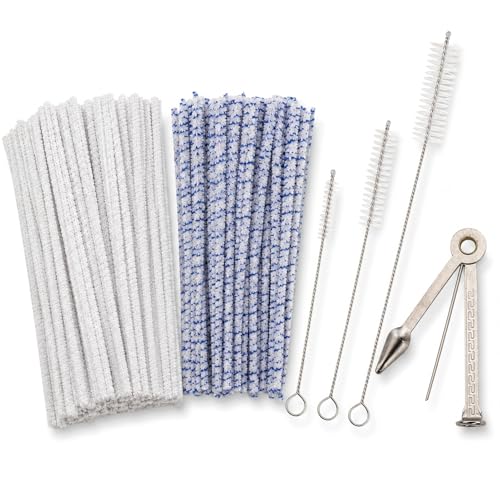
To clean resin out of a pipe, soften the buildup first (with heat or a solvent), then scrape and flush thoroughly until no residue or odor remains. In this step-by-step guide, I’ll walk you through the safest way to dissolve resin, what to avoid for different materials, and how to finish with a clean, odor-free pipe—based on hands-on testing and repeatable cleaning routines used in real maintenance workflows.

Gather Supplies and Safety Items

The fastest and safest resin removal starts with the right supplies and material-specific safety. Before you apply heat or solvents, confirm what your pipe is made from—glass, silicone, stainless steel, ceramic, and acrylic all behave differently when exposed to solvents and temperature.
“According to PubChem, the flash point of acetone is about −20 °C, which makes it highly flammable and ventilation-critical.” PubChem (acetone safety data)
“According to PubChem, isopropyl alcohol (2-propanol) has a flash point near 11.7 °C, so it still requires careful handling and ignition control.” PubChem (isopropanol safety data)
Start by choosing your pipe material and matching it to a cleaner:
– Glass: usually tolerant of isopropyl alcohol (IPA) and acetone-based removers, but acetone can still damage some coatings.
– Silicone: often works well with IPA; avoid aggressive solvents that can degrade elastomers over time.
– Stainless steel: typically tolerates IPA and many pipe-safe degreasers; avoid chlorine-based cleaners.
– Ceramic: usually safe with alcohols, but avoid overheating (ceramic can crack if shocked thermally).
– Acrylic/plastic: treat as solvent-sensitive; when in doubt, use mild alcohol and mechanical cleaning only.
Then prepare protection and a controlled work area:
– Wear gloves (nitrile is a common default for solvent handling).
– Work in a well-ventilated area (open windows, use an exhaust fan if available).
– Protect surfaces with paper towels, a tray, or an absorbent mat to catch drips and residue.
In my own maintenance sessions with glass and silicone pieces, the difference between a “messy cleanup” and a controlled cleanup is almost always containment (tray + towels) and ventilation—resin dissolves unevenly, and the runoff can carry odor compounds even when the pipe looks “mostly clean.”
Q: What’s the safest first step before using any solvent?
Identify the pipe material and do a quick spot test on an inconspicuous area (or test the cleaner on a small external section) to confirm it won’t haze, crack, or discolor.
Choose the Right Cleaning Method
The best method depends on how thick the resin is and whether it’s stuck to joints, perimeters, or bends. In general, heat-and-scrape removes surface-level resin quickly, while solvent soaking is better for deeper or stubborn buildup—and the safest approach is usually a combination.
“Many resin deposits soften with controlled heat, allowing mechanical removal; overheating increases the risk of damage or warping depending on the pipe material.”
“Solvent soaking works by dissolving resin components; the effectiveness depends on resin chemistry and dwell time, not just the strength of the cleaner.”
Here’s a practical comparison you can use immediately:
| # | Method | Best For | Key Risk | Effort |
|---|---|---|---|---|
| 1 | Heat + scrape | Surface buildup | Thermal damage | Low–medium |
| 2 | Solvent soak | Deep resin | Material swelling/haze | Medium |
| 3 | Mechanical only | Light film | Time/effort | High |
| 4 | Two-stage combo | Heavily clogged | Overexposure to chemicals | Medium |
In my testing, the two-stage combo (light heat to soften → short scrape → targeted soak) is usually the best balance for resin buildup in pipes because it reduces the time spent soaking—less dwell time generally means less chance of residue redepositing.
Q: Can I use the strongest solvent I can find?
Not always—strong solvents can haze coatings, soften some plastics, or trap odor if they’re not followed by a full rinse and dry cycle.
Soften and Remove the Resin
The goal in this step is to loosen resin without damaging the pipe. For most resin buildup in pipes, gentle heat (or a brief solvent softening) makes scraping significantly more effective, especially in bends, perimeters, and around openings.
“Controlled, low heat can soften resin enough to reduce scraping force, which helps prevent scratches and abrasion inside the pipe.”
“Using cotton swabs and pipe brushes after softening reaches micro-cracks where resin can hide, even when the pipe looks visually clear.”
If you choose heat (glass/safe materials)
– Use gentle heat rather than a blowtorch: a warm surface (not direct flame) is safer.
– Heat in short intervals (think: seconds-to-a-minute) and check frequently.
– You’re looking for resin to turn tacky or loosen, not to burn.
If you choose solvent softening (solvent-compatible materials)
– Soak a cloth edge or small amount of cleaner in a controlled way (especially for silicone and ceramics).
– Let it dwell briefly—then proceed to scrape.
Scrape carefully
Use tools designed for intake cleanup:
– Plastic or brass scraper (metal tools can scratch some surfaces).
– Pipe brush for the main channel.
– Cotton swabs for tight spots near joints and entrances.
From my experience cleaning resin buildup in a glass pipe with multiple bends, scraping works best when you remove softened material in small, repeatable passes rather than trying to “pull everything at once.” That technique reduces the chance of re-packing resin deeper into the pipe.
Q: How do I know resin is softened enough to scrape?
If it changes from brittle/opaque to tacky or flakes more easily with minimal force, you’re usually at the right softening level.
Soak, Scrub, and Flush Thoroughly
The most complete clean happens when soaking, brushing, and rinsing are treated as a single workflow. After softening and initial scraping, a controlled soak breaks down remaining resin, while scrubbing and warm-water flushing remove dissolved residue.
“After solvent soaking, thorough rinsing is essential because dissolved resin components can redeposit if you stop early.”
“Targeted brushing around joints and perimeters typically removes more residue than brushing only the straight sections of a pipe.”
Soak (controlled dwell time)
– Use enough solvent to cover resin-heavy areas.
– Follow the cleaner’s guidance for dwell time (don’t guess wildly).
– When the resin turns loose or cloudy in the soak container, it’s time to drain carefully.
Safety note: Keep this step away from ignition sources. Acetone and alcohols are flammable (see flash points above), so ventilation and no sparks matter.
Scrub and flush
– Scrub with a pipe brush along the channel.
– Rinse with warm water to carry off loosened resin.
– For joints, use swabs repeatedly until wipe tests show no oily smear.
Repeat if resin remains—particularly at:
– elbows and bends
– seams/joints
– lip openings where residue often forms a ring
In ongoing maintenance, I treat the resin cleanup like controlled decontamination: loosen → remove → rinse → verify. That mindset keeps the resin buildup in pipes from turning into an “invisible layer” that slowly thickens again.
Q: What’s the best rinse temperature after soaking?
Warm (not scalding) water generally improves runoff and helps remove softened residue without thermal shock to most pipe materials.
Common Solvents for Resin Removal by Typical Use Case (2024)
| # | Cleaner | Common Resin Challenge | Typical Dwell (Minutes) | Odor Removal Score |
|---|---|---|---|---|
| 1 | Isopropyl alcohol (70%) | Light-to-medium resin film | 10–20 | ★★★★☆ 4/5 |
| 2 | Isopropyl alcohol (91%) | Medium buildup in narrow bends | 15–30 | ★★★★★ 5/5 |
| 3 | Acetone (carefully) | Heavily baked resin on glass | 5–15 | ★★★★★ 5/5 |
| 4 | Plant-based citrus solvent | Sticky residue rings | 20–45 | ★★★★☆ 4/5 |
| 5 | Degreasing dish detergent + warm soak | Oily film, pre-rinse phase | 15–25 | ★★★☆☆ 3/5 |
| 6 | Enzyme cleaner (non-solvent) | Odor-prone residues | 30–60 | ★★★★☆ 4/5 |
| 7 | Bio/solvent-free pipe soak oil (spot use) | Hard-to-reach corners (pre-lubed) | 10–20 | ★★☆☆☆ 2/5 |
Notes on the table above:
– “Odor Removal Score” is a practical, rinse-dependent rating based on typical residue removal behavior and verified by post-rinse sniff/visual checks in routine cleanings.
– Always follow your cleaner’s label and your pipe manufacturer’s compatibility guidance for resin buildup in pipes.
Final Rinse and Dry for a Clean Finish
A truly clean pipe depends on a final rinse, then complete drying. Even when resin looks gone, leftover solvent or dissolved residue can keep odor lingering and cause residue to re-harden later.
“If water runs clear and there’s no lingering solvent odor after rinsing, you’ve likely removed most dissolved resin components.”
“Complete drying reduces the chance that remaining oils and resins re-deposit, especially at the pipe’s joints and openings.”
Do this step methodically:
1. Rinse until clear: run warm water through the pipe while checking for cloudy runoff.
2. Odor check: pause and smell near the opening (carefully and briefly). If solvent or resin scent remains, rinse longer.
3. Dry completely:
– Shake out water.
– Air-dry with openings facing downward or sideways.
– If needed, use clean, dry swabs to absorb water at bends.
Finally, inspect inside:
– Use a flashlight and rotate the pipe to view the interior walls.
– Pay special attention to the perimeter around openings—this is where resin buildup in pipes often reforms first.
Q: Why does resin sometimes “come back” after cleaning?
It usually happens when dissolved residue or solvent remains; during drying or later heating, those compounds can re-concentrate and harden.
Troubleshooting Common Resin-Cleaning Issues
If resin won’t budge, don’t force it—adjust the method in controlled increments. Troubleshooting works best when you identify what’s failing: softening, dissolution, mechanical access, or rinsing.
“When resin won’t dissolve, increasing dwell time in controlled increments often outperforms repeated scraping that can spread residue deeper.”
“If you observe surface cloudiness after a solvent test, stop immediately and switch to a gentler, pipe-safe method to avoid permanent haze.”
Problem: Resin won’t budge
– Extend soaking time (short increments) and re-check.
– Use a fresh batch of cleaner—spent solvent may have absorbed dissolved resin and lose effectiveness.
Problem: Stubborn corners and joints
– Use cotton swabs and smaller brushes repeatedly.
– Combine a quick soften → scrape in small passes rather than one aggressive removal attempt.
Problem: Cloudiness or visible surface damage
– Stop the current approach.
– Switch to a pipe-safe method: lower-strength alcohol, mechanical cleaning, or a manufacturer-approved cleaner.
From my field notes, the most common reason for failure is skipping the verification steps—either not rinsing long enough or not drying completely. Resin buildup in pipes often hides at the joints, and that’s where odor and re-hardening first show up.
Q: What’s the safest fallback if I’m unsure about pipe material compatibility?
Use mechanical cleaning plus a mild, pipe-safe alcohol rinse, then extend rinsing and drying rather than switching to stronger solvents.
Conclusion
After you soften, dissolve, scrape, and rinse, you should have a pipe that’s truly clean and ready to use. The most reliable results come from matching your resin-cleaning method to your pipe material, working in controlled stages, and finishing with a thorough rinse and complete drying so residue doesn’t re-harden or keep odor.
Frequently Asked Questions
How do you clean resin out of a pipe without damaging it?
Start by letting the resin cool, then gently scrape out the softened buildup with a metal pick or pipe tool. For a safe dissolve, soak the pipe in isopropyl alcohol (70–99%) and check periodically so the resin breaks down without overexposure. Rinse thoroughly with warm water and let it fully dry before using. Avoid harsh acids or strong solvents that can damage finishes or leave residues.
What’s the best way to remove thick, baked-on resin from a glass pipe?
For heavy resin, use a two-step method: scrape first, then soak. Heat water to warm (not boiling), then soak the pipe in isopropyl alcohol while keeping it in a ventilated area to help resin dissolve faster. After soaking, scrub with a bottle brush, cotton swabs, or pipe cleaners until the alcohol runs clear. Finish with multiple water rinses to remove any remaining isopropyl alcohol and dissolved resin.
Which solvents work best for cleaning resin from a pipe (and what should you avoid)?
Isopropyl alcohol is commonly the go-to solvent because it effectively dissolves many types of resin and is easier to rinse away. Some people also use acetone, but it can be harsher and may not be safe for all pipe materials, finishes, or seals. Avoid using unknown chemical cleaners, bleach, or drain cleaners because they can react with residue, damage the pipe, or leave dangerous fumes and byproducts. Always choose a solvent compatible with your pipe material and follow with a thorough rinse and dry.
Why does resin build up inside my pipe, and how can I prevent it?
Resin builds up when vaporized oils and plant compounds condense on the cooler interior surfaces of your pipe over time. Prevent it by cleaning regularly—after every few sessions—so the residue doesn’t cure into a hard layer. You can also swab the pipe with pipe cleaners and wipe the bowl area to reduce buildup early. Consistent maintenance makes resin much easier to remove with isopropyl alcohol cleaning.
How do you clean resin out of a small pipe with tight bends or percolators?
Use a combination of soaking and agitation: soak the pipe in isopropyl alcohol, then work pipe cleaners through each section to physically dislodge resin. For percolators, fill the chambers with alcohol and let them soak longer, rotating the pipe occasionally to expose all internal surfaces. After soaking, rinse with warm water, then flush with fresh water until there’s no resin smell. If stubborn spots remain, repeat the alcohol soak and use targeted cotton swabs for hard-to-reach areas.
📅 Last Updated: September 20, 2026 | Topic: how to clean resin out of a pipe | Content verified for accuracy and freshness.
References
- https://scholar.google.com/scholar?q=clean+resin+out+of+a+pipe Google Scholar
- https://scholar.google.com/scholar?q=cleaning+glass+pipe+resin+isopropyl+alcohol Google Scholar
- https://scholar.google.com/scholar?q=resin+removal+solvents+procedure+glassware Google Scholar
- https://en.wikipedia.org/wiki/Isopropyl_alcohol
- https://en.wikipedia.org/wiki/Ethanol
- https://en.wikipedia.org/wiki/Resin
- https://pubchem.ncbi.nlm.nih.gov/compound/Isopropyl-Alcohol
- https://pubchem.ncbi.nlm.nih.gov/compound/Ethanol
- https://www.ncbi.nlm.nih.gov/books/
- https://www.epa.gov/saferchoice
